1.yum源概述,本地yum源备份及光盘配置:
yum优点:
Rpm安装(下载软件,单独安装,需要解决依赖关系)
源码安装 confgure make make install
yum基于rpm,相当于rpm升级版,⾃动解决依赖关系
分类:
1.本地yum源
yum仓库在本地,系统光盘/镜像⽂件
2.⽹络yum源
aliyun
163源
sohu源
清华源
centos源
redhat源
epel源
3.特定软件
nginx
mysql
# 当前在etc⽬录,跳转到yum.repos.d⽬录
[root@localhost etc]# cd yum.repos.d/
#查看默认的源⽂件
[root@mm yum.repos.d]# ls
CentOS-Base.repo CentOS-fasttrack.repo CentOS-Vault.repo
mysql-community.repo
CentOS-CR.repo CentOS-Media.repo CentOS-x86_64-kernel.repo
mysql-community-source.repo
CentOS-Debuginfo.repo CentOS-Sources.repo mysql-community
debuginfo.repo
[root@mm yum.repos.d]# pwd
/etc/yum.repos.d
2.将所有的repo⽂件做成压缩包,命名为repo.tar.gz
[root@mm yum.repos.d]# tar -zcvf repo.tar.gz ./*.repo
./CentOS-Base.repo
./CentOS-CR.repo
./CentOS-Debuginfo.repo
./CentOS-fasttrack.repo
./CentOS-Media.repo
./CentOS-Sources.repo
./CentOS-Vault.repo
./CentOS-x86_64-kernel.repo
./mysql-community-debuginfo.repo
./mysql-community.repo
./mysql-community-source.repo
您在 /var/spool/mail/root 中有新邮件
# 查看⽂件信息
[root@mm yum.repos.d]# lsCentOS-Base.repo CentOS-fasttrack.repo CentOS-Vault.repo
mysql-community.repo
CentOS-CR.repo CentOS-Media.repo CentOS-x86_64-kernel.repo
mysql-community-source.repo
CentOS-Debuginfo.repo CentOS-Sources.repo mysql-community
debuginfo.repo repo.tar.gz
3.删除所有的repo⽂件
[root@mm yum.repos.d]# rm -rf ./*.repo
您在 /var/spool/mail/root 中有新邮件
[root@localhost yum.repos.d]# ls
repo.tar.gz
[root@mm yum.repos.d]#
1.yum源安装:
1.指定挂载文件,将/dev/sr0 挂载到 /mnt 下
[root@mm ~]# mount -o ro /dev/sr0 /mnt/
2.ls /mnt/ 有东西挂载成功
[root@mm ~]# ls /mnt/
3.开机自动执行挂载
[root@mm ~]# vim /etc/rc.local
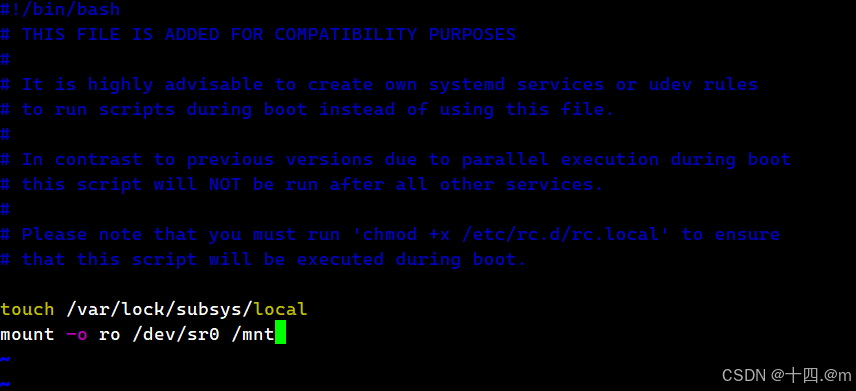
或者:
[root@mm ~]# echo "mount -o ro /dev/sr0 /mnt" >> /etc/rc.local
[root@mm ~]# lsblk
NAME MAJ:MIN RM SIZE RO TYPE MOUNTPOINT
sda 8:0 0 20G 0 disk
├─sda1 8:1 0 1G 0 part /boot
└─sda2 8:2 0 19G 0 part
├─centos-root 253:0 0 17G 0 lvm /
└─centos-swap 253:1 0 2G 0 lvm [SWAP]
sr0 11:0 1 8.8G 0 rom /mnt
2.编写本地repo⽂件
1.创建⼀个repo⽂件
2.编辑内容
yum 仓库的格式
[仓库名称] 可以有多个仓库
name= 仓库名称
baseurl= 仓库的路径,⽀持多种格式 file:// ftp:// http/s://
gpgcheck= gpg秘钥检测 0不检测,1检测,如果需要配置秘钥链接
enable= 0|1 是否启⽤当前仓库
清理缓存,查看源列表
[root@mm ~]#
ls /etc/yum.repos.d/
repo.tar.gz
[root@mm ~]#
vim /etc/yum.repos.d/20240714001.repo
[local]
name
=
local0
baseurl
=
file
:
///mnt
gpgcheck
=
0
enable
=
1
#
清理缓存
[root@mm ~]#
yum clear all
已加载插件:fastestmirror
没有该命令:clear。请使⽤ /usr/bin/yum
--help
4.创建缓存
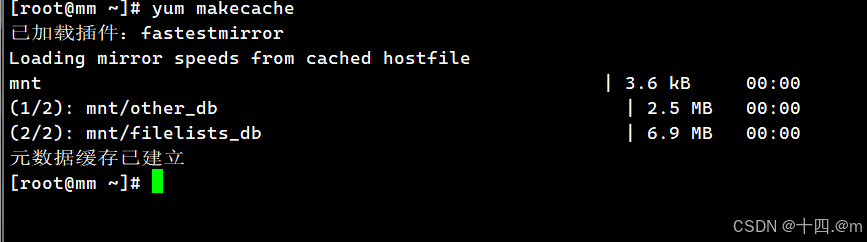
[root@mm ~]# yum makecache
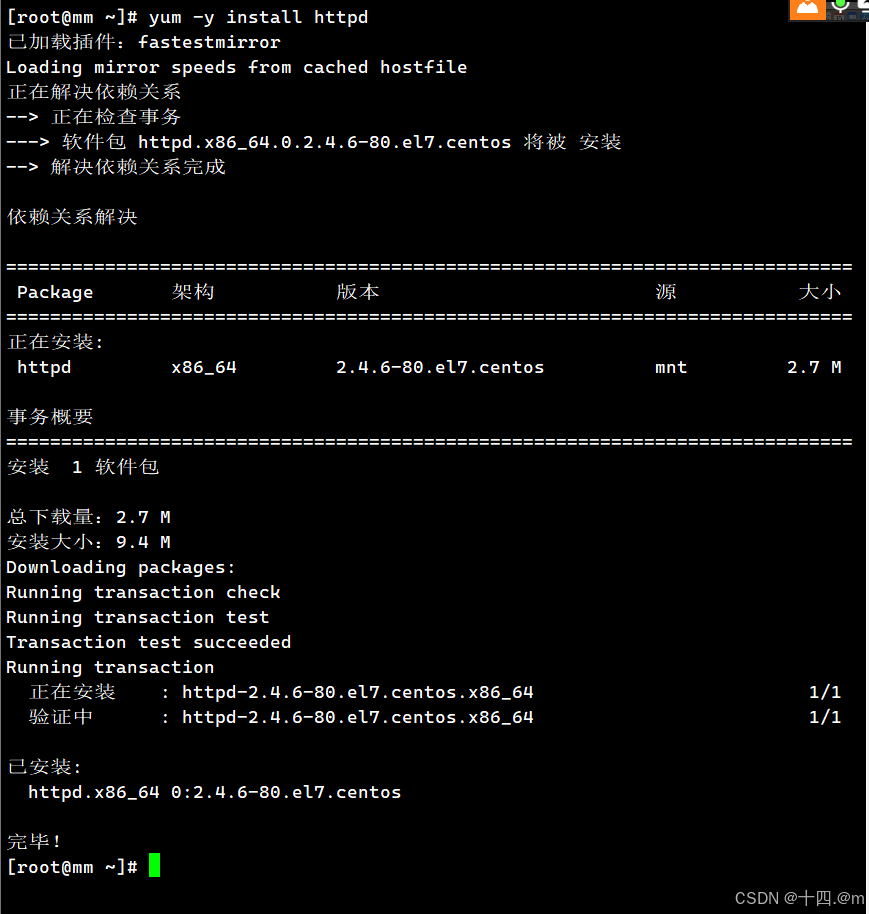
5.测试:
[root@mm ~]# yum -y install httpd //安装成功
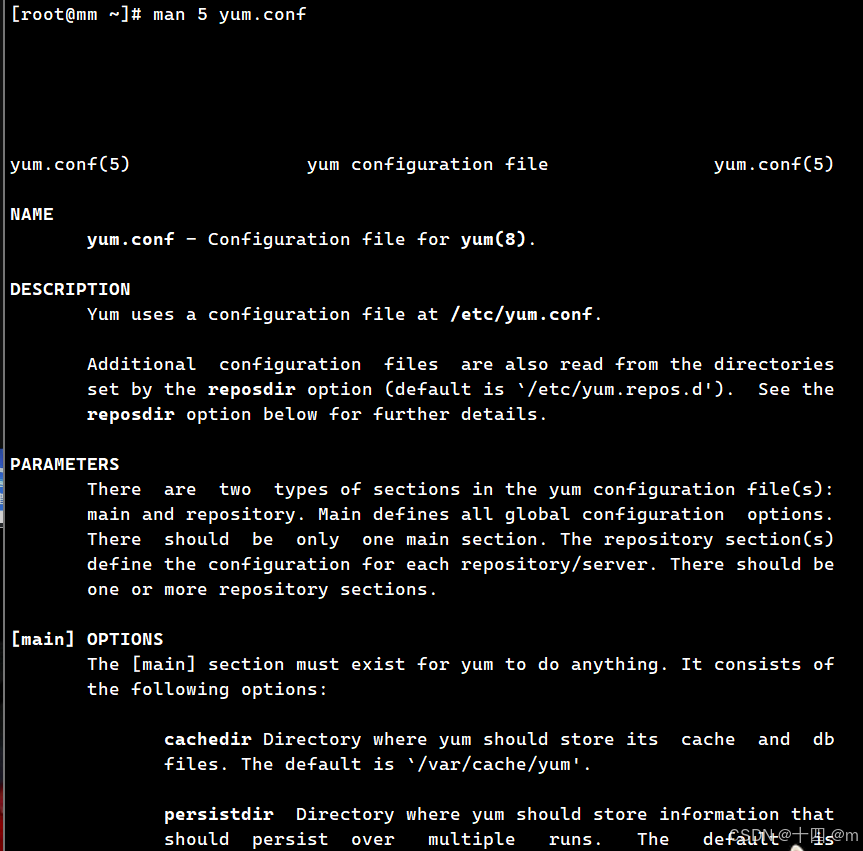
2. man 5 配置文件:(配置文件的帮助文档)
[root@mm ~]# man 5 yum.conf
3.网络yum源配置:
1.搜索阿⾥镜像源
2. 根据官⽅提示配置yum源
3.复制阿⾥云提供的url,下载⽂件
[root@mm ~]# wget -O /etc/yum.repos.d/CentOS-Base.repo https://mirrors.aliyun.com/repo/Centos-7.repo
或
[root@mm ~]# curl -o /etc/yum.repos.d/CentOS-Base.repo https://mirrors.aliyun.com/repo/Centos-7.repo
4.运⾏ yum makecache⽣成缓存 yum clear
[root@mm ~]# yum makecache
5.查看源
[root@mm yum.repos.d]# yum repolist all
已加载插件:fastestmirror
Loading mirror speeds from cached hostfile
* base: mirrors.aliyun.com
* extras: mirrors.aliyun.com
* updates: mirrors.aliyun.com
源标识 源名称 状态
base/7/x86_64 CentOS-7 - Base -
mirrors.aliyun.com 启⽤: 10,072centosplus/7/x86_64 CentOS-7 - Plus -
mirrors.aliyun.com 禁⽤
contrib/7/x86_64 CentOS-7 - Contrib -
mirrors.aliyun.com 禁⽤
extras/7/x86_64 CentOS-7 - Extras -
mirrors.aliyun.com 启⽤: 526
local local0 启⽤: 9,911
updates/7/x86_64 CentOS-7 - Updates -
mirrors.aliyun.com 启⽤: 6,173
repolist: 26,682
4.特定软件源配置:
1.移除epel源,如果不⾏就全清空
[root@mm ~]# rm -rf /etc/yum.repos.d/epel.repo
您在 /var/spool/mail/root 中有新邮件
[root@mm ~]# yum clear all
已加载插件:fastestmirror
没有该命令:clear。请使⽤ /usr/bin/yum --help
[root@mm ~]# yum makecache
已加载插件:fastestmirror
Loading mirror speeds from cached hostfile
extras
| 2.9 kB 00:00:00
local
| 3.6 kB 00:00:00
os
| 3.6 kB 00:00:00
updates
| 2.9 kB 00:00:00
元数据缓存已建⽴
2.搜nginx的镜像:
nginx news https://nginx.org/
3. 安装稳定版本
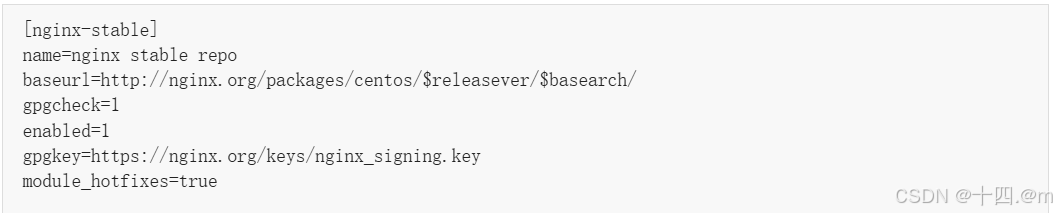
[root@mm ~]# vim /etc/yum.repos.d/nginx.repo
4. 创建缓存
[root@mm ~]# yum clean all
已加载插件:fastestmirror
正在清理软件源: nginx-stable
Cleaning up list of fastest mirrors
Other repos take up 745 M of disk space (use --verbose for details)
[root@mm ~]# yum makecache
已加载插件:fastestmirror
Determining fastest mirrors
nginx-stable
| 2.9 kB 00:00:00
(1/3): nginx-stable/7/x86_64/filelists_db
| 121 kB 00:00:01
(2/3): nginx-stable/7/x86_64/primary_db
| 97 kB 00:00:01
(3/3): nginx-stable/7/x86_64/other_db
| 59 kB 00:00:00
元数据缓存已建⽴
您在 /var/spool/mail/root 中有新邮件
[root@mm ~]# yum list|grep nginx
nginx.x86_64 1:1.26.1-2.el7.ngx
nginx-stable
nginx-debug.x86_64 1:1.8.0-1.el7.ngx
nginx-stable
5.安装并且检查
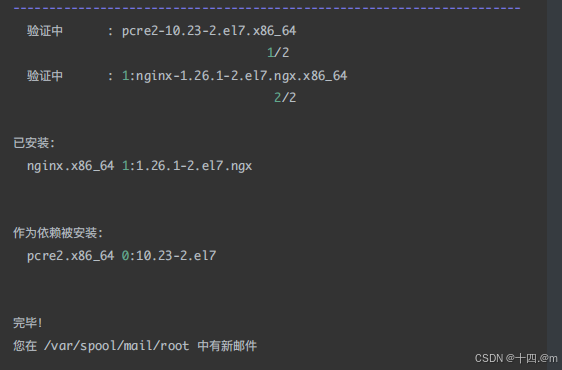
[root@mm ~]# yum install nginx -y
6. 启动(停用)服务
#
启动服务
[root@mm ~]#
nginx
#
查看指令
[root@mm ~]#
whereis nginx
nginx: /usr/sbin/nginx /usr/lib64/nginx /etc/nginx /usr/share/nginx
/usr/share/man/man8/nginx.8.gz
#
访问服务器
[root@mm ~]#
curl http://localhost
<!DOCTYPE html>
<html>
<head>
<title>
Welcome to nginx!
</title>
<style>
html { color-scheme: light dark; }
body { width: 35em; margin: 0 auto;
font-family: Tahoma, Verdana, Arial, sans-serif; }
</style>
</head>
<body>
<h1>Welcome to nginx!</h1>
<p>If you see this page, the nginx web server is successfully installed
and
working. Further configuration is required.</p>
<p>For online documentation and support please refer to
<a href="http://nginx.org/">nginx.org</a>.<br/>
Commercial support is available at
<a href="http://nginx.com/">nginx.com</a>.</p>
<p><em>Thank you for using nginx.</em></p>
</body>
</html>
#
停⽤
nginx
[root@mm ~]#
nginx -s stop
您在 /var/spool/mail/root 中有新邮件
#
访问测试
[root@mm ~]#
curl http://localhost
curl: (7) Failed connect to localhost:80; 拒绝连接
[root@mm ~]
5.缓存某些软件到本地:
1.缓存安装软件包
下⼀次还⽤
国外源
2.如何缓存
vim /etc/yum.conf
[main]
cachedir=/var/cache/yum/$basearch/$releaserver # 定义软件包缓存路径
keepcache=1 #开启缓存
debuglevel=2
logfile=/var/log/yum.log
1.vim /etc/yum.cong
2.keepcache=1
3.测试 yum -y. install tree
4./var/cache/yum/x66_32/7/base/packages/treeexxxxxx.rpm
[root@mm ~]# vim /etc/yum.conf
3.卸载,然后安装nginx 查看缓存⽂件
[root@mm ~]# yum -y remove nginx.x86_64
#
安装
[root@mm ~]#
yum install nginx -y
#
查找安装包
[root@mm ~]#
find /var/cache/ -name "*tree*" -type f
/var/cache/yum/x86_64/7/os/packages/tree-1.6.0-10.el7.x86_64.rpm
您在 /var/spool/mail/root 中有新邮件
[root@mm ~]#
find /var/cache/ -name "*nginx*" -type f
/var/cache/yum/x86_64/7/nginx-stable/packages/nginx-1.26.1-
2.el7.ngx.x86_64.rpm
[root@mm ~]#
4.只下载不安装
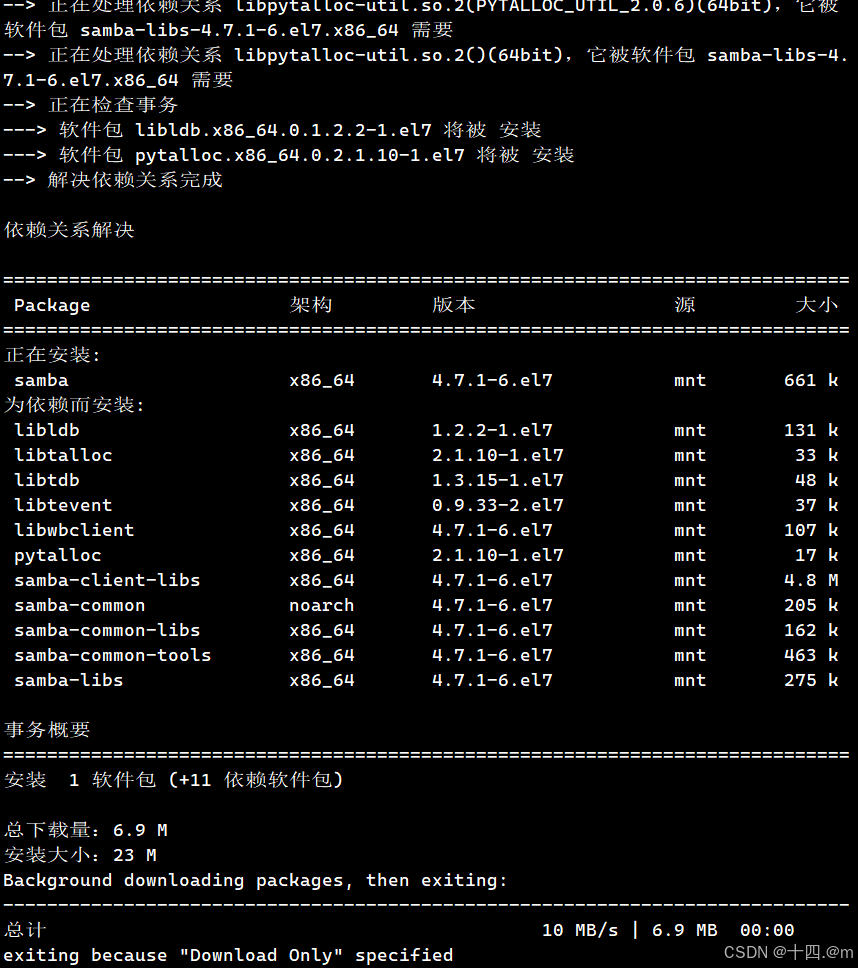
[root@mm ~]# yum install --downloadonly --downloaddir=./soft/ samba
[root@mm ~]# ls soft/
6.自建yum仓库:
1.安装createrepo制作仓库的软件
[root@mm ~]#
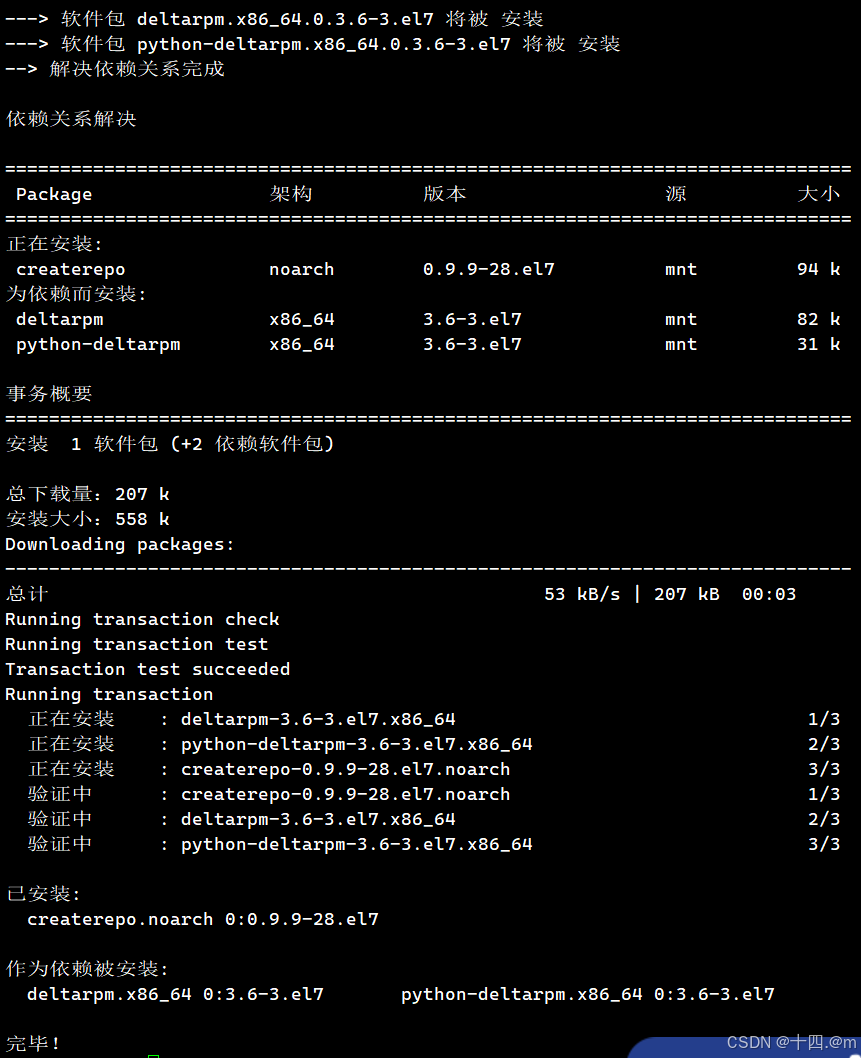
yum -y install createrepo
2.把soft⽂件夹做成⼀个本地的⾃建仓库
[root@mm ~]# createrepo soft/
[root@mm ~]# cd soft/
[root@mm soft]# ls
avahi-libs-0.6.31-20.el7.x86_64.rpm pytalloc-2.1.16- 1.el7.x86_64.rpm
cups-libs-1.6.3-52.el7_9.x86_64.rpm python-tdb-1.3.18- 1.el7.x86_64.rpm
gnutls-3.3.29-9.el7_6.x86_64.rpm repodata
libldb-1.5.4-2.el7.x86_64.rpm samba-4.10.16-
25.el7_9.x86_64.rpm
libtalloc-2.1.16-1.el7.x86_64.rpm samba-client-libs-4.10.16- 25.el7_9.x86_64.rpm
libtdb-1.3.18-1.el7.x86_64.rpm samba-common-4.10.16- 25.el7_9.noarch.rpm
libtevent-0.9.39-1.el7.x86_64.rpm samba-common-libs-4.10.16- 25.el7_9.x86_64.rpm
libwbclient-4.10.16-25.el7_9.x86_64.rpm samba-common-tools-4.10.16- 25.el7_9.x86_64.rpm
nettle-2.7.1-9.el7_9.x86_64.rpm samba-libs-4.10.16- 25.el7_9.x86_64.rpm
pyldb-1.5.4-2.el7.x86_64.rpm trousers-0.3.14- 2.el7.x86_64.rpm
3.在/etc/yum.repos.d/下创建 soft.repo
vim /etc/yum.repos.d/soft.repo
[soft]
name=soft
baseurl=file:///root/soft/
gpgcheck=0
enable=1
yum clean all
yum makecache
4.再次安装samba
[root@mm soft]# yum -y install samba


 被折叠的 条评论
为什么被折叠?
被折叠的 条评论
为什么被折叠?
 到【灌水乐园】发言


