


 文章详细介绍了如何构建一个技术社区,包括创建主题表、发布主题、集成Markdown编辑器SimpleMDE、主题列表展示、分类筛选、分页查询功能。同时,文章还涉及了主题内容的查看、编辑和删除,以及删除分类时如何更新主题的所属分类。整个过程覆盖了前端路由、组件设计和后端接口开发等多个方面。
目录
主题操作
1.创建主题表
执行命令。
php think migrate:create Topic
打开database\migrations\…_topic.php,编写change()方法。
public function change()
{
$table = $this->table(
'topic',
['engine' => 'InnoDB', 'collation' => 'utf8mb4_general_ci']
);
$table->addColumn(
'title',
'string',
['limit' => 100, 'null' => false, 'default' => '', 'comment' => '标题']
)
->addColumn(
'category_id',
'integer',
['null' => false, 'default' => 0, 'comment' => '分类id']
)
->addColumn(
'content',
'text',
['null' => false, 'comment' => '主题内容']
)
->addColumn(
'user_id',
'integer',
['null' => false, 'default' => 0, 'comment' => '用户id']
)
->addColumn(
'is_show',
'boolean',
['null' => false, 'default' => 0, 'comment' => '是否显示']
)
->addColumn(
'hits',
'integer',
['null' => false, 'default' => 0, 'comment' => '点击量']
)
->addColumn(
'likenum',
'integer',
['null' => false, 'default' => 0, 'comment' => '点赞量']
)
->addTimestamps()
->create();
}
执行迁移。
php think migrate:run
2.发布主题
打开src\router\index.js,添加路由。
routes: [
……(原有代码)
{ path: '/post', name: 'post', component: resolve => require(['@/pages/TopicEdit.vue'], resolve), meta: { title: '发布主题' } },
],
创建src\pages\TopicEdit.vue。
<template>
<div>
发布主题
</div>
</template>
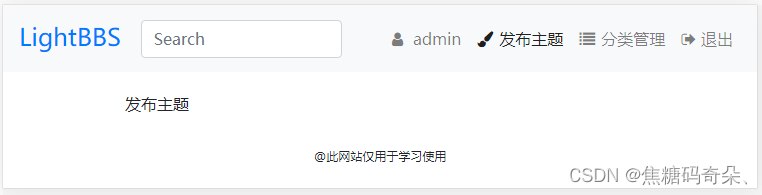
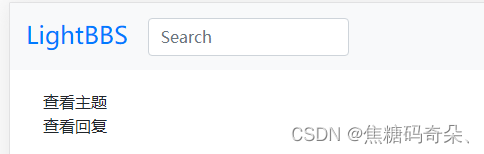
打开src\components\Header.vue,在顶部导航中添加链接。
<ul class="navbar-nav header-nav" v-if="isLogin">
<li class="nav-item">
……(原有代码)
</li>
<li class="nav-item" v-show="user.role === 'admin'">
<router-link class="nav-link" :to="{ name: 'post' }">
<i class="fa fa-paint-brush"></i>发布主题
</router-link>
</li>
……(原有代码)
</ul>
添加样式。
.header-nav {
……(原有代码)
.fa-paint-brush {
margin-right: 6px;
}
}
页面效果如下
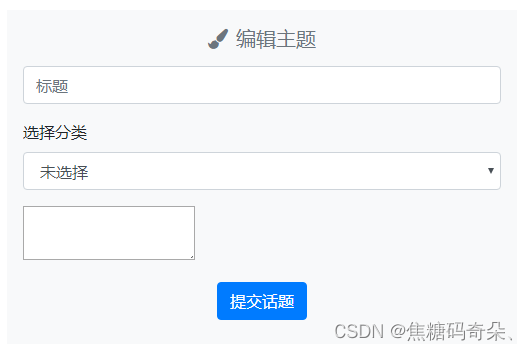
打开src\pages\TopicEdit.vue,编写页面。
<template>
<div class="bg-light px-3">
<h5 class="pt-3 pb-2 text-muted text-center"><i class="fa fa-paint-brush mr-2"></i>编辑主题</h5>
<div class="form-group">
<input type="text" v-model="form.title" class="form-control" placeholder="标题">
</div>
<div class="form-group">
<label>选择分类</label>
<select class="form-control" v-model="form.category_id">
<option value="0">未选择</option>
<option v-for="(cate,index) in cates" :key="index" :value="cate.id" name="category_id">{{ cate.name }}
</option>
</select>
</div>
<div class="form-group">
<textarea ref="editor"></textarea>
</div>
<div class="text-center pb-4">
<input type="button" class="btn btn-primary" @click="save" value="提交话题">
</div>
</div>
</template>
<script>
export default {
data () {
return {
form: {
title: '',
content: '',
category_id: 0
},
cates: []
}
},
created () {
this.getCategory()
},
methods: {
getCategory () {
this.$http.get('category/index').then(res => {
if (res.data.code === 1) {
this.cates = res.data.data
}
}).catch(() => {
this.$toastr.e('操作失败,服务器异常。')
})
},
save () {
// 发布主题
}
}
}
</script>
页面效果如下
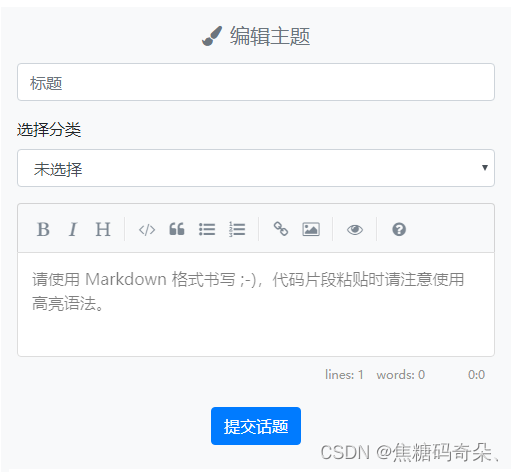
3.SimpleMDE编辑器
安装编辑器。
npm install simplemde@1.11.2 --save
在src\pages\TopicEdit.vue中引入。
<script>
import 'simplemde/debug/simplemde.css'
import SimpleMDE from 'simplemde'
export default {
data () {
……(原有代码)
},
mounted () {
const simplemde = new SimpleMDE({
element: this.$refs.editor,
placeholder: '请使用 Markdown 格式书写 ;-),代码片段粘贴时请注意使用高亮语法。',
spellChecker: false,
autoDownloadFontAwesome: false,
autosave: {
enabled: false,
uniqueId: 'content'
},
showIcons: ['code'],
autofocus: true,
renderingConfig: {
codeSyntaxHighlighting: true
}
})
simplemde.codemirror.on('change', () => {
// 将改变后的值赋给文章内容
this.form.content = simplemde.value()
})
this.simplemde = simplemde
},
……(原有代码)
}
</script>
页面效果如下
编写save()方法。
save () {
this.$http.post('topic/save', this.form).then(res => {
if (res.data.code === 0) {
this.$toastr.e(res.data.msg)
} else if (res.data.code === 1) {
this.$toastr.s('操作成功。')
this.$router.push({ name: 'topic_show', params: { id: res.data.data.id } })
}
}).catch(() => {
this.$toastr.e('操作失败,服务器异常。')
})
}
打开src\router\index.js,添加路由。
routes: [
……(原有代码)
{ path: '/show/:id', name: 'topic_show', component: resolve => require(['@/pages/TopicShow.vue'], resolve), meta: { title: '查看话题' } },
],
创建src\pages\TopicShow.vue。
<template>
<div>
查看主题
</div>
</template>
打开route\route.php,添加服务器路由。
Route::post('topic/save', 'api/Topic/save');
创建application\api\controller\Topic.php。
<?php
namespace app\api\controller;
class Topic extends Common
{
protected $checkActive = ['save', 'del'];
public function save()
{
}
}
创建application\api\validate\Topic.php验证器。
<?php
namespace app\api\validate;
use think\Validate;
class Topic extends Validate
{
protected $rule = [
'title' => 'require|max:100',
'content' => 'checkText:65535'
];
protected $message = [
'title.require' => '标题不能为空',
'title.max' => '标题最多为100个字符'
];
protected function checkText($value, $rule)
{
return strlen($value) <= $rule ? true : '内容最多65535个字节';
}
}
在application\api\controller\Topic.php中导入命名空间。
use app\api\validate\Topic as TopicValidate;
编写save()方法。
public function save()
{
$id = $this->request->post('id/d', 0);
$data = [
'category_id' => $this->request->post('category_id/d', 0),
'title' => $this->request->post('title/s', ''),
'content' => $this->request->post('content/s', '')
];
$validate = new TopicValidate();
if (!$validate->check($data)) {
$this->error('操作失败,' . $validate->getError() . '。');
}
}
创建application\api\model\Topic.php模型文件。
<?php
namespace app\api\model;
use think\Model;
class Topic extends Model
{
}
在application\api\controller\Topic.php中导入命名空间。
use app\api\model\Topic as TopicModel;
继续编写save()方法。
public function save()
{
……(原有代码)
if ($id) {
if (!$topic = TopicModel::get($id)) {
$this->error('修改失败,记录不存在。');
}
if ($this->user->role !== 'admin' && $this->user->id !== $topic->user_id) {
$this->error('修改失败,您没有权限修改此内容。');
}
$topic->save($data);
$this->success('修改成功。', null, ['id' => $id]);
} else {
$data['is_show'] = true;
$data['user_id'] = $this->user->id;
$topic = TopicModel::create($data);
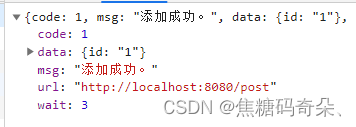
$this->success('添加成功。', null, ['id' => $topic->id]);
}
}
测试程序
4.主题列表
打开src\pages\Home.vue,编写页面。
<template>
<div class="row">
<div class="col-lg-8">
<List />
</div>
<div class="col-lg-4">
<Sidebar />
</div>
</div>
</template>
<script>
import List from '@/components/topic/List'
import Sidebar from '@/components/Sidebar'
export default {
components: { List, Sidebar }
}
</script>
创建src\components\topic\List.vue。
<template>
<div>主题列表</div>
</template>
创建src\components\Sidebar.vue。
<template>
<div>侧边栏</div>
</template>
页面效果如下。

在主题列表src\components\topic\List.vue页面查询数据。
<script>
export default {
data () {
return {
topics: [],
empty: false,
}
},
created () {
this.getTopicList()
},
methods: {
getTopicList () {
this.$http.get('topic/list').then(res => {
if (res.data.code === 1) {
this.topics = res.data.data.data
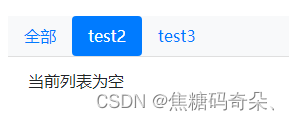
this.empty = this.topics.length ? false : '当前列表为空'
}
}).catch(() => {
this.$toastr.e('操作失败,服务器异常。')
})
},
}
}
</script>
打开route\route.php,编写服务器端接口。
Route::get('topic/list', 'api/Topic/index');
打开application\api\model\Topic.php,编写user()方法,用于关联操作。
public function user()
{
return $this->belongsTo('User', 'user_id');
}
打开application\api\controller\Topic.php,编写index()方法。
public function index()
{
$where = ['is_show' => 1];
$data = TopicModel::with(['user' => function ($query) {
$query->field('id,name,img_url');
}])->field('id,user_id,title,category_id,hits,likenum,update_time')
->where($where)->order('id', 'desc')->select();
$data = array_map(function ($v) {
$v['user']['img_url'] = $this->avatarUrl($v['user']['img_url']);
return $v;
}, $data->toArray());
$this->success('', null, [
'data' => $data
]);
}
将数据输出到页面中。
<template>
<div>
<div class="bg-light">
<ul class="list-group list-group-flush">
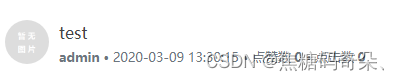
<li class="list-group-item" v-for="(topic,index) in topics" :key="index">
<div class="row">
<div>
<router-link :to="{ name: 'topic_show', params: { id: topic.id } }">
<img :src="topic.user.img_url" class="rounded-circle topic-img">
</router-link>
</div>
<div>
<div class="row">
<h5 class="card-title topic-title" style="font-size: 16px;">
<router-link :to="{ name: 'topic_show', params: { id: topic.id } }">{{ topic.title }}</router-link>
</h5>
</div>
<div class="row">
<span class="small text-muted">
<strong>{{ topic.user.name }}</strong> •
<span class="d-none d-md-inline">{{ topic.update_time }} • </span>
点赞数 <strong>{{ topic.likenum }}</strong> •
点击数 <strong>{{ topic.hits }}</strong>
</span>
</div>
</div>
</div>
</li>
<li class="list-group-item" v-if="empty !== false">{{ empty }}</li>
</ul>
</div>
</div>
</template>
添加样式代码。
<style scoped>
.topic-img {
width: 44px;
height: 44px;
margin-right: 25px;
}
.topic-title {
margin-top: 3px;
margin-bottom: 5px;
}
.topic-title a {
color: #444;
}
</style>
页面效果如下。
5.分类筛选
打开src\router\index.js,添加路由。
routes: [
……(原有代码)
{ path: '/cate/:cate', name: 'topic_list', component: resolve => require(['@/pages/Home.vue'], resolve), meta: { title: '话题列表' } },
],
打开src\components\topic\List.vue。
data () {
return {
……(原有代码)
cates: [],
}
},
查询数据。
created () {
this.getCategory()
this.getTopicList()
},
methods: {
……(原有代码)
getCategory () {
this.$http.get('category/index').then(res => {
if (res.data.code === 1) {
this.cates = res.data.data
}
}).catch(() => {
this.$toastr.e('操作失败,服务器异常。')
})
},
}
输出到页面中。
<div class="bg-light">
<ul class="nav nav-pills">
<li class="nav-item bbs-cate-item">
<router-link class="nav-link" :to="{ name: 'topic_list', params: { cate: 0 } }">全部</router-link>
</li>
<li class="nav-item bbs-cate-item" v-for="(cate, index) in cates" :key="index">
<router-link class="nav-link" :to="{ name: 'topic_list', params: { cate: cate.id } }">{{ cate.name }}</router-link>
</li>
</ul>
……(原有代码)
</div>
添加样式。
<style scoped>
……(原有代码)
.bbs-cate-item a {
color: #666;
}
</style>
页面效果如下。

在页面打开后,获取URL中传过来的分类id。
data () {
return {
……(原有代码)
cate_active: parseInt(this.$route.params.cate) || 0,
}
},
在getTopicList()方法中查询数据的时候,传入分类id。
getTopicList () {
var params = { category_id: this.cate_active }
this.$http.get('topic/list', { params: params }).then(res => {
if (res.data.code === 1) {
……(原有代码)
}
}).catch(() => {
this.$toastr.e('操作失败,服务器异常。')
})
},
服务器接收分类id,放入查询条件中。
打开application\api\controller\Topic.php,修改index()方法。
public function index()
{
$category_id = $this->request->get('category_id/d', 0);
$where = ['is_show' => 1];
if ($category_id) {
$where['category_id'] = $category_id;
}
……(原有代码)
}
打开src\components\topic\List.vue,在分类id发生变化时更新列表。
export default {
data () {
……(原有代码)
},
watch: {
'$route' () {
this.cate_active = parseInt(this.$route.params.cate) || 0
this.getTopicList()
}
},
……(原有代码)
}
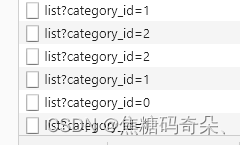
访问测试。
每次切换分类,就会触发请求,并传递分类id。
6.分页查询
修改application\api\controller\Topic.php,添加分页查询功能。
public function index()
{
$category_id = $this->request->get('category_id/d', 0);
$page = max($this->request->get('page/d', 1), 1);
$size = max(min($this->request->get('size/d', 10), 50), 1);
$where = ['is_show' => 1];
if ($category_id) {
$where['category_id'] = $category_id;
}
$total = TopicModel::where($where)->count();
$data = TopicModel::with(['user' => function ($query) {
$query->field('id,name,img_url');
}])->field('id,user_id,title,category_id,hits,likenum,update_time')
->where($where)->order('id', 'desc')->limit(($page - 1) * $size, $size)->select();
$data = array_map(function ($v) {
$v['user']['img_url'] = $this->avatarUrl($v['user']['img_url']);
return $v;
}, $data->toArray());
$this->success('', null, [
'data' => $data,
'total' => $total,
'page' => $page
]);
}
打开src\router\index.js,修改路由,允许传入page参数。
routes: [
……(原有代码)
{ path: '/cate/:cate/page/:page', name: 'topic_list', component: resolve => require(['@/pages/Home.vue'], resolve), meta: { title: '话题列表' } },
],
打开src\components\topic\List.vue,保存查询参数。
data () {
return {
……(原有代码)
page: {
current: parseInt(this.$route.params.page) || 1,
total: 0,
size: 7
}
}
},
在查询前后对分页参数进行处理。
getTopicList () {
var params = { page: this.page.current, size: this.page.size, category_id: this.cate_active }
this.$http.get('topic/list', { params: params }).then(res => {
if (res.data.code === 1) {
this.topics = res.data.data.data
this.page.current = res.data.data.page
this.page.total = res.data.data.total
this.empty = this.topics.length ? false : '当前列表为空'
}
}).catch(() => {
this.$toastr.e('操作失败,服务器异常。')
})
}
在切换分类时,将page设为1。
修改“全部”链接如下。
<router-link class="nav-link" :to="{ name: 'topic_list', params: { cate: 0, page: 1 } }">全部</router-link>
修改分类名称链接如下。
<router-link class="nav-link" :to="{ name: 'topic_list', params: { cate: cate.id, page: 1 } }">{{ cate.name }}</router-link>
当page值发生变化时,更新列表。
watch: {
'$route' () {
this.cate_active = parseInt(this.$route.params.cate) || 0
this.page.current = parseInt(this.$route.params.page) || 1
this.getTopicList()
}
},
创建分页导航组件src\components\Pagination.vue。
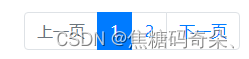
<template>
<ul class="pagination justify-content-center" v-if="max > 1">
<li v-on:click.stop.prevent="pageChange(current == 1 ? 1 : current - 1)" class="page-item d-none d-md-block"
:class="{disabled: current === 1}">
<span class="page-link">上一页</span>
</li>
<li @click.stop.prevent="pageChange(1)" class="page-item" :class="{active: current === 1}"
v-if="{false: current === 1}">
<span class="page-link">1</span>
</li>
<li @click.stop.prevent="pageChange(current - display)" class="page-item" v-if="showJumpPrev">
<span class="page-link">«</span>
</li>
<li v-for="(page,index) in pagingCounts" :key="index" @click.stop.prevent="pageChange(page)" class="page-item"
:class="{active: current === page}">
<span class="page-link">{{page}}</span>
</li>
<li @click.stop.prevent="pageChange(current + display)" class="page-item" v-if="showJumpNext">
<span class="page-link">»</span>
</li>
<li @click.stop.prevent="pageChange(max)" class="page-item" :class="{active: current === max}">
<span class="page-link">{{max}}</span>
</li>
<li v-on:click.stop.prevent="pageChange(current == max ? max: current + 1)" class="page-item"
:class="{disabled:current===max}">
<span class="page-link d-none d-md-block">下一页</span>
</li>
</ul>
</template>
<script>
export default {
data: function () {
return {
max: 0, // 总页数
page: this.current // 当前页数
}
},
props: {
// 最多显示的页码链接个数
display: {
type: Number,
default: 5,
required: false
},
// 当前是第几页
current: {
type: Number,
default: 1,
required: false
},
// 总记录数
total: {
type: Number,
default: 1
},
// 每页显示的条数
size: {
type: Number,
default: 10,
required: false
}
},
created () {
this.max = Math.ceil(this.total / this.size)
},
computed: {
numOffset () {
return Math.floor((this.display + 2) / 2) - 1
},
showJumpPrev () {
if (this.total > this.display + 2) {
if (this.page > this.display) {
return true
}
}
return false
},
showJumpNext () {
if (this.max > this.display + 2) {
if (this.page <= this.max - this.display) {
return true
}
}
return false
},
// 当前要显示的数字按钮集合
pagingCounts () {
let that = this,
startNum,
result = [],
showJumpPrev = that.showJumpPrev,
showJumpNext = that.showJumpNext;
if (showJumpPrev && !showJumpNext) {
startNum = that.max - that.display;
for (let i = startNum; i < that.max; i++) {
result.push(i)
}
} else if (!showJumpPrev && showJumpNext) {
for (let i = 2; i < that.display + 2; i++) {
result.push(i)
}
} else if (showJumpPrev && showJumpNext) {
for (let i = that.current - that.numOffset; i <= that.current + that.numOffset; i++) {
result.push(i)
}
} else {
for (let i = 2; i < that.max; i++) {
result.push(i)
}
}
return result
}
},
methods: {
pageChange: function (page) {
if (this.page === page) {
return
}
this.page = page
this.$emit('change', this.page)
}
},
watch: {
total: {
handler: function () {
let that = this
this.max = Math.ceil(that.total / that.size)
}
}
}
}
</script>
<style scoped>
.page-link {
cursor: pointer;
}
</style>
在src\components\topic\List.vue中使用组件。
<script>
import Pagination from '../../components/Pagination'
export default {
……(原有代码)
components: { Pagination }
}
</script>
在页面中使用。
<template>
<div>
……(原有代码)
<div class="mt-3">
<Pagination :current="page.current" :total="page.total" :size="page.size" @change="pageChange"></Pagination>
</div>
</div>
</template>
编写pageChange()方法。
methods: {
……(原有代码)
pageChange (page) {
this.$router.push({ name: 'topic_list', params: { cate: this.cate_active, page: page } })
}
},
页面效果如下。
7.查看主题
打开src\pages\TopicShow.vue,编写页面结构。
<template>
<div class="row">
<div class="col-lg-8">
<Show />
<Reply />
</div>
<div class="col-lg-4">
<Sidebar />
</div>
</div>
</template>
<script>
import Show from '@/components/topic/Show'
import Reply from '@/components/topic/Reply'
import Sidebar from '@/components/Sidebar'
export default {
components: { Show, Reply, Sidebar }
}
</script>
创建src\components\topic\Show.vue。
<template>
<div>查看主题</div>
</template>
创建src\components\topic\Reply.vue。
<template>
<div>查看回复</div>
</template>
页面效果如下
打开src\components\topic\Show.vue,接收id,查询数据。
<script>
export default {
data () {
return {
id: this.$route.params.id,
topic: {
user: {}
},
}
},
created () {
this.getTopic()
},
methods: {
getTopic () {
this.$http.get('topic/show', { params: { id: this.id } }).then(res => {
if (res.data.code === 1) {
this.topic = res.data.data
}
}).catch(() => {
this.$toastr.e('加载失败,服务器异常。')
})
}
}
}
</script>
打开route\route.php,编写服务器端路由。
Route::get('topic/show', 'api/Topic/show');
打开application\api\controller\Topic.php,编写show()方法。
public function show()
{
$id = $this->request->get('id/d', 0);
$topic = TopicModel::with(['user' => function ($query) {
$query->field('id,name,img_url');
}])->where('is_show', 1)->get($id);
if (!$topic) {
$this->error('获取话题失败。');
}
$topic['user']['img_url'] = $this->avatarUrl($topic['user']['img_url']);
$topic->setInc('hits');
$this->success('', false, $topic);
}
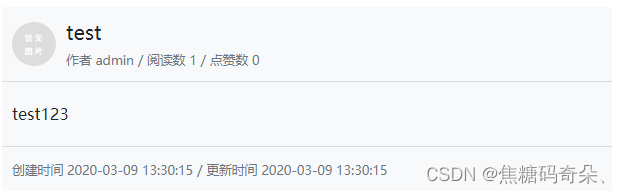
打开src\components\topic\Show.vue,输出到页面中。
<template>
<div class="topic">
<div class="panel bg-light">
<div class="panel-heading row">
<div>
<img :src="topic.user.img_url" class="rounded-circle topic-img">
</div>
<div>
<h5>{{topic.title}}</h5>
<span class="small text-muted">作者 {{ topic.user.name }} / 阅读数 {{ topic.hits }} / 点赞数 {{ topic.likenum }}</span>
</div>
</div>
<div class="panel-body">
<div class="markdown-body" v-html="topic.content"></div>
<div class="topic-info">
<span class="small text-muted">创建时间 {{ topic.create_time }} / 更新时间 {{ topic.update_time }}</span>
</div>
</div>
</div>
</div>
</template>
编写样式。
<style scoped>
.panel-heading {
padding: 10px;
}
.panel-heading h5 {
margin: 0.2rem 0;
}
.panel-body {
border-top: 1px solid #d9dadb;
}
.markdown-body {
padding: 20px 10px;
}
.topic-info {
border-top: 1px solid #d9dadb;
padding: 10px;
}
.topic-img {
width: 44px;
height: 44px;
margin: 5px 10px 0 15px;
}
</style>
页面效果如下。
8.解析Markdown语法
安装解析模块。
npm install showdown@1.9.1 --save
在src\components\topic\Show.vue中使用。
<script>
import showdown from 'showdown'
const converter = new showdown.Converter()
……(原有代码)
</script>
添加到methods中。
methods {
……(原有代码)
showdown (content) {
return converter.makeHtml(content)
},
},
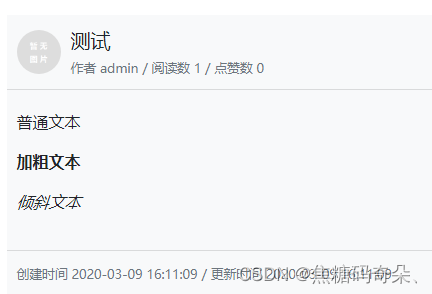
在页面中输出。
<div class="markdown-body" v-html="showdown(topic.content)"></div>
在编辑器中使用Markdown语法测试。
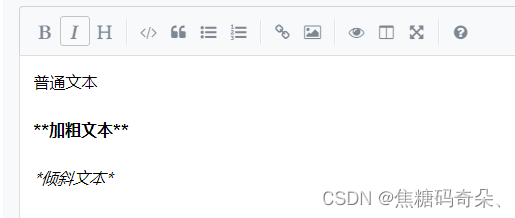
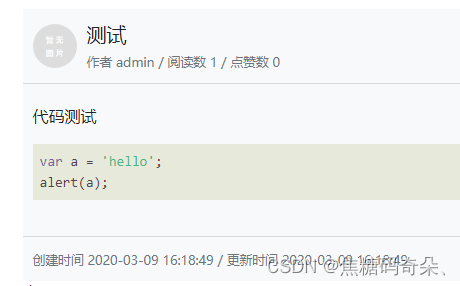
提交成功后,显示结果如下。
9.代码高亮
安装代码高亮模块。
npm install highlight.js@9.18.1 --save
在src\main.js中导入。
import 'highlight.js/styles/paraiso-light.css'
import hljs from 'highlight.js'
Vue.directive('highlight',function (el) {
let blocks = el.querySelectorAll('pre code');
blocks.forEach((block)=>{
hljs.highlightBlock(block)
})
})
在src\components\topic\Show.vue中使用。
<div class="markdown-body" v-highlight v-html="showdown(topic.content)"></div>
测试程序。在编辑器中编写一段代码。
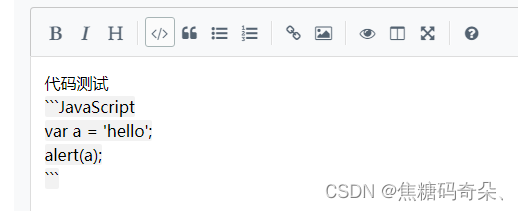
页面效果如下。
10.修改主题
打开src\router\index.js,先添加路由。
routes: [
……(原有代码)
{ path: '/edit/:id', name: 'edit', component: resolve => require(['@/pages/TopicEdit.vue'], resolve), meta: { title: '编辑话题' } },
],
打开src\components\topic\Show.vue,添加“编辑”链接。需要注意的是,只有管理员和作者有权限修改主题。先把用户信息取出来。
<script>
import { mapState } from 'vuex'
……(原有代码)
export default {
data () {
……(原有代码)
},
computed: {
...mapState(['user'])
},
……(原有代码)
}
</script>
如果当前用户有权限,就显示“编辑”链接。
<div class="topic-info">
……(原有代码)
<router-link v-if="user.role === 'admin' || topic.user_id === user.id"
:to="{ name: 'edit', params: { id: id } }" tag="button" class="btn btn-link opt">编辑</router-link>
</div>
添加样式。
<style scoped>
……(原有代码)
.opt {
color: #adadad;
font-size: 12px;
position: relative;
top: -1px;
}
.opt:hover {
text-decoration: none;
color: #666;
}
</style>
打开src\pages\TopicEdit.vue,接收id。
data () {
return {
form: {
id: this.$route.params.id || 0,
……(原有代码)
},
cates: []
}
},
在页面打开后,查询指定id的主题数据。
created () {
this.getCategory()
if (this.form.id) {
this.getTopic()
}
},
methods: {
……(原有代码)
getTopic () {
this.$http.get('topic/show', { params: { id: this.form.id } }).then(res => {
if (res.data.code === 1) {
this.form.title = res.data.data.title
this.form.category_id = res.data.data.category_id
this.form.content = res.data.data.content
this.simplemde.value(this.form.content)
}
}).catch(() => {
this.$toastr.e('加载失败,服务器异常。')
})
}
}
测试程序。
11.删除主题
打开src\components\topic\Show.vue,添加“删除”链接。
<div class="topic-info">
……(原有代码)
<button v-if="user.role === 'admin'" class="btn btn-link opt" @click="delTopic(topic.id)">删除</button>
</div>
编写对应的delTopic()方法。
methods {
……(原有代码)
delTopic () {
if (!window.confirm('是否确认删除?')) {
return
}
var data = { id: this.id }
this.$http.post('topic/del', data).then(res => {
if (res.data.code === 1) {
this.$router.push({ name: 'topic_list', params: { id: 0, page: 1 } })
this.$toastr.s('删除话题成功。')
}
}).catch(() => {
this.$toastr.e('加载失败,服务器异常。')
})
}
}
打开route\route.php,添加服务器路由。
Route::post('topic/del', 'api/Topic/del');
打开application\api\controller\Topic.php,编写del()方法。
public function del()
{
$id = $this->request->post('id/d', 0);
$topic = TopicModel::where([
'is_show' => true
])->get($id);
if ($this->user->role !== 'admin' && $topic->user_id !== $this->user->id) {
$this->error('删除失败,您没有权限进行此操作。', null, []);
}
$topic->is_show = false;
$topic->save();
$this->success('删除成功。', null, []);
}
测试程序。
12.删除分类时修改主题所属分类
打开application\api\controller\Category.php,导入命名空间。
use app\api\model\Topic as TopicModel;
修改del()方法。
public function del()
{
$id = $this->request->post('id/d', 0);
if ($category = CategoryModel::get($id)) {
$category->delete();
TopicModel::where('category_id', $id)->update(['category_id' => 0]);
$this->success('删除成功。');
}
$this->error('删除失败,记录不存在。');
}
测试程序。


 被折叠的 条评论
为什么被折叠?
被折叠的 条评论
为什么被折叠?
 到【灌水乐园】发言


