


 本文介绍了Maven的基本概念和作用,详细阐述了Maven的安装与配置过程,包括环境变量设置、验证安装、配置本地仓库以及更换中央仓库。接着,讲解了在Eclipse和IntelliJ IDEA中配置Maven以及创建Maven Web项目,包括编写pom.xml和web.xml文件,解决项目报错,更新项目依赖,以及在IDEA中启动和配置项目。
1. Maven简单介绍
Apache Maven是个项目管理和自动构建工具(常用的自动构建工具 ant,maven, Gradle android项目管理和构建已使用),基于项目对象模型(POM)的概念。
2.Maven的作用
完成项目的相关操作,如:编译,构建,单元测试,安装,网站生成和基于Maven部署项目。
3. Maven安装与配置
(1.)下载maven安装包,解压即可使用
http://maven.apache.org/download.cgi http://maven.apache.org/download.cgi(2.)配置maven环境变量
右键此电脑点击属性

点击高级设置,开始配置环境变量

修改 MAVEN_HOME,M2_HOME 的路径,为自己存放apache-maven-3.5.4的路径
配置方式跟jdk有些类似,环境变量MAVEN_HOME和M2_HOME的值为maven的根目录、
然后在path环境变量里加入“%MAVEN_HOME%\bin;%M2_HOME%\bin;”即可

(3.)验证
doc窗口执行命令“mvn –version”

(4.)修改“MAVEN_HOME\conf”下的setting.xml文件,配置本地仓库。注意是:“E:/”而非“E:\”

(5.) 中央仓库(默认是国外的源,换成国内的阿里巴巴的源,速度更快)

4.maven之基于Eclipse配置Maven并创建Maven Web项目
(1.)Windoe ==>Preferences ==>Maven ==>Installation
选中本机存放Maven的目录
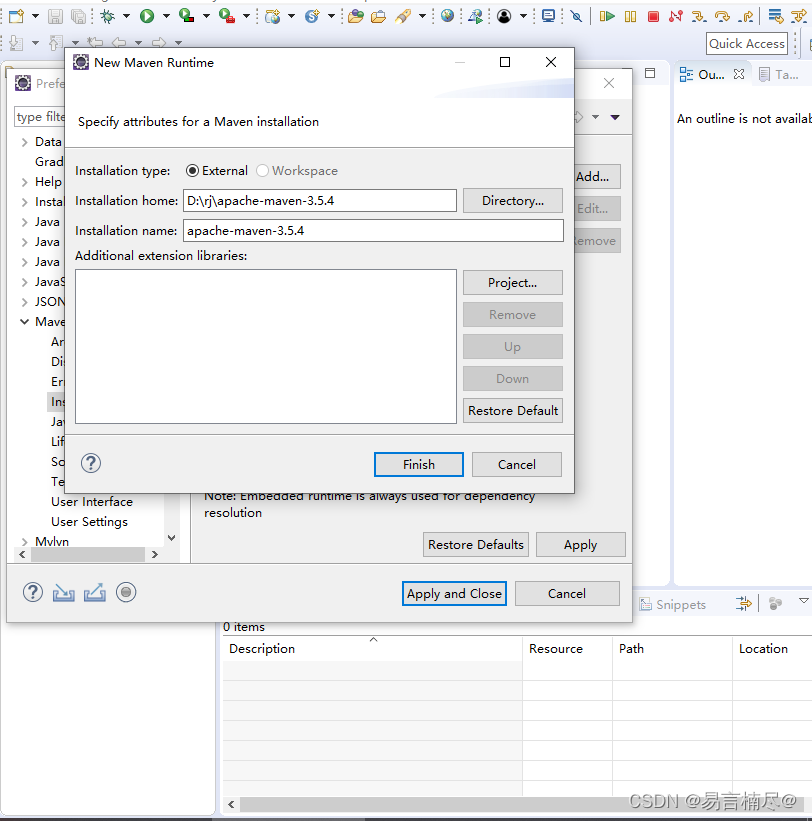
勾选刚刚添加的路径,保存并关闭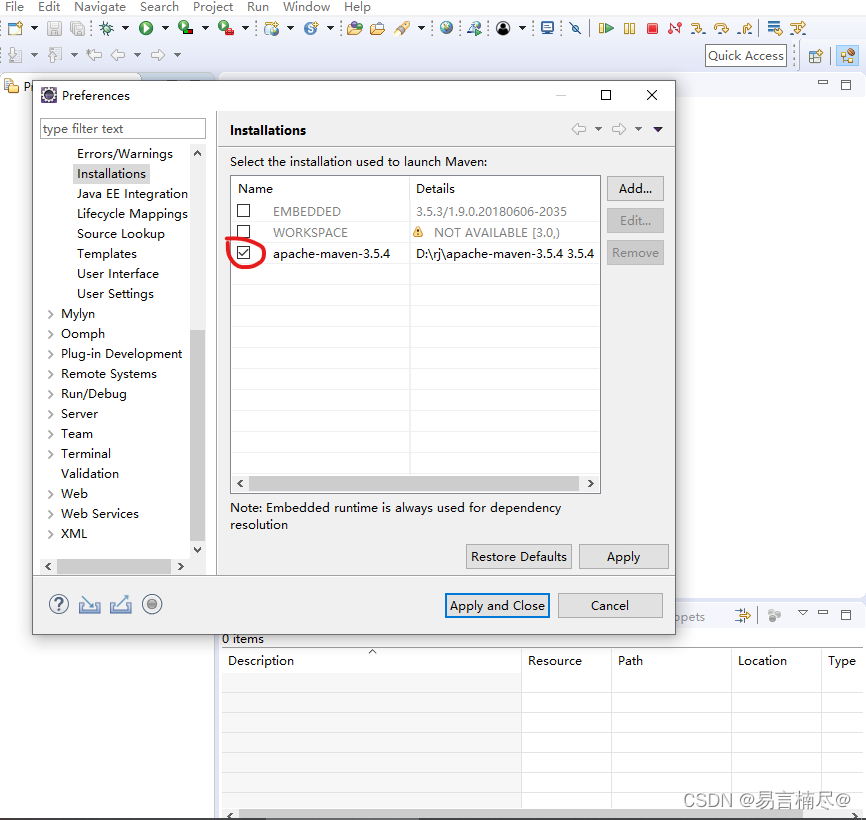
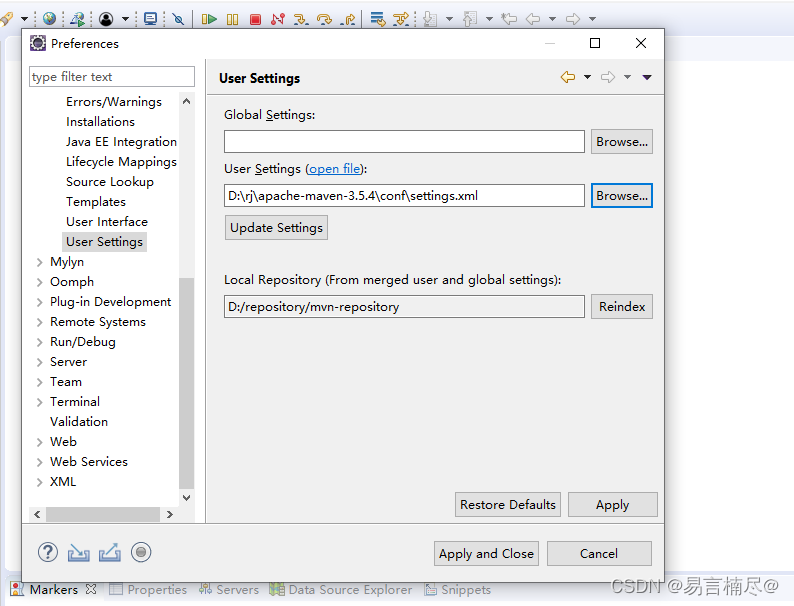
(2.)Windoe ==>Preferences ==>Maven ==>User Settings
选中本地Maven文件中settings.xml的位置,保存并退出
到这一步,基于Eclipse配置Maven就已经完成啦!!!!
接下来就是创建首个Maven Web项目,及可能会遇到的问题
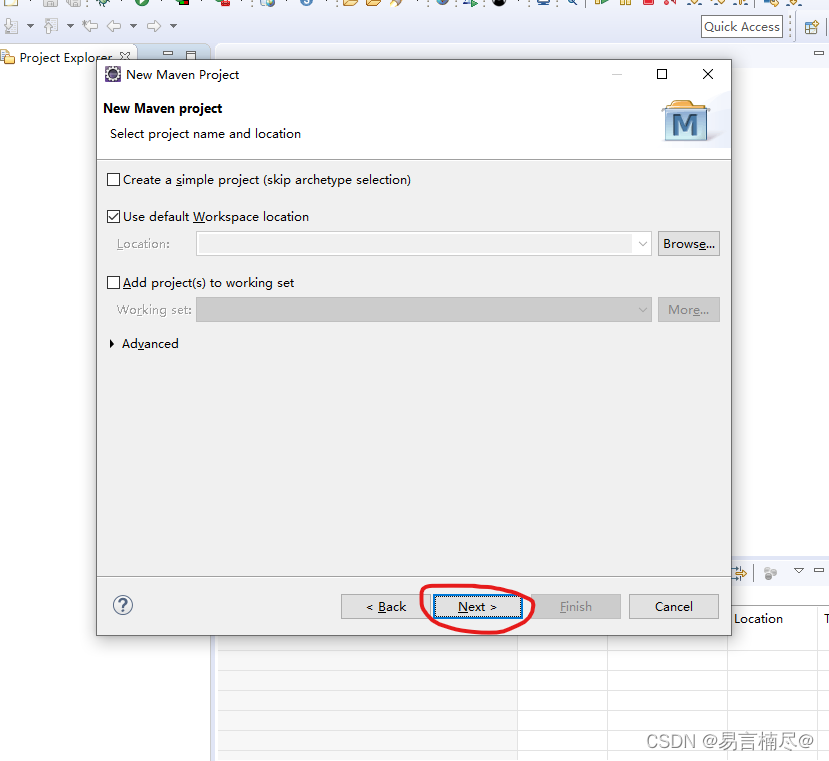
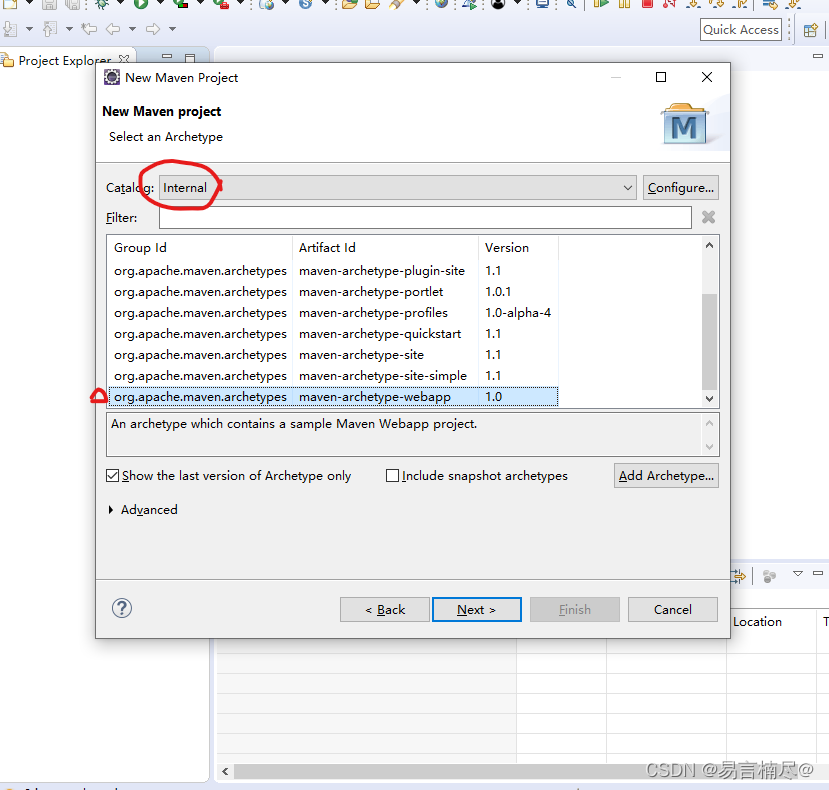
File ==> Other ==>Maven Project
直接点击Next
选中Internal , 并选中webapp项目,点击next开始下载jar包,到此步切记要联网
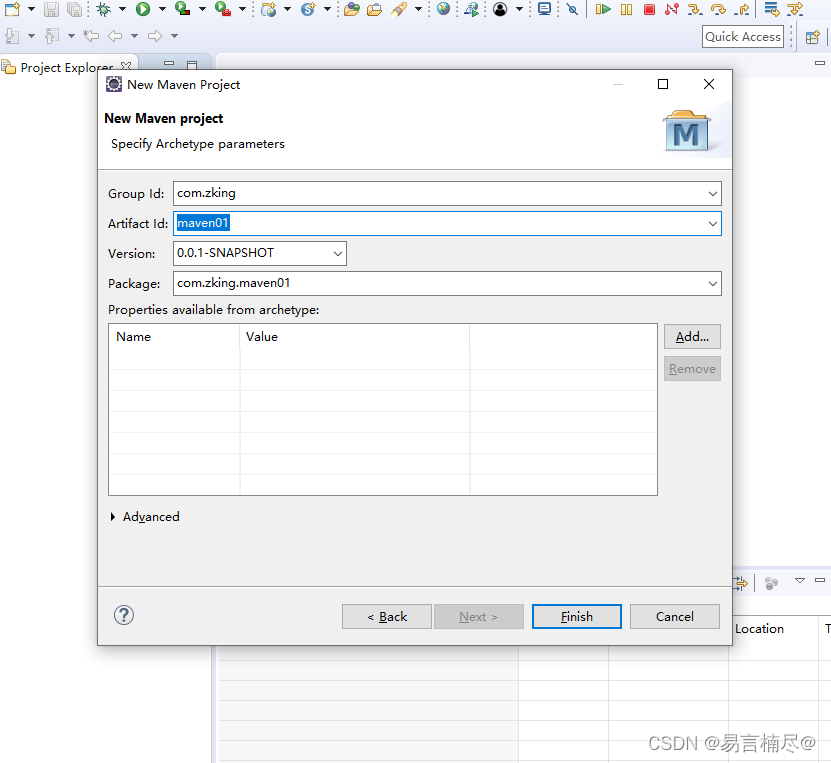
添加公司域名 和 项目名
创建项目成功后,先编写pom.xml
<project xmlns="http://maven.apache.org/POM/4.0.0" xmlns:xsi="http://www.w3.org/2001/XMLSchema-instance"
  xsi:schemaLocation="http://maven.apache.org/POM/4.0.0 http://maven.apache.org/maven-v4_0_0.xsd">
  <modelVersion>4.0.0</modelVersion>
  <groupId>com.zking</groupId>
  <artifactId>maven01</artifactId>
  <packaging>war</packaging>
  <version>0.0.1-SNAPSHOT</version>
  <name>maven01 Maven Webapp</name>
  <url>http://maven.apache.org</url>
  <dependencies>
    <dependency>
      <groupId>junit</groupId>
      <artifactId>junit</artifactId>
      <version>4.13</version>
      <scope>test</scope>
    </dependency>

    <!-- servlet -->
	<dependency>
 	  	<groupId>javax.servlet</groupId>
  	  	<artifactId>javax.servlet-api</artifactId>
  	 	<version>4.0.1</version>
  	 	<scope>provided</scope>
	</dependency>

  </dependencies>
  <build>
    <finalName>maven01</finalName>
    <plugins>
   	 	<plugin>
			<groupId>org.apache.maven.plugins</groupId>
			<artifactId>maven-compiler-plugin</artifactId>
			<version>3.7.0</version>
			<configuration>
				<source>1.8</source>
				<target>1.8</target>
				<encoding>UTF-8</encoding>
			</configuration>
		</plugin>
    </plugins>
  </build>
</project>
然后编写web.xml
<web-app xmlns:xsi="http://www.w3.org/2001/XMLSchema-instance"
	xmlns="http://java.sun.com/xml/ns/javaee"
	xsi:schemaLocation="http://java.sun.com/xml/ns/javaee http://java.sun.com/xml/ns/javaee/web-app_3_0.xsd"
	id="WebApp_ID" version="3.0">
  <display-name>Archetype Created Web Application</display-name>
</web-app>
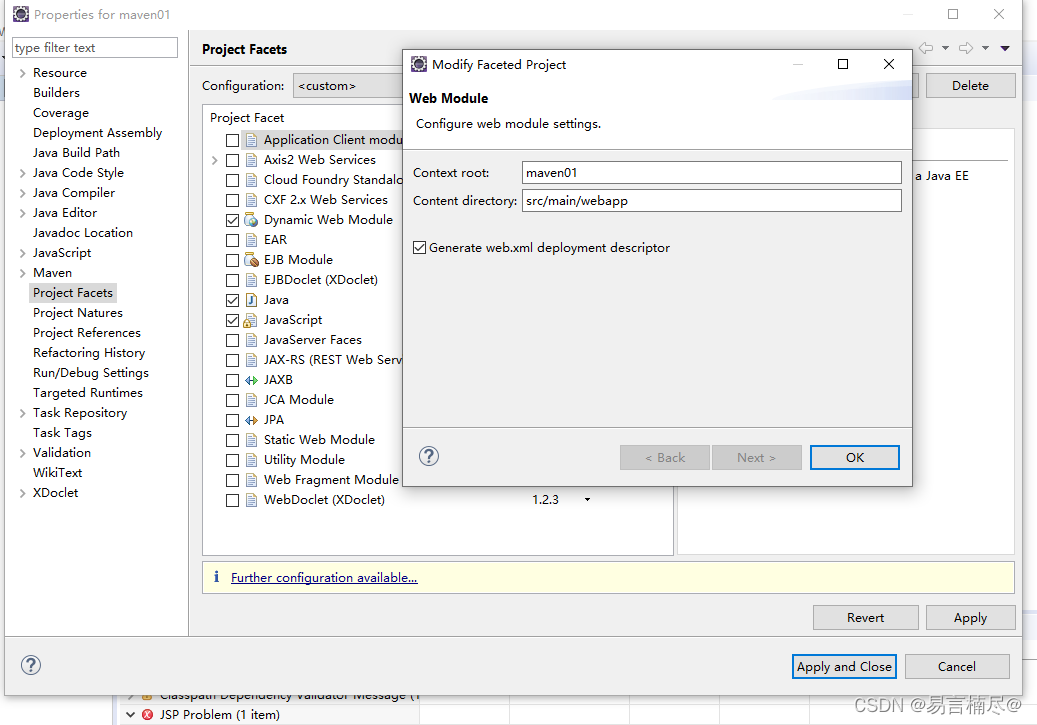
如果此时项目报错,选中项目右键,==> properties ==>Project Facats
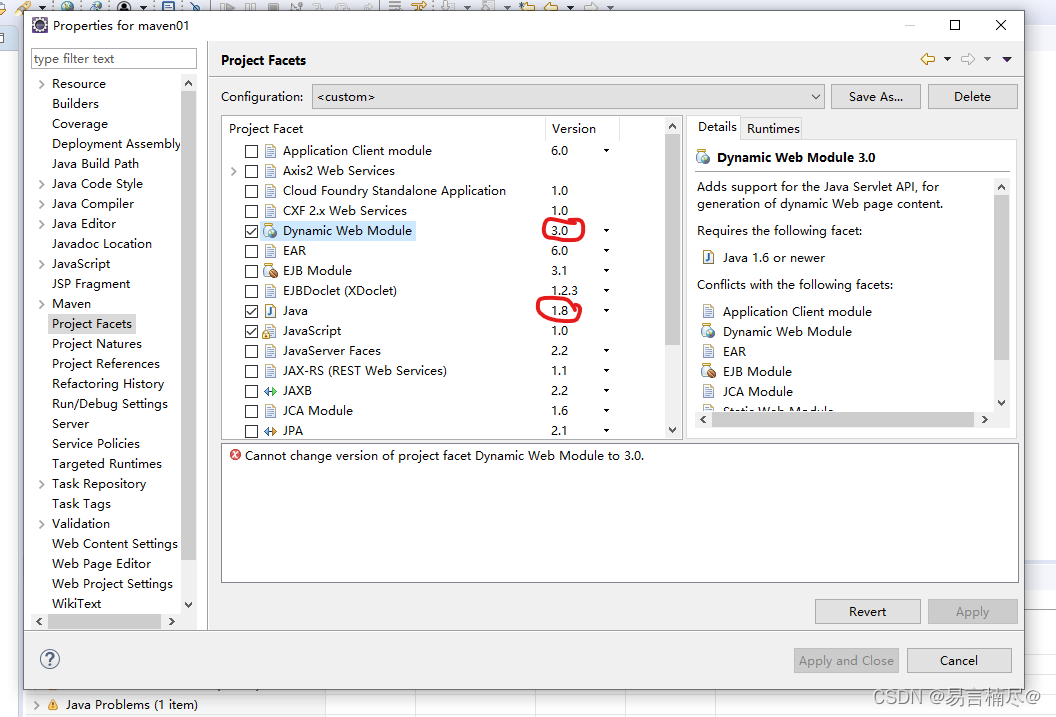
保存后再打开,会出现下图圈出的链接,点击
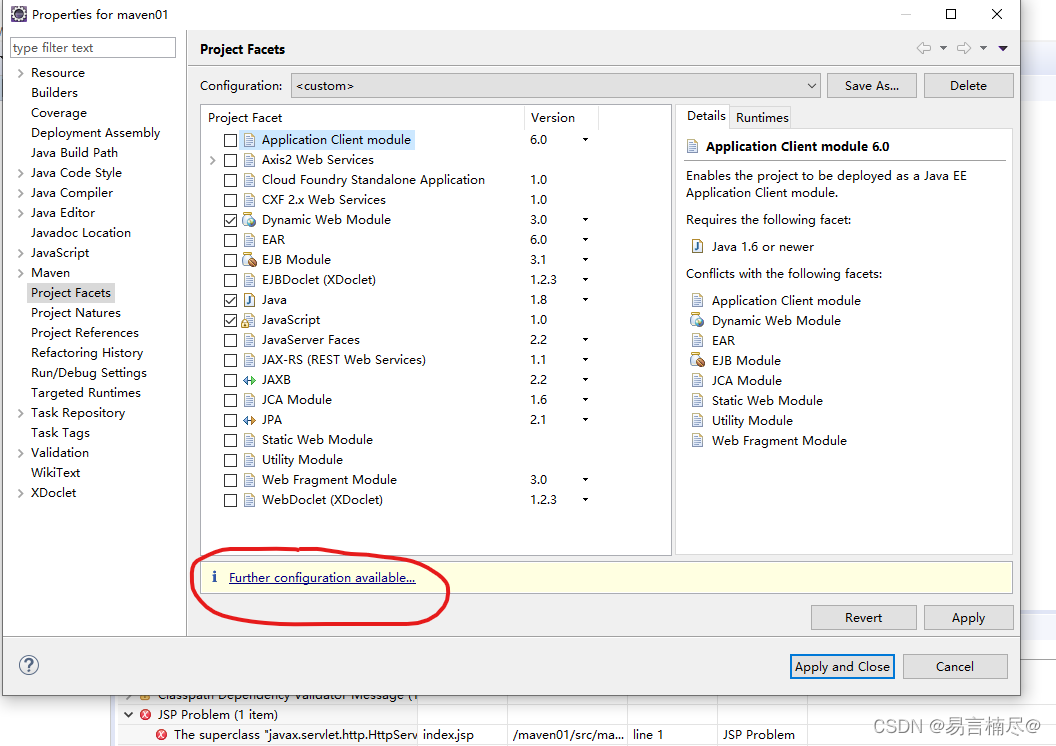
指定web.xml存放的路径
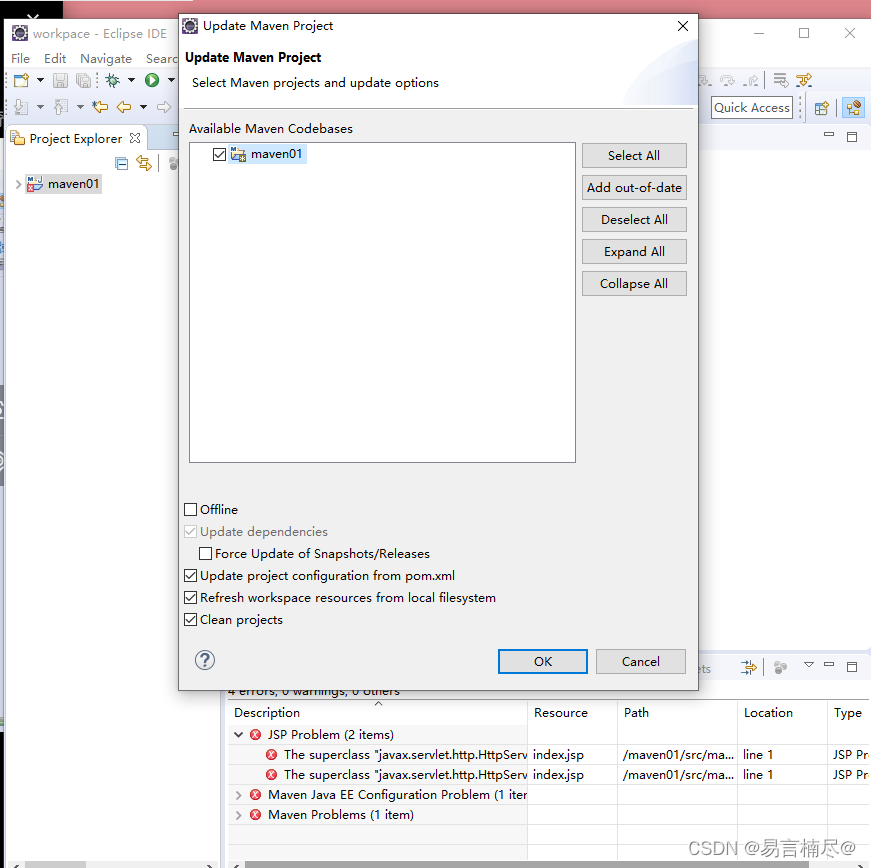
最后一步,选中项目右键 ==>Maven ==>Update Project , 选中项目,更新依赖
怎样找到源代码目录?
选中项目右键 ==> Refactor ==>Configure Created Web Applicat
取消√,点击Apply and Clise(如果此按钮灰掉了,点不动,请看下一步操作)

如果Apply and Clise按钮灰掉了,点不动,双击下图圈中的选项
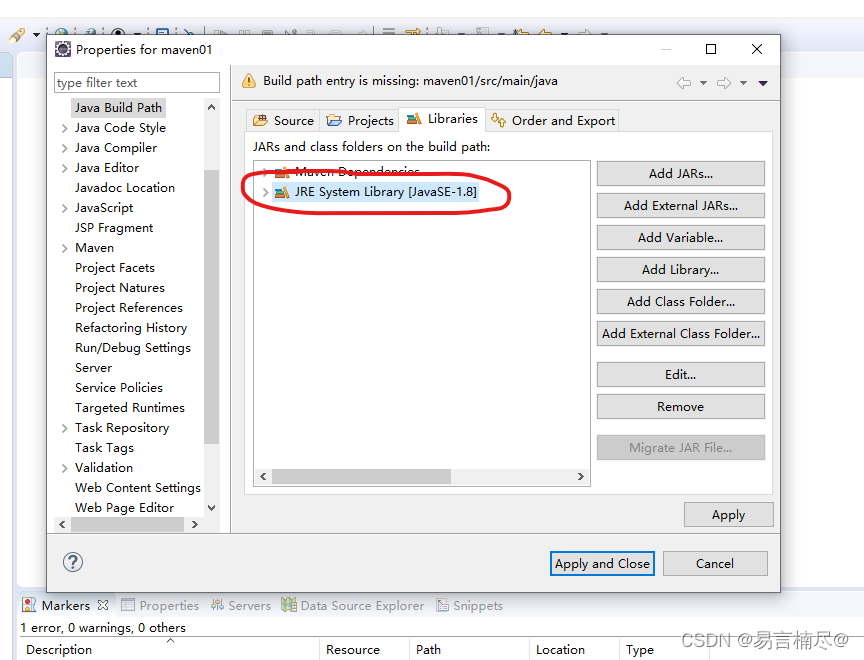
选中,点击finish即可

5.maven之基于IDEA配置Maven并创建Maven 项目
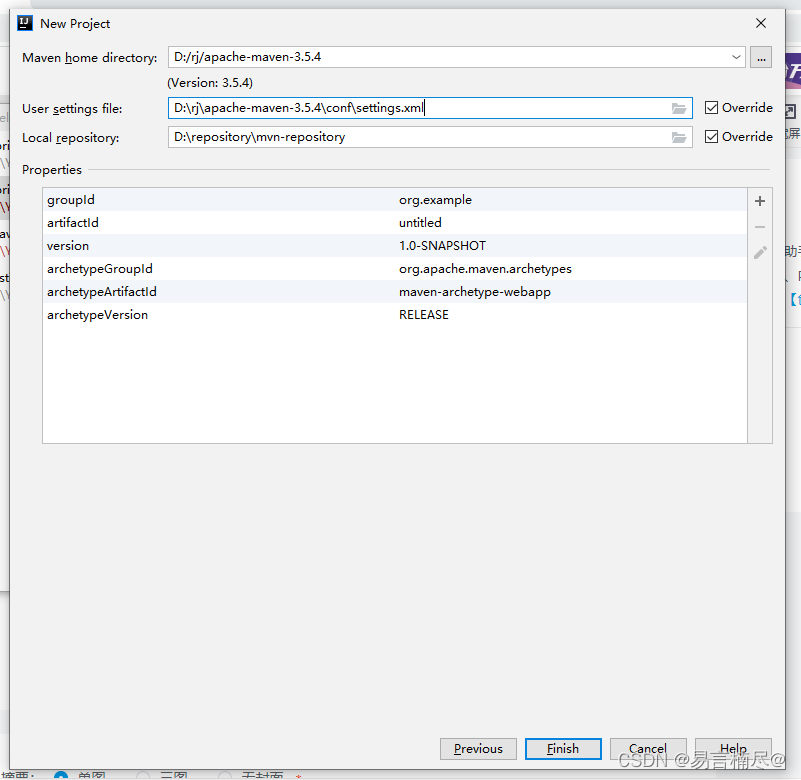
点击新建项目,选中Webapp,点击NEXT
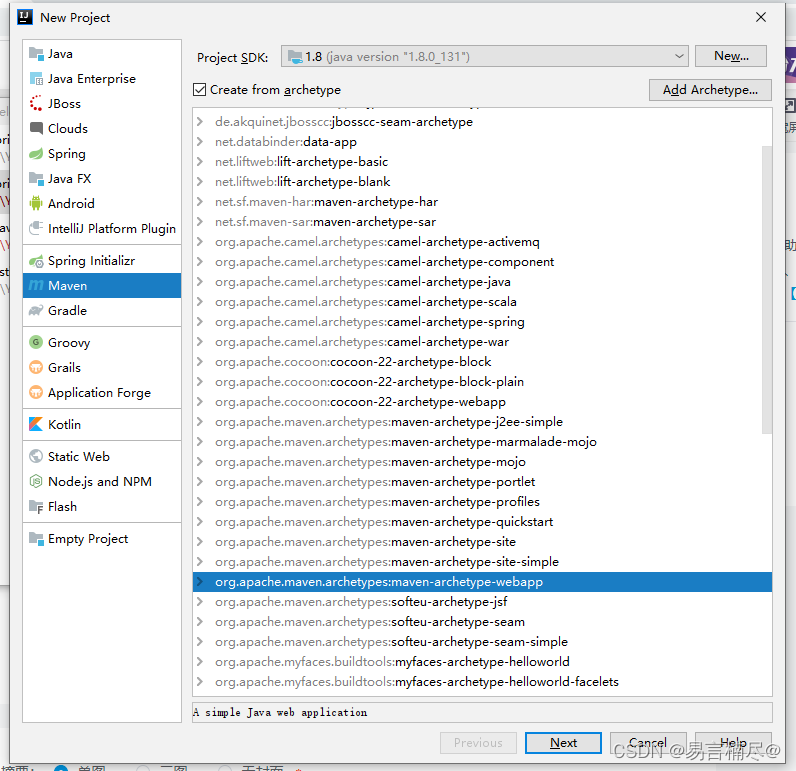
选择本机Maven文件,并选择setting.xml文件的位置,完成后点击finish, 创建项目一定要记得联网喔!
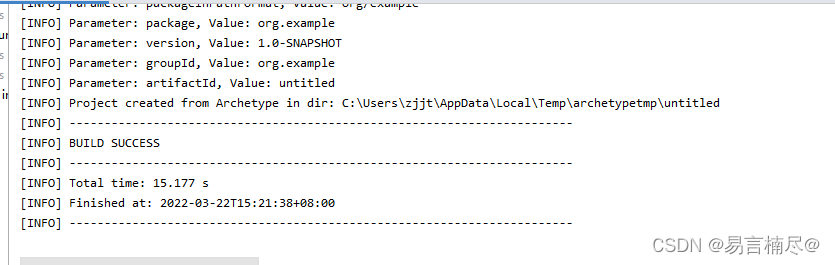
如果输出跟下图一样,表示项目创建成功
然后开始配置pom.xml文件,配置好的代码文件如下(如果想查看依赖是否引入成功,可以点击External Libraries)
<?xml version="1.0" encoding="UTF-8"?>
<project xmlns="http://maven.apache.org/POM/4.0.0" xmlns:xsi="http://www.w3.org/2001/XMLSchema-instance"
  xsi:schemaLocation="http://maven.apache.org/POM/4.0.0 http://maven.apache.org/xsd/maven-4.0.0.xsd">
  <modelVersion>4.0.0</modelVersion>

  <groupId>com.zking</groupId>
  <artifactId>maven01</artifactId>
  <version>1.0-SNAPSHOT</version>
  <packaging>war</packaging>

  <name>maven01 Maven Webapp</name>
  <!-- FIXME change it to the project's website -->
  <url>http://www.example.com</url>

  <properties>
    <project.build.sourceEncoding>UTF-8</project.build.sourceEncoding>
    <maven.compiler.source>1.8</maven.compiler.source>
    <maven.compiler.target>1.8</maven.compiler.target>

    <!--junit-->
    <junit.version>4.13</junit.version>
    <!--servlet-->
    <servlet.version>4.0.1</servlet.version>
  </properties>

  <dependencies>
    <!--junit-->
    <dependency>
      <groupId>junit</groupId>
      <artifactId>junit</artifactId>
      <version>${junit.version}</version>
      <scope>test</scope>
    </dependency>

    <!--servlet-->
    <dependency>
      <groupId>javax.servlet</groupId>
      <artifactId>javax.servlet-api</artifactId>
      <version>${servlet.version}</version>
      <scope>provided</scope>
    </dependency>

  </dependencies>

  <build>
    <finalName>maven01</finalName>
   <plugins>
     <plugin>
       <groupId>org.apache.maven.plugins</groupId>
       <artifactId>maven-compiler-plugin</artifactId>
       <version>3.7.0</version>
       <configuration>
         <source>${maven.compiler.source}</source>
         <target>${maven.compiler.target}</target>
         <encoding>${project.build.sourceEncoding}</encoding>
       </configuration>
     </plugin>
   </plugins>
  </build>
</project>
接下来开始配置web.xml文件,代码如下
<web-app xmlns:xsi="http://www.w3.org/2001/XMLSchema-instance"
         xmlns="http://java.sun.com/xml/ns/javaee"
         xsi:schemaLocation="http://java.sun.com/xml/ns/javaee http://java.sun.com/xml/ns/javaee/web-app_3_0.xsd"
         id="WebApp_ID" version="3.0">
  <display-name>Archetype Created Web Application</display-name>
</web-app>
到这一步,项目创建已经基本完成了,接下来要介绍的是如何启动项目
点击
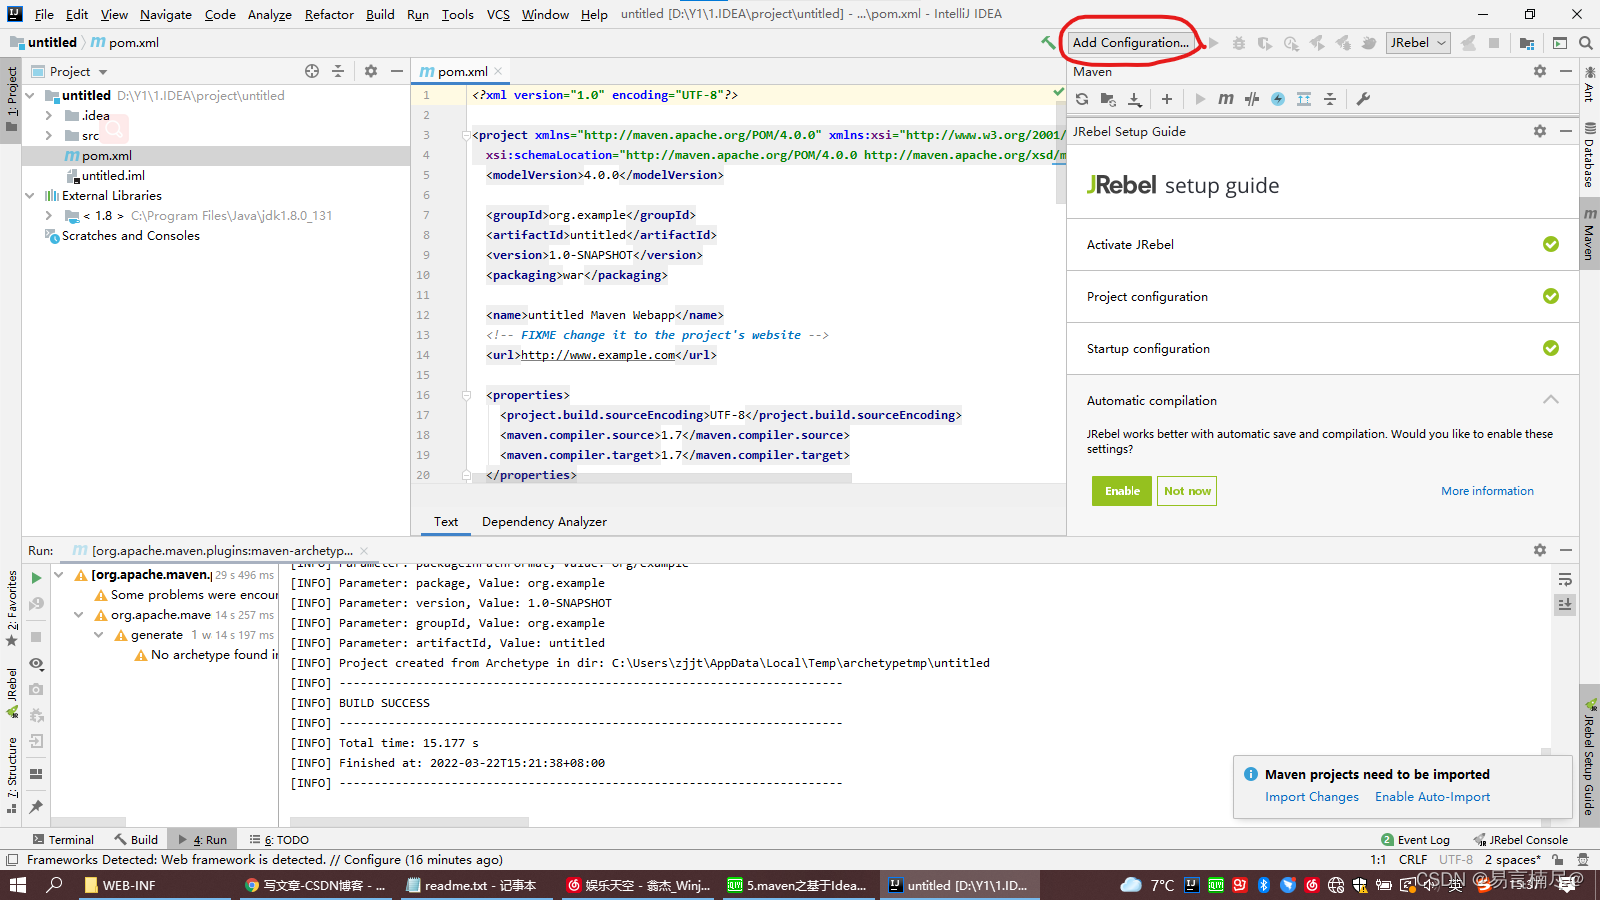
首先需要配置Tomcat
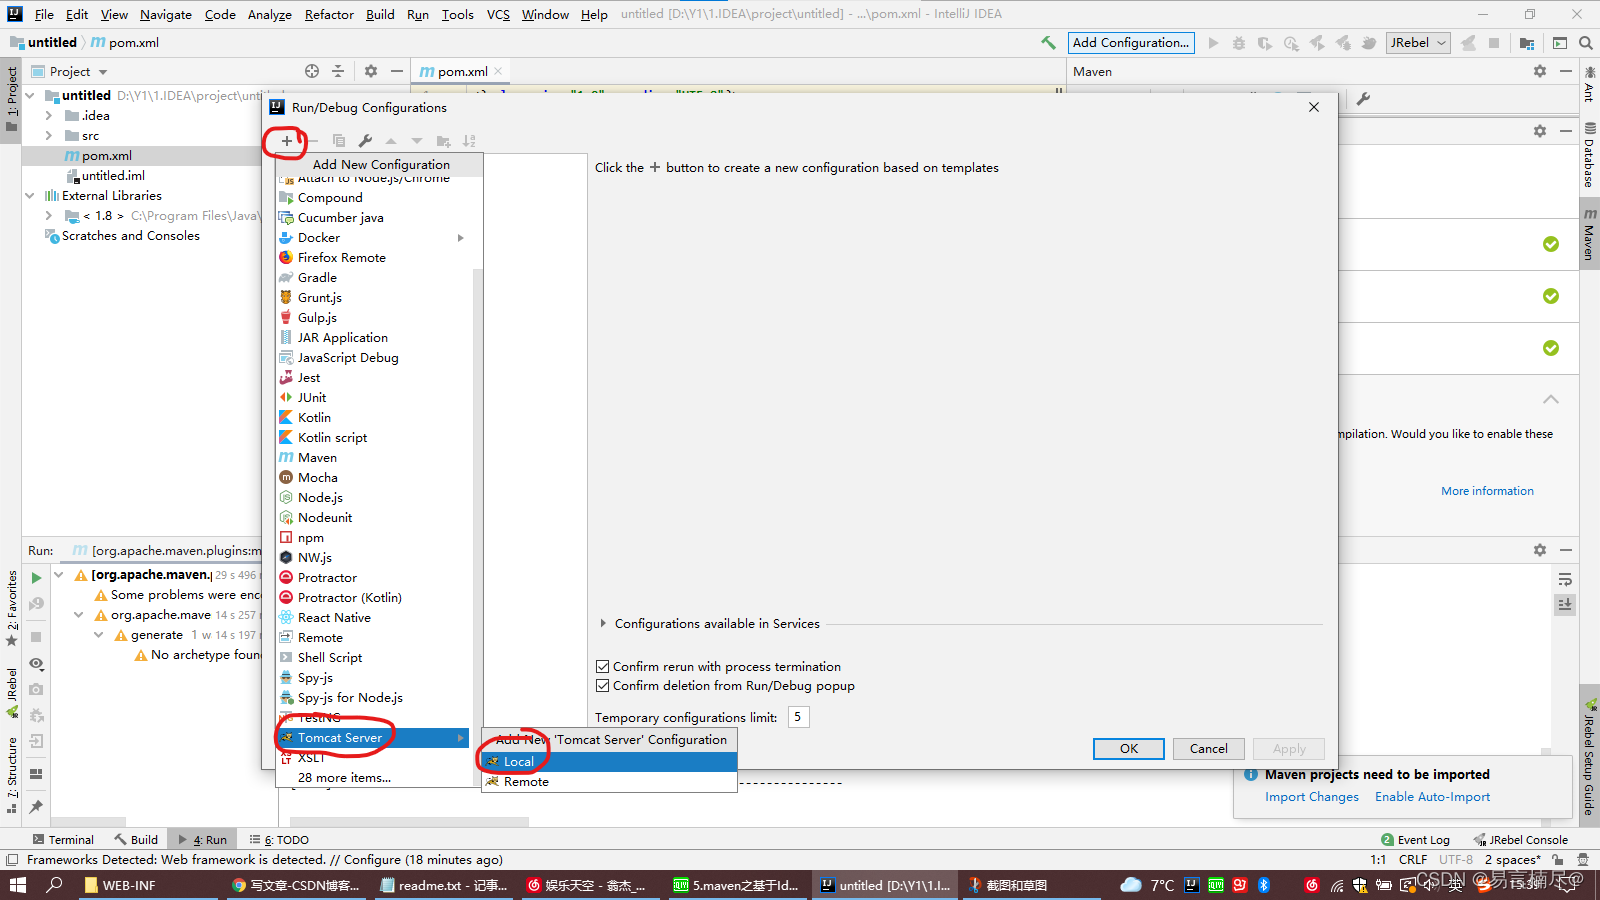
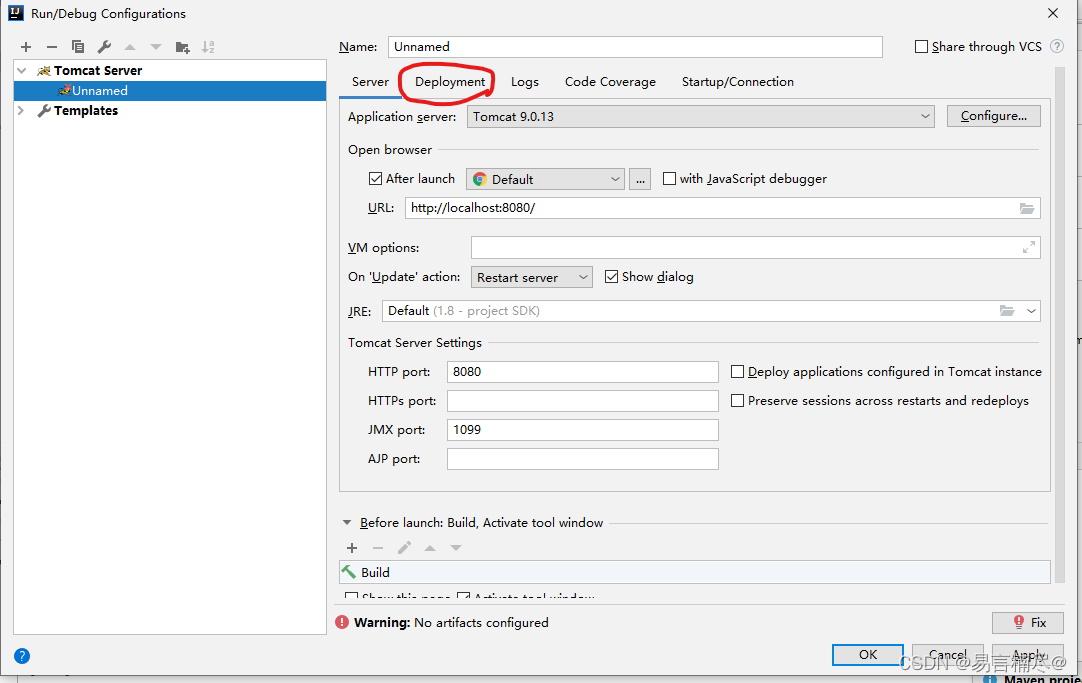
随便选择一个项目名,点击OK即可,切记:项目名只能在此处更改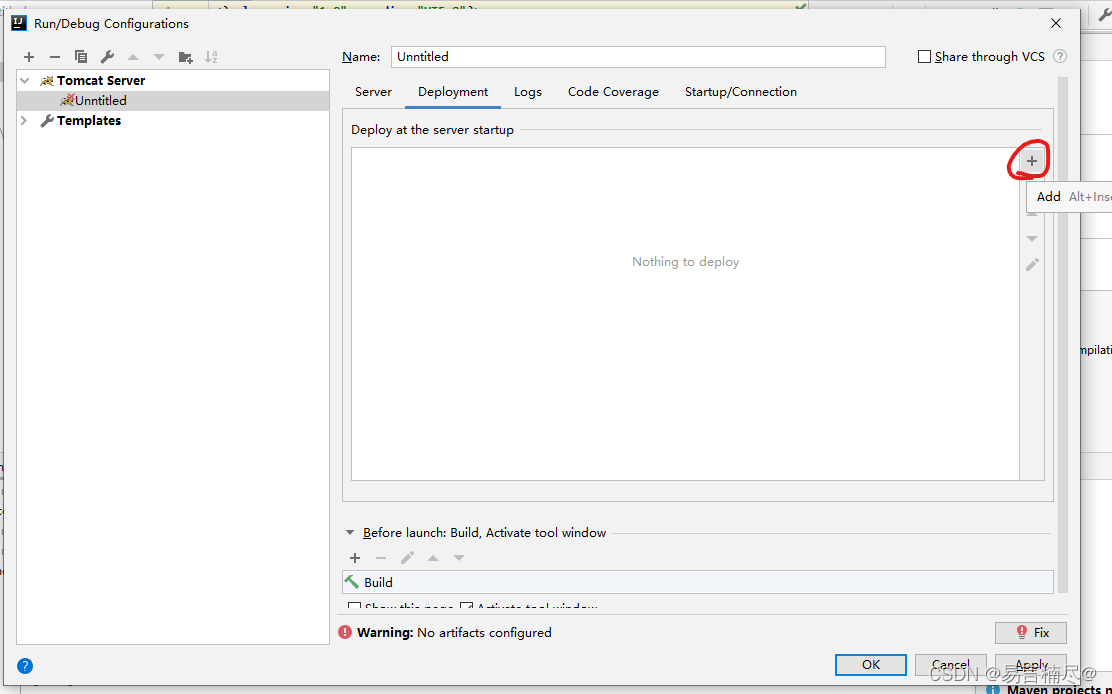
然后选择想使用的浏览器,点击OK,即可完成项目发布!!!


 584
584

 被折叠的 条评论
为什么被折叠?
被折叠的 条评论
为什么被折叠?
 到【灌水乐园】发言


