


1. 容器 docker
1.1. 修改主机名
两台主机修改为 master 和 node
[root@w1 ~] hostnamectl set-hostname master
[root@w1 ~] bash
[root@w2 ~] hostnamectl set-hostname node
[root@w2 ~] bash'1.2. 配置节点映射文件
[root@master ~] vi /etc/hosts
192.168.200.60 master
192.168.200.70 node
[root@master ~] scp /etc/hosts 192.168.200.70:/etc/hosts
1.3. 所有节点关闭防火墙和 selinux
[root@master yum.repos.d] systemctl stop firewalld
[root@master yum.repos.d] setenforce 0
[root@master yum.repos.d]
1.4. 所有节点开启路由转发功能
两台都要
[root@master ~] vi /etc/sysctl.conf

net.ipv4.ip_forward=1
net.bridge.bridge-nf-call-ip6tables=1
net.bridge.bridge-nf-call-iptables = 1

[root@master ~] scp /etc/sysctl.conf node:/etc/sysctl.conf
每个节点都执行
[root@master ~] modprobe br_netfilter
[root@master ~] sysctl -p
1.5. 所有节点安装依赖包
[root@master ~] yum install -y yum-utils device-mapper-persistent-data lvm21.6. 所有节点安装 docker
[root@master ~] yum-config-manager --add-repo http://mirrors.aliyun.com/docker-ce/linux/centos/docker-ce.repo配置 yum 源
[root@master ~] mv /etc/yum.repos.d/* /media/
[root@master ~] vi /etc/yum.repos.d/yum.repo

[centos-7.9-extras]
name=extras
baseurl=https://mirrors.aliyun.com/centos/7.9.2009/extras/x86_64/
gpgcheck=0
enabled=1


[centos-7.9-os]
name=os
baseurl=https://mirrors.aliyun.com/centos/7.9.2009/os/x86_64/
gpgcheck=0
enabled=1
[root@master ~] yum-config-manager --add-repo http://mirrors.aliyun.com/docker-ce/linux/centos/docker-ce.repo
[root@master ~] yum clean all && yum repolist
[root@master ~] yum install docker-ce-20.10.21 docker-ce-cli-20.10.21 -y
[root@master ~] yum makecache fast
[root@master ~] docker -v
Docker version 20.10.21, build baeda1f
node 节点
[root@node ~] mv /etc/yum.repos.d/* /media/
[root@node ~] vi /etc/yum.repos.d/yum.repo

[centos-7.9-extras]
name=extras
baseurl=https://mirrors.aliyun.com/centos/7.9.2009/extras/x86_64/
gpgcheck=0
enabled=1


[centos-7.9-os]
name=os
baseurl=https://mirrors.aliyun.com/centos/7.9.2009/os/x86_64/
gpgcheck=0
enabled=1

[root@node ~] yum-config-manager --add-repo http://mirrors.aliyun.com/docker-ce/linux/centos/docker-ce.repo
[root@node ~] yum clean all && yum repolist
[root@node ~] yum install docker-ce-20.10.21 docker-ce-cli-20.10.21 -y
[root@node ~] yum makecache fast
[root@node ~] docker -v
Docker version 20.10.21, build baeda1f
错误
yum remove docker-buildx-plugin
yum install docker-ce-cli
yum -y install docker-ce-cli-20.10.21
1.7. 启动 docker 服务
[root@master ~] systemctl daemon-reload
[root@master ~] systemctl restart docker
[root@master ~] systemctl enable docker
Created symlink from /etc/systemd/system/multi-user.target.wants/docker.service to /usr/lib/systemd/system/docker.service.
[root@node ~] systemctl daemon-reload
[root@node ~] systemctl restart docker
[root@node ~] systemctl enable docker
Created symlink from /etc/systemd/system/multi-user.target.wants/docker.service to /usr/lib/systemd/system/docker.service.
2. 镜像命令管理
2.1. 搜索镜像 docker search
[root@master ~] docker search mysql:5.7
2.2. 上传镜像 docker push
[root@master ~] deoker push nginx:lates2.3. 查看镜像 docker images
查看所有镜像
[root@master ~]docker image ls
或者
[root@master ~]docker images
查看latest的版本
latest是指拉取最新可用的
docker image inspect image_id
 "Env": [
            "PATH=/usr/local/sbin:/usr/local/bin:/usr/sbin:/usr/bin:/sbin:/bin",
            "NGINX_VERSION=1.27.2",
            "NJS_VERSION=0.8.6",
            "NJS_RELEASE=1~bookworm",
            "PKG_RELEASE=1~bookworm",
            "DYNPKG_RELEASE=1~bookworm"
2.4. 拉取镜像 docker pull
知道版本号的添版本的号,不知道的填latest

[root@master ~] docker pull nginx:latest
latest: Pulling from library/nginx
a480a496ba95: Pull complete
f3ace1b8ce45: Pull complete
11d6fdd0e8a7: Pull complete
f1091da6fd5c: Pull complete
40eea07b53d8: Pull complete
6476794e50f4: Pull complete
70850b3ec6b2: Pull complete
Digest: sha256:28402db69fec7c17e179ea87882667f1e054391138f77ffaf0c3eb388efc3ffb
Status: Downloaded newer image for nginx:latest
docker.io/library/nginx:latest
2.5. 删除镜像 docker rmi
[root@master ~] docker image ls  获取镜像id
REPOSITORY   TAG       IMAGE ID       CREATED       SIZE
nginx        latest    3b25b682ea82   3 weeks ago   192MB
[root@master ~] docker rmi 3b25b682ea82   根据id删除
Untagged: nginx:latest
Untagged: nginx@sha256:28402db69fec7c17e179ea87882667f1e054391138f77ffaf0c3eb388efc3ffb
Deleted: sha256:3b25b682ea82b2db3cc4fd48db818be788ee3f902ac7378090cf2624ec2442df
a9d3eca6ed1881b5fe5d1e02024e1450822879e4c13bb48c9386d0ad
...
[root@master ~] docker rmi 3b25b682ea82 --f   强制删除
2.6. 镜像打包 docker tag
[root@master ~]# docker tag nginx:latest nginx:v1.0 在原来的后面加上版本
[root@master ~]# docker image ls
REPOSITORY   TAG       IMAGE ID       CREATED       SIZE
nginx        latest    3b25b682ea82   3 weeks ago   192MB
nginx        v1.0      3b25b682ea82   3 weeks ago   192MB
2.7. 保存镜像 docker save
docker save -o nginx.tar nginx:v1.0
2.8. 下载镜像 docker load
docker load -i nginx.tar3. 搭建自己的 docker 仓库
3.1.1. 配置私有仓库文件
创建 /etc/docker 目录
[root@master ~] mkdir -p /etc/docker
[root@master ~] vi /etc/docker/daemon.json
{
  "registry-mirrors": [
    "https://registry.cn-hangzhou.aliyuncs.com",
    "https://docker.1panel.live/",
    "https://hub.atomgit.com/",
    "https://dockerhub.timeweb.cloud/",
    "http://192.168.200.60:5000/",
    "https://docker.udayun.com/"
  ],
    "insecure-registries":["192.168.200.60:5000"]
}
[root@master ~] systemctl daemon-reload
[root@master ~] systemctl restart docker
下载
[root@master ~] docker pull registry:latest
[root@master ~] docker images
REPOSITORY                   TAG       IMAGE ID       CREATED         SIZE
nginx                        latest    3b25b682ea82   3 weeks ago     192MB
nginx                        v1.0      3b25b682ea82   3 weeks ago     192MB
registry                     latest    75ef5b734af4   13 months ago   25.4MB

[root@master ~] docker run -d -v /opt/registry:/var/lib/registry -p 5000:5000 --restart=always --name registry registry:latest
3.1.2. 配置私有仓库文件
下载nginx
[root@master ~] docker pull nginx
[root@master ~] docker images
REPOSITORY                   TAG       IMAGE ID       CREATED         SIZE
nginx                        latest    3b25b682ea82   3 weeks ago     192MB
nginx                        v1.0      3b25b682ea82   3 weeks ago     192MB
registry                     latest    75ef5b734af4   13 months ago   25.4MB
192.168.200.60:5000/centos   latest    5d0da3dc9764   3 years ago     231MB
centos                       latest    5d0da3dc9764   3 years ago     231MB

[root@master ~] docker tag 5d0da3dc9764  192.168.200.60:5000/ningx:latest
# 打包镜像:格式 docker tag image:版本号 本地IP:端口/打包后的镜像名字:版本号
[root@master ~] docker push 192.168.200.60:5000/nginx:latest
# 上传镜像:格式 docker push 仓库ip地址/镜像名字:版本号
node 机子
[root@node ~] vi /etc/docker/daemon.json

{
  "registry-mirrors": [
    "https://registry.cn-hangzhou.aliyuncs.com",
    "https://docker.1panel.live/",
    "https://hub.atomgit.com/",
    "https://dockerhub.timeweb.cloud/",
    "http://192.168.200.60:5000/",
    "https://docker.udayun.com/"
    ## 这里的mirrors是镜像加速器
  ],
    "insecure-registries":["192.168.200.60:5000"]
    ## 配置的私有仓库的地址,是一个不安全的地址
}

[root@node ~]  docker pull 192.168.200.60:5000/nginx
# 这里是从master上下载nginx
docker pull registry:latest
docker run -d -v /opt/registry:/var/lib/registry -p 5000:5000 --restart=always --name registry registry:latest
vi /etc/docker/daemon.json
{
  "registry-mirrors": [
    "http://192.168.200.60:5000/"
  ]
}
4. 配置 barbor 仓库(没法做到上传下载)
原因可能是:本地搭建了私仓
一文读懂Harbor以及部署实践攻略_harbor搭建与使用详解-优快云博客
4.1. 基础搭建
4.1.1. 准备安装包
harbor-offline-installer-v2.6.1.tgz
v1.25.5-docker-compose-Linux-x86_64
4.1.2. 解压安装包并安装 compose
[root@node ~] tar -zxvf harbor-offline-installer-v2.6.1.tgz
harbor/harbor.v2.6.1.tar.gz
harbor/prepare
harbor/LICENSE
harbor/install.sh
harbor/common.sh
harbor/harbor.yml.tmpl

[root@node ~] cp v1.25.5-docker-compose-Linux-x86_64 /usr/bin/docker-compose
## 将compose复制到/usr/bin
[root@node ~] cd harbor
[root@node harbor] ll
总用量 743380
drwxr-xr-x. 3 root root        20 11月  3 02:52 common
-rw-r--r--. 1 root root      3639 10月  9 2022 common.sh
-rw-r--r--. 1 root root 761180661 10月  9 2022 harbor.v2.6.1.tar.gz
-rw-r--r--. 1 root root     10491 10月  9 2022 harbor.yml.tmpl
-rwxr-xr-x. 1 root root      3171 10月  9 2022 install.sh
-rw-r--r--. 1 root root     11347 10月  9 2022 LICENSE
-rwxr-xr-x. 1 root root      1881 10月  9 2022 prepare
4.2. 编辑配置文件
4.2.1. 编辑vi harbor.yml
注释 https 的所有,并改个密码
[root@node harbor] vi harbor.yml
1 # Configuration file of Harbor
2
3 # The IP address or hostname to access admin UI and registry service.
4 # DO NOT use localhost or 127.0.0.1, because Harbor needs to be accessed by externa        l clients.
5 hostname: 192.168.200.70
6
7 # http related config
8 http:
9   # port for http, default is 80. If https enabled, this port will redirect to http        s port
10   port: 80
11 注释掉https所有
12 # https related config
13 #https:
14   # https port for harbor, default is 443
15  # port: 443
16   # The path of cert and key files for nginx
17   #certificate: /your/certificate/path
18   #private_key: /your/private/key/path
34 harbor_admin_password: Harbor12345
4.2.2. 安装镜像文件
![]()
这里安装./install.sh 报错:不能联网解决方案重启 docker
[root@node harbor] systemctl restart docker
这里重启可以解决

安装
[root@node harbor] ./prepare && ./install.sh

重启docker
[root@node harbor] systemctl daemon-reload
[root@node harbor] systemctl restart docker
4.2.3. 查看 compose 服务状态
running (healthy)代表 OK
[root@node harbor] docker-compose start

看一下compose状态
[root@node harbor] docker-compose ps
NAME                COMMAND                  SERVICE             STATUS              PORTS
chartmuseum         "./docker-entrypoint…"   chartmuseum         exited (127)
harbor-core         "/harbor/entrypoint.…"   core                running (healthy)
harbor-db           "/docker-entrypoint.…"   postgresql          running (healthy)
harbor-jobservice   "/harbor/entrypoint.…"   jobservice          running (healthy)
harbor-log          "/bin/sh -c /usr/loc…"   log                 running (healthy)   127.0.0.1:1514->10514/tcp
harbor-portal       "nginx -g 'daemon of…"   portal              running (healthy)
nginx               "nginx -g 'daemon of…"   proxy               running (healthy)   0.0.0.0:80->8080/tcp, :::80->8080/tcp
redis               "redis-server /etc/r…"   redis               running (healthy)
registry            "/home/harbor/entryp…"   registry            running (healthy)
registryctl         "/home/harbor/start.…"   registryctl         running (healthy)

扩展
up -d 会执行docker-compose.yml 里面所有配置服务
[root@node harbor] docker-compose up -d
WARN[0000] Found orphan containers ([chartmuseum]) for this project. If you removed or renamed this service in your compose file, you can run this command with the --remove-orphans flag to clean it up.
[+] Running 9/9
 ⠿ Container harbor-log         Running                                               0.0s
 ⠿ Container harbor-portal      Running                                               0.0s
 ⠿ Container registry           Running                                               0.0s
 ⠿ Container redis              Running                                               0.0s
 ⠿ Container harbor-db          Running                                               0.0s
 ⠿ Container registryctl        Running                                               0.0s
 ⠿ Container harbor-core        Running                                               0.0s
 ⠿ Container harbor-jobservice  Running                                               0.0s
 ⠿ Container nginx              Running                                               0.0s
4.2.4. 日志查看
docker日志根据容器当前状态查看
ps 获取ip
[root@node harbor] docker ps
CONTAINER ID   IMAGE
cf309cdf5c17   goharbor/harbor-jobservice:v2.6.1
根据psid查看
[root@node harbor] docker logs -f cf309cdf5c17
4.3. 查看 harbor
浏览器输入 ip 地址
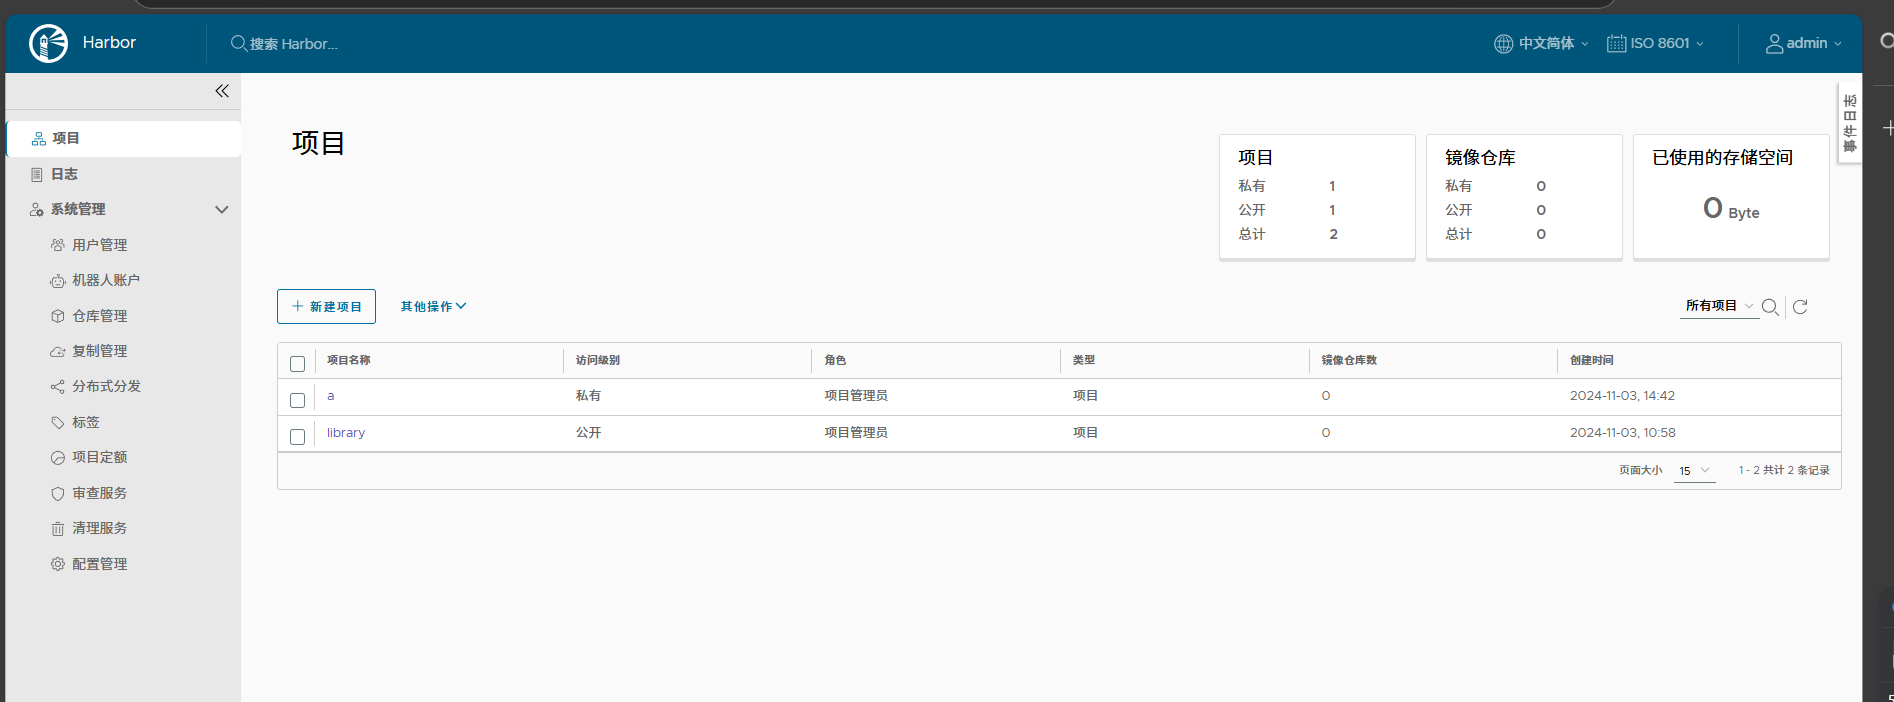
4.3.1. 上传镜像到 harbor(未成功)
不知道为什么本地登录不上
[root@node harbor]#  docker pull registry.cn-hangzhou.aliyuncs.com/hcie/busybox:1.29-2
[root@node harbor]#  docker tag registry.cn-hangzhou.aliyuncs.com/hcie/busybox:1.29-2 192.168.200.70:5000/library/busybox:1.29-2
[root@node harbor]#  docker push 192.168.200.70:5000/library/busybox:1.29-2
The push refers to repository [192.168.200.70:5000/library/busybox]
Get "http://192.168.200.70:5000/v2/": dial tcp 192.168.200.70:5000: connect: connection refused
[root@node harbor]# docker login -u admin -p admin12345
启动所有ps进程
[root@node harbor]# docker restart $(docker ps -a -q)
docker rmi $(docker images | grep goharbor | awk '{print $3}') -f
批量删除barborHarbor 重启失败--已解决_error: for harbor-log cannot start service log: dr-优快云博客


 被折叠的 条评论
为什么被折叠?
被折叠的 条评论
为什么被折叠?
 到【灌水乐园】发言


