


PXE
规模化:可以同时装配多台服务器
自动化:自动安装操作系统和各种配置
不需要光盘U盘 前置需要一台PXE服务器
pxe是预启动执行环境,再操作系统之前运行
实验:
首先先关闭防火墙等操作
[root@localhost ~]# systemctl disable --now firewalld
Removed symlink /etc/systemd/system/multi-user.target.wants/firewalld.service.
Removed symlink /etc/systemd/system/dbus-org.fedoraproject.FirewallD1.service.
[root@localhost ~]# setenforce 0
[root@localhost ~]# vim /etc/selinux/config
修改成
SELINUX=disabled
然后吧虚拟机网络设置成仅主机模式 然后yum安装
yum install -y tftp-server  xinetd  dhcp  vsftpd  syslinux
[root@localhost ~]# cd /mnt/
[root@localhost mnt]# ls
CentOS_BuildTag  EULA  images    LiveOS    repodata              RPM-GPG-KEY-CentOS-Testing-7
EFI              GPL   isolinux  Packages  RPM-GPG-KEY-CentOS-7  TRANS.TBL
[root@localhost mnt]# cd images/
[root@localhost images]# ls
efiboot.img  pxeboot  TRANS.TBL
[root@localhost images]# cp pxeboot/
cp: 在"pxeboot/" 后缺少了要操作的目标文件
Try 'cp --help' for more information.
[root@localhost images]# cd pxeboot/
[root@localhost pxeboot]# ls
initrd.img  TRANS.TBL  vmlinuz
[root@localhost pxeboot]# cp vmlinuz initrd.img /var/lib/tftpboot/
[root@localhost pxeboot]# cd /usr/share/syslinux/
[root@localhost syslinux]# ls
altmbr.bin     dosutil       ifcpu64.c32         kbdmap.c32   pcitest.c32     syslinux.com
altmbr_c.bin   elf.c32       ifcpu.c32           linux.c32    pmload.c32      syslinux.exe
altmbr_f.bin   ethersel.c32  ifplop.c32          ls.c32       poweroff.com    ver.com
cat.c32        gfxboot.c32   int18.com           lua.c32      pwd.c32         vesainfo.c32
chain.c32      gptmbr.bin    isohdpfx.bin        mboot.c32    pxechain.com    vesamenu.c32
cmd.c32        gptmbr_c.bin  isohdpfx_c.bin      mbr.bin      pxelinux.0      vpdtest.c32
config.c32     gptmbr_f.bin  isohdpfx_f.bin      mbr_c.bin    reboot.c32      whichsys.c32
cpuid.c32      gpxecmd.c32   isohdppx.bin        mbr_f.bin    rosh.c32        zzjson.c32
cpuidtest.c32  gpxelinux.0   isohdppx_c.bin      memdisk      sanboot.c32
diag           gpxelinuxk.0  isohdppx_f.bin      memdump.com  sdi.c32
disk.c32       hdt.c32       isolinux.bin        meminfo.c32  sysdump.c32
dmitest.c32    host.c32      isolinux-debug.bin  menu.c32     syslinux64.exe
[root@localhost syslinux]# cp p
cp: 在"p" 后缺少了要操作的目标文件
Try 'cp --help' for more information.
[root@localhost syslinux]# cp pxelinux.0 /var/lib/tftpboot/
[root@localhost syslinux]# ls /var/lib/tftpboot/
initrd.img  pxelinux.0  vmlinuz
[root@localhost syslinux]# cd /var/lib/t
tftpboot/ tpm/      tuned/
[root@localhost syslinux]# cd /var/lib/tftpboot/
[root@localhost tftpboot]# ls
initrd.img  pxelinux.0  vmlinuz
[root@localhost tftpboot]# mkdir pxelinux.cfg
[root@localhost tftpboot]# ls
initrd.img  pxelinux.0  pxelinux.cfg  vmlinuz
[root@localhost tftpboot]# cd pxelinux.cfg/
[root@localhost pxelinux.cfg]# vim default
default auto #指定默认入口名称
prompt 0 #设置是否等待用户选择,“1”表示等待用户控制
label auto #图形安装(默认)引导入口,label 用来定义启动项
kernel vmlinuz #kernel 和 append用来定义引导参数
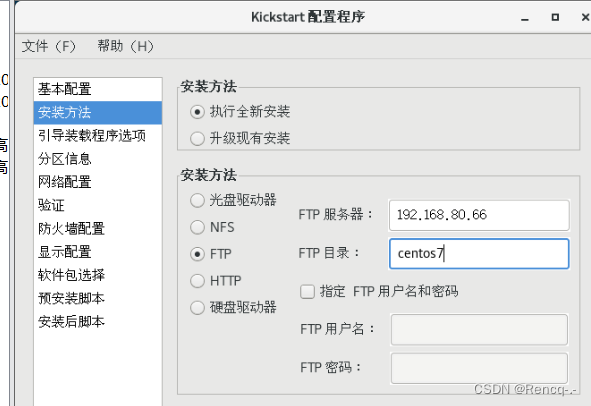
append initrd=initrd.img method=ftp://192.168.80.66/centos7
label linux text #文本安装引导入口
kernel vmlinuz
append text initrd=initrd.img method=ftp://192.168.80.66/centos7
label linux rescue #救援模式引导入口
kernel vmlinuz
append rescue initrd=initrd.img method=ftp://192.168.80.66/centos7[root@localhost syslinux]# cd /var/lib/tftpboot/
[root@localhost tftpboot]# ls
initrd.img pxelinux.0 vmlinuz
[root@localhost tftpboot]# mkdir pxelinux.cfg
[root@localhost tftpboot]# ls
initrd.img pxelinux.0 pxelinux.cfg vmlinuz
[root@localhost tftpboot]# cd pxelinux.cfg/
[root@localhost pxelinux.cfg]# vim default
[root@localhost pxelinux.cfg]# vim default
[root@localhost pxelinux.cfg]# vim default
[root@localhost pxelinux.cfg]# cd /etc/xinetd.d/
[root@localhost xinetd.d]# vim t
tcpmux-server tftp time-dgram time-stream
[root@localhost xinetd.d]# vim tftp
service tftp
{
        socket_type             = dgram
        protocol                = udp
        wait                    = no
        user                    = root
        server                  = /usr/sbin/in.tftpd
        server_args             = -s /var/lib/tftpboot
        disable                 = no
        per_source              = 11
        cps                     = 100 2
        flags                   = IPv4
}
然后启动
[root@localhost xinetd.d]# systemctl enable --now tftp xinetd
Created symlink from /etc/systemd/system/sockets.target.wants/tftp.socket to /usr/lib/systemd/system/tftp.socket.
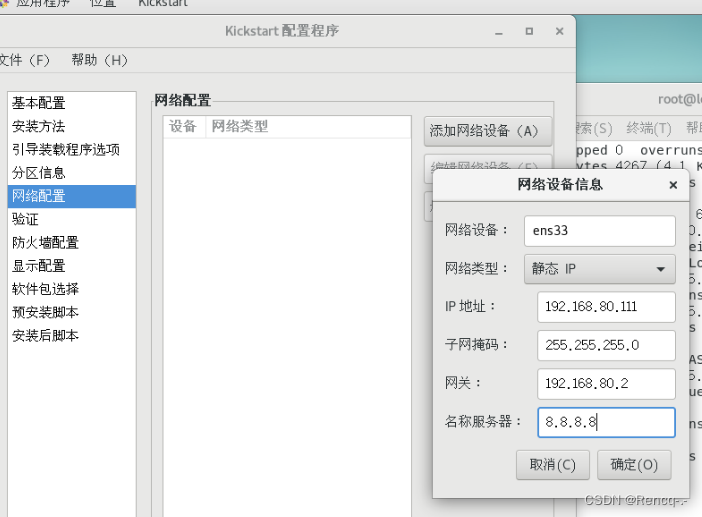
在vim修改vim dhcpd.conf文件
max-lease-time 7200;
# Use this to enble / disable dynamic dns updates globally.
ddns-update-style none;
next-server 192.168.80.66;
filename "pxelinux.0";
subnet 192.168.80.0 netmask 255.255.255.0 {
range 192.168.80.100 192.168.80.200;
option routers 192.168.80.30;
}
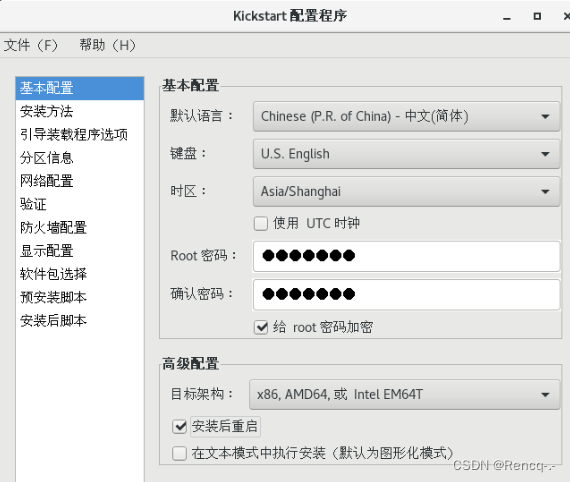
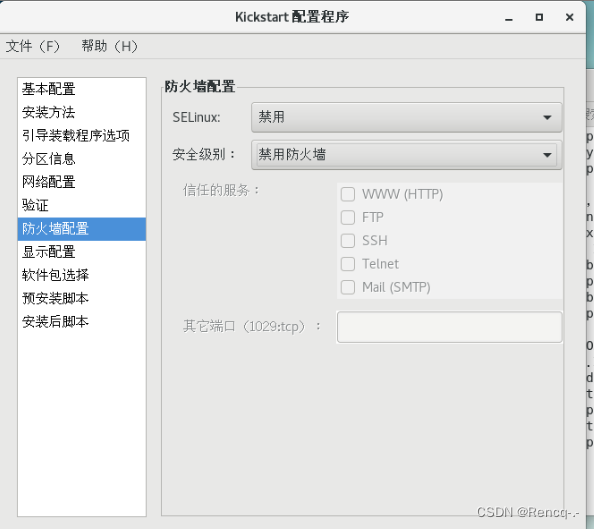
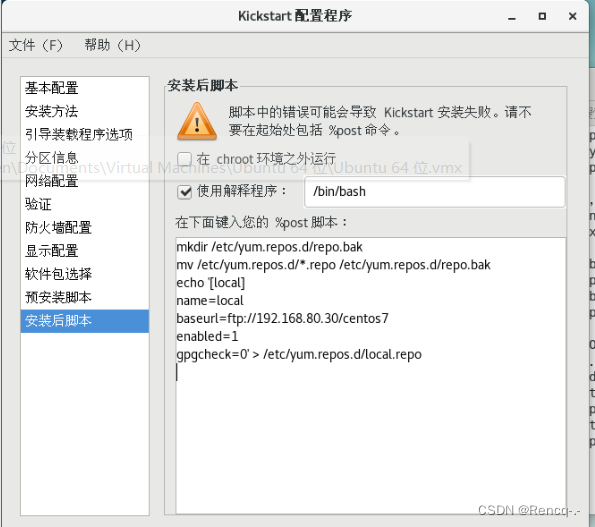
最后安装[root@localhost dhcp]# yum install -y system-config-kickstart.noarch
然后到虚拟机找到第二个文件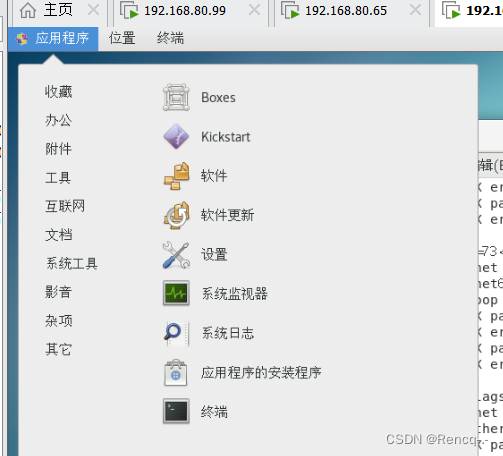
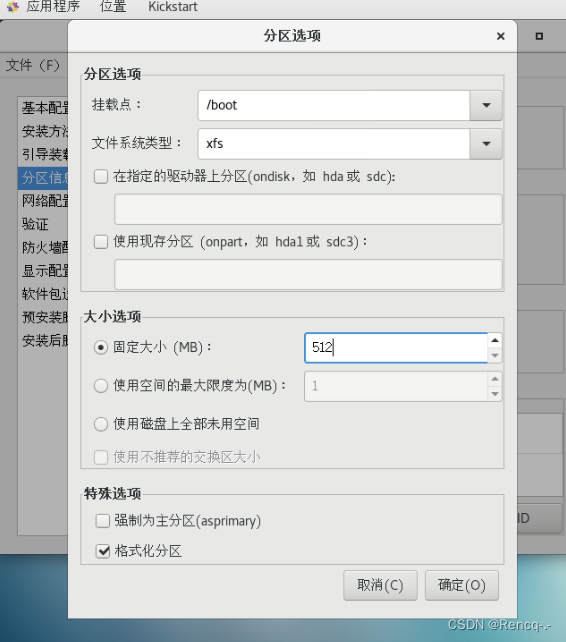
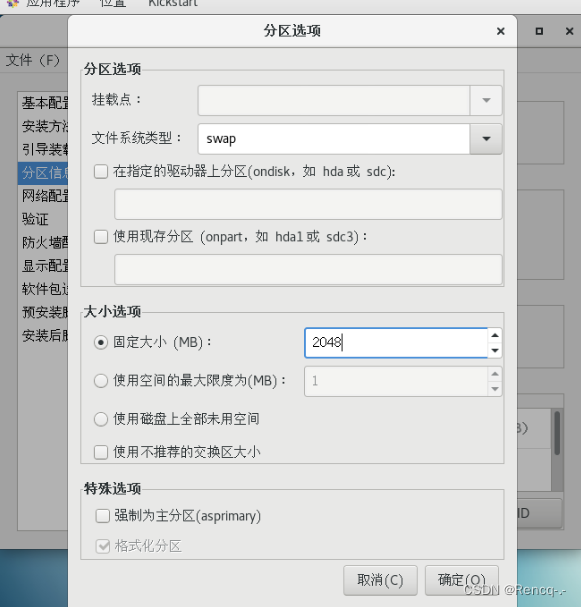
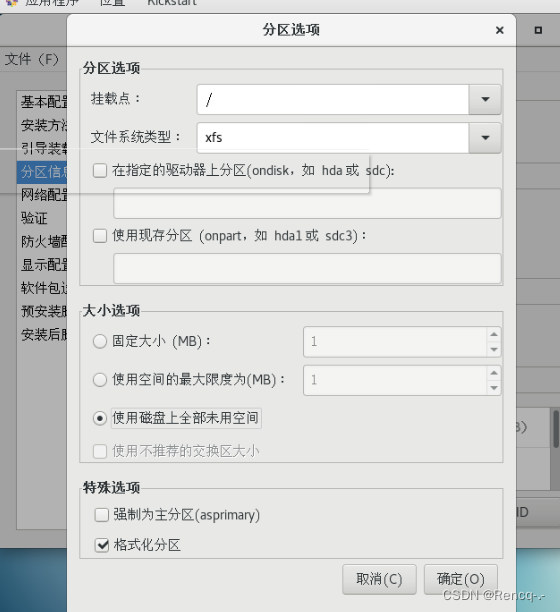
然后保存到root中
这时候我们到根目录中就可以看见ks.的那个文件了
anaconda-ks.cfg initial-setup-ks.cfg ks.cfg 公共 模板 视频 图片 文档 下载
先vim到[root@localhost ~]# vim anaconda-ks.cfg这个目录复制下面的东西

%packages
@^gnome-desktop-environment
@base
@core
@desktop-debugging
@development
@dial-up
@directory-client
@fonts
@gnome-desktop
@guest-agents
@guest-desktop-agents
@input-methods
@internet-browser
@java-platform
@multimedia
@network-file-system-client
@networkmanager-submodules
@print-client
@x11
chrony
kexec-tools

%end

在vim到root@localhost ~]# vim ks.cfg
在最下面添加上去上面的东西
[root@localhost ~]# cp ks.cfg /var/ftp/
[root@localhost ~]# cd /var/ftp/
[root@localhost ftp]# ls
ks.cfg  pub
[root@localhost ftp]# mkdr centos7
bash: mkdr: 未找到命令...
[root@localhost ftp]# mkdir centos7
[root@localhost ftp]# mount /dev/sr0 centos7/
mount: /dev/sr0 写保护,将以只读方式挂载
[root@localhost ftp]# ls centos7/
CentOS_BuildTag  EULA  images    LiveOS    repodata              RPM-GPG-KEY-CentOS-Testing-7
EFI              GPL   isolinux  Packages  RPM-GPG-KEY-CentOS-7  TRANS.TBL
当我们操作完成之后在去准备一台新的客户机 不用挂载光盘 运行内存一定大于2GB
然后虚拟机创建就好了


 被折叠的 条评论
为什么被折叠?
被折叠的 条评论
为什么被折叠?
 到【灌水乐园】发言


