


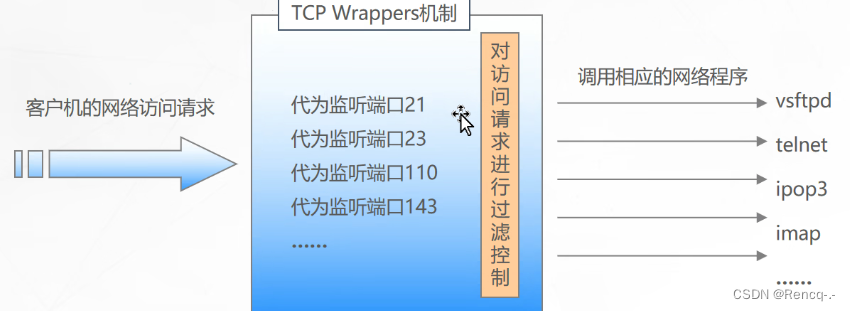
远程连接:
ssh(TCP/22端口 传输的时候加密)
ssh主程序位于:usr/sbin/sshd
ssh服务端配置文件:/etc/ssh/ssh_confing
‘
TCP
:原理
配置O
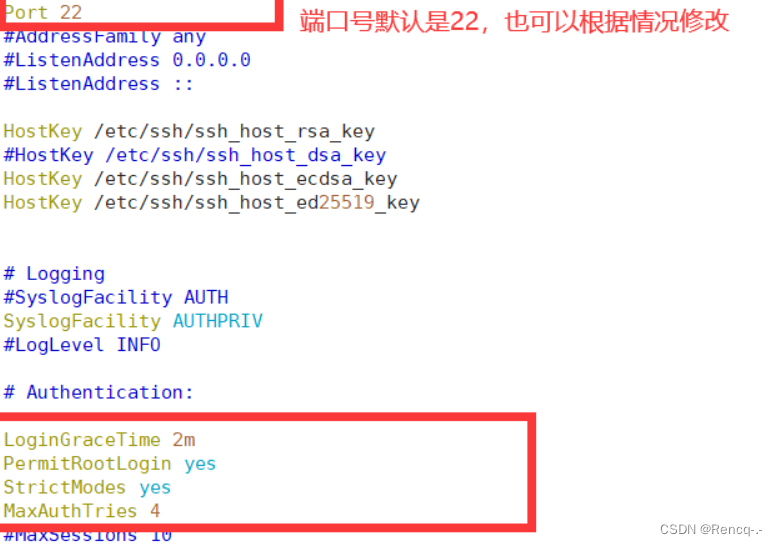
root@localhost ~]# vim /etc/ssh/sshd_config
Port 22 								#监听端口为 22
ListenAddress 0.0.0.0 					#监听地址为任意网段,也可以指定OpenSSH服务器的具体IP

LoginGraceTime 2m 						#登录验证时间为 2 分钟
PermitRootLogin no 						#禁止 root 用户登录
MaxAuthTries 6 							#最大重试次数为 6

PermitEmptyPasswords no 				#禁止空密码用户登录
UseDNS no 								#禁用 DNS 反向解析,以加快远程连接速度

#只允许zhangsan、lisi、wangwu用户登录,且其中wangwu用户仅能够从IP地址为61.23.24.25 的主机远程登录
AllowUsers zhangsan lisi wangwu@61.23.24.25 					#多个用户以空格分隔
#禁止某些用户登录,用法于AllowUsers 类似(注意不要同时使用)
ssh相关配置文件
基本操作
systemctl start sshd //启动sshd服务。
systemctl status sshd //查看服务状态
systemctl is-enabled sshd //查看服务是否自启动执行
配置文件
etc/ssh/sshd_config(服务端配置文件)
/etc/ssh/ssh_config(客户端配置文件)
服务端的重要配置
vim /etc/ssh/sshd_config
Port 22 #监听端口为 22
ListenAddress 0.0.0.0 #监听地址为任意网段,也可以指定OpenSSH服务器的具体IP
LoginGraceTime 2m #登录验证时间为 2 分钟
PermitRootLogin no #禁止 root 用户登录
MaxAuthTries 6 #最大重试次数为 6
PermitEmptyPasswords no #禁止空密码用户登录
UseDNS no #禁用 DNS 反向解析,以加快远程连接速度
AllowUsers zhangsan lisi wangwu@61.23.24.25 #只允许zhangsan、lisi、wangwu用户登录,且其中wangwu用户仅能够从IP地址为61.23.24.25 的主机远程登录
ssh验证
vim /etc/ssh/sshd_config
PasswordAuthentication yes #启用密码验证
PubkeyAuthentication yes #启用密钥对验证
AuthorizedKeysFile .ssh/ authorized_keys #指定公钥库文件
创建使用密钥对验证
1、首先确保服务端开启了ssh密钥对验证 /etc/ssh/sshd_config --> PubkeyAuthentication yes
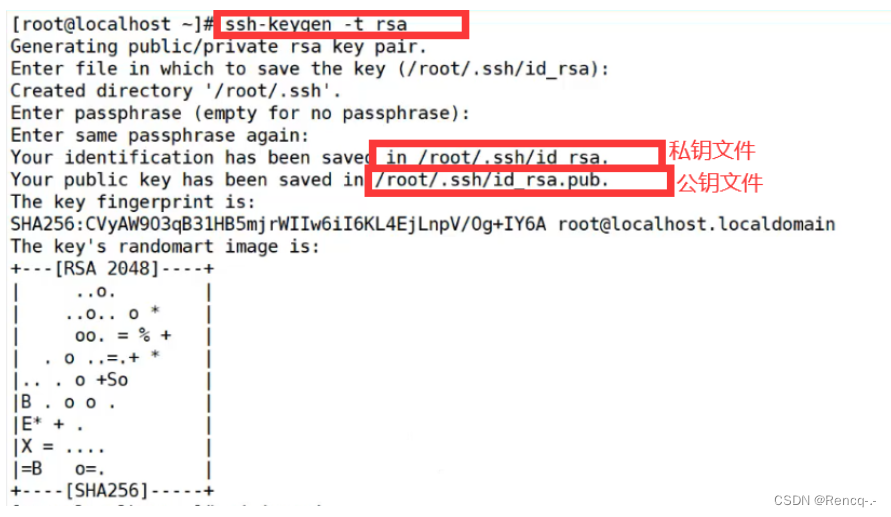
2、在客户端创建密钥对
ssh-keygen [-t rsa/dsa/ecdsa]
3、上传公钥至服务端
ssh-copy-id [-i 公钥文件] 用户名@目标主机IP //公钥信息会自动保存到服务端的 ~/.ssh/authorized_keys 文件里
4、客户端 ssh 远程登录,使用密钥对的密码进行验证
注:密钥对在客户端是谁创建的,只能谁使用;密钥对上传给服务端的哪个用户,那么就只能使用那个用户去登录
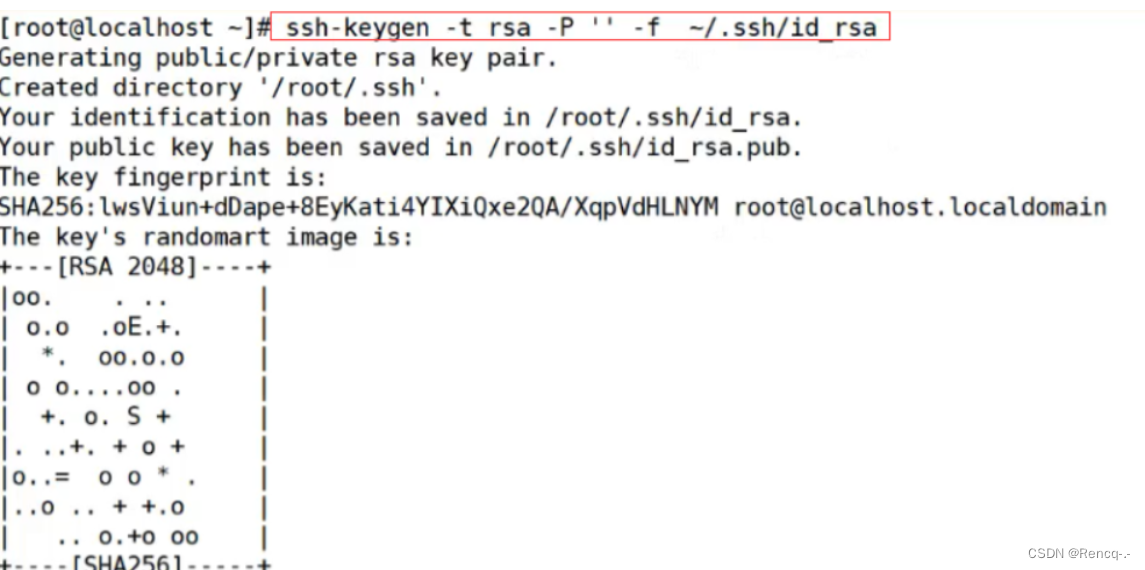
面交互ssh
ssh-keygen 一路回车,不设置密码
ssh-copy-id
ssh-agent bash
ssh-add
Enter passphrase for /home/admin/.ssh/id_ecdsa: //输入私钥的密码
面交互上传服务器


 8226
8226

 被折叠的 条评论
为什么被折叠?
被折叠的 条评论
为什么被折叠?
 到【灌水乐园】发言


