家人们,时隔一天带着新的知识来与大家见面啦!今天我们学习的是如何在我们JS中获取和控制HTML元素,大家想要学好JavaScript要坚持不懈的学下去噢, 有什么不懂的可以私信我,或者在下面评论,看到了一定会回复噢。
一.如何在JS中获取HTML元素
1.通过标签中的id属性(getElementById)
通过标签中的id属性获取HTML元素,首先给我们的标签设置一个id名字,我们直接使用标签的id名字操作HTML属性,给大家来一道开胃小菜,使用我们的JS制作图片自动切换效果,给大家上代码。
下面代码中通过id获取属性:a1.style.backgroundImage 这是简写
a1:<div>标签设置的id名 style:样式 backgroundImage:背景图片
<!DOCTYPE html>

<html>
	<head>
		<meta charset="utf-8">
		<title></title>
		<style>

		div{
		    width:100px;
			height:200px;
			/* url:位置 */
			background:url("images/a0.jpg") center/cover;
		}
		</style>
	</head>
	<body>

	<!-- 制作图片自动切换效果-->
	<!-- 1.想完成这个效果希望大家把图片的格式是a1,a2这种格式方便我们使用 -->
	<div id="a1"></div>

	<script>
	 //定义一个变量
	 var b=1;
	 //使用循环计时器让我们的图片切换
	 setInterval(function fn1(){
		 a1.style.backgroundImage='url("images/a'+(b%3)+'.jpg")';
		//每执行一次b就加上1
	  b++;
	 },1000)
	</script>
	</body>
</html>
我们的一个标准的通过id获取html元素的写法 ,当点击按钮时换颜色
var d=document.getElementById("d1") //拿到要换颜色的div标签的id赋值给d
d.style.background="yellow"
<!DOCTYPE html>
<html>
	<head>
		<meta charset="utf-8">
		<title></title>
		<style>

		div{
			/* 设置宽*/
			width:100px;
			/* 设置高 */
			height:100px;
			/* 设置背景颜色 */
			background:red;
		    display: inline-block;
		}

		</style>
	</head>
	<body>
<!-- 如何在JS中获取HTML元素 -->
     <div id="d1"></div>
	 <div></div>
	 <div></div>
	 <!-- br跨行标签 -->
	 <br>
	 <button onclick="fn1()" >通过id更改颜色</button>

	 <script>

	    //一.通过标签中的id属性
	    function fn1() {
	    //直接使用id
	    // d1.style.background="blue"

	    // Element 元素(标签)
	    var d=document.getElementById("d1")
	    d.style.background="yellow"
	    }

	 </script>
	</body>
</html>
图片的放置位置:下载你需要的图片,把图片放进一个文件夹,然后把文件夹移入进来

2.通过标签名(getElementsByTagName)
当我们想要修改的数据比较多时,就可以使用通过标签名获取HTML元素。
<!DOCTYPE html>
<html>
	<head>
		<meta charset="utf-8">
		<title></title>
		<style>

		div{
			/* 设置宽*/
			width:100px;
			/* 设置高 */
			height:100px;
			/* 设置背景颜色 */
			background:red;
		    display: inline-block;
		}

		</style>
	</head>
	<body>
<!-- 如何在JS中获取HTML元素 -->
     <div id="d1"></div>
	 <div></div>
	 <div></div>
	 <!-- br跨行标签 -->
	 <br>

	 <button onclick="fn2()" >通过标签名更改颜色</button>

<script>

     // 通过标签名
	   function fn2(){
		   var dv=document.getElementsByTagName("div");
		   //dv是一个数组,所以我们要遍历数组
		   //只要碰到foreach循环 不能用var
		   //使用let(定义局部变量)
		   for( let i of dv){
			   i.style.background="blue";
		   }
	   }
</script>
	</body>
</html>
3..通过标签中的calss属性(getElementsByClassName)
当只想修改部分东西是可以使用,通过class属性改变颜色
<!DOCTYPE html>
<html>
	<head>
		<meta charset="utf-8">
		<title></title>
		<style>

		div{
			/* 设置宽*/
			width:100px;
			/* 设置高 */
			height:100px;
			/* 设置背景颜色 */
			background:red;
		    display: inline-block;
		}

		</style>
	</head>
	<body>
<!-- 如何在JS中获取HTML元素 -->
     <div class="a"></div>
	 <div class="a"></div>
	 <div></div>
	 <!-- br跨行标签 -->
	 <br>

	 <button onclick="fn3()">通过标签中的class属性改变颜色</button>

	 <script>


	   //通过标签中的class属性
	   function fn3(){
		   var c=document.getElementsByClassName("a");
		   // foreach循环
		   for(let i of c){
			   i.style.background="yellow";
		   }
	   }

	 </script>
	</body>
</html>
二.如何控制元素显示(style)
1.display
| none | 不显示(页面不会有空间) |
| block | 以块状元素显示 |
| inline |
以行内元素显示 |
| inline-block | 以行块显示 |
none和block的运用:
<!DOCTYPE html>
<html>
	<head>
		<meta charset="utf-8">
		<title></title>
		<style>
		div{
			/* 宽 */
			width:200px;
			/* 高 */
			height:150px;
			/* 背景颜色 */
			background:red;

		}

		</style>

	</head>
	<body>
		<!-- 控制元素显示(style) -->
		<!-- 当点击按钮时div不显示 -->
  <div id="d1"></div>
  <button onclick="fn1()">点我隐藏</button>


  <script>
     function fn1(){
		 // 如果div是显示时,按钮调用该函数我们就不显示
		 // block:以块状元素显示
		if(d1.style.display=="block"){
			//none:不显示(页面不会有空间)
			d1.style.display="none";
		}else{
            d1.style.display="block"
				   }
	 }


  </script>
	</body>
</html>
2.opacity
1.使用方法:用于控制元素的透明度,0-1的范围,0就完全透明,1完全不透明
2.代码展示如何使用
<!DOCTYPE html>
<html>
	<head>
		<meta charset="utf-8">
		<title></title>
		<style>
		div{
			/* 宽 */
			width:200px;
			/* 高 */
			height:150px;
			/* 背景颜色 */
			background:red;

		}

		</style>

	</head>
	<body>
		<!-- 控制元素显示(style) -->
		<!-- 当点击按钮时div不显示 -->
  <div id="d1"></div>

  <button onclick="fn2()">点我隐藏</button>


  <script>


	 // 控制元素的透明度
	 function fn2(){
		 // opacity元素透明度0-1
		if(d1.style.opacity==0){
			d1.style.opacity=1;
		}else{
			d1.style.opacity=0;
		}
	 }


  </script>
	</body>
</html>
三.HTML元素上常用的事件
| onclick | 点击事件 |
| ondblclick | 双击事件 |
| onfocus | 获得焦点事件 |
| onblur | 失去焦点 |
| onmouseover | 鼠标移入 |
| onmouseout | 鼠标移出 |
1.onclick点击事件
题目:有三十个输入框,设置两个按钮 ,点击两个按钮时,输入框出现不同的值
<!DOCTYPE html>

<html>
	<head>
		<meta charset="utf-8">
		<title></title>
	</head>
	<body>
		<!--题目:有三十个输入框,设置两个按钮,
		 点击两个按钮时,输入框出现不同的值-->
	<input type="text"><input type="text"><input type="text"><input type="text"><input type="text"><input type="text"><input
	        type="text"><input type="text"><input type="text"><input type="text"><input type="text"><input
	        type="text"><input type="text"><input type="text"><input type="text"><input type="text"><input
	        type="text"><input type="text"><input type="text"><input type="text"><input type="text"><input
	        type="text"><input type="text"><input type="text"><input type="text"><input type="text"><input
	        type="text"><input type="text"><input type="text"><input type="text">
	<br>
	<!-- 调用函数时,往函数中传参 -->
	<button onclick="fn1('哈哈')">哈哈</button>
     <button onclick="fn1('喜喜')">喜喜</button>
<script>

	function fn1(a){
		//通过标签名拿到所有的输入框
		var is=document.getElementsByTagName("input")
		//foreach循环遍历数组
		for(let i of is){
			//更改输入框里的值
			i.value=a;
		}
	}

	</script>
	</body>
</html>
2.ondocus(获得焦点事件)和onblur(失去焦点)使用
题目:有三十个输入框,当我们的输入框获得焦点时输入框为空,当我们失去焦点时输入框显示一句话。(接上面的题)
<!DOCTYPE html>

<html>
	<head>
		<meta charset="utf-8">
		<title></title>
	</head>
	<body>
		<!--题目:有三十个输入框,设置两个按钮,
		 点击两个按钮时,输入框出现不同的值-->
	<input type="text"><input type="text"><input type="text"><input type="text"><input type="text"><input type="text"><input
	        type="text"><input type="text"><input type="text"><input type="text"><input type="text"><input
	        type="text"><input type="text"><input type="text"><input type="text"><input type="text"><input
	        type="text"><input type="text"><input type="text"><input type="text"><input type="text"><input
	        type="text"><input type="text"><input type="text"><input type="text"><input type="text"><input
	        type="text"><input type="text"><input type="text"><input type="text">
	<br>
	<!-- 调用函数时,往函数中传参 -->
	<button onclick="fn1('哈哈')">哈哈</button>
     <button onclick="fn1('喜喜')">喜喜</button>
<script>

	function fn1(a){
		//通过标签名拿到所有的输入框
		var is=document.getElementsByTagName("input")
		//foreach循环遍历数组
		for(let i of is){
			//更改输入框里的值
			i.value=a;
		}
	}

	// 题目:当我们的输入框获得焦点时输入框为空,
	// 当我们失去焦点时输入框显示一句话
	// 匿名箭头函数
	  (()=>{
		  //拿到所有输入框中
		  var is=document.getElementsByTagName("input");
		  // foreach循环遍历
		  for(let i of is){
			  // onfocus:获得焦点
			  i.onfocus=()=>{
				  // 当获得焦点时输入框的值为空
				  i.value="";
			  }

			// onblur:失去焦点
			i.onblur=()=>{
				i.value="xx";
			}

		  }
	  })();


	</script>
	</body>
</html>
3.onmouseover(鼠标移入)和onmouseout(鼠标移出)
代码是前两个一起的,看到最后面那一段,是鼠标移入和鼠标移出的使用
<!DOCTYPE html>

<html>
	<head>
		<meta charset="utf-8">
		<title></title>
	</head>
	<body>
		<!--题目:有三十个输入框,设置两个按钮,
		 点击两个按钮时,输入框出现不同的值-->
	<input type="text"><input type="text"><input type="text"><input type="text"><input type="text"><input type="text"><input
	        type="text"><input type="text"><input type="text"><input type="text"><input type="text"><input
	        type="text"><input type="text"><input type="text"><input type="text"><input type="text"><input
	        type="text"><input type="text"><input type="text"><input type="text"><input type="text"><input
	        type="text"><input type="text"><input type="text"><input type="text"><input type="text"><input
	        type="text"><input type="text"><input type="text"><input type="text">
	<br>
	<!-- 调用函数时,往函数中传参 -->
	<button onclick="fn1('哈哈')">哈哈</button>
     <button onclick="fn1('喜喜')">喜喜</button>
<script>

	function fn1(a){
		//通过标签名拿到所有的输入框
		var is=document.getElementsByTagName("input")
		//foreach循环遍历数组
		for(let i of is){
			//更改输入框里的值
			i.value=a;
		}
	}

	// 题目:当我们的输入框获得焦点时输入框为空,
	// 当我们失去焦点时输入框显示一句话
	// 匿名箭头函数
	  (()=>{
		  //拿到所有输入框中
		  var is=document.getElementsByTagName("input");
		  // foreach循环遍历
		  for(let i of is){
			  // onfocus:获得焦点
			  i.onfocus=()=>{
				  // 当获得焦点时输入框的值为空
				  i.value="";
			  }

			// onblur:失去焦点
			i.onblur=()=>{
				i.value="xx";
			}

		  }
	  })();


	</script>
	</body>
</html>
今天的学习就到这里啦,大家一定要坚持下去,有不懂的大家评论在下方,或者私信我,在给大家留一小道题目。
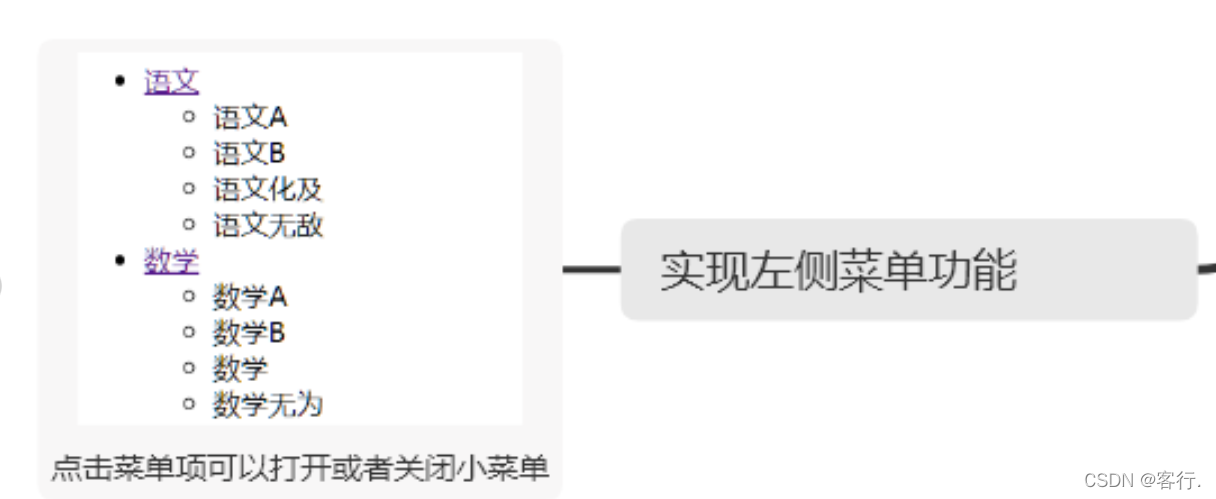
题目:实现一个菜单功能,点击语文是菜单关闭,再次点开语文时,菜单打开,大家可以自己写下,该题目可以使用我们今天学的none和block的运用。巩固今天的知识点噢,把该题目的代码放在下方,大家要先自己写,不会的在去看代码。
<!DOCTYPE html>
<html>
	<head>
		<meta charset="utf-8">
		<title></title>


	</head>
	<body>

  <!-- 左侧菜单 -->
  <ul>
	  <li><i onclick="fn3('u1')">家电</i>
	  <ul id="u1">
		  <li>冰箱</li>
		  <li>电视</li>
          <li>洗衣机</li>
	  </ul>
		</li>
  </ul>

  <ul>
  	  <li><i onclick="fn3('u2')">水果</i>
  	  <ul id="u2">
  		  <li>菠萝</li>
  		  <li>菠萝蜜</li>
  		  <li>水蜜桃</li>
  	  </ul>
	  </li>
  </ul>


  <script>


      // 实现左侧菜单功能,点击菜单选项打开或者关闭
	  function fn3(id){
		  //通过id拿到
		  var li=document.getElementById(id)
		  //将对应元素设置为不显示
		    if(li.style.display=="none"){
		        li.style.display="block"
		          }else{
		              li.style.display="none"
		          }
	  }


  </script>
	</body>
</html>


 本文详细介绍了如何在JavaScript中获取和控制HTML元素,包括通过id、标签名和class属性的方法,以及利用display和opacity控制元素显示。同时,文章还提及了常用的HTML元素事件,如onclick、onfocus、onblur、onmouseover和onmouseout,并提供相关练习题巩固所学知识。


 1042
1042

 被折叠的 条评论
为什么被折叠?


