


 本文详细解析了Android Navigation的配置和使用,包括导航栈定义、fragment与action的关联、页面跳转和传参。通过示例介绍了如何在nav_graph.xml中配置navigation、fragment和action,以及如何在Activity中关联Navigation。此外,还探讨了参数安全传递和动画设置,为Android移动开发提供实践指导。
页面标签主要包含navigation、fragment与action
-
navigation: 定义导航栈,可以进行嵌套定义,各个navigation相互独立。它有一个属性startDestination用来定义导航栈的根入口fragment
-
fragment: 顾名思义fragment页面。通过name属性来定义关联的fragment
-
action: 意图,可以理解为Intent,即跳转的行为。通过destination来关联将要跳转的目标fragment。
以上是nav_graph.xml的基本配置。
在配置完之后,我们还需要将其关联到Activity中。因为所有的Fragment都离不开Activity。
Navigation为我们提供了两个配置参数: defaultNavHost与navGraph,所以在Activity的xml中需要如下配置👇
<?xml version="1.0" encoding="utf-8"?>-
defaultNavHost: 将设备的回退操作进行拦截,并将其交给Navigation进行管理。
-
navGraph: Navigation的配置文件,即上面我们配置的nav_graph.xml文件
除此之外,fragment的name属性必须为NavHostFragment,因为它会作为我们配置的所有fragment的管理者。具体通过内部的NavController中的NavigationProvider来获取Navigator抽象实例,具体实现类是FragmentNavigator,所以最终通过它的navigate方法进行创建我们配置的Fragment,并且添加到NavHostFragment的FrameLayout根布局中。
此时如果我们直接运行程序后发现已经可以看到入口页面WelcomeFragment
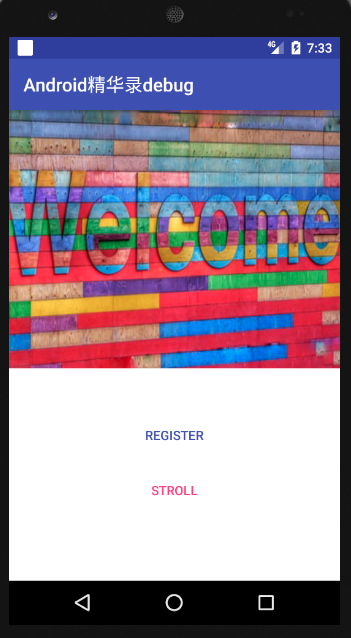
但点击register等操作你会发现点击跳转无效,所以接下来我们需要为其添加跳转
跳转
由于我们之前已经在nav_graph.xml中定义了action,所以跳转的接入非常方便,每一个action的关联跳转只需一行代码👇
class WelcomeFragment : Fragment() {
override fun onCreateView(inflater: LayoutInflater, container: ViewGroup?, savedInstanceState: Bundle?): View? {
return inflater.inflate(R.layout.fragment_welcome, container, false).apply {
register_bt.setOnClickListener(Navigation.createNavigateOnClickListener(R.id.action_go_to_register_page))
stroll_bt.setOnClickListener(Navigation.createNavigateOnClickListener(R.id.action_go_to_order_list_page))
}
}
}
代码中的id就是配置的action的id,内部原理是先获取到对应的NavController,通过点击的view来遍历找到最外层的parent view,因为最外层的parent view会在配置文件导入时,即NavHostFragment中的onViewCreated方法中进行关联对应的NavController👇
@Override
public void onViewCreated(@NonNull View view, @Nullable Bundle savedInstanceState) {
super.onViewCreated(view, savedInstanceState);
if (!(view instanceof ViewGroup)) {
throw new IllegalStateException(“created host view " + view + " is not a ViewGroup”);
}
Navigation.setViewNavController(view, mNavController);
// When added programmatically, we need to set the NavController on the parent - i.e.,
// the View that has the ID matching this NavHo
《Android学习笔记总结+最新移动架构视频+大厂安卓面试真题+项目实战源码讲义》

浏览器打开:qq.cn.hn/FTe 免费领取
stFragment.
if (view.getParent() != null) {
View rootView = (View) view.getParent();
if (rootView.getId() == getId()) {
Navigation.setViewNavController(rootView, mNavController);
}
}
}
然后再调用navigate进行页面跳转处理,最终通过FragmentTransaction的replace进行Fragment替换👇
-------------- NavController ------------------
private void navigate(@NonNull NavDestination node, @Nullable Bundle args,
@Nullable NavOptions navOptions, @Nullable Navigator.Extras navigatorExtras) {
boolean popped = false;
if (navOptions != null) {
if (navOptions.getPopUpTo() != -1) {
popped = popBackStackInternal(navOptions.getPopUpTo(),
navOptions.isPopUpToInclusive());
}
}
Navigator navigator = mNavigatorProvider.getNavigator(
node.getNavigatorName());
Bundle finalArgs = node.addInDefaultArgs(args);
---- 关键代码 -------
NavDestination newDest = navigator.navigate(node, finalArgs,
navOptions, navigatorExtras);
…
}
-------------- FragmentNavigator ------------------
public NavDestination navigate(@NonNull Destination destination, @Nullable Bundle args,
@Nullable NavOptions navOptions, @Nullable Navigator.Extras navigatorExtras) {
if (mFragmentManager.isStateSaved()) {
Log.i(TAG, “Ignoring navigate() call: FragmentManager has already”
- " saved its state");
return null;
}
String className = destination.getClassName();
if (className.charAt(0) == ‘.’) {
className = mContext.getPackageName() + className;
}
final Fragment frag = instantiateFragment(mContext, mFragmentManager,
className, args);
frag.setArguments(args);
final FragmentTransaction ft = mFragmentManager.beginTransaction();
int enterAnim = navOptions != null ? navOptions.getEnterAnim() : -1;
int exitAnim = navOptions != null ? navOptions.getExitAnim() : -1;
int popEnterAnim = navOptions != null ? navOptions.getPopEnterAnim() : -1;
int popExitAnim = navOptions != null ? navOptions.getPopExitAnim() : -1;
if (enterAnim != -1 || exitAnim != -1 || popEnterAnim != -1 || popExitAnim != -1) {
enterAnim = enterAnim != -1 ? enterAnim : 0;
exitAnim = exitAnim != -1 ? exitAnim : 0;
popEnterAnim = popEnterAnim != -1 ? popEnterAnim : 0;
popExitAnim = popExitAnim != -1 ? popExitAnim : 0;
ft.setCustomAnimations(enterAnim, exitAnim, popEnterAnim, popExitAnim);
}
------ 关键代码 ------
ft.replace(mContainerId, frag);
ft.setPrimaryNavigationFragment(frag);
…
}
源码就分析到这里了,如果需要深入了解,建议阅读NavHostFragment、NavController、NavigatorProvider与FragmentNavigator
传参
以上是页面的无参跳转,那么对于有参跳转又该如何呢?
大家想到的应该都是bundle,将传递的数据填入到bundle中。没错Navigator提供的navigate方法可以进行传递bundle数据👇
findNavController().navigate(R.id.action_go_to_shop_detail_page, bundleOf(“title” to “I am title”))
这种传统的方法在传递数据类型上并不能保证其一致性,为了减少人为精力上的错误,Navigation提供了一个Gradle插件,专门用来保证数据的类型安全。
使用它的话需要引入该插件,方式如下👇
buildscript {
repositories {
google()
}
dependencies {
def nav_version = “2.1.0”
classpath “androidx.navigation:navigation-safe-args-gradle-plugin:$nav_version”
}
}
最后再到app下的build.gradle中引入该插件👇
apply plugin: “androidx.navigation.safeargs.kotlin”
而它的使用方式也很简单,首先参数需要在nav_graph.xml中进行配置。👇
现在我们从ShopListFragment跳转到ShopDetailFragment,需要在ShopListFragment的对应action中添加argument,声明对应的参数类型与参数名,也可以通过defaultValue定义参数的默认值与nullable标明是否可空。对应的ShopDetailFragment接收参数也是一样。
另外popUpTo与popUpToInclusive属性是为了实现跳转到CartFragment时达到SingleTop效果。
下面我们直接看在代码中如何使用这些配置的参数,首先是在ShopListFragment中👇
holder.item.setOnClickListener(Navigation.createNavigateOnClickListener(ShopListFragmentDirections.actionGoToShopDetailPage(shopList[position])))
还是创建一个createNavigateOnClickListener,只不过现在传递的不再是跳转的action id,而是通过插件自动生成的ShopListFragmentDirections.actionGoToShopDetailPage方法。一旦我们如上配置了argument,插件就会自动生成一个以[类名]+Directions的类,而自动生成的类本质是做了跳转与参数的封装,源码如下👇
class ShopListFragmentDirections private constructor() {
private data class ActionGoToShopDetailPage(val title: String) : NavDirections {
override fun getActionId(): Int = R.id.action_go_to_shop_detail_page
override fun getArguments(): Bundle {
val result = Bundle()
result.putString(“title”, this.title)
return result
}
}
companion object {
fun actionGoToShopDetailPage(title: String): NavDirections = ActionGoToShopDetailPage(title)
}
}
本质是将action id与argument封装成一个NavDirections,内部通过解析它来获取action id与argument,从而执行跳转。
而对于接受方ShopDetailFragment,插件页面自动帮我们生成一个ShopDetailFragmentArgs,以[类名]+Args的类。所以我们需要做的也非常简单👇
class ShopDetailFragment : Fragment() {
private val args by navArgs()
override fun onCreateView(inflater: LayoutInflater, container: ViewGroup?, savedInstanceState: Bundle?): View? {
return inflater.inflate(R.layout.fragment_shop_detail, container, false).apply {
title.text = args.title
add_cart.setOnClickListener(Navigation.createNavigateOnClickListener(ShopDetailFragmentDirections.actionGoToCartPage()))
}
}
}
通过navArgs来获取ShopDetailFragmentArgs对象,它其中包含了传递过来的页面数据。
动画
在action中不仅可以配置跳转的destination,还可以定义对应页面的转场动画,使用非常简单👇
<?xml version="1.0" encoding="utf-8"?><navigation xmlns:android=“http://schemas.android.com/apk/res/android”
xmlns:app=“http://schemas.android.com/apk/res-auto”
lFragmentArgs对象,它其中包含了传递过来的页面数据。
动画
在action中不仅可以配置跳转的destination,还可以定义对应页面的转场动画,使用非常简单👇
<?xml version="1.0" encoding="utf-8"?><navigation xmlns:android=“http://schemas.android.com/apk/res/android”
xmlns:app=“http://schemas.android.com/apk/res-auto”


 476
476

 被折叠的 条评论
为什么被折叠?
被折叠的 条评论
为什么被折叠?
 到【灌水乐园】发言


