


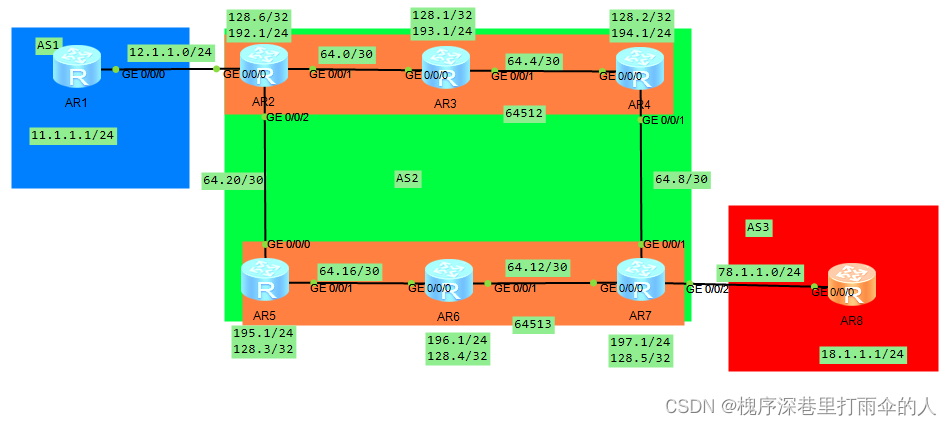
 文章详细描述了如何在IP地址划分172.16.0.0/16到172.16.192.0/18的网络中配置ospf和bgp,包括子网掩码调整、路由宣告和避免路由黑洞的策略。还涉及了联邦ID和路由反射器的设置。

IP地址分化:
172.16.0.0/16
172.16.0.0/18 --- 备份
172.16.64.0/18 ---- 骨干
172.16.64.0/30 23网段
172.16.64.4/30 34
172.16.64.8/30 47
172.16.64.12/30 67
172.16.64.16/30 56
172.16.64.20/30 25
l0
172.16.128.0/18 --- 建邻环回
172.16.128.6/32 R2
172.16.128.1/32 R3
172.16.128.2/32 R4
172.16.128.3/32 R5
172.16.128.4/32 R6
172.16.128.5/32 R7
l1
172.16.192.0/18 --- 用户
172.16.192.0/24 R2
172.16.193.0/24 R3
172.16.194.0/24 R4
172.16.195.0/24 R5
172.16.196.0/24 R6
172.16.197.0/24 R7
地址配好后,做ospf配置:
eg:
[r2]ospf 1 router-id 2.2.2.2
[r2-ospf-1]area 0
[r2-ospf-1-area-0.0.0.0]network 172.16.0.0 0.0.255.255
配置完后,打开路由表会发现,划分给用户的网段的掩码变成了32位,这时需要将其改回24位,在每个路由器上进入环回1接口敲ospf network-type broadcast
eg:[r4-LoopBack1]ospf network-type broadcast
下一步开始bgp建邻:
先r1和r2,r7和r8
[r1]bgp 1

[r1-bgp]peer 12.1.1.2 as-number 2


[r2]bgp 64512

[r2-bgp]confederation id 2

[r2-bgp]peer 12.1.1.1 as-number 1


[r8]bgp 3

[r8-bgp]peer 78.1.1.1 as-number 2


[r7]bgp 64513

[r7-bgp]confederation id 2

[r7-bgp]peer 78.1.1.2 as-number 3
r2、r3、r4使用联邦,虚拟号64512
[r2]bgp 64512

[r2-bgp]peer 172.16.128.1 as-number 64512

[r2-bgp]peer 172.16.128.1 connect-interface LoopBack 0

[r2-bgp]peer 172.16.128.1 next-hop-local


[r3]bgp 64512

[r3-bgp]confederation id 2

[r3-bgp]peer 172.16.128.6 as-number 64512

[r3-bgp]peer 172.16.128.6 connect-interface LoopBack 0

[r3-bgp]peer 172.16.128.2 as-number 64512

[r3-bgp]peer 172.16.128.2 connect-interface LoopBack 0


[r4]bgp 64512

[r4-bgp]confederation id 2

[r4-bgp]peer 172.16.128.1 as-number 64512

[r4-bgp]peer 172.16.128.1 connect-interface LoopBack 0
r5、r6、r7建立联邦,虚拟号64513
[r5]bgp 64513

[r5-bgp]confederation id 2

[r5-bgp]peer 172.16.128.4 as-number 64513

[r5-bgp]peer 172.16.128.4 connect-interface LoopBack 0


[r6]bgp 64513

[r6-bgp]confederation id 2

[r6-bgp]peer 172.16.128.3 as-number 64513

[r6-bgp]peer 172.16.128.3 connect-interface LoopBack 0

[r6-bgp]peer 172.16.128.5 as-number 64513

[r6-bgp]peer 172.16.128.5 connect-interface LoopBack 0


[r7]bgp 64513

[r7-bgp]confederation id 2

[r7-bgp]peer 172.16.128.4 as-number 64513

[r7-bgp]peer 172.16.128.4 connect-interface LoopBack 0

[r7-bgp]peer 172.16.128.4 next-hop-local
区域64512与区域64513建邻
[r2]bgp 64512

[r2-bgp]confederation peer-as 64513

[r2-bgp]peer 172.16.128.3 as-number 64513

[r2-bgp]peer 172.16.128.3 ebgp-max-hop 2

[r2-bgp]peer 172.16.128.3 connect-interface LoopBack 0

[r2-bgp]peer 172.16.128.3 next-hop-local


[r5]bgp 64513

[r5-bgp]confederation peer-as 64512

[r5-bgp]peer 172.16.128.6 as-number 64512

[r5-bgp]peer 172.16.128.6 ebgp-max-hop 2

[r5-bgp]peer 172.16.128.6 connect-interface LoopBack 0


[r4]bgp 64512

[r4-bgp]confederation peer-as 64513

[r4-bgp]peer 172.16.128.5 as-number 64513

[r4-bgp]peer 172.16.128.5 ebgp-max-hop 2

[r4-bgp]peer 172.16.128.5 connect-interface LoopBack 0


[r7]bgp 64513

[r7-bgp]confederation peer-as 64512

[r7-bgp]peer 172.16.128.2 as-number 64512

[r7-bgp]peer 172.16.128.2 ebgp-max-hop 2

[r7-bgp]peer 172.16.128.2 connect-interface LoopBack 0

[r7-bgp]peer 172.16.128.2 next-hop-local
给r3和r6建立路由反射器
[r3]bgp 64512

[r3-bgp]peer 172.16.128.2 reflect-client


[r6]bgp 64513

[r6-bgp]peer 172.16.128.5 reflect-client
现在全区域都已建邻,接下来进行宣告,首先宣告r1和r8的环回
eg:[r1]bgp 1
[r1-bgp]network 11.1.1.0 24
在r2和r7上配置静态路由172.16.192.0 18 NULL 0,防止路由黑洞
eg:[r7]ip route-static 172.16.192.0 18 NULL 0
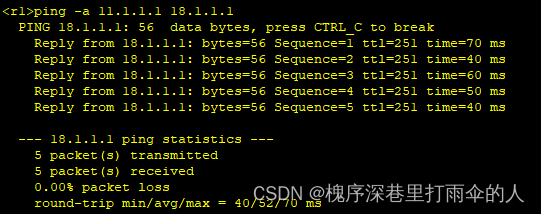
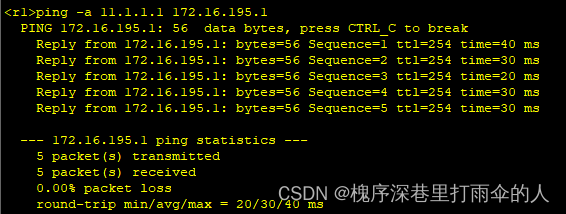
最后在r2的bgp上宣告172.16.192.0 18的用户网段,再查看每个路由器的bgp表确认无误后,即可实现全网可达
eg:
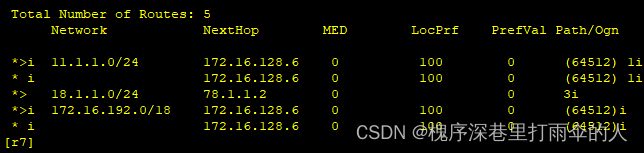
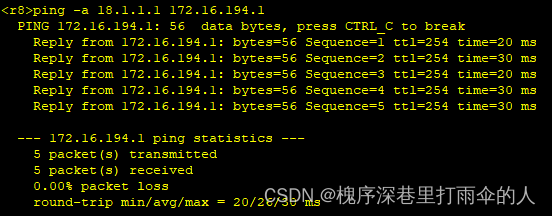
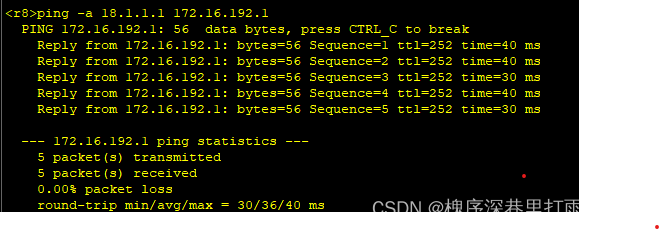
测试:


 被折叠的 条评论
为什么被折叠?
被折叠的 条评论
为什么被折叠?
 到【灌水乐园】发言


