


网上学习资料一大堆,但如果学到的知识不成体系,遇到问题时只是浅尝辄止,不再深入研究,那么很难做到真正的技术提升。
一个人可以走的很快,但一群人才能走的更远!不论你是正从事IT行业的老鸟或是对IT行业感兴趣的新人,都欢迎加入我们的的圈子(技术交流、学习资源、职场吐槽、大厂内推、面试辅导),让我们一起学习成长!
127.0.0.1 localhost localhost.localdomain localhost4 localhost4.localdomain4
::1 localhost localhost.localdomain localhost6 localhost6.localdomain6
192.168.2.1 server
192.168.2.2 web1
192.168.2.3 data1
192.168.2.3 | CHANGED | rc=0 >>
127.0.0.1 localhost localhost.localdomain localhost4 localhost4.localdomain4
::1 localhost localhost.localdomain localhost6 localhost6.localdomain6
192.168.2.1 server
192.168.2.2 web1
192.168.2.3 data1
###### 案例2:再次传输hosts文件,到目标主机的源文件自动备份一下
[root@localhost ~]# ansible all -m copy -a ‘src=/etc/hosts dest=/etc/hosts backup=yes’
[root@localhost ~]# ansible all -m shell -a ‘ls -l /etc/hosts*’
192.168.2.3 | CHANGED | rc=0 >>
-rw-r–r-- 1 root root 229 2月 20 20:37 /etc/hosts
-rw-r–r-- 1 root root 212 2月 20 20:29 /etc/hosts.21223.2023-02-20@20:37:39~
-rw-r–r–. 1 root root 370 6月 7 2013 /etc/hosts.allow
-rw-r–r–. 1 root root 460 6月 7 2013 /etc/hosts.deny
192.168.2.2 | CHANGED | rc=0 >>
#### 四,系统管理


##### 1.systemd服务管理


|  |  |
| --- | --- |
| 选项 | 描述 |
| name | 用于指定服务器的 |
| enabled | 控制主机的开机自启动 enabled=yes enable=no |
| daemon-reload | yes是否重新加载对应的服务的管理配置文件 |
| state | 表示指定操作服务器的状态的 state=started(开启) state=stopped(关闭) state=reloaded(重读配置文件的) state=restarted(重启) |


###### 案例1:关闭firewalld
[root@localhost ~]# ansible all -m systemd -a ‘name=firewalld enabled=no state=stopped’
[root@localhost ~]# ansible all -a “systemctl status firewalld”
192.168.2.3 | FAILED | rc=3 >>
● firewalld.service - firewalld - dynamic firewall daemon
Loaded: loaded (/usr/lib/systemd/system/firewalld.service; disabled; vendor preset: enabled)
Active: inactive (dead)
Docs: man:firewalld(1)non-zero return code
192.168.2.2 | FAILED | rc=3 >>
● firewalld.service - firewalld - dynamic firewall daemon
Loaded: loaded (/usr/lib/systemd/system/firewalld.service; disabled; vendor preset: enabled)
Active: inactive (dead)
Docs: man:firewalld(1)non-zero return code
###### 例2:开启sshd服务
[root@localhost ~]# ansible all -m systemd -a ‘name=sshd enabled=yes state=started’
[root@localhost ~]# ansible all -a “systemctl status sshd”
###### 案例3:重启data这台机器上的mysql服务
[root@localhost ~]# ansible data -m systemd -a ‘name=mysqld state=restarted’
##### 2.service模块


|  |  |
| --- | --- |
| 选项 | 描述 |
| 开机自启 | enabled |
| 服务器名称 | name |
| 服务开关重启 | state |
| 运行级别 | runlevel |


#### 五,软件包管理


##### 1.yum源配置管理模块


|  |  |  |
| --- | --- | --- |
| yum\_repository源选项 | yum源配置文件内容 | 作用 |
| name | [epel] | yum源中名字(中括号 里面的名字即可) |
| description | name=xxxxx | yum源的注释说明 |
| baseurl | baseurl= | yum源中下载软件包的地址(可以直接访问到repodata目录) |
| enable=yes/no | enable=1/0 | 是否启动这个源 |
| gpgcheck=yes/no | gpgcheck=0 | 是否启动gpgcheck功能 |
| file(可以不加) | 无 | 指定yum源文件,自动添加.repo |


###### 案例1:批量添加nginx源
[root@localhost ~]# ansible all -m yum_repository -a ‘name=nginx description=“nginx” baseurl=“http://nginx.org/packages/centos/
r
e
l
e
a
s
e
v
e
r
/
releasever/
releasever/basearch/” gpgcheck=no enabled=yes’
192.168.2.2 | CHANGED => {
“ansible_facts”: {
“discovered_interpreter_python”: “/usr/bin/python”
},
“changed”: true,
“repo”: “nginx”,
“state”: “present”
}
192.168.2.3 | CHANGED => {
“ansible_facts”: {
“discovered_interpreter_python”: “/usr/bin/python”
},
“changed”: true,
“repo”: “nginx”,
“state”: “present”
}
##### 2.yum模块


|  |  |
| --- | --- |
| 选项 | 描述 |
| name | 指定软件包名字 |
| state | installed安装 removed(删除) latest(如果安装就检查更新 没安装则安装) |


###### 案例1:安装lrzsz
[root@localhost ~]# ansible all -a ‘rpm -e lrzsz’
[root@localhost ~]# ansible all -m yum -a ‘name=lrzsz state=installed’
###### 案例2:安装cowsay,aalib
[root@localhost ~]# ansible web -m yum -a ‘name=sl,cowsay,aalib state=installed’
##### 3.get\_url模块


|  |  |
| --- | --- |
| 选项 | 描述 |
| url | 指定要下载的地址 |
| dest | 下载到那个目录 |


###### 案例1:下载tengine源码包到/server/tools(不存在)目录下
[root@localhost ~]# ansible web -m file -a ‘path=/server/tools/ state=directory’
[root@localhost ~]# ansible web -m get_url -a “url=https://tengine.taobao.org/download/tengine-2.3.3.tar.gz dest=/server/tools/”
[root@localhost ~]# ansible web -a ‘ls /server/tools’
192.168.2.2 | CHANGED | rc=0 >>
tengine-2.3.3.tar.gz
#### 六,系统工具管理


##### 1.mount模块


|  |  |
| --- | --- |
| 选项 | 描述 |
| fstype | 指定文件类型 |
| src | 源地址 |
| path | 挂载点 |
| state | state=absent(卸载并修改fstab(清理配置)) state=unmounted(卸载不修改/etc/fstab) state=present(仅修改/etc/fstab不挂载) state=remounted(重新挂载) |


###### 案例1:挂载NFS磁盘
[root@localhost ~]# ansible web -m file -a ‘path=/nfs-data state=directory’
[root@localhost ~]# ansible web -m mount -a ‘fstype=nfs src=“192.168.2.3:/data” path=/nfs-data state=mounted’
##### 2.cron定时任务模块


|  |  |  |
| --- | --- | --- |
| cron的选项 | 定时任务配置中的内容 | 描述 |
| name | #及后面的内容 | 定时任务名字 |
| minute | \*/2 | 分钟minute=“\*/2”,如果没有用到不用填写即可 |
| hour |  | 小时 |
| day |  | 日 |
| month |  | 月份 |
| week |  | 周 |
| job | 命令(脚本) | 指定命令或脚本 |
| state |  | present默认是添加 添加定时任务 absent删除 |


###### 案例1:添加自动同步时间的定时任务
- / 2 * * * * / sbin / ntpdat e ntp
[root@localhost ~]# ansible all -m cron -a ‘name=“sync time by” minute=“*/2” job=“/sbin/ntpdate ntp1.aliyun.com &> /dev/null state=present”’
#### 七,用户管理模块


##### 1.user用户模块


|  |  |
| --- | --- |
| 选项 | 描述 |
| name | 用户名 |
| uid | 指定uid |
| group | 知道用户组 |
| shell | 指定命令解释器 |
| create\_home | 是否创建家目录 |
| state | state=present(添加) state=absent(删除) |


###### 案例1:创建用户
[root@localhost ~]# ansible web -m user -a ‘name=www’
###### 案例2:创建程序用户
[root@localhost ~]# ansible web -m user -a ‘name=cjx uid=10085 shell=/shell/nologin create_home=no state=present’
##### 2.group组模块


|  |  |
| --- | --- |
| 选项 | 描述 |
| name | 指定用户组名字 |
| gid | 指定组的gid |
| state | state=present(添加)state=adsent(删除) |


### 五,Ansible模块实验-部署rsync服务端


##### 1.部署流程


* 服务部署:yum安装(更新)rsync


* 配置文件


* 创建虚拟用户rsync


* 创建密码和分配权限


* 同步对应目录,改所有者


* 重启服务


##### 2.根据流程写出命令


* yum -y install rsync


* 配置好rsync文件然后scp上传替换


* 创建虚拟用户:useradd -s /sbin/nologin -M rsync


* 密码文件和权限:echo 'rsync\_back:1' > /etc/rsync.password 修改权限:chmod 600 /etc/rsync.password


* 创建共享目录:mkdir /data 分配所有者 chown rsync.rsync /data


* 重启服务:systemctl restart rsync


##### 3.ansible部署rsync


###### 1.在ansible服务器上创建rsync配置文件用于上传
[root@localhost ~]# mkdir /data/
[root@localhost ~]# vi /data/rsyncd.conf
uid = root
gid = root
port 873
address = 192.168.2.2
hosts allow = 192.168.2.0/24
max connections = 4
pid file = /var/run/rsyncd.pid
timeout = 900
dont compress = *.gz *.tgz *.zip *.z *.Z *.rpm *.deb *.bz2
[data]
path = /data
read only = no
auth users = test
secrets file = /etc/rsync.password
###### 2.安装rsync
[root@localhost ~]# ansible rsync -m yum -a ‘name=rsync state=installed’
###### 3.配置文件分发
[root@localhost ~]# ansible rsync -m copy -a ‘src=/data/rsyncd.conf dest=/etc/rsyncd.conf backup=yes’
###### 4.创建虚拟用户
[root@localhost ~]# ansible rsync -m user -a 'name=rsync shell=/sbin/nologin create_home=no state=present
###### 5.创建密码文件和权限
[root@localhost ~]# ansible rsync -m file -a ‘path=/etc/rsync.password mode=600 state=touch’
[root@localhost ~]# ansible rsync -m shell -a “echo ‘test:1’ > /etc/rsync.password”
###### 6.创建rsync同步的目录,和分配属组
[root@localhost ~]# ansible rsync -m file -a ‘path=/data owner=rsync group=rsync state=directory’
###### 7.重启服务
[root@localhost ~]# ansible rsync -m systemd -a ‘name=rsyncd enabled=yes state=started’
###### 8.测试
[root@localhost ~]# rsync -avz --password-file=/etc/server.pass /test/ test@192.168.2.2::data
sending incremental file list
./
sent 47 bytes received 23 bytes 140.00 bytes/sec
total size is 0 speedup is 0.00
### 六,Ansible-playbook(剧本)


##### 一.ansible中Hoc与playbook的区别


|  |  |  |
| --- | --- | --- |
| 命令 | 含义 | 应用场景 |
| ad-hoc | ans命令运行对应模块与选项 | 临时使用,测试使用 |
| playbook | 通过文件执行(类似脚本) | 用于批量管理,部署,收集信息,分发(文件重复执行) |


##### 二.playbook与shell的区别


|  |  |
| --- | --- |
| 剧本与脚本 | 应用场景 |
| playbook剧本 | 批量管理,批量部署,批量分发 |
| shell脚本 | 某一台,服务脚本,系统巡查,定时备份 |


##### 三.playbook编写规则


* 剧本格式叫yaml格式(yml)


* 缩进(不要使用Tab,使用空格)


* 核心格式剧本中所有的内容要对齐


* 对齐的时候不能使用Tab


* 在不同层级中需要使用两个空格来分层


* hosts:用于指定那些主机


* tasks:用于对这些主机,运行什么模块


##### 四.案例


参数:


|  |  |
| --- | --- |
| 参数 | 描述 |
| -i | 指定hosts文件(默认/etc/ansible/hosts) |
| -C | 检测yml文件是否有误 |
| --list-hosts | 列出清单 |
| --list-tasks | 列出任务 |
| --list-tags | 列出标签 |
| --syntax-check | 语法检查 |


###### 案例1:所有机器的/tmp下面创建test.txt
[root@localhost playbook]# vi touch.yml
- hosts: all
vars:
filename: test1.txt
tasks:- name: touch file
shell: touch /tmp/{{filename}}
- name: touch file
###### 案例2:添加定时同步时间的定时任务
[root@localhost playbook]# vi cron.yml
- hosts: all
tasks:- name: add cron sync time
cron:
name: “sync time by”
minute: “*/2”
job: “/sbin/ntpdate ntp1.aliyun.com &> /dev/null”
state: present
- name: add cron sync time
[root@localhost playbook]# ansible-playbook -C cron.yml
###### 案例3:批量下载zabbix-agent2-6.0客户端并启动
[root@localhost playbook]# vi zabbix_agent.yml
- hosts: all
tasks:- name: download zabbix agent2
get_url:
url: https://mirrors.tuna.tsinghua.edu.cn/zabbix/zabbix/6.0/rhel/7/x86_64/zabbix-agent2-6.0.0-1.el7.x86_64.rpm
dest: /tmp/
validate_certs: no - name: install zabbix agent2
yum:
name: /tmp/zabbix-agent2-6.0.0-1.el7.x86_64.rpm
state: installed - name: start zabbix agent2
systemd:
name: zabbix-agent2
enabled: yes
state: started
- name: download zabbix agent2
[root@localhost playbook]# ansible-playbook -C zabbix_agent.yml
案例4:配置rsync服务器端
[root@localhost playbook]# vi rsync_backup.yml
- hosts: rsync
tasks:- name: install rsync
yum:
name: rsync
state: latest - name: config
copy:
src: /data/rsyncd.conf
dest: /etc/rsyncd.conf
backup: yes - name: virtual user
user:
name: rsync
shell: /sbin/nologin
create_home: no
state: present - name: password txt
shell:
‘echo “rsync_backup:1” > /etc/rsync.password’ - name: password
file:
path: /etc/rsync.password
owner: rsync
group: rsync
state: file - name: reload rsync
systemd:
name: rsyncd
enabled: yes
state: started
- name: install rsync
[root@localhost playbook]# ansible-playbook -C rsync_backup.yml
##### 五,综合案例


###### 1.安装ansible
yum -y install ansible
###### 2.ssh公钥
ssh-keygen -t rsa
ssh-copy-id root@IP
###### 3.创建ansible-playbook文件目录
[root@localhost ~]# mkdir -p /etc/ansible/ansible_playbook/{conf,file,scripts,tools}
###### 4.准备资料


###### 1.创建ansible清单
[root@localhost ~]# vi /etc/ansible/hosts
[rsync]
192.168.2.2
[data]
192.168.2.3
[web]
192.168.2.4
###### 2.准备程序配置文件
#NFS共享
[root@localhost conf]# vi /etc/ansible/ansible_playbook/conf/exports
/data 192.168.2.0/24(rw,sync,all_squash)
#httpd文件
cp /etc/httpd/httpd.conf /etc/ansible/ansible_playbook/conf/
#rsync配置文件
[root@localhost conf]# vi /etc/ansible/ansible_playbook/conf/rsyncd.conf
uid = www
gid = www
port 873
address = 192.168.2.2
hosts allow = 192.168.2.0/24
max connections = 4
pid file = /var/run/rsyncd.pid
timeout = 900
dont compress = *.gz *.tgz *.zip *.z *.Z *.rpm *.deb *.bz2
[backup]
path = /backup
read only = no
auth users = rsync_backup
secrets file = /etc/rsync.password
###### 3.运行脚本
#设置rsync执行文件权限
[root@localhost conf]# vi /etc/ansible/ansible_playbook/scripts/rsync_backup.sh
#!/usr/bin/bash
export PATH=/usr/local/sbin:/usr/local/bin:/usr/sbin:/usr/bin:/root/bin
#1.定义变量
Host=
(
h
o
s
t
n
a
m
e
)
A
d
d
r
=
(hostname) Addr=
(hostname)Addr=(ifconfig ens33|awk 'NR==2{print KaTeX parse error: Expected 'EOF', got '}' at position 2: 2}̲') Date=(date +%F)
Dest=KaTeX parse error: Expected group after '_' at position 7: {Host}_̲{Addr}_${Date}
Path=/backup
#2.创建备份目录
[ -d
P
a
t
h
/
Path/
Path/Dest ] || mkdir -p
P
a
t
h
/
Path/
Path/Dest
#3.备份对应的文件
cd / &&
[ -f
P
a
t
h
/
Path/
Path/Dest/system.tar.gz ] || tar czf
P
a
t
h
/
Path/
Path/Dest/system.tar.gz etc/fstab etc/rsyncd.conf &&
[ -f
P
a
t
h
/
Path/
Path/Dest/log.tar.gz ] || tar czf
P
a
t
h
/
Path/
Path/Dest/log.tar.gz var/log/messages var/log/secure && \
#4.携带md5验证信息
[ -f
P
a
t
h
/
Path/
Path/Dest/flag ] || md5sum
P
a
t
h
/
Path/
Path/Dest/*.tar.gz >
P
a
t
h
/
Path/
Path/Dest/flag_${Date}
#4.推送本地数据至备份服务器
export RSYNC_PASSWORD=1
rsync -avz $Path/ rsync_backup@rsync1::backup
#5.本地保留最近7天的数据
find $Path/ -type d -mtime +7|xargs rm -rf
#检查rsync状态
[root@localhost conf]# vi /etc/ansible/ansible_playbook/scripts/rsync_check.sh
#!/usr/bin/bash
#1.定义全局的变量
export PATH=/usr/local/sbin:/usr/local/bin:/usr/sbin:/usr/bin:/root/bin
#2.定义局部变量
Path=/backup
Date=$(date +%F)
#3.查看flag文件,将校验的结果保存至result_时间
find KaTeX parse error: Expected group after '_' at position 7: Path/*_̲{Date} -type f -name "flag
D
a
t
e
"
>
Date" >
Date">Path/result_${Date}
#4.将校验的结果发送邮件给管理员
mail -s "Rsync Backup
D
a
t
e
"
1793594335
@
q
q
.
c
o
m
<
Date" 1793594335@qq.com <
Date"1793594335@qq.com<Path/result_${Date}
#5.删除超过7天的校验结果文件, 删除超过180天的备份数据文件
find $Path/ -type f -name “result*” -mtime +7|xargs rm -f
find $Path/ -type d -mtime +180|xargs rm -rf
###### 4.准备sersync部署
(1)在ansible服务器先下载sersync
(2)解压到/etc/ansible/ansible_playbook/并修改配置文件
(3)推送到nfs
(4)启动sersync
###### 5.基础环境部署


* (1)网络环境(关闭firewall selinux)


* (2)epel仓库


* (3)安装rsync,nfs-utils


* (4)创建组


* (5)创建用户


* (6)创建目录,并修改权限


* (7)推送脚本


* (8)推送rsync客户端密码文件,修改权限


* (9)计划任务
[root@localhost ~]# cd /etc/ansible/ansible_playbook/
[root@localhost ansible_playbook]# vi base.yaml
- hosts: all
tasks:-
name: clear repos.d
file: path=/etc/yum.repos.d/ state=absent -
name: create repos.d
file: path=/etc/yum.repos.d/ state=directory -
name: install base repo
get_url: url=http://mirrors.aliyun.com/repo/Centos-7.repo
dest: /etc/yum.repos.d/CentOS-Base.repo -
name: install epel repo
get_url: url=http://mirrors.aliyun.com/repo/epel-7.repo
dest: /etc/yum.repos.d/epel.repo -
name: install rsync nfs-utils
yum: name=rsync,nfs-utils state=installed
crea -
name: create group www
group: name=www gid=666 -
name: create user www
user: name=www uid=666 create_home=no shell=/sbin/nologin -
name: create rsync client password
copy: content=‘1’ dest=/etc/rsync.pass mode=600 -
name: create scripts directory
file: path=/server/scripts/ recurse=yes state=directory -
name: push scripts
copy: src=./scripts/rsync_backup.sh dest=/server/scripts -
name: crontab
cron: name=“backup scripts” hour=01 minute=00 job=“/usr/bin/bash /server/scripts/rsync_backup.sh &> /dev/null”
-
###### 6.rsync安装
[root@localhost ansible_playbook]# vi rsync.yaml
-
hosts: rsync
tasks:-
name: install rsync
yum: name=rsync state=installed -
name: config rsync
copy: src=/etc/ansible/ansible_playbook/conf/rsyncd.conf dest=/etc/rsyncd.conf
notify: restart rsync -
name: create rsync local user
copy: content=‘rsync_backup:1’ dest=/etc/rsync.password mode=600 -
name: create data
file: path=/data state=directory recurse=yes owner=www group=www mode=755 -
name: create backup
file: path=/backup state=directory recurse=yes owner=www group=www mode=755 -
name: start rsync
service: name=rsyncd state=started enabled=yes -
name: push check scripts
copy: src=./scripts/rsync_check.sh dest=/server/scripts -
name: crond check scripts
cron: name=“check scripts” hour=05 minute=00 job=“/usr/bin/bash /server/scripts/rsync_check.sh &> /dev/null”
handlers:
- name: restart rsync
service: name=rsyncd state=restarted
-
###### 7.nfs部署
vim /etc/ansible/ansible_playbook/nfs.yaml
-
hosts: nfs
tasks:
-
name: install nfs
yum: name=nfs-utils state=installed -
name: config nfs
copy: src=./conf/exports dest=/etc/exports
notify: restart nfs -
name: create data
file: path=/data state=directory recurse=yes owner=www group=www mode=755 -
name: start nfs
service: name=nfs-server state=started enabled=yes
handlers:
- name: restart nfs
service: name=nfs-server state=restarted
-
###### 8.sersync部署
vim /etc/ansible/ansible_playbook/sersync.yaml
-
hosts: nfs
tasks:
-
name: scp sersync
copy: src=./tools/sersync/ dest=/usr/local/sersync owner=www group=www mode=755 -
name: start sersync
shell: pgrep sersync;
[ $? -eq 0 ] || /usr/local/sersync/sersync2 -dro /usr/local/sersync/confxml.xml
-
###### 9.web部署
vim /etc/ansible/ansible_playbook/web.yaml
-
hosts: web
tasks:
-
name: mount nfs
mount: src=nfs:/data path=/data fstype=nfs state=mounted -
name: install httpd
yum: name=httpd state=installed -
name: config httpd
copy: src=./conf/httpd.conf dest=/etc/httpd/conf/httpd.conf
notify: restart httpd -
name: start httpd
service: name=httpd state=started enabled=yes
handlers:
- name: restart httpd
service: name=httpd state=restarted
-
###### 10.合成ansible-playbook脚本
vim main.yaml
- import_playbook: base.yaml
- import_playbook: rsync.yaml
- import_playbook: nfs.yaml
- import_playbook: sersync.yaml
- import_playbook: web.yaml
###### 11.测试
预检测:ansible-playbook -C main.yaml
执行: ansible-playbook main.yaml
### 七,Ansible-变量系列


#### 一,变量分类


|  |  |
| --- | --- |
| 变量 | 描述 |
| 命令行vars | 临时使用,较少用 |
| 变量文件vars\_files | 某一个主机使用,较少使用 |
| 主机组共用的变量文件group\_vars | 应用范围广泛 |
| ansible内置变量(facts变量) | 收集主机的基本信息,IP地址,主机名,系统及版本 |
| register变量 | 实现命令行$()或``功能 |


#### 二,变量学习


##### 1.vars变量


 注意:在调用变量时不可以变量开头,如果需要的话需要添加双引号
[root@localhost playbook]# vi vars_dir.yml
- hosts: test
vars:
dir_name: /test
file_name: file.txt
tasks:- name: print var
debug:
msg: 变量 {{ dir_name }}
- name: print var
[root@localhost playbook]# ansible-playbook vars_dir.yml
TASK [print var] ***********************************************************************************************************************************
ok: [192.168.2.2] => {
“msg”: “变量 /test”
}
##### 2.vars\_files变量


 把变量存放到一个文件中
[root@localhost playbook]# vi vars.yml
dir: /data_dir
file: file.txt
[root@localhost playbook]# vi vars_dir.yml
- hosts: test
vars_files: ./vars.yml
tasks:- name: print var
debug:
msg: 目录 {{ dir }} - name: print file
debug:
msg: 文件 {{ file }}
- name: print var
[root@localhost playbook]# ansible-playbook vars_dir.yml
TASK [print var] ***********************************************************************************************************************************
ok: [192.168.2.2] => {
“msg”: “目录 /data_dir”
}
TASK [print file] **********************************************************************************************************************************
ok: [192.168.2.2] => {
“msg”: “文件 file.txt”
}
##### 3.group\_vars变量


要求:需要创建一个group\_vars目录,目录下面创建以主机组命名,存放变量名文件vars.yml


例:
group_vars/目录:
lb/vars.yml #存在lb组的变量
web/vars.yml #存放web组的变量
data/vars.yml #存放data组的变量
all/vars.yml #存放所有主机公用的变量
为test组和所有主机组(all)创建变量
#创建组变量
[root@localhost playbook]# mkdir -p group_vars/test/
[root@localhost playbook]# vi group_vars/test/vars.yml
dir: /test
[root@localhost playbook]# mkdir -p group_vars/all/
[root@localhost playbook]# vi group_vars/all/vars.yml
file: file.txt
#在ansible-playbook文件中直接调用即可
[root@localhost playbook]# vi vars_dir.yml
- hosts: test
tasks:- name: print var
debug:
msg: 目录 {{ dir }} - name: print file
debug:
msg: 文件 {{ file }}
- name: print var
#测试
[root@localhost playbook]# ansible-playbook vars_dir.yml
ok: [192.168.2.2] => {
“msg”: “目录 /test”
}
TASK [print file] **********************************************************************************************************************************
ok: [192.168.2.2] => {
“msg”: “文件 file.txt”
}
#### 三,Ansible内置变量(facts变量)


##### 1.查看所有的内置变量
[root@localhost ~]# ansible all -m setup
##### 2.常用的facts变量
ansible_hostname #主机名
ansible_memtotal_mb #内存⼤⼩(总计) 单位mb
ansible_processor_vcpus # cpu数量
ansible _default_ipv4.address #默认网卡ip etn0
ansible_distribution #系统发行版本名称
ansible_processor_cores #核心总数
ansible_date_time.date #当前时间 年-月-日
##### 3.案例:系统巡查-获取所有机器的基本信息保存下来
[root@localhost playbook]# vi vars_sys_info.yml
- hosts: all
tasks:- name: create file system
lineinfile:
path: /tmp/{{ ansible_hostname }}
create: yes
line: “主机名:{{ ansible_hostname }}\nip地址:{{ ansible_default_ipv4.address }}”
- name: create file system
##### 测试:
[root@localhost playbook]# ansible-playbook vars_sys_info.yml
[root@localhost playbook]# ansible all -m shell -a “cat /tmp/rsync_01”
192.168.2.2 | CHANGED | rc=0 >>
主机名:rsync_01
ip地址:192.168.2.2
##### 4.facts总结
如果ansible中使用到一些系统的基础信息,就可以直接使用内置变量调用,无需定义,如果没有这种需求或通过别的方式实现这个需求,可以关闭facts功能,让剧本加速,使用:用gather_facts: no
- hosts: all
gather_facts: no
vars:
dir: /test
file: file.txt
tasks:- name: mkdir
file:
path: “{{ dir }}”
state: directory
- name: mkdir
#### 四,ansible-register变量


 ansible-register用于提取linux命令中的命令的输出信息,作为变量使用


##### 1.取出命令中的变量
[root@localhost playbook]# vi vars_register.yml
- hosts: all
tasks:- name: date time
shell: date
register: date - name: export
debug:
msg: “{{date}}”
- name: date time
#获取
[root@localhost playbook]# ansible-playbook vars_register.yml
TASK [export] *****************************************************************************************************
ok: [192.168.2.2] => {
“msg”: {
“changed”: true,
“cmd”: “date”,
“delta”: “0:00:00.001997”,
“end”: “2023-02-23 22:24:23.071061”,
“failed”: false,
“rc”: 0,
“start”: “2023-02-23 22:24:23.069064”,
“stderr”: “”,
“stderr_lines”: [],
“stdout”: “2023年 02月 23日 星期四 22:24:23 CST”,
“stdout_lines”: [
“2023年 02月 23日 星期四 22:24:23 CST”
]
}
}
##### 2.输出子选项即可
[root@localhost playbook]# vi vars_register.yml
- hosts: all
tasks:- name: date time
shell: date
register: date
- name: date time
最后的话
最近很多小伙伴找我要Linux学习资料,于是我翻箱倒柜,整理了一些优质资源,涵盖视频、电子书、PPT等共享给大家!
资料预览
给大家整理的视频资料:

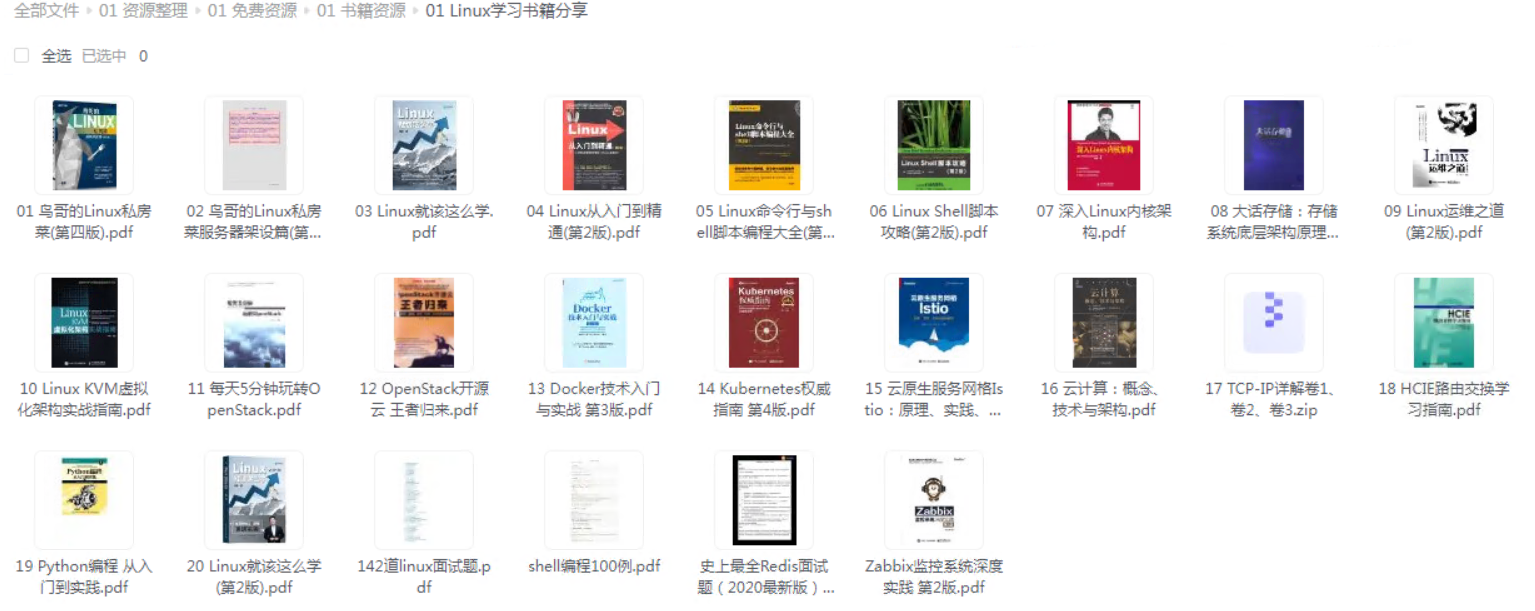
给大家整理的电子书资料:
如果本文对你有帮助,欢迎点赞、收藏、转发给朋友,让我有持续创作的动力!
网上学习资料一大堆,但如果学到的知识不成体系,遇到问题时只是浅尝辄止,不再深入研究,那么很难做到真正的技术提升。
一个人可以走的很快,但一群人才能走的更远!不论你是正从事IT行业的老鸟或是对IT行业感兴趣的新人,都欢迎加入我们的的圈子(技术交流、学习资源、职场吐槽、大厂内推、面试辅导),让我们一起学习成长!
port] *****************************************************************************************************
ok: [192.168.2.2] => {
“msg”: {
“changed”: true,
“cmd”: “date”,
“delta”: “0:00:00.001997”,
“end”: “2023-02-23 22:24:23.071061”,
“failed”: false,
“rc”: 0,
“start”: “2023-02-23 22:24:23.069064”,
“stderr”: “”,
“stderr_lines”: [],
“stdout”: “2023年 02月 23日 星期四 22:24:23 CST”,
“stdout_lines”: [
“2023年 02月 23日 星期四 22:24:23 CST”
]
}
}
##### 2.输出子选项即可
[root@localhost playbook]# vi vars_register.yml
- hosts: all
tasks:- name: date time
shell: date
register: date
- name: date time
最后的话
最近很多小伙伴找我要Linux学习资料,于是我翻箱倒柜,整理了一些优质资源,涵盖视频、电子书、PPT等共享给大家!
资料预览
给大家整理的视频资料:
[外链图片转存中…(img-Zz3LZALi-1715532313921)]
给大家整理的电子书资料:
[外链图片转存中…(img-ZDHuPQRL-1715532313922)]
如果本文对你有帮助,欢迎点赞、收藏、转发给朋友,让我有持续创作的动力!
网上学习资料一大堆,但如果学到的知识不成体系,遇到问题时只是浅尝辄止,不再深入研究,那么很难做到真正的技术提升。
一个人可以走的很快,但一群人才能走的更远!不论你是正从事IT行业的老鸟或是对IT行业感兴趣的新人,都欢迎加入我们的的圈子(技术交流、学习资源、职场吐槽、大厂内推、面试辅导),让我们一起学习成长!


 被折叠的 条评论
为什么被折叠?
被折叠的 条评论
为什么被折叠?
 到【灌水乐园】发言


