


目录
一.前言
今天就给大家介绍一款接口管理神器swagger2,swagger2的出现就是为了从根本上解决上述问题,它作为一个规范和完整的框架,可以用于生成、描述、调用和可视化 RESTful 风格的 Web 服务:
- 接口文档在线自动生成
- 文档随接口变动实时更新,节省维护成本
- 支持在线接口测试,不依赖第三方工具
二.文档(swagger)框架准备
2.1 swagger框架pom依赖
<!--swagger2-->
<dependency>
    <groupId>io.springfox</groupId>
    <artifactId>springfox-swagger2</artifactId>
    <version>3.0.0</version>
</dependency>
<dependency>
    <groupId>com.github.xiaoymin</groupId>
    <artifactId>knife4j-spring-boot-starter</artifactId>
    <version>3.0.2</version>
</dependency>
2.2 创建一个config类,用于配置swagger2
@Configuration
@EnableSwagger2//开启swagger2
@EnableKnife4j//启用swagger2的一个ui样式
public class Swagger2Config {
    @Bean
    public Docket createRestApi() {
        return  new Docket(DocumentationType.SWAGGER_2)
                .useDefaultResponseMessages(false)
                .apiInfo(apiInfo())
                .select()
                .apis(RequestHandlerSelectors.basePackage("com.example"))//扫描哪个包下的接口
                .paths(PathSelectors.any()) // 可以根据url路径设置哪些请求加入文档,忽略哪些请求 Swagger 会扫描该包下所有 Controller 定义的 API,并产生文档内容(除了被 @ApiIgnore 指定的请求)
                .build();
    }

    private ApiInfo apiInfo() {
        return new ApiInfoBuilder()
                .title("lesson16接口api文档")//标题文字
                .description("接口api文档")//接口描述
                .contact(new Contact("skywalker","http://www.baidu.com","53816565@qq.com"))//联系人相关信息
                .termsOfServiceUrl("http://localhost:8080/")//设置文档的License信息
                .version("1.0")//接口版本号
                .build();
    }
}
2.3rest接口
@Api(tags = "用户相关api")
@Slf4j
@RestController
public class UserController {
    @ApiOperation("根据用户id获取详细")
    @GetMapping("detail")
    public String detail(@RequestParam(value = "userId")@ApiParam("用户id") String userId) {
        //TODO: 实际业务处理
        return "OK";
    }

    @ApiOperation("保存新用户")
    @PostMapping("save")
    public UserDto save( @RequestBody UserDto dto){
        return new UserDto();
    }
}
@ApiModel("用户对象")
@Data
public class UserDto {
@ApiModelProperty(value = "用户名",required = true)
private String username;
@Enumerated(EnumType.STRING)
@ApiModelProperty("性别")
private SexEnum sex;
@ApiModelProperty(value = "密码",required = true)
private String password;
@ApiModelProperty("年龄")
private Integer age;
@ApiModelProperty("邮箱")
private String email;
}2.4swagger框架注解
具体注解详情请看:swagger常用注解_十年(Sugar)的博客-优快云博客_swagger注解
@Api:【类】修饰整个类,描述Controller的作用,该标签中有个tags属性,不同类中相同的tags标签值的会在文档中归为一类@ApiOperation:【rest方法】描述一个类的一个方法,或者说一个接口@ApiParam:【rest中的get参数】单个参数描述@ApiModel:【入/出参对象】用对象来接收参数@ApiProperty:【入/出参对象中的属性字段】用对象接收参数时,描述对象的一个字段@ApiResponse:HTTP响应其中1个描述--用的少@ApiResponses:HTTP响应整体描述--用的少@ApiIgnore:使用该注解忽略这个API--用的少@ApiError:发生错误返回的信息--用的少@ApiImplicitParam:描述一个请求参数,可以配置参数的中文含义,还可以给参数设置默认值--用的少@ApiImplicitParams:描述由多个 @ApiImplicitParam 注解的参数组成的请求参数列表--用的少
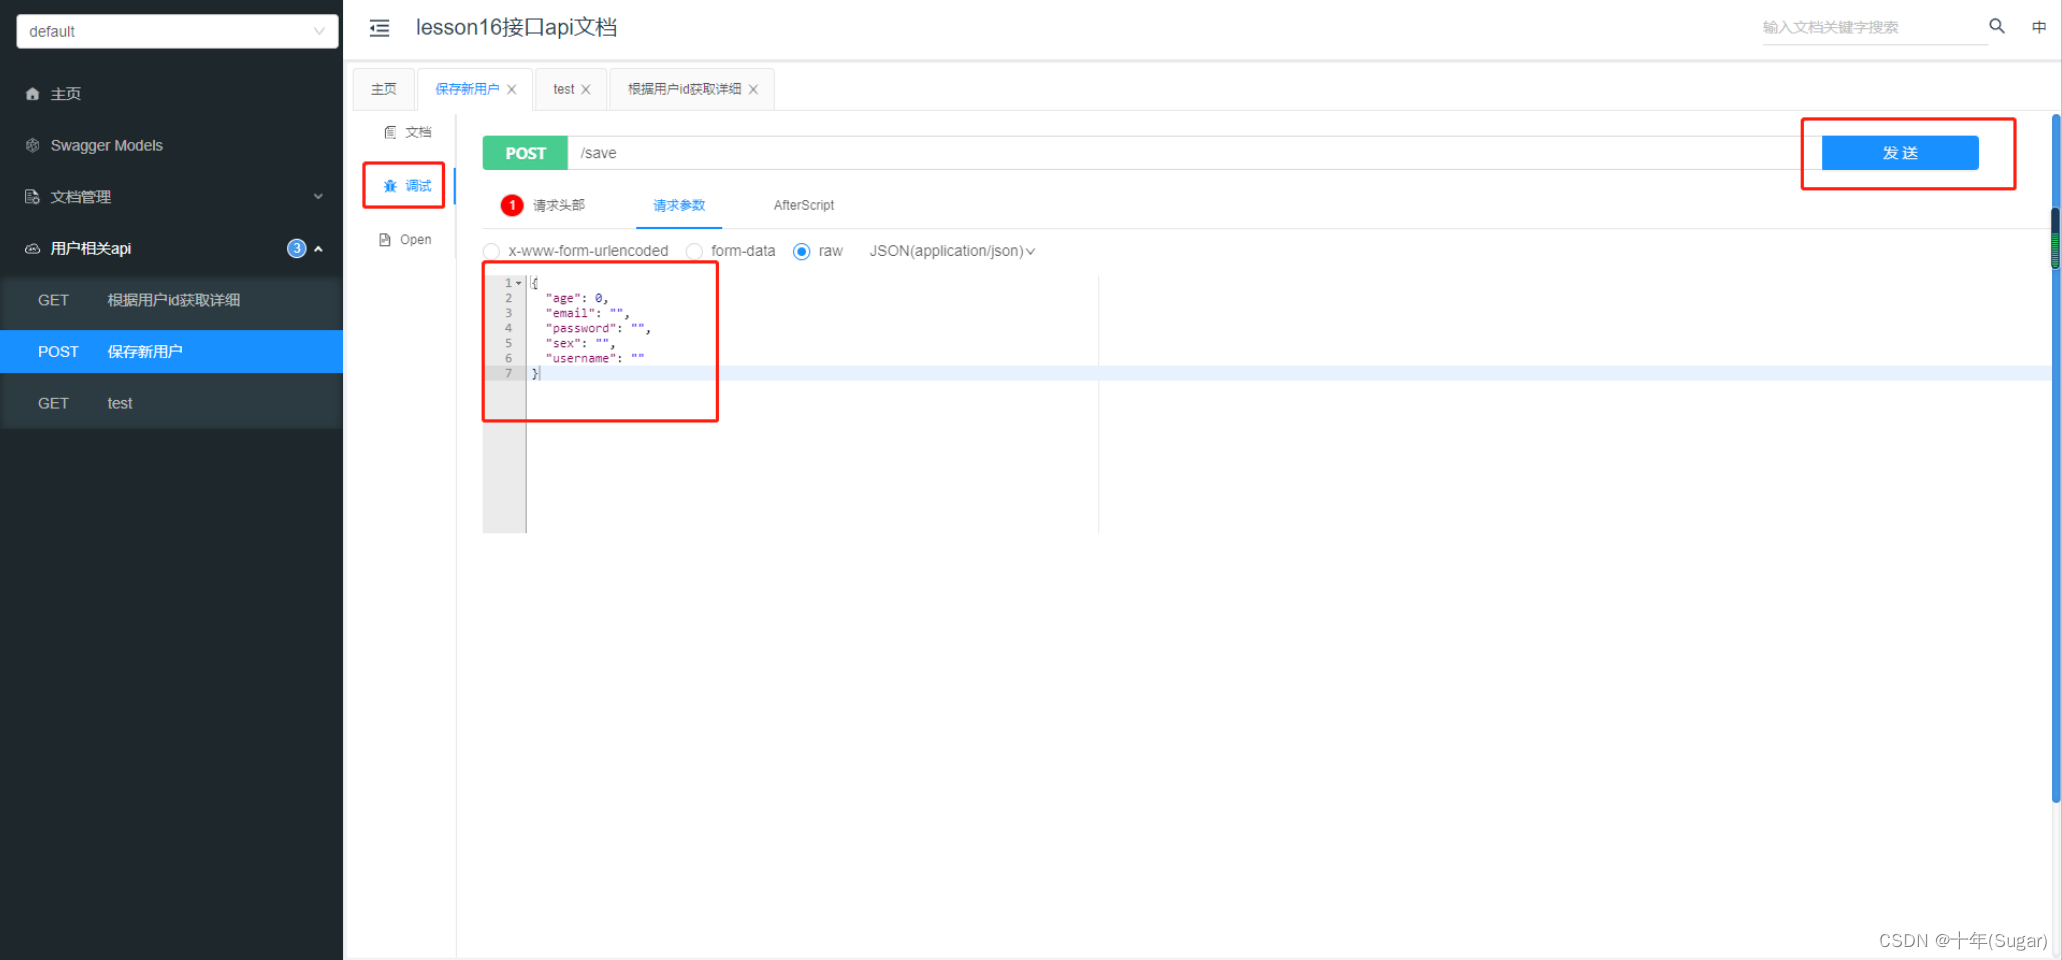
三.看文档显示结果
配置完毕后打开浏览器,输入 http://localhost:8080/doc.html
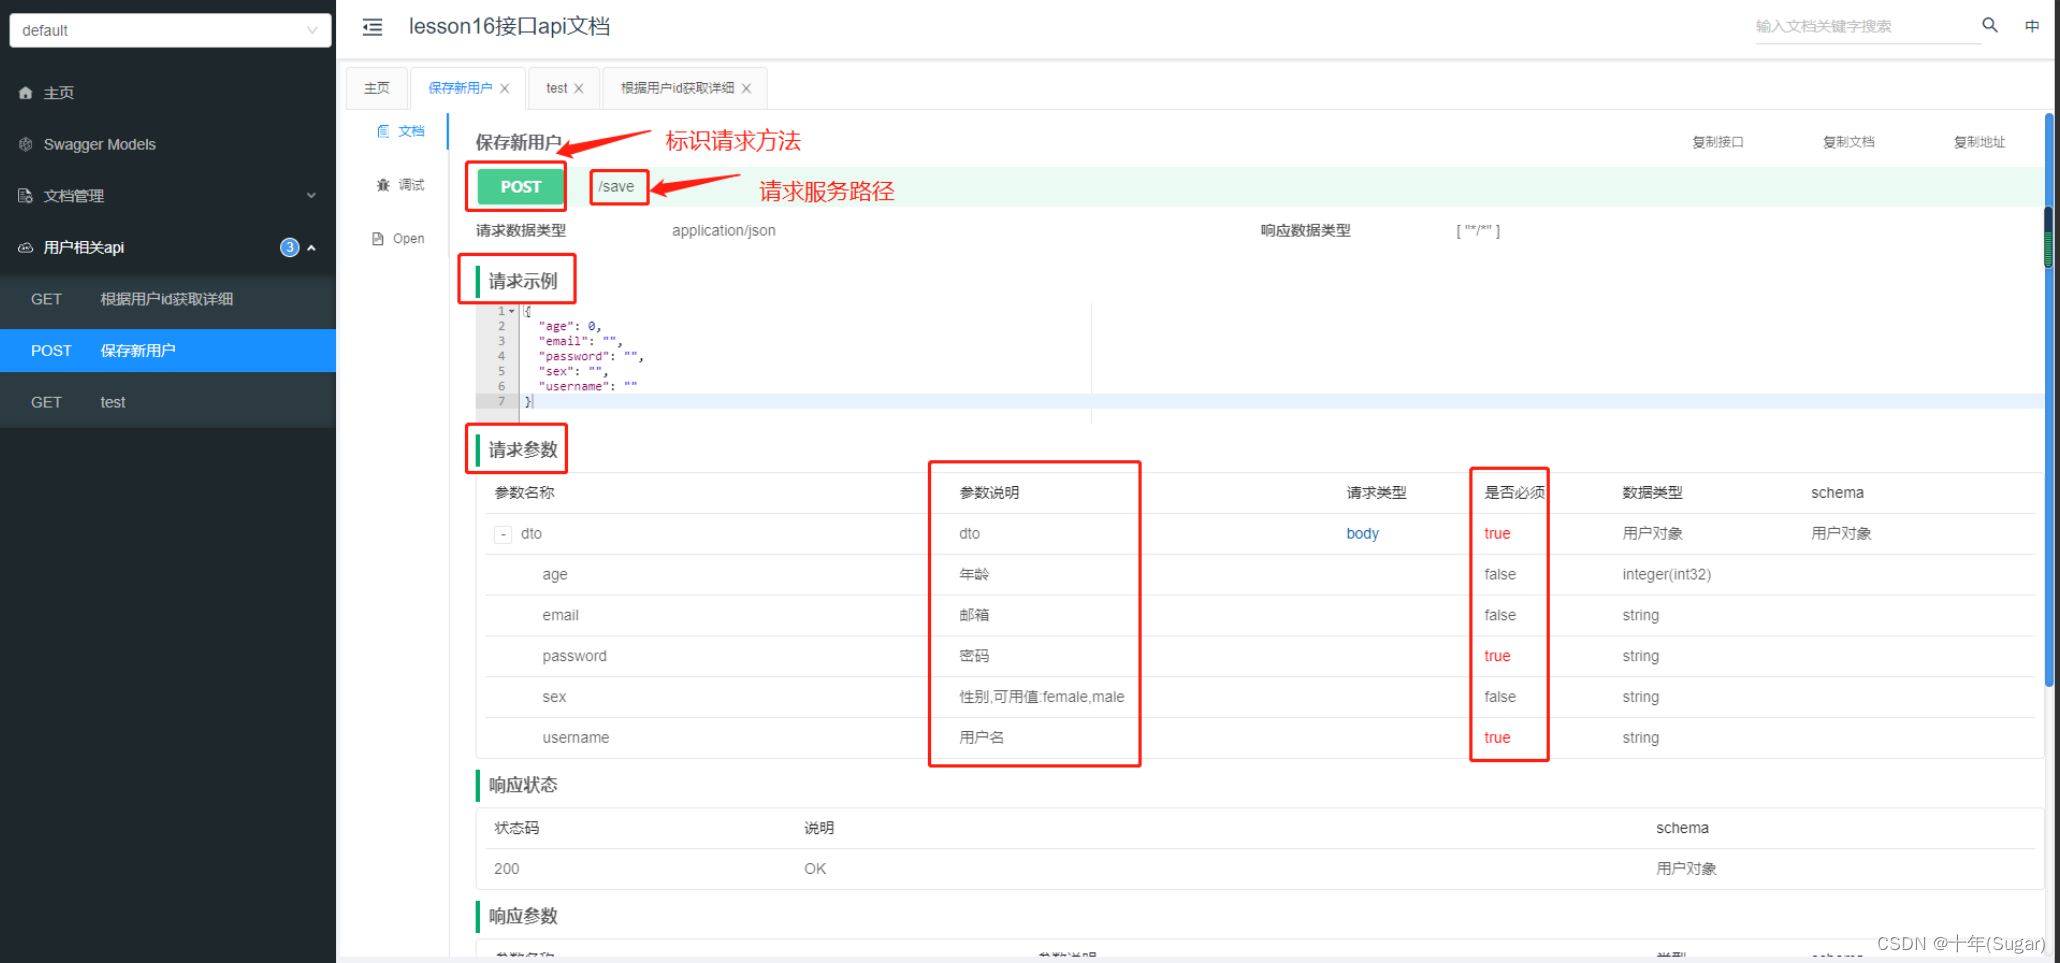
这个ui界面中可用的信息非常多,甚至,你可以在还可以在页面请求后台调试代码


 被折叠的 条评论
为什么被折叠?
被折叠的 条评论
为什么被折叠?
 到【灌水乐园】发言


