


目录
前言
Squid 主要提供缓存加速、应用层过滤控制的功能。
一、缓存代理概述
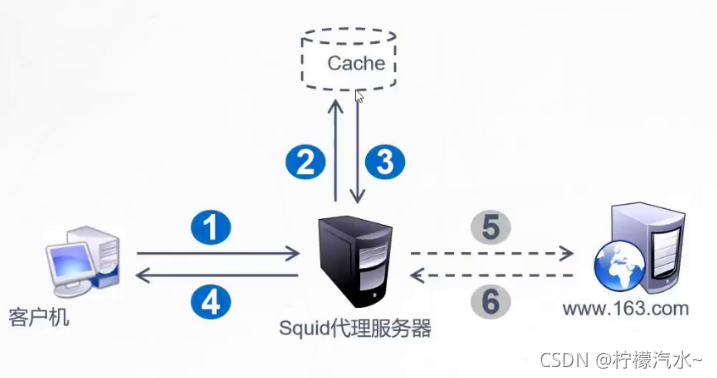
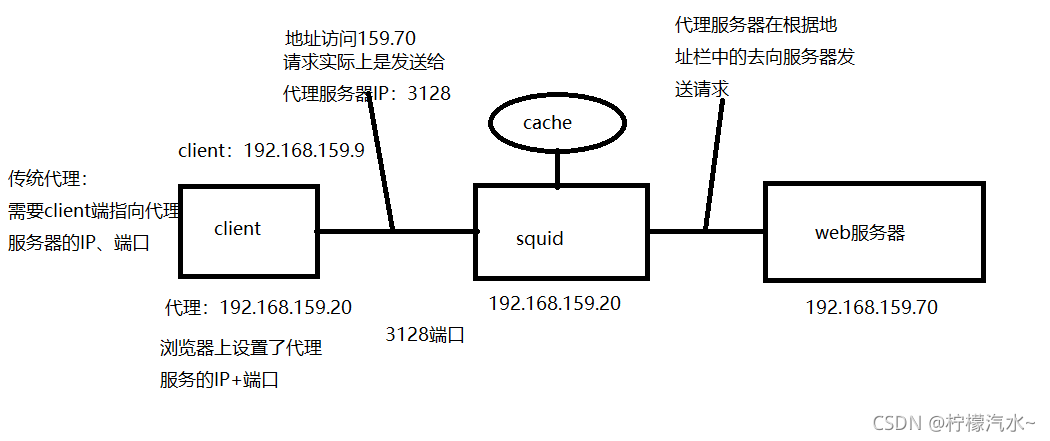
1、代理的工作机制
代替客户机向网站请求数据,从而可以隐藏用户的真实IP地址。
将获得的网页数据(静态 Web 元素)保存到缓存中并发送给客户机,以便下次请求相同的数据时快速响应。
2、代理的基本类型
传统代理:适用于Internet,需明确指定服务端
透明代理:客户机不需指定代理服务器的地址和端口,而是通过默认路由、防火墙策略将Web访问重定向给代理服务器处理
反向代理:如果 Squid 反向代理服务器中缓存了该请求的资源,则将该请求的资源直接返回给客户端;否则反向代理服务器将向后台的 WEB 服务器请求资源,然后将请求的应答返回给客户端,同时也将该应答缓存(静态)在本地,供下一个请求者使用。
3、使用代理的好处
提高Web访问速度
隐藏客户机的真实lP地址
二、squid代理安装
1、编译安装Squid
1-1、安装依赖环境
systemctl stop firewalld
systemctl disable firewalld
setenforce 0
#关闭防火墙(关闭开启自启)及安装访问控制机制
[root@squid ~]# yum -y install gcc gcc-c++ make
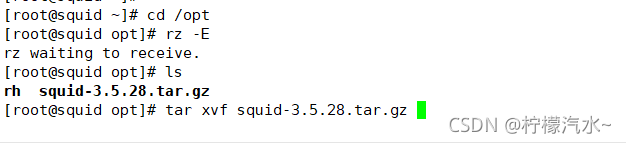
[root@squid ~]# cd /opt 上传软件包squid-3.5.27.tar到/opt目录下
[root@squid opt]# rz -E
rz waiting to receive.
[root@squid opt]# ls
rh squid-3.5.28.tar.gz
[root@squid opt]# tar xvf squid-3.5.28.tar.gz
[root@squid /]# cd /opt/squid-3.5.28/
[root@squid squid-3.5.28]# ./configure --prefix=/usr/local/squid --sysconfdir=/etc --
enable-arp-acl --enable-linux-netfilter --enable-linux-tproxy --enable-async-io=100 --enable-err-language="Simplify_Chinese" --enable-underscore --enable-poll --enable-gnuregex
上述脚本解释
./configure --prefix=/usr/local/squid ##安装目录
--sysconfdir=/etc/ ##单独将配置文件修改到/etc目录下
--enable-arp-acl ##可在ACL中设置通过MAC地址进行管理,防止IP欺骗
--enable-linux-netfilter ##使用内核过滤
--enable-linux-tproxy ##支持透明模式
--enable-async-io=100 ##异步I/O,提升储存性能,值可修改
--enable-err-language="Simplify_Chinese" ##错误信息的显示语言
--enable-underscore ##允许URL中有下划线
--enable-poll ##使用Poll()模式,提升性能
--enable-gnuregex ##使用GNU正则表达式
[root@squid squid-3.5.28]# make && make install
[root@squid squid-3.5.28]# ln -s /usr/local/squid/sbin/* /usr/local/sbin ##创建链接文件,优化路径
[root@squid squid-3.5.28]# useradd -M -s /sbin/nologin squid ##创建程序用户、组
[root@squid squid-3.5.28]# chown -R squid:squid /usr/local/squid/var/ ##改变目录属主

2、修改Squid的配置文件
[root@squid squid-3.5.28]# vim /etc/squid.conf
-----56行--插入------
55 # And finally deny all other access to this proxy
56 http_access allow all  #放在http_access deny all 之前,允许任意客户机使用代理服务,控制规则自上而下匹配
57 http_access deny all
58
-----61行--插入------
59 # Squid normally listens to port 3128
60 http_port 3128  #用来指定代理服务监听的地址和端口(默认的端口号为3128)
61 cache_effective_user squid  #添加,指定程序用户,用来设置初始化、运行时缓存的账号,否则启动不成功
62 cache_effective_group squid  #添加,指定账号基本组
63 coredump_dir /usr/local/squid/var/cache/squid  #指定缓存文件目录

[root@squid ~]# squid -k parse  ##检查配置文件
[root@squid ~]# squid –k rec    ##重新加载配置文件
[root@squid ~]# squid -zX       ##初始化缓存目录
[root@squid ~]# squid           ##启动squid服务
[root@squid ~]# netstat -anpt | grep squid  ##确认squid服务处于正常监听状态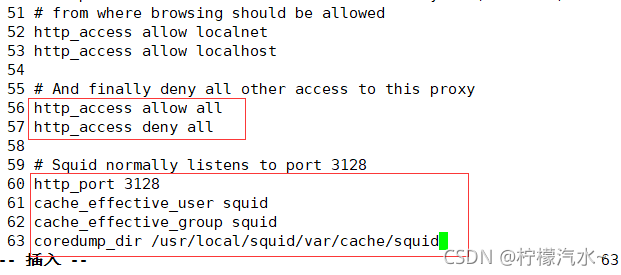

3、编写Squid服务脚本
[root@squid ~]# vi /etc/init.d/squid
#!/bin/bash
#chkconfig: 35 90 25
#config: /etc/squid.conf
#pidfile: /usr/local/squid/var/run/squid.pid
#Description: Squid - Internet Object Cache

PID="/usr/local/squid/var/run/squid.pid"
CONF="/etc/squid.conf"
CMD="/usr/local/squid/sbin/squid"

case "$1" in
        start)
                netstat -utpln | grep squid &>/dev/null
                if [ $? -eq 0 ]
                        then
                                echo "Squid is running"
                else
                        $CMD
                fi
        ;;
        stop)
                $CMD -k kill &>/dev/null
                rm -rf $PID &>/dev/null
        ;;
        status)
                [ -f $PID ] &>/dev/null
                        if [ $? -eq 0 ]
                          then
                                netstat -utpln | grep squid
                        else
                                echo "Squid is not running"
                        fi
	;;
        restart)
                $0 stop &>/dev/null
                echo "正在关闭Squid..."
                $0 start &>/dev/null
                echo "正在启动Squid..."
        ;;
        reload)
                $CMD -k reconfigure
        ;;
        check)
                $CMD -k parse
        ;;
        *)
                echo "用法:{start | stop | restart | reload | check | status}"
esac


[root@squid ~]# chmod +x /etc/init.d/squid
[root@squid ~]# chkconfig --add squid
[root@squid ~]# chkconfig squid on
[root@squid ~]# service squid restart     ##测试正常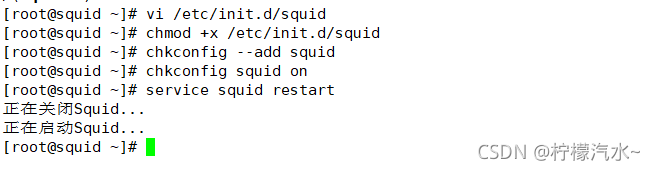
三、搭建传统代理
1、squid服务器
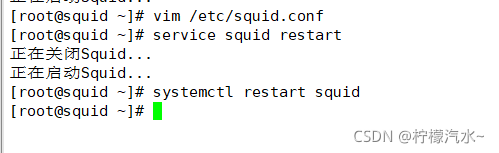
[root@squid ~]# vim /etc/squid.conf

#64行插入
cache_mem 64 MB
#指定缓存功能所使用的内存空间大小,便于保持访问较频繁的WEB对象,容量最好为4的倍数,单位为MB,建议设为物理内存的1/4
reply_body_max_size 10 MB
#允许用户下载的最大文件大小,以字节为单位,当下载超过指定大小的Web对象时,浏览器的报错页面中会出现“请求或访问太大”的提示默认设置0表示不进行限制
maximum_object_size 4096 KB
#允许保存到缓存空间的最大对象大小,以KB为单位,超过大小限制的文件将不被缓存,而是直接转发给用户


[root@squid ~]# service squid restart
正在关闭Squid...
正在启动Squid...
[root@squid ~]# systemctl restart squid

#修改防火墙规则
[root@squid ~]# systemctl start firewalld.service
[root@squid ~]# iptables -F
[root@squid ~]# iptables -I INPUT -p tcp --dport 3128 -j ACCEPT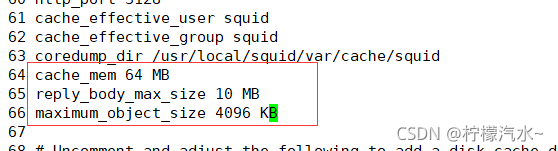

2、Web1配置
[root@web1 ~]# systemctl stop firewalld.service
[root@web1 ~]# setenforce 0
[root@web1 ~]# yum -y install httpd
[root@web1 ~]# systemctl start httpd
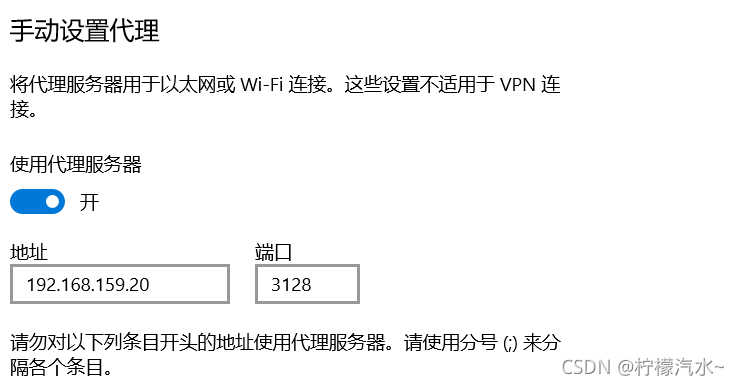
[root@web1 ~]# netstat -natp | grep 803、客户端配置(添加代理)
谷歌浏览器:设置--》高级--》系统--》打开代理设置--》设置代理
4、使用win10访问 web1 IP
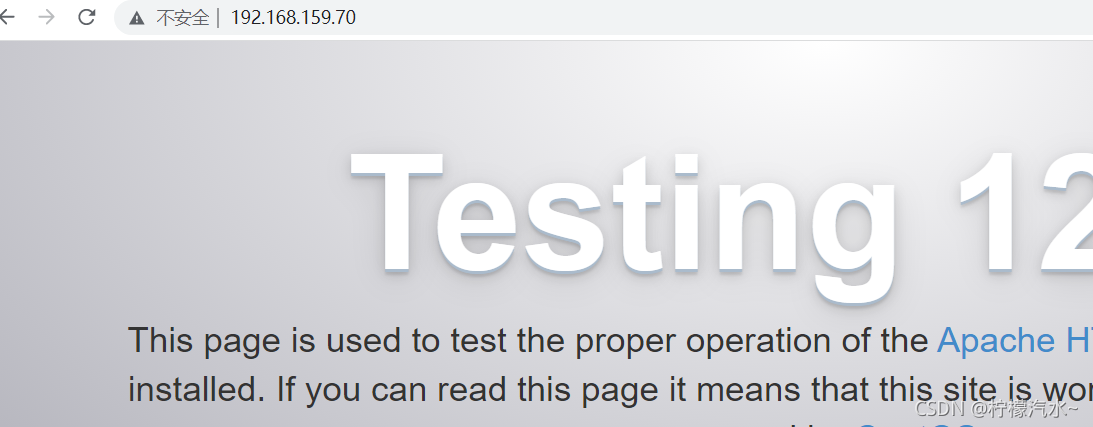
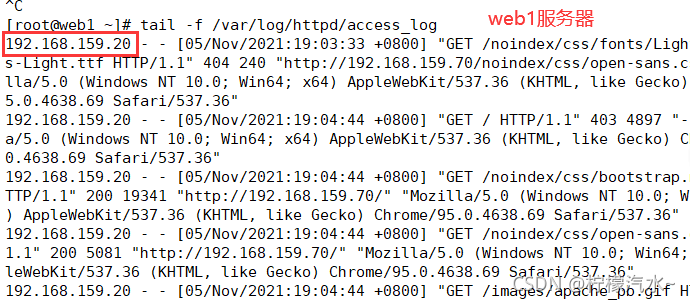
5、web1 服务器查看访问日志信息
#动态查看访问日志,观察来访IP
[root@web1 ~]# tail -f /var/log/httpd/access_log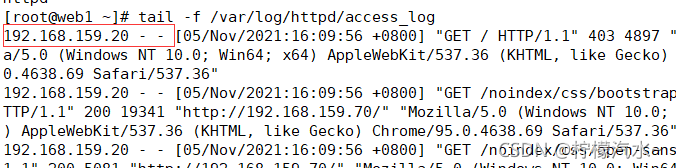
四、搭建透明代理
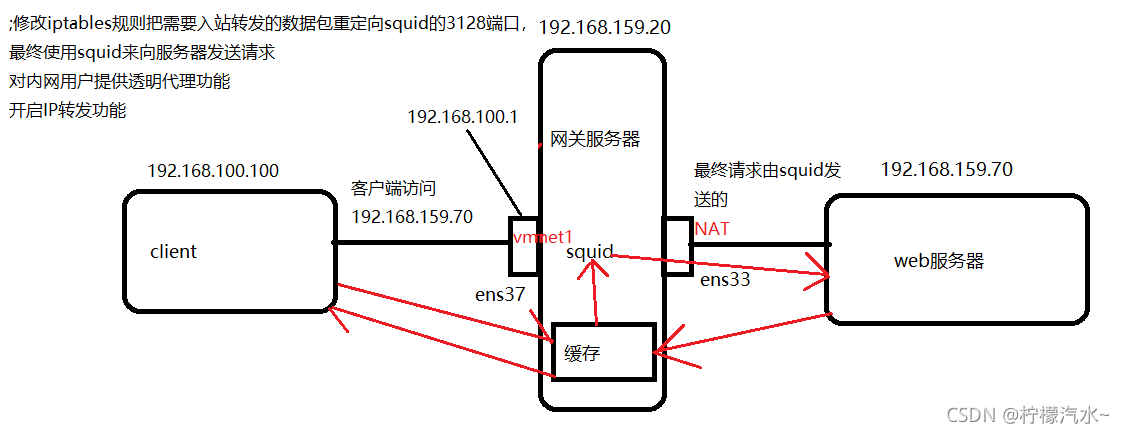
1、环境配置
| 主机 | 主机名 | 操作系统 | IP 地址 | 主要软件 |
| Squid-Server | CentOS 7-5 | CentOS 7 | ens33:192.168.159.20、ens37:192.168.100.1 | squid-3.5.28.tar.gz |
| Web1 | CentOS 7-5 | CentOS 7 | 192.168.159.70 | httpd |
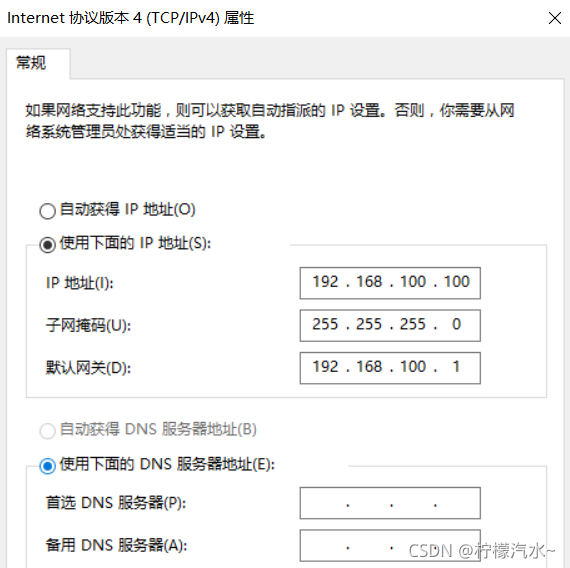
| 客户端 | Win10 | Windows | 192.168.100.100 |
squid服务器:

[root@squid ~]# systemctl stop firewalld.service
[root@squid ~]# systemctl disable firewalld.service
[root@squid ~]# yum install iptables* -y

[root@squid ~]# systemctl start iptables
[root@squid ~]# systemctl status iptables
2、客户端配置
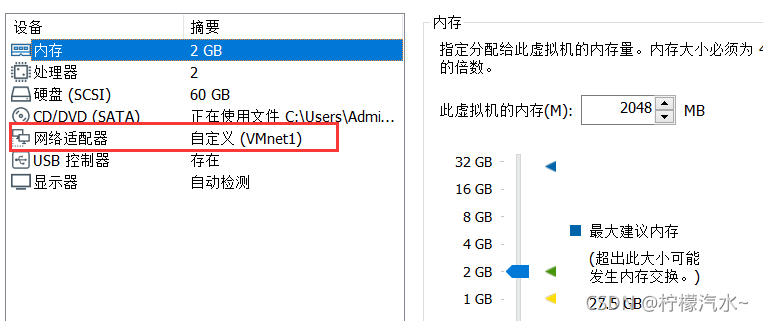
3、Squid服务器配置
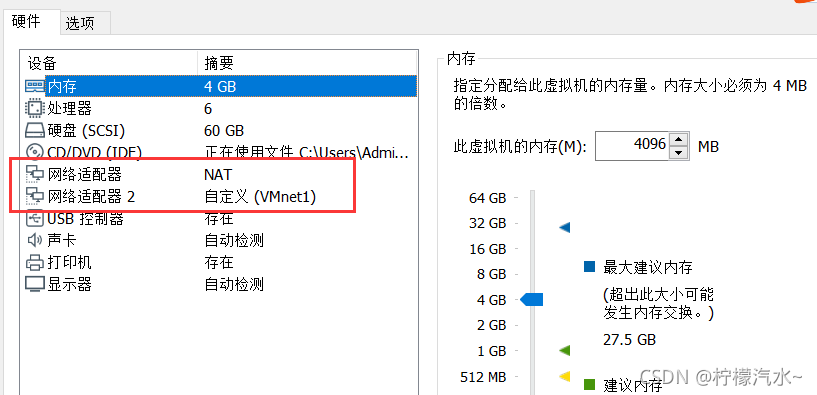
3-1、添加一块网卡37,并设置为vmnet1(仅主机)
3-2、配置
[root@squid ~]# cd /etc/sysconfig/network-scripts/
[root@squid network-scripts]# cp ifcfg-ens33 ifcfg-ens37
[root@squid network-scripts]# vim ifcfg-ens37
[root@squid network-scripts]# systemctl restart network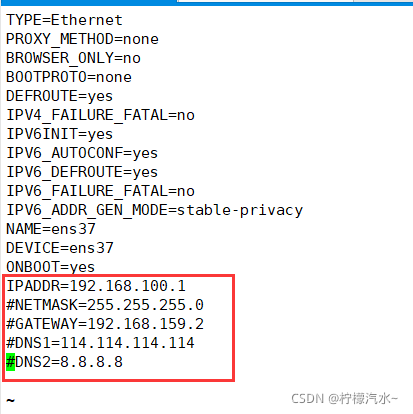
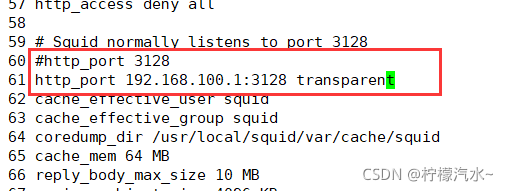
[root@squid network-scripts]# vim /etc/squid.conf
#http_port 192.168.100.1:3128
#60行修改添加提供内网服务的IP地址,和支持透明代理选项 transparent
http_port 192.168.100.1:3128 transparent


[root@squid network-scripts]# systemctl restart squid
[root@squid network-scripts]# service squid restart
正在关闭Squid...
正在启动Squid...


[root@squid network-scripts]# echo 'net.ipv4.ip_forward = 1' >> /etc/sysctl.conf
[root@squid network-scripts]# sysctl -p
net.ipv4.ip_forward = 1

#添加防火墙规则(将来源为100网段:80/443端口的流量重定向到3128端口)
[root@squid network-scripts]# iptables -t nat -I PREROUTING -i ens37 -s 192.168.100.0/24 -p tcp --dport 80 -j REDIRECT --to 3128
[root@squid network-scripts]# iptables -t nat -I PREROUTING -i ens37 -s 192.168.100.0/24 -p tcp --dport 443 -j REDIRECT --to 3128

#若进行重启,则需要配置以下规则
[root@squid network-scripts]# iptables -I INPUT -p tcp --dport 3128 -j ACCEPT


iptables -vnL

4、客户端关闭代理
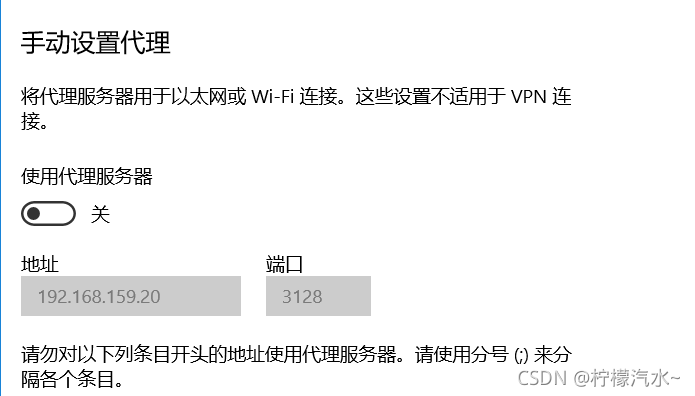
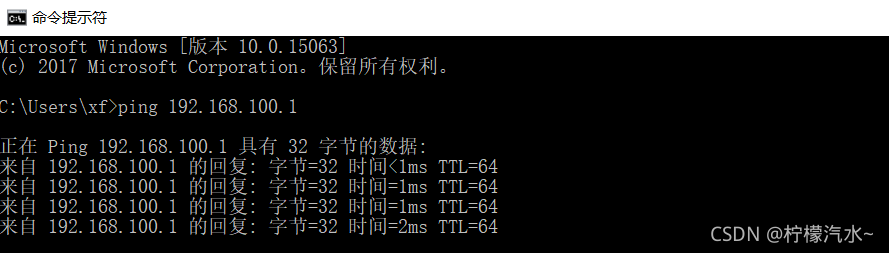
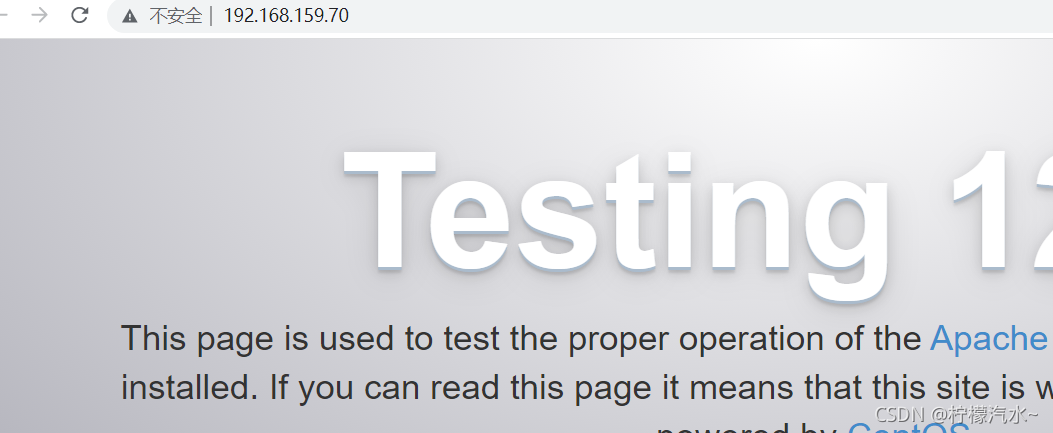
5、验证
总结
Squid是一个缓存Internet数据的一个软件,它接收用户的下载申请,并自动处理所下载的数据。也就是说,当一个用户想要下载一个主页时,它向Squid发出一个申请,要Squid替它下载,然后Squid 连接所申请网站并请求该主页,接着把该主页传给用户同时保留一个备份,当别的用户申请同样的页面时,Squid把保存的备份立即传给用户,减少了向Internet提交重复的Web请求的过程,提高了用户下载网页的速度,隐藏了客户机的真实IP。
代理模式下,始终是要用squid向web服务器发送请求
传统模式:事先就会在浏览器设置代理的IP和端口
透明模式:不需要事先设置,只需要直接访问web服务器即可,但是在经过squid作为网关的时候会被iptables规则重定向到squid的3128端口,最终仍会被squid进行转发


 664
664

 被折叠的 条评论
为什么被折叠?
被折叠的 条评论
为什么被折叠?
 到【灌水乐园】发言


