Stable Diffusion极致真实人像·新

时隔两年,又入了SD的坑。之前的图(Soultonic:Stable diffusion极致真实人像)虽然现在也还能看,但毕竟两年过去了,总得有点升级吧,于是就有了这篇。

img

UniPC

img

DPM++ 3M SDE

img

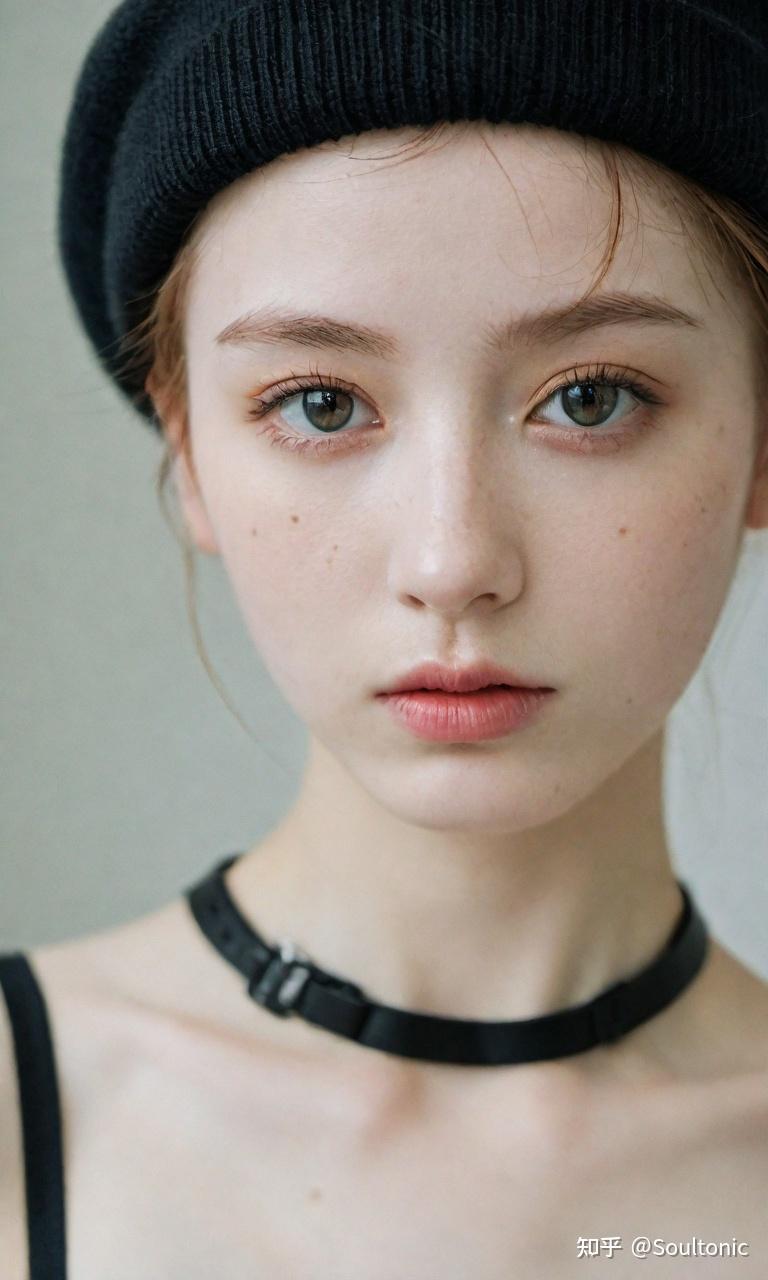
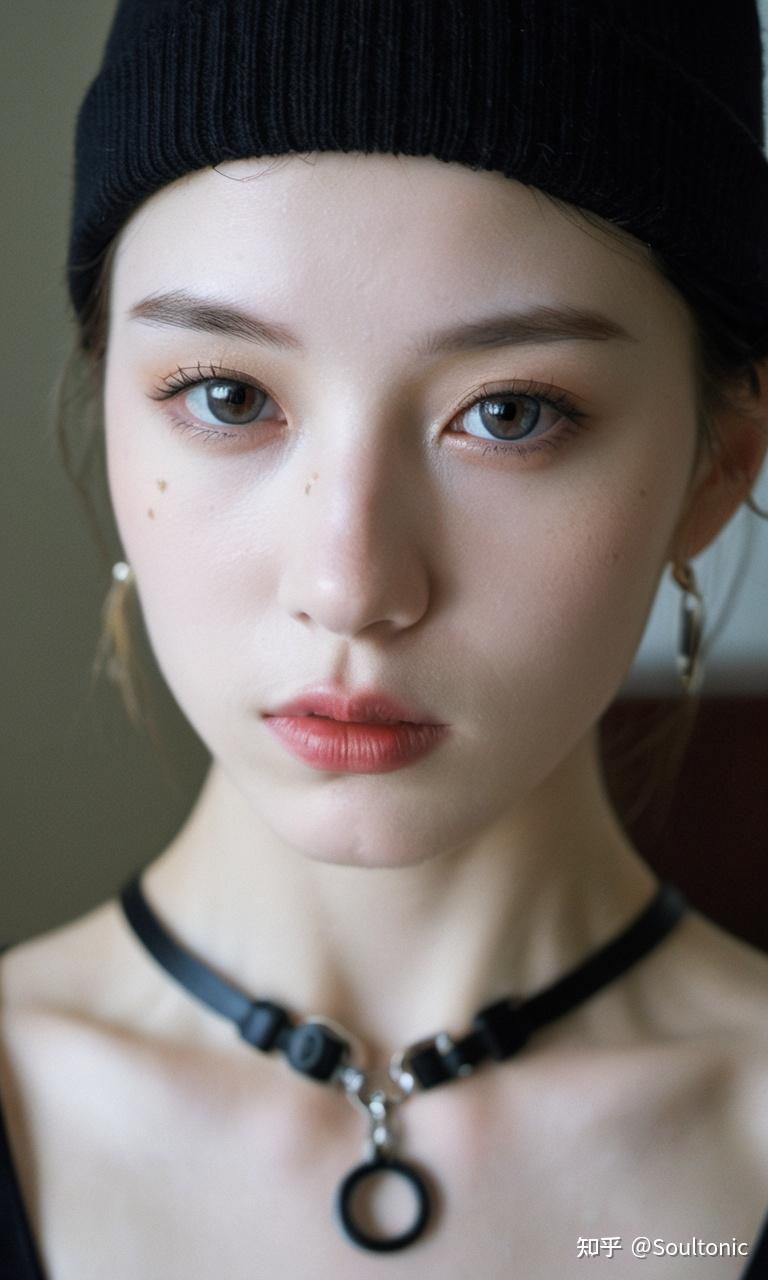
Checkpoint模型:xxmix9realisticsdxl_v10(c站上的)

**Lora模型:**之前用的胶片风lora的3.0版本(LEOSAM’s FilmGirl 胶片风 LoRA–全新VELVIA版本-LoRA-LEOSAM是只兔狲-LiblibAI)

正提示词:xxmixgirl,Thorough, analog style, eye focus, highest quality, (highly detailed skin), photo of a exquisitely beautiful pale skin punk Dutch girl, 21yo, (wearing harness, and beanie), perfect face, alluring eyes, [seductive makeup], skin pores, (piercing:0.5), indoor, messy bedroom, (bokeh:0.6), sharp focus, dappled lighting, (backlighting:0.7), film grain, photographed on a Sony A7R IV, 18mm F/1.7 cine lens, (highly detailed, intricately detailed), 8k, HDR, seductively posing, front view, (uppper body:0.9) <lora:LEOSAM’s FilmGirl 胶片风 LoRA–全新VELVIA版本_3.0:1>

是模型作者的提示词,我只是加了个lora和调整了参数,不过用自己的提示词复现同等质量的图也不难。

负提示词:(worst quality, low quality, illustration, 3d, 2d, painting, cartoons, sketch), tooth, open mouth

Step:100(30就够了我只是有强迫症)

Sampler:DPM++ 3M SDE和UniPC

高分修复和后期处理没什么必要

Refiner 切换时机:0.01

宽高:768×1280

CFG:7

模型作者图种子:2516340429

我的图种子:3083935321

顺带一提,封面是DPM++ 2M SDE Heun,看了半天分辨不出来它跟3M哪个更好一点
纸上得来终觉浅,要学会跟着视频一起敲,要动手实操,才能将自己的所学运用到实际当中去,这时候可以搞点实战案例来学习。

在这里插入图片描述

这份完整版的AIGC全套学习资料已经上传优快云,朋友们如果需要可以微信扫描下方优快云官方认证二维码免费领取【保证100%免费

在这里插入图片描述

### 如何使用 Stable Diffusion 生成逼真的人像图片 为了利用 Stable Diffusion 创建更加真实的肖像画,除了基本的设置外,还需要调整特定参数并可能应用额外的技术来提升图像质量。 #### 设置环境与加载模型 首先确保已准备好运行环境,并按照标准流程导入必要的库和预训练模型[^2]: ```python from diffusers import StableDiffusionPipeline import torch model_id = "runwayml/stable-diffusion-v1-5" pipeline = StableDiffusionPipeline.from_pretrained(model_id, torch_dtype=torch.float16).to("cuda") ``` #### 调整采样步骤数量 对于希望获得更清晰、细节更为丰富的输出结果而言,适当增加 `num_inference_steps` 参数值是非常重要的。较低的数量可能会导致最终产物显得不够精细甚至有些模糊[^3]: ```python image = pipeline(prompt="A realistic portrait of a person", num_inference_steps=80).images[0] ``` #### 应用高分辨率策略 如果目标是生产超高解析度的作品,则可以在推理过程中加入放大处理或是直接指定较高的尺寸规格。不过需要注意的是这会显著延长计算时间并且消耗更多资源: ```python height = width = 768 # Higher resolution settings guidance_scale = 7.5 # Adjust guidance scale as needed for better quality portraits negative_prompt = "" # Optionally set negative prompts to avoid unwanted elements image = pipeline( prompt="A highly detailed and photorealistic portrait photo", height=height, width=width, num_inference_steps=100, guidance_scale=guidance_scale, negative_prompt=negative_prompt ).images[0] # Save the generated image locally image.save("./realistic_portrait.png") ``` 通过上述方法可以有效地提高由 Stable Diffusion 所创造出来的人物头像的真实感,在实际操作时可根据个人喜好微调各个选项直至满意为止。
评论
添加红包

请填写红包祝福语或标题

红包个数最小为10个

红包金额最低5元

当前余额3.43前往充值 >
需支付:10.00
成就一亿技术人!
领取后你会自动成为博主和红包主的粉丝 规则
hope_wisdom
发出的红包
实付
使用余额支付
点击重新获取
扫码支付
钱包余额 0

抵扣说明:

1.余额是钱包充值的虚拟货币,按照1:1的比例进行支付金额的抵扣。
2.余额无法直接购买下载,可以购买VIP、付费专栏及课程。

余额充值