


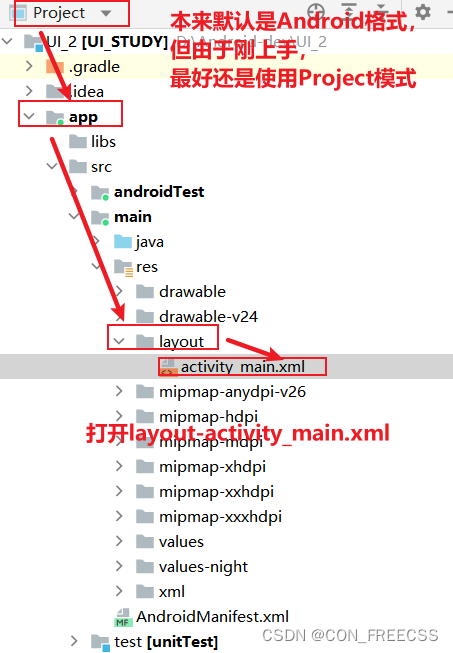
认识布局界面:activity_main.xml
认识类文件:MainActivity.java
一、改变布局的两种方式
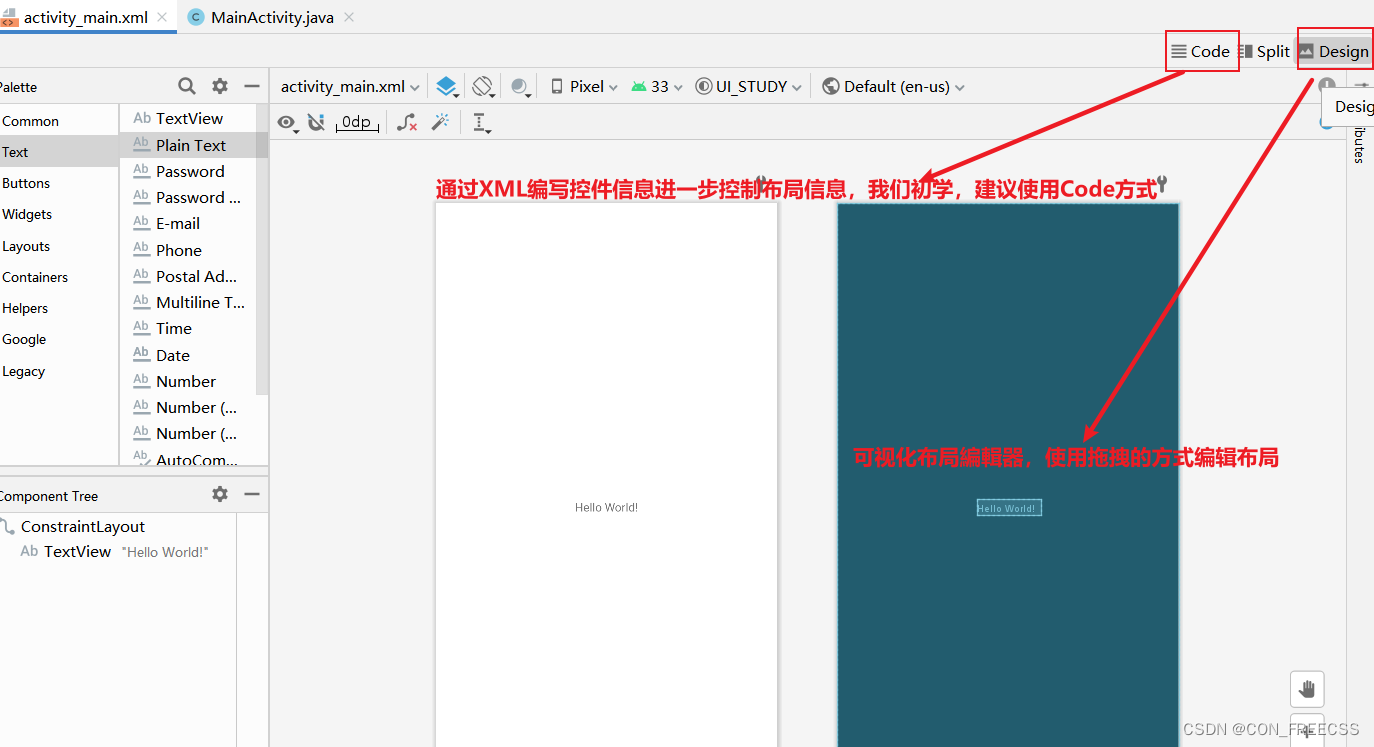
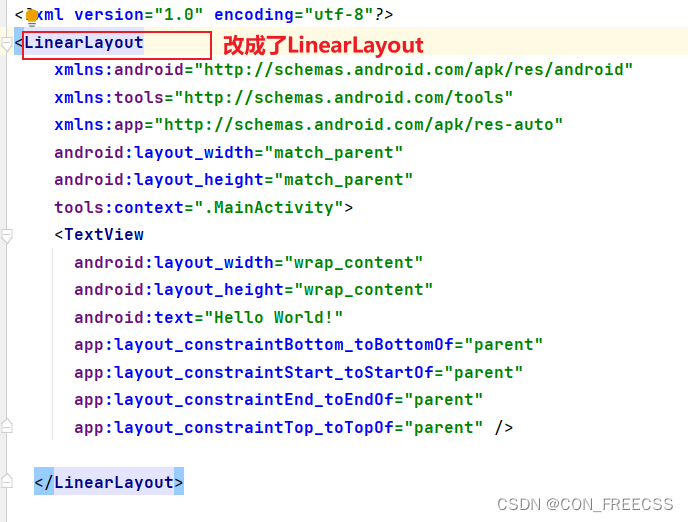
1、xml文件中添加控件
通过静态添加控件,进一步改变布局。可以在![]() design里面直接预览。
design里面直接预览。
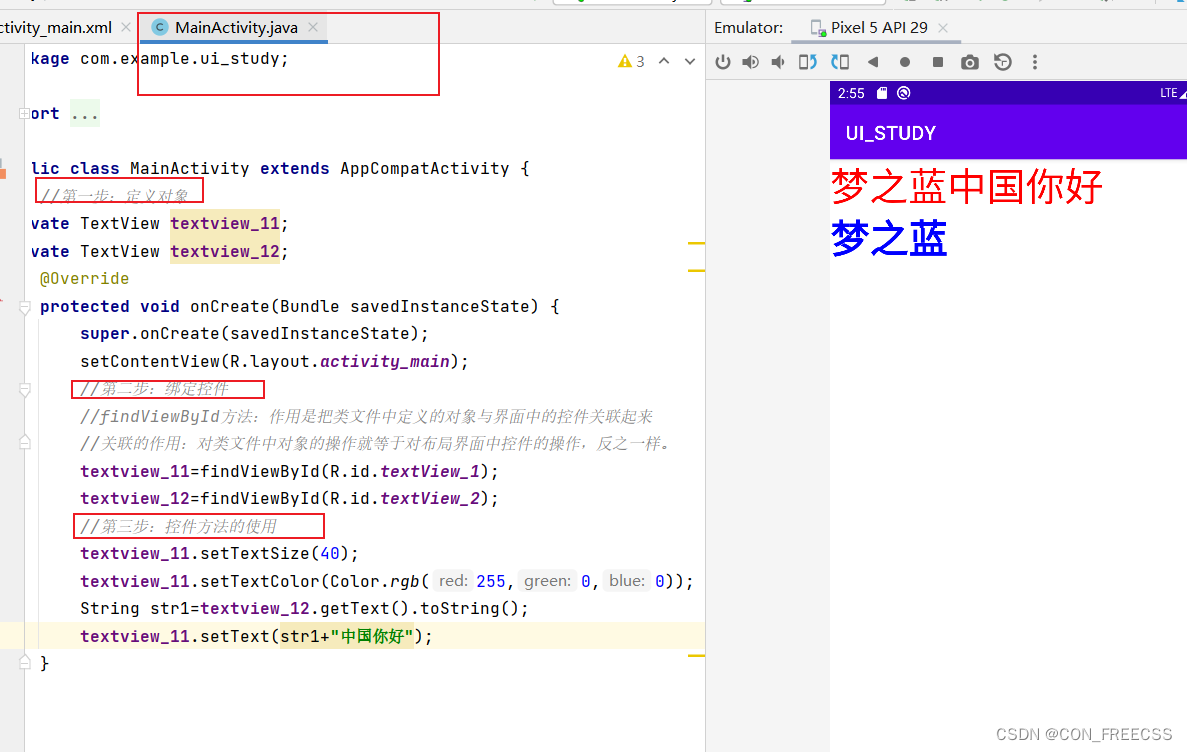
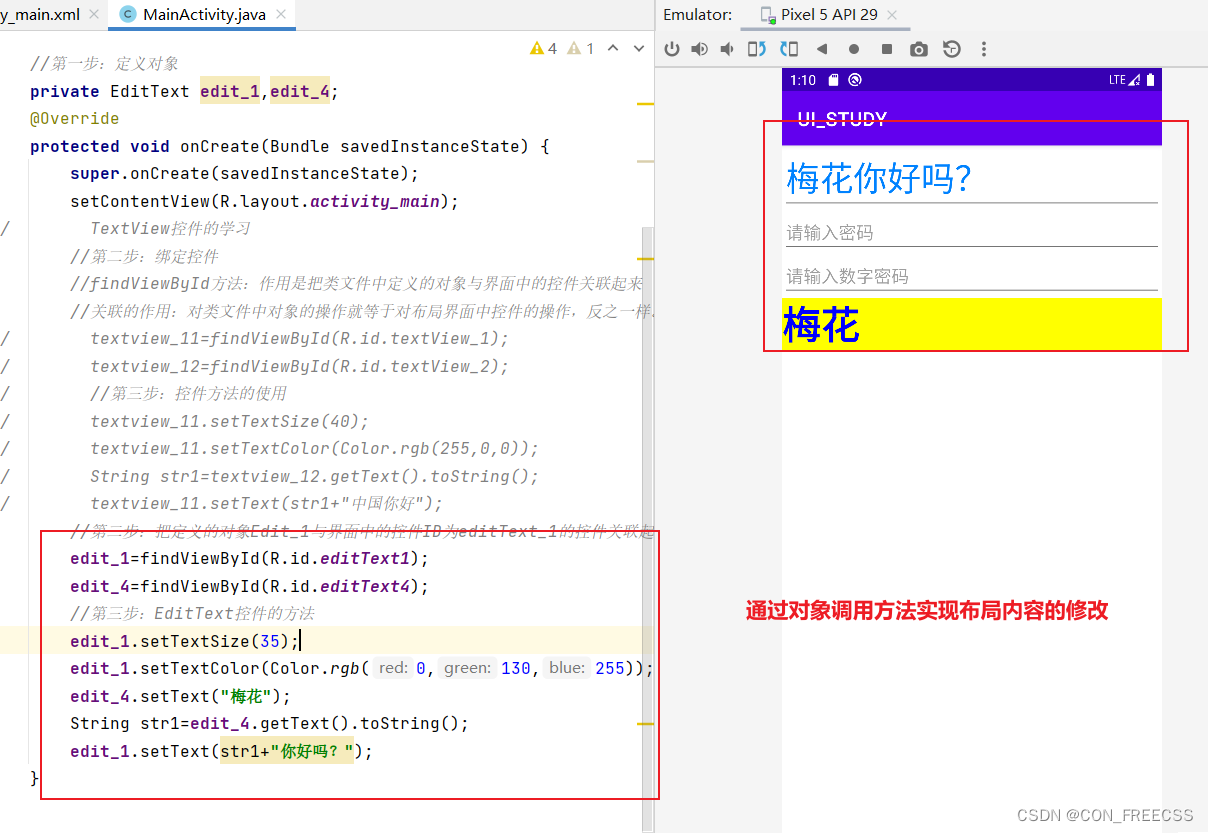
2.MainActivity.java代码中更改控件属性,动态改变布局
但是仍然需要先定义控件,才能使用代码修改属性,因为需要绑定控件。
步骤:
step1:定义对象;
step2:绑定控件--用类调用findViewById方法来绑定控件,绑定成功后对对象的操作就等同于对布局界面的控件操作一样。
二、常见控件使用及其属性介绍
1.TextView控件-
常见必须属性:通过添加属性达到用户需求。
android id:控件的唯一标识=“@+id/名称”
android:layout_width:控件的宽度=“match_parent”匹配父容器宽度/“wrap_parent”自适应宽度
android:layout_height:控件的高度=“数据相同,也可用dp”
ex:使用xml文件直接配置控件

ex:使用.java类文件动态控制控件
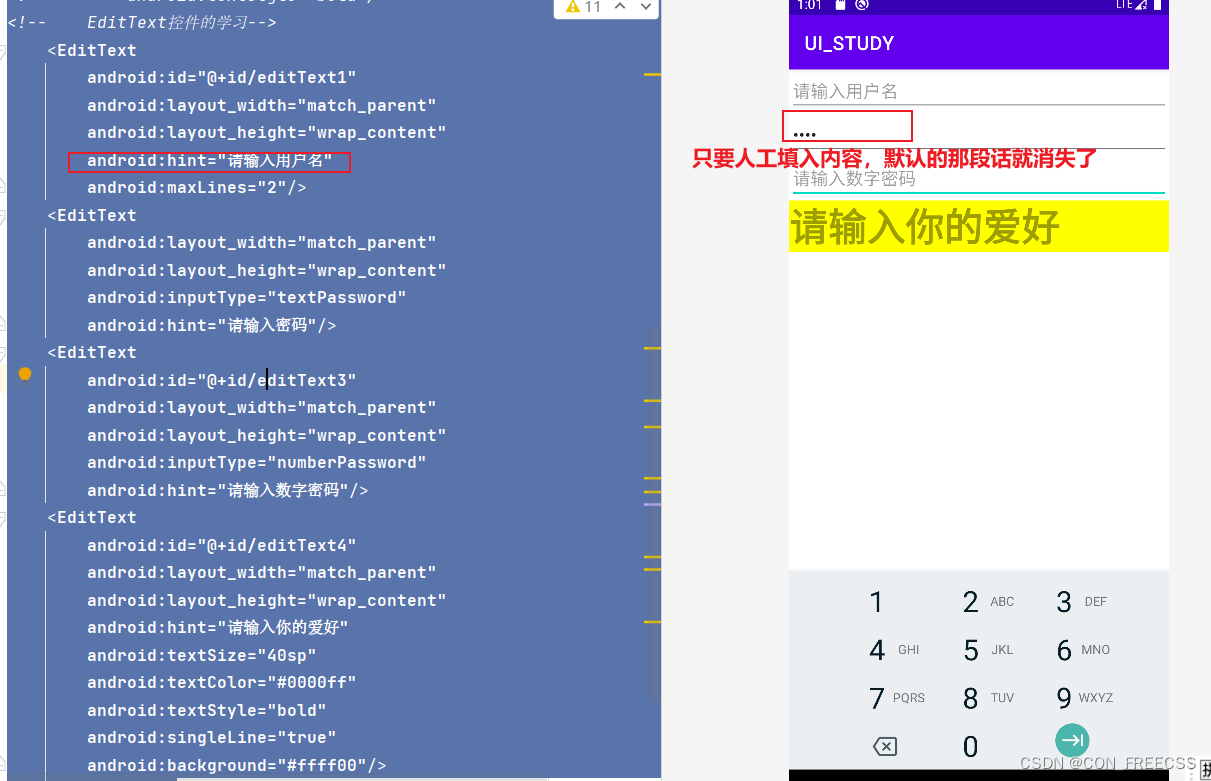
2.EditView控件:
ex:
 <EditText
        android:id="@+id/editText1"
        android:layout_width="match_parent"
        android:layout_height="wrap_content"
        android:hint="请输入用户名"
        android:maxLines="2"/>
    <EditText
        android:layout_width="match_parent"
        android:layout_height="wrap_content"
        android:inputType="textPassword"
        android:hint="请输入密码"/>
    <EditText
        android:id="@+id/editText3"
        android:layout_width="match_parent"
        android:layout_height="wrap_content"
        android:inputType="numberPassword"
        android:hint="请输入数字密码"/>
    <EditText
        android:id="@+id/editText4"
        android:layout_width="match_parent"
        android:layout_height="wrap_content"
        android:hint="请输入你的爱好"
        android:textSize="40sp"
        android:textColor="#0000ff"
        android:textStyle="bold"
        android:singleLine="true"
        android:background="#ffff00"/>
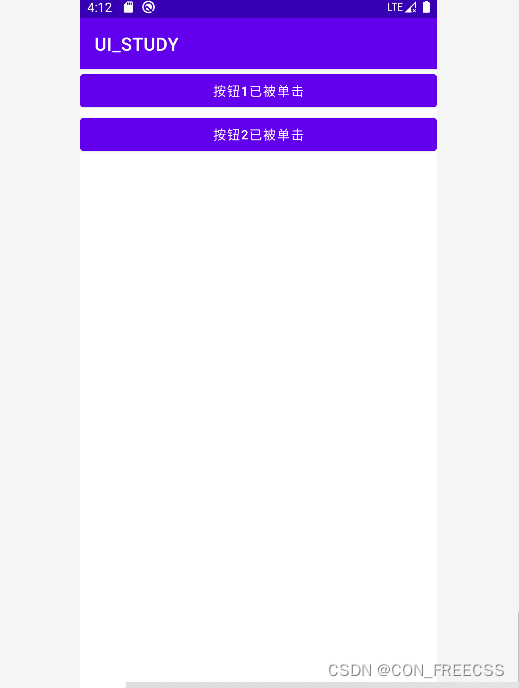
3.Button控件:
<!--    Button控件的学习-->
    <Button
        android:id="@+id/button_one"
        android:layout_width="match_parent"
        android:layout_height="wrap_content"
        android:text="按钮1"/>
    <Button
        android:id="@+id/button_two"
        android:layout_width="match_parent"
        android:layout_height="wrap_content"
        android:text="按钮2"/>
public class MainActivity extends AppCompatActivity  implements View.OnClickListener {
//    //第一步:定义对象
//private TextView textview_11;
//private TextView textview_12;

    //第一步:定义对象
//    private EditText edit_1,edit_4;

    //第一步:定义对象
    private Button btn_one,btn_two;
    @Override
    protected void onCreate(Bundle savedInstanceState) {
        super.onCreate(savedInstanceState);
        setContentView(R.layout.activity_main);
        btn_one = findViewById(R.id.button_one);
        btn_two = findViewById(R.id.button_two);
        btn_two.setOnClickListener(this);
        btn_one.setOnClickListener(new View.OnClickListener() {
            @Override
            public void onClick(View view) {
                btn_one.setText("按钮1已被单击");
            }
        });
    }
    @Override
    public void onClick(View view){
        switch (view.getId()){
            case R.id.button_two:
            btn_two.setText("按钮2已被单击");
            break;
            default:
            break;
            }
        }
运行结果如图:
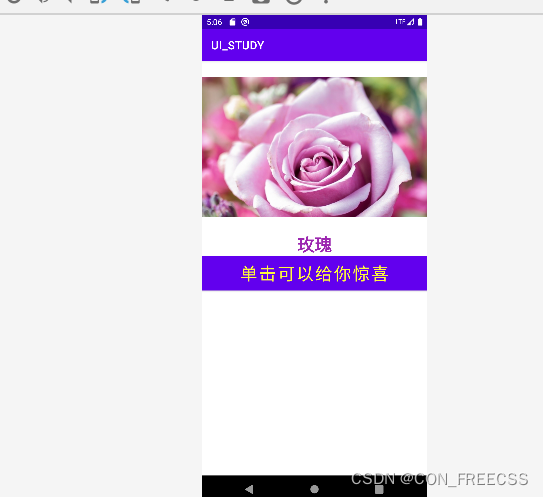
4.ImageView控件:
用于界面上展示图片的一个控件,可以让程序界面变得更加丰富多彩。
常见必须属性:android:src 数据:@drawable/rose
ex:
 <ImageView
        android:id="@+id/imageView_1"
        android:layout_width="wrap_content"
        android:layout_height="300dp"
        android:src="@drawable/rose"/>
    <TextView
        android:id="@+id/textView_1"
        android:layout_width="wrap_content"
        android:layout_height="wrap_content"
        android:text="玫瑰"
        android:textSize="30sp"
        android:textColor="#9C27B0"
        android:textStyle="bold"
        android:layout_gravity="center"/>
    <Button
        android:id="@+id/button_1"
        android:layout_width="match_parent"
        android:layout_height="wrap_content"
        android:text="单击可以给你惊喜"
        android:textSize="30sp"
        android:textColor="#FFFB3B"
        android:layout_gravity="center"
        android:background="#000000"/>
ex:
  private ImageView img_1;
    private TextView txt_1;
    private Button btn_1;

    //    @Override
    protected void onCreate(Bundle savedInstanceState) {
        super.onCreate(savedInstanceState);
        setContentView(R.layout.activity_main);
//第二步:绑定控件
        img_1 = findViewById(R.id.imageView_1);
        txt_1 = findViewById(R.id.textView_1);
        btn_1 = findViewById(R.id.button_1);
        //第三步:按钮单击事件
        btn_1.setOnClickListener(new View.OnClickListener() {
            @Override
            public void onClick(View view) {
                img_1.setImageResource(R.drawable.dongwu);
                txt_1.setText("动物");
            }
        });
运行效果如图所示:


 8824
8824

 被折叠的 条评论
为什么被折叠?
被折叠的 条评论
为什么被折叠?
 到【灌水乐园】发言


