


一,介绍:
1,前后端分离的特点
前后端分离是的前端与后端之间的职责更加明确
后台: 负责业务处理
前端: 负责显示逻辑
在这种情况下,前端和后端可以分别交付给专业的开发人员去做,所以是必须要定义前后端直接的对接 接口,否则各自为是则项目无法集成,这时就需要一个文档来定义统一的接口。
2,在没有swagger之前
在没有swagger之间,我们可以使用word,excel等功能来书写接口定义文档,但又有一个弊端,即: 在接口发送改变时需要及时的同步接口文档,否则实际的接口与接口文档不相符,则接口文件就失去了 作用,甚至会起到反作用。
3,swagger的作用
根据在代码中使用自定义的注解来生成接口文档,这个在前后端分离的项目中很重要。这样做的好处是 在开发接口时可以通过swagger将接口文档定义好,同时也方便以后的维护。
4,swagger的优点
号称时最流行的API框架

接口文档在线生成,避免同步的麻烦

可以支持在线对接口执行测试

支持多语言
二,基本使用:
1,SpringBoot集成Swagger 新建springboot项目
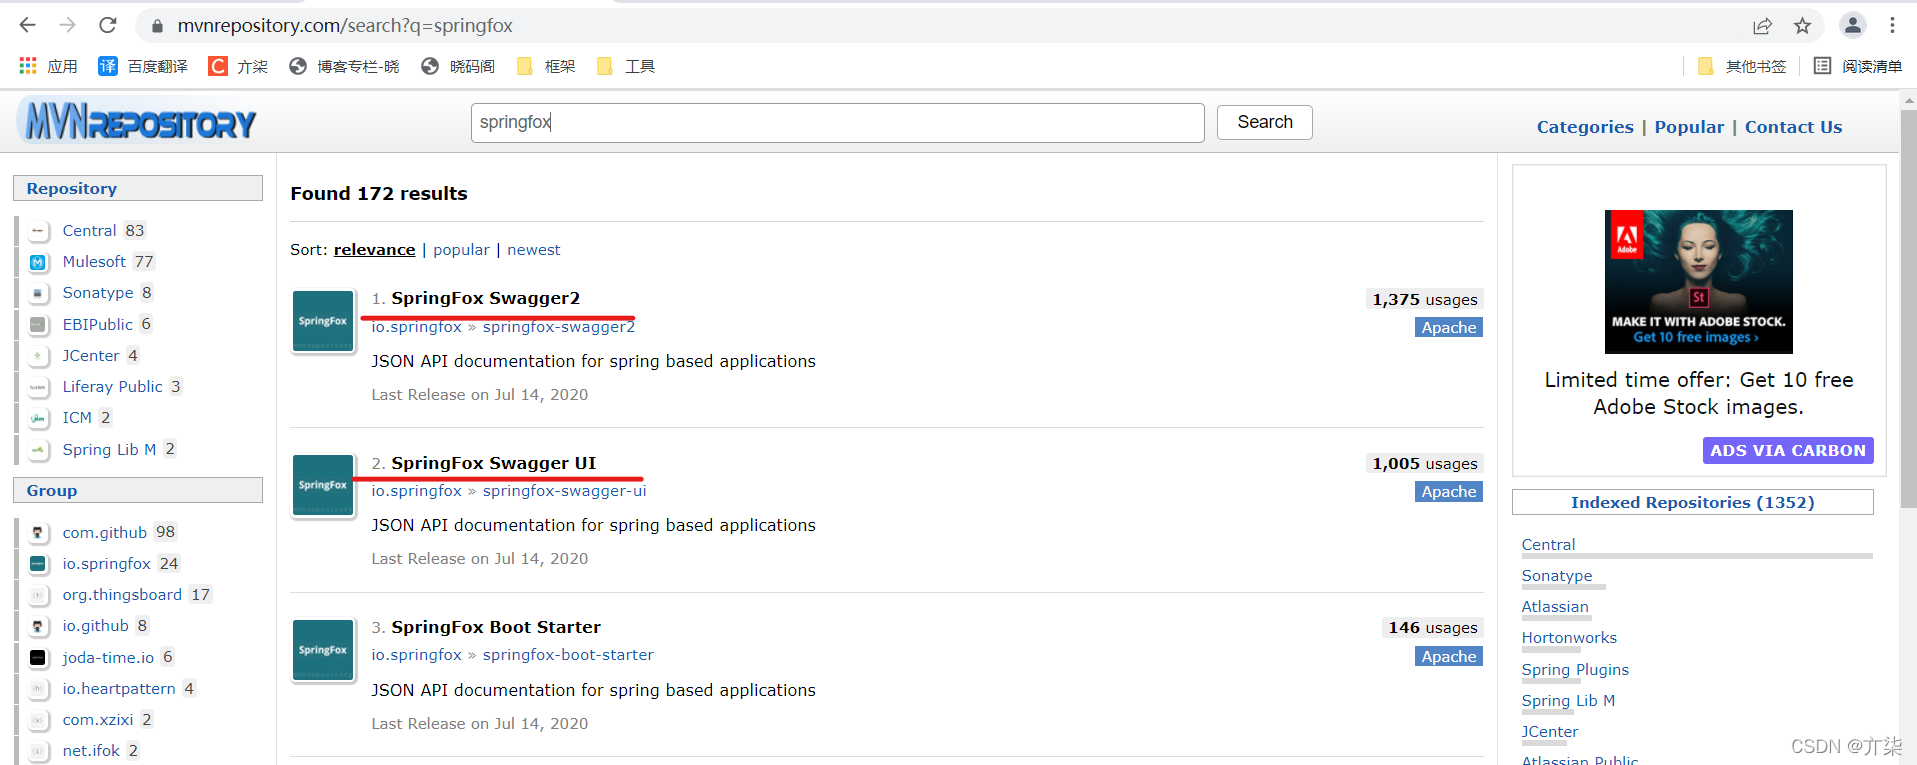
新建一个spirngboot项目,勾选组件时勾选Spring-Web2,导入Swagger依赖 查找springbox,在pom.xml中导入如下图标出的依赖
<!-- https://mvnrepository.com/artifact/io.springfox/springfox-swagger2 -->
<dependency>
<groupId>io.springfox</groupId>
<artifactId>springfox-swagger2</artifactId>
<version>2.9.2</version>
</dependency>
<!-- https://mvnrepository.com/artifact/io.springfox/springfox-swagger-ui -->
<dependency>
<groupId>io.springfox</groupId>
<artifactId>springfox-swagger-ui</artifactId>
<version>2.9.2</version>
</dependency>
3,编写swagger的配置类
package com.zking.mini_program.config;

import org.springframework.context.annotation.Bean;
import org.springframework.context.annotation.Configuration;
import springfox.documentation.builders.ApiInfoBuilder;
import springfox.documentation.builders.PathSelectors;
import springfox.documentation.builders.RequestHandlerSelectors;
import springfox.documentation.service.ApiInfo;
import springfox.documentation.spi.DocumentationType;
import springfox.documentation.spring.web.plugins.Docket;
import springfox.documentation.swagger2.annotations.EnableSwagger2;

/**
 * @author lgs
 *
 */
@Configuration
@EnableSwagger2
public class SwaggerConfig {
    @Bean
    public Docket createRestApi() {
        return new Docket(DocumentationType.SWAGGER_2).apiInfo(apiInfo())
                .select()
                .apis(RequestHandlerSelectors.basePackage("com.zking.mini_program.controller"))
                .paths(PathSelectors.any())
                .build();
    }

    private ApiInfo apiInfo() {
        return new ApiInfoBuilder()
                .title("Swagger--测试api")
                .description("SwaggerDemo API DOC")
                .version("1.0")
                .termsOfServiceUrl("https://blog.youkuaiyun.com/m0_58525944?spm=1011.2124.3001.5343")
                .build();
    }
}
注意: 该配置类需要根据自己的项目修改,如以下配置
paths 指定需要生成文档的url规则
title 文档标题
description 描述
4,开发一个controller用于测试
@RestController
@RequestMapping("/swaggerdemo")
public class HelloController {
@GetMapping("/hello")
public Object hello(@RequestBody User user) {
Map<String, Object> map = new HashMap<String, Object>();
map.put("code", 1);
map.put("msg", "操作成功");
return map;
}
}
5,启动服务,验证集成效果
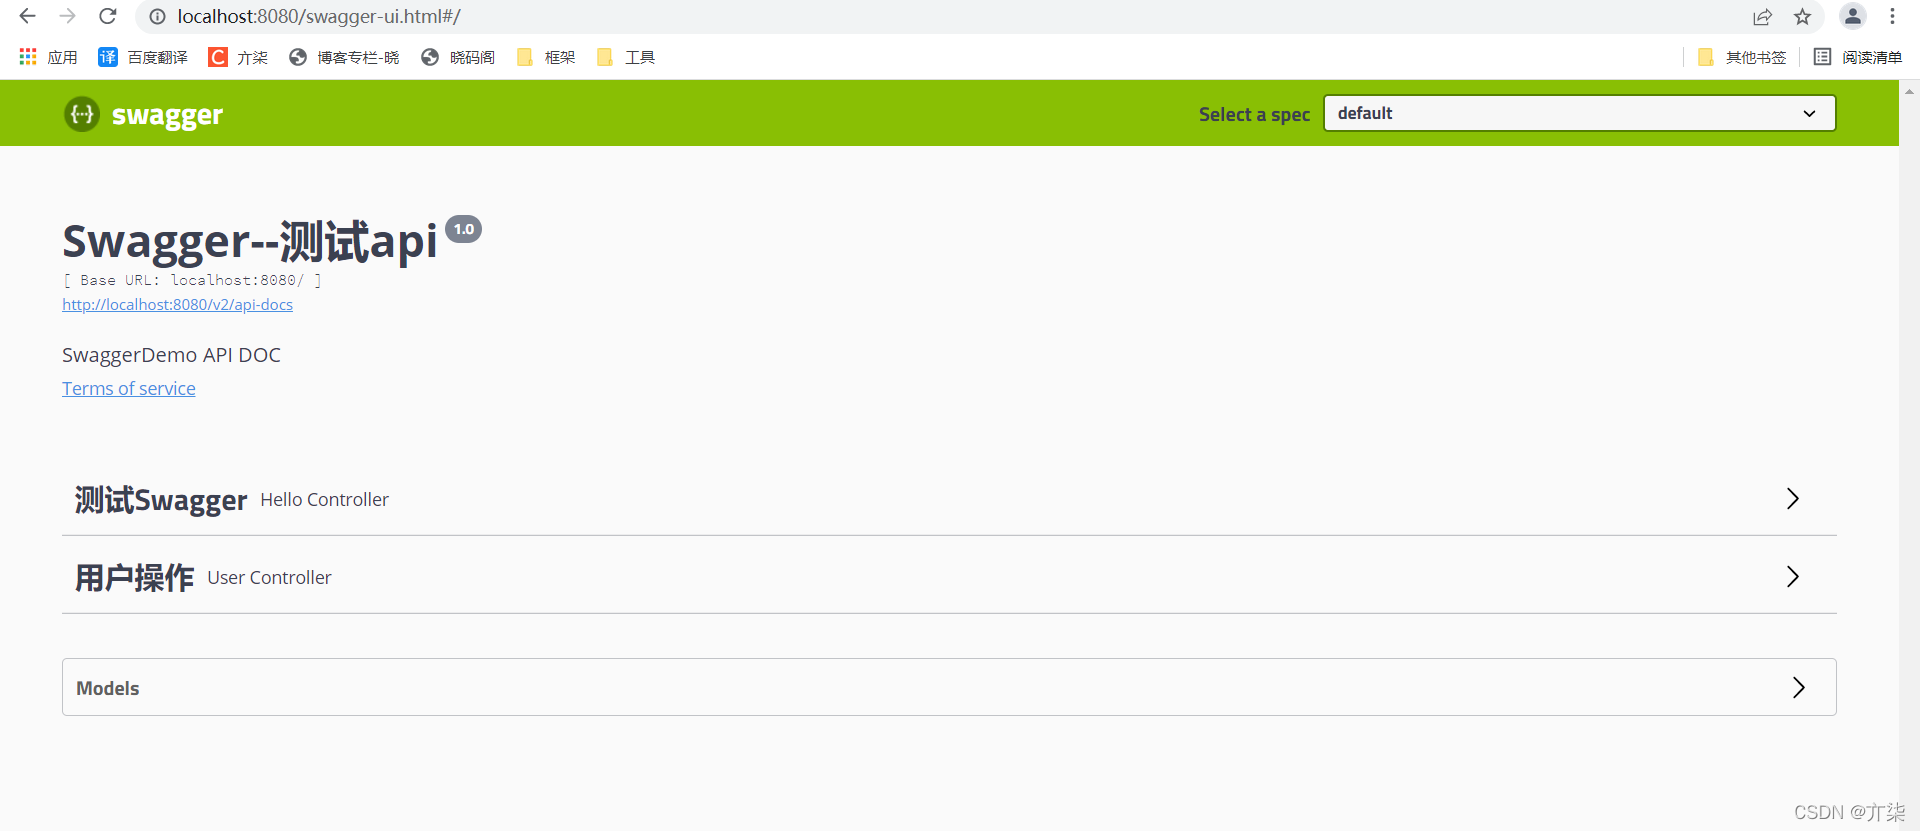
服务启动后,访问:http://localhost:8080/swagger-ui.html
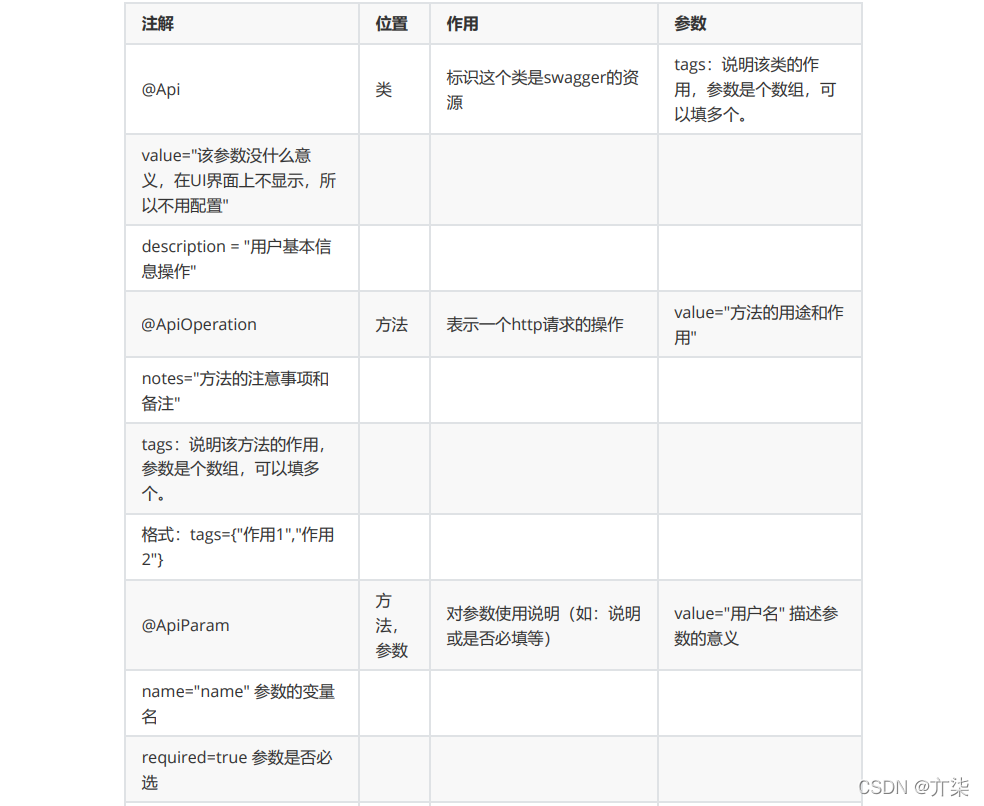
6,swagger常用注解
更全面的信息可以参考官方说明文档:swagger-annotations 1.3.10 API
实战注解:
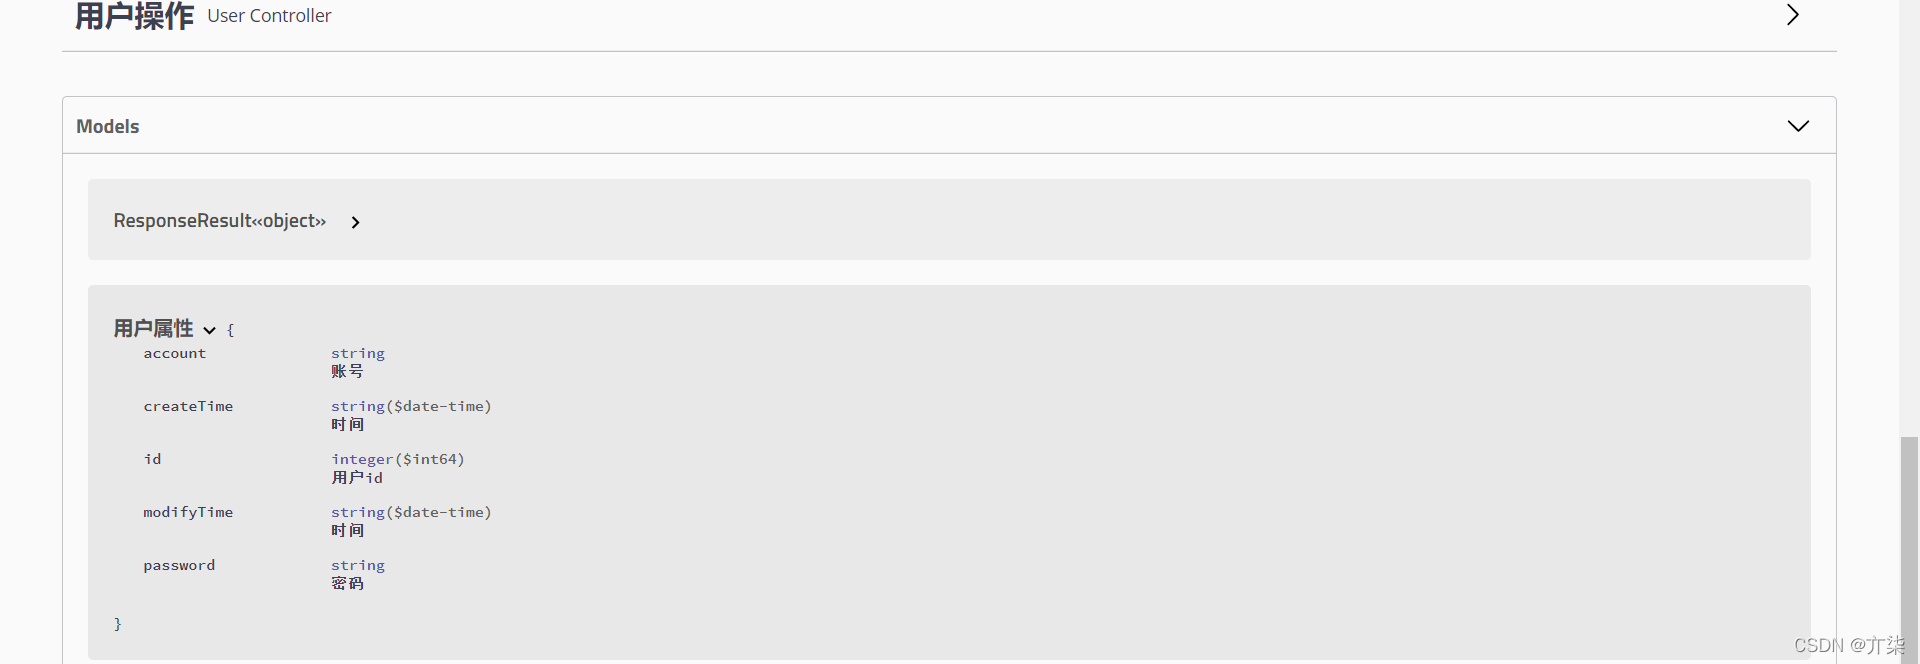
实体类
package com.zking.mini_program.pojo;

import io.swagger.annotations.ApiModel;
import io.swagger.annotations.ApiModelProperty;
import java.io.Serializable;
import java.time.LocalDateTime;

@ApiModel("用户属性")
public class User {

    @ApiModelProperty("用户id")
    private Long id;

    @ApiModelProperty("账号")
    private String account;

    @ApiModelProperty("密码")
    private String password;

    @ApiModelProperty("时间")
    private LocalDateTime modifyTime;

    @ApiModelProperty("时间")
    private LocalDateTime createTime;

}
controller类
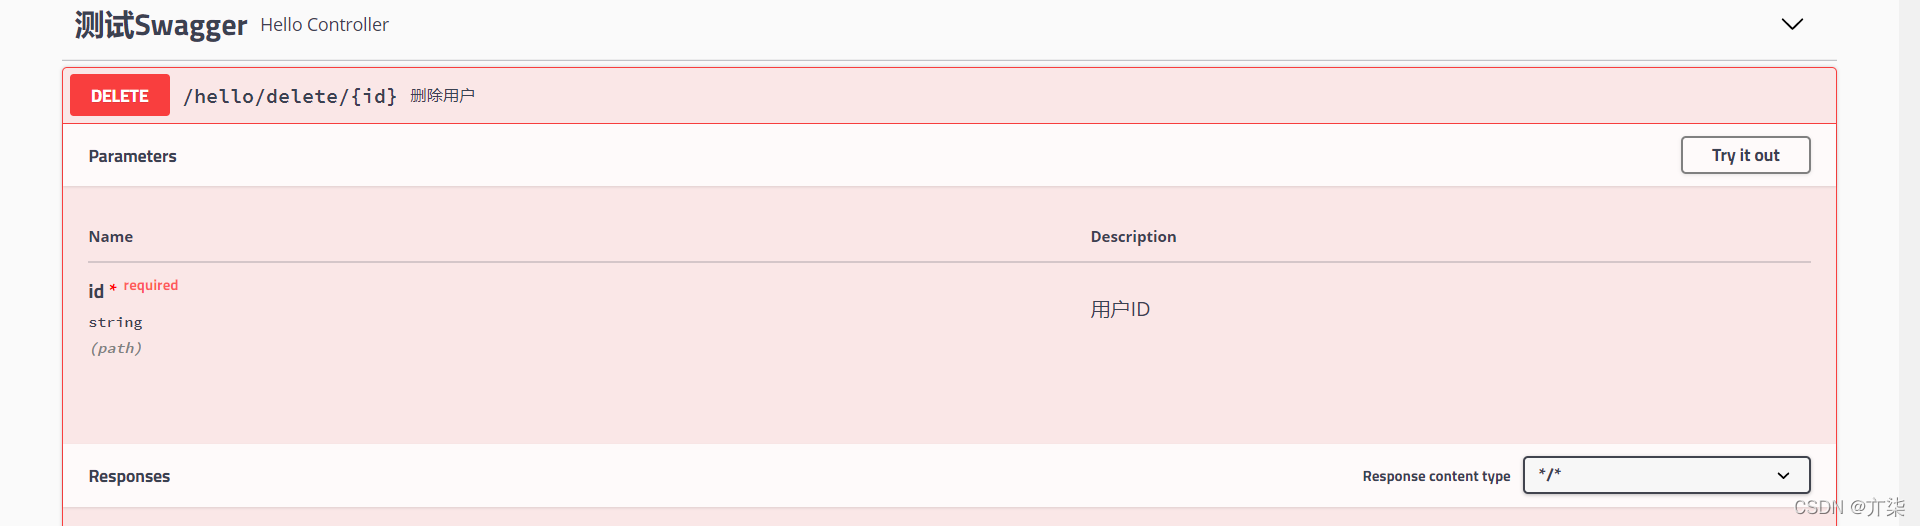
package com.zking.mini_program.controller;

import com.zking.mini_program.pojo.User;
import com.zking.mini_program.util.response.ResponseResult;
import io.swagger.annotations.*;
import org.springframework.web.bind.annotation.*;

@RestController
@RequestMapping("/hello")
@Api(tags = "测试Swagger")
@SuppressWarnings("all")
public class HelloController {

    @ApiOperation(value = "欢迎信息")
    @GetMapping("/hello")
    @ApiImplicitParams({
            @ApiImplicitParam(name = "name", value = "名称", dataType = "string", paramType = "query", required = true),
            @ApiImplicitParam(name = "msg", value = "消息", dataType = "string", paramType = "query", required = true)
    })
    public ResponseResult<?> hello(String name, String msg) {
        return ResponseResult.success();
    }

    @PostMapping("/register")
    @ApiOperation("注册用户接口")
    @ApiResponses({
            @ApiResponse(code = 10001, message = "Exception 01"),
            @ApiResponse(code = 10002, message = "Exception 02"),
            @ApiResponse(code = 10003, message = "Exception 03")
    })
    public ResponseResult<?> register(@RequestBody User user) {
        return ResponseResult.success();
    }

    @PutMapping("/edit")
    @ApiOperation("修改用户信息")
    public ResponseResult<?> edit(User user) {
        return ResponseResult.success();
    }

    @DeleteMapping("/delete/{id}")
    @ApiOperation("删除用户")
    @ApiImplicitParam(name = "id", value = "用户ID", dataType = "string", paramType = "path", required = true)
    public ResponseResult<?> delete(@PathVariable("id") String id) {
        return ResponseResult.success();
    }

}

OK!到这就结束了,希望能帮到你!!!


 1004
1004

 被折叠的 条评论
为什么被折叠?
被折叠的 条评论
为什么被折叠?
 到【灌水乐园】发言


