


前言
本篇主要介绍如何使用Spring AI来快速创建一个自己的AI聊天模型,当然其他模型也是类似的步骤
SpringAI官网链接: https://docs.spring.io/spring-ai/reference/index.html
阿里云百炼链接: https://bailian.console.aliyun.com/
目录
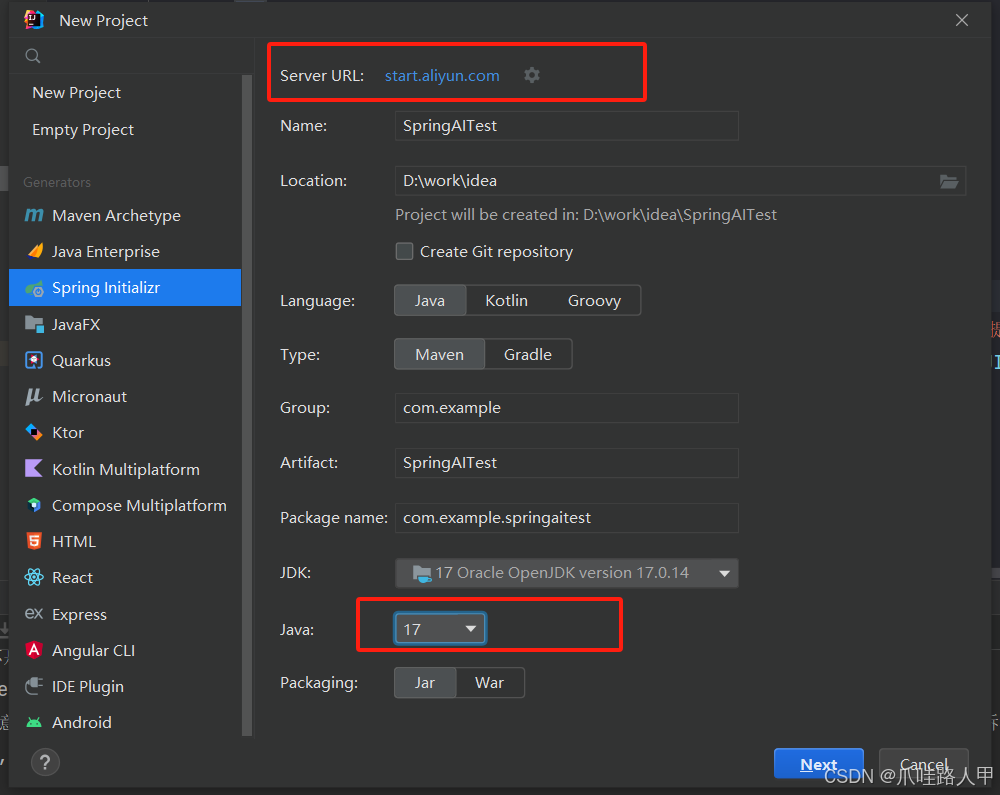
1、创建SpringBoot项目
1、创建一个全新的SpringBoot项目即可,注意JDK要求17以上,SpringBoot版本是3.x.x,有些人Server URL用的可能是阿里云的镜像,在创建项目的时候没办法直接添加SpringAI的依赖,不过问题不大,直接正常创建即可,不需要添加其他依赖,新建后再手动添加AI依赖也一样,或者修改自己的Server URL,改为Spring官方源即可 https://start.spring.io
2、引入对应依赖
1、手动引入Spring AI的starter,在pom文件中添加以下内容
<repositories>
  <repository>
    <id>spring-snapshots</id>
    <name>Spring Snapshots</name>
    <url>https://repo.spring.io/snapshot</url>
    <releases>
      <enabled>false</enabled>
    </releases>
  </repository>
  <repository>
    <name>Central Portal Snapshots</name>
    <id>central-portal-snapshots</id>
    <url>https://central.sonatype.com/repository/maven-snapshots/</url>
    <releases>
      <enabled>false</enabled>
    </releases>
    <snapshots>
      <enabled>true</enabled>
    </snapshots>
  </repository>
</repositories>
<dependency>
            <groupId>org.springframework.ai</groupId>
            <artifactId>spring-ai-openai-spring-boot-starter</artifactId>
            <version>1.0.0-M6</version>
 </dependency>
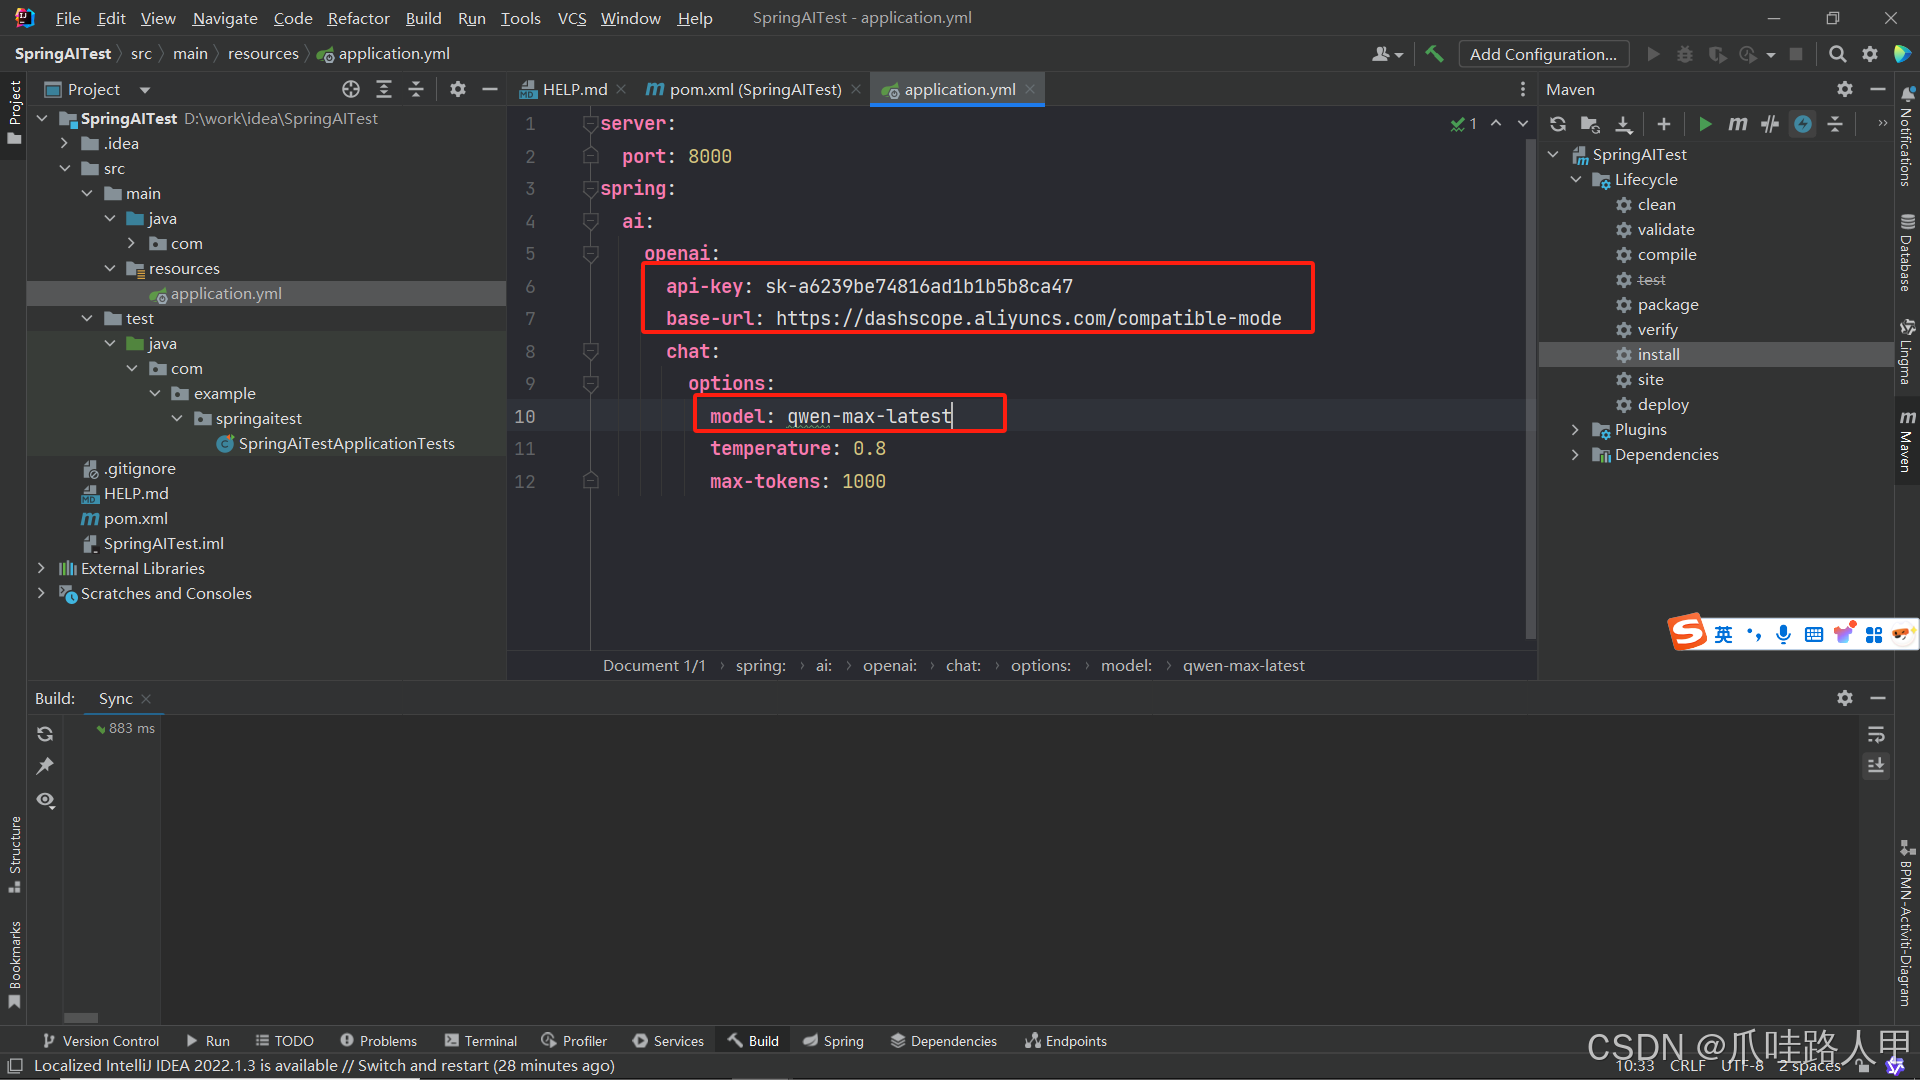
3、配置yaml文件
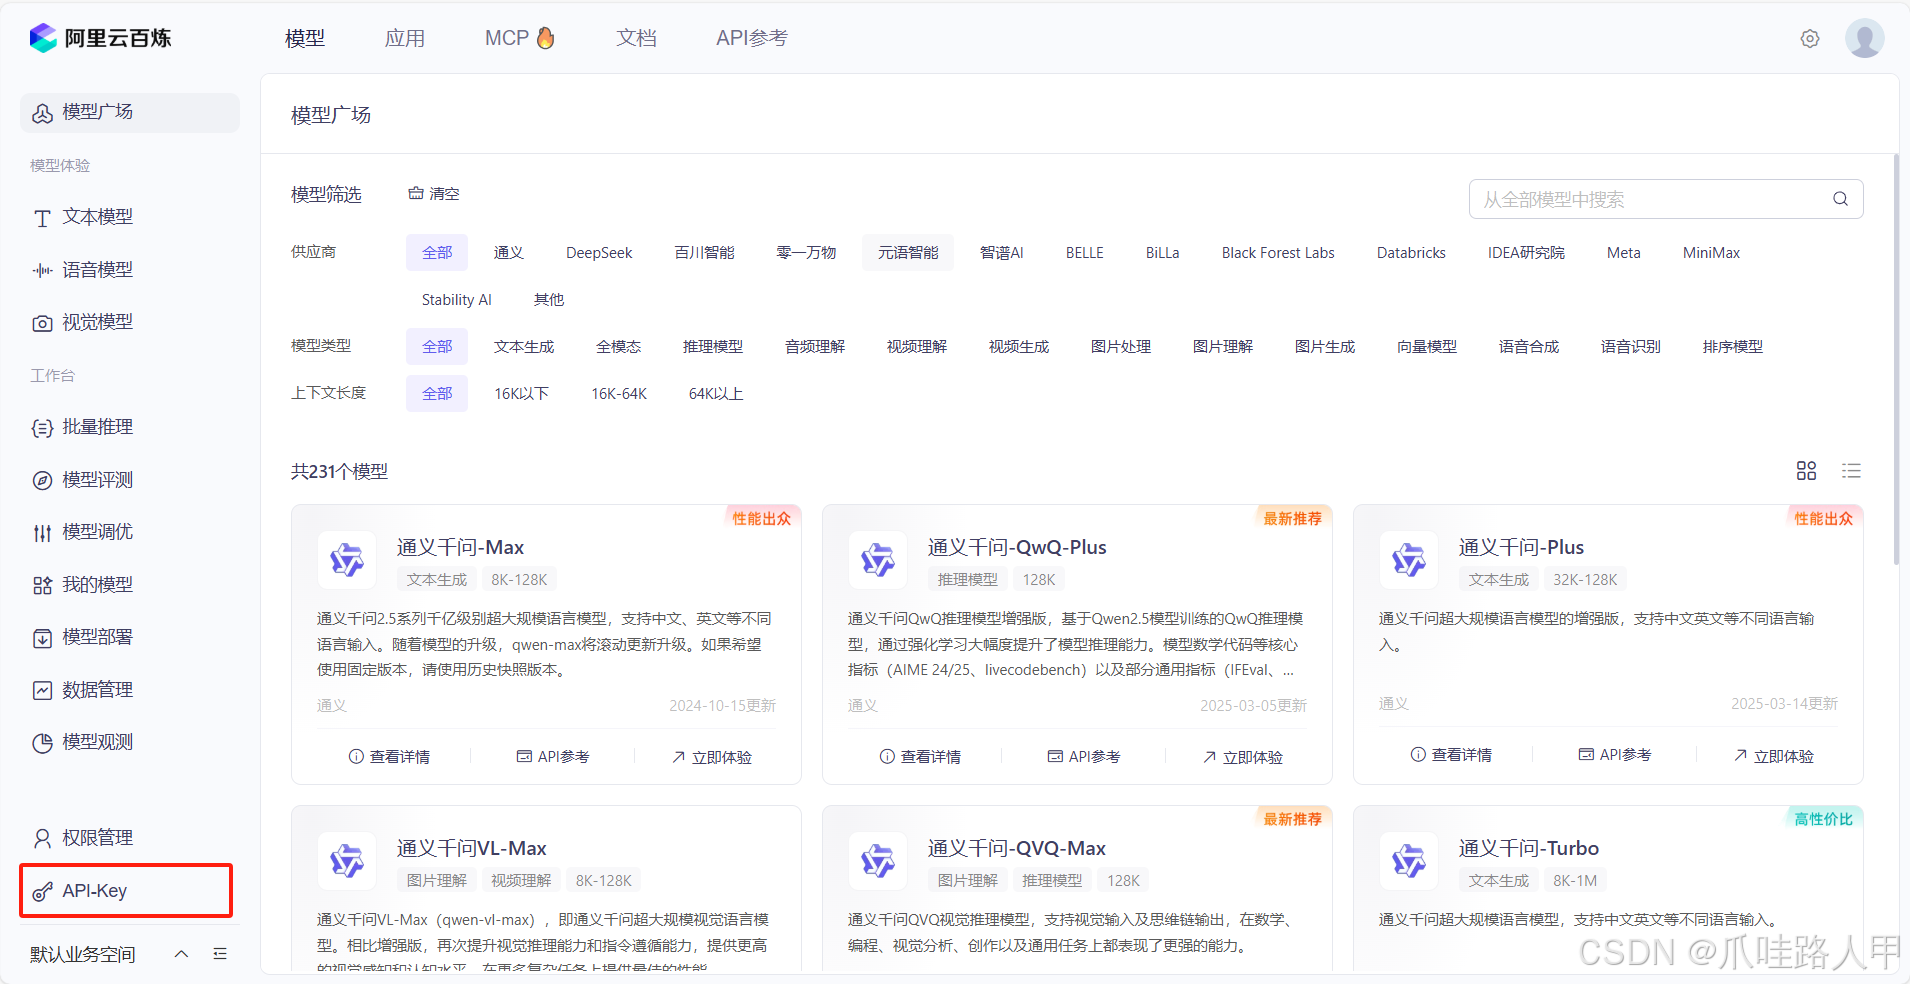
里面的api-key和base-url以及model名称都可以在阿里云的百炼里面找到开通服务后每个模型免费送100万token,选择合适的模型,创建自己的api-key即可
4、配置ChatClient对象
ChatClient对象可以在配置文件中设置一下默认值,也可以在此手动添加一些默认值,对应参数可以参照官网说明进行调整和修改
package com.example.springaitest.config;
@Configuration
class ChatAIConfig {

    @Bean
    ChatClient chatClient(ChatClient.Builder builder) {
        return builder.defaultSystem("你是一个专业智能助手,用来回答和解决用户提出的各种问题")
                .build();
    }

}
5、使用ChatClient并创建与大模型交互的Controller
package com.example.springaitest.controller;
@RestController
@RequestMapping("/ai")
public class AIController {

	@Autowired
	private  ChatClient chatClient;


	@GetMapping("/simple")
	public Map<String, String> completion(@RequestParam(value = "message", defaultValue = "Tell me a joke") String message) {
		try {
			// 打印请求消息以调试
			System.out.println("Requesting with message: " + message);

			ChatClient.CallResponseSpec result = this.chatClient.prompt().user(message).call();
			//System.out.println(new Gson().toJson(result));
			System.out.println(result);
			// 调用 API 并获取响应内容
			String responseContent = result.content();

			// 打印响应内容以调试
			System.out.println("Response content: " + responseContent);

			return Map.of("completion", Objects.requireNonNull(responseContent));
		} catch (Exception e) {
			// 捕获异常并返回错误信息
			e.printStackTrace();
			return Map.of("error", "Failed to get completion: " + e.getMessage());
		}
	}
}
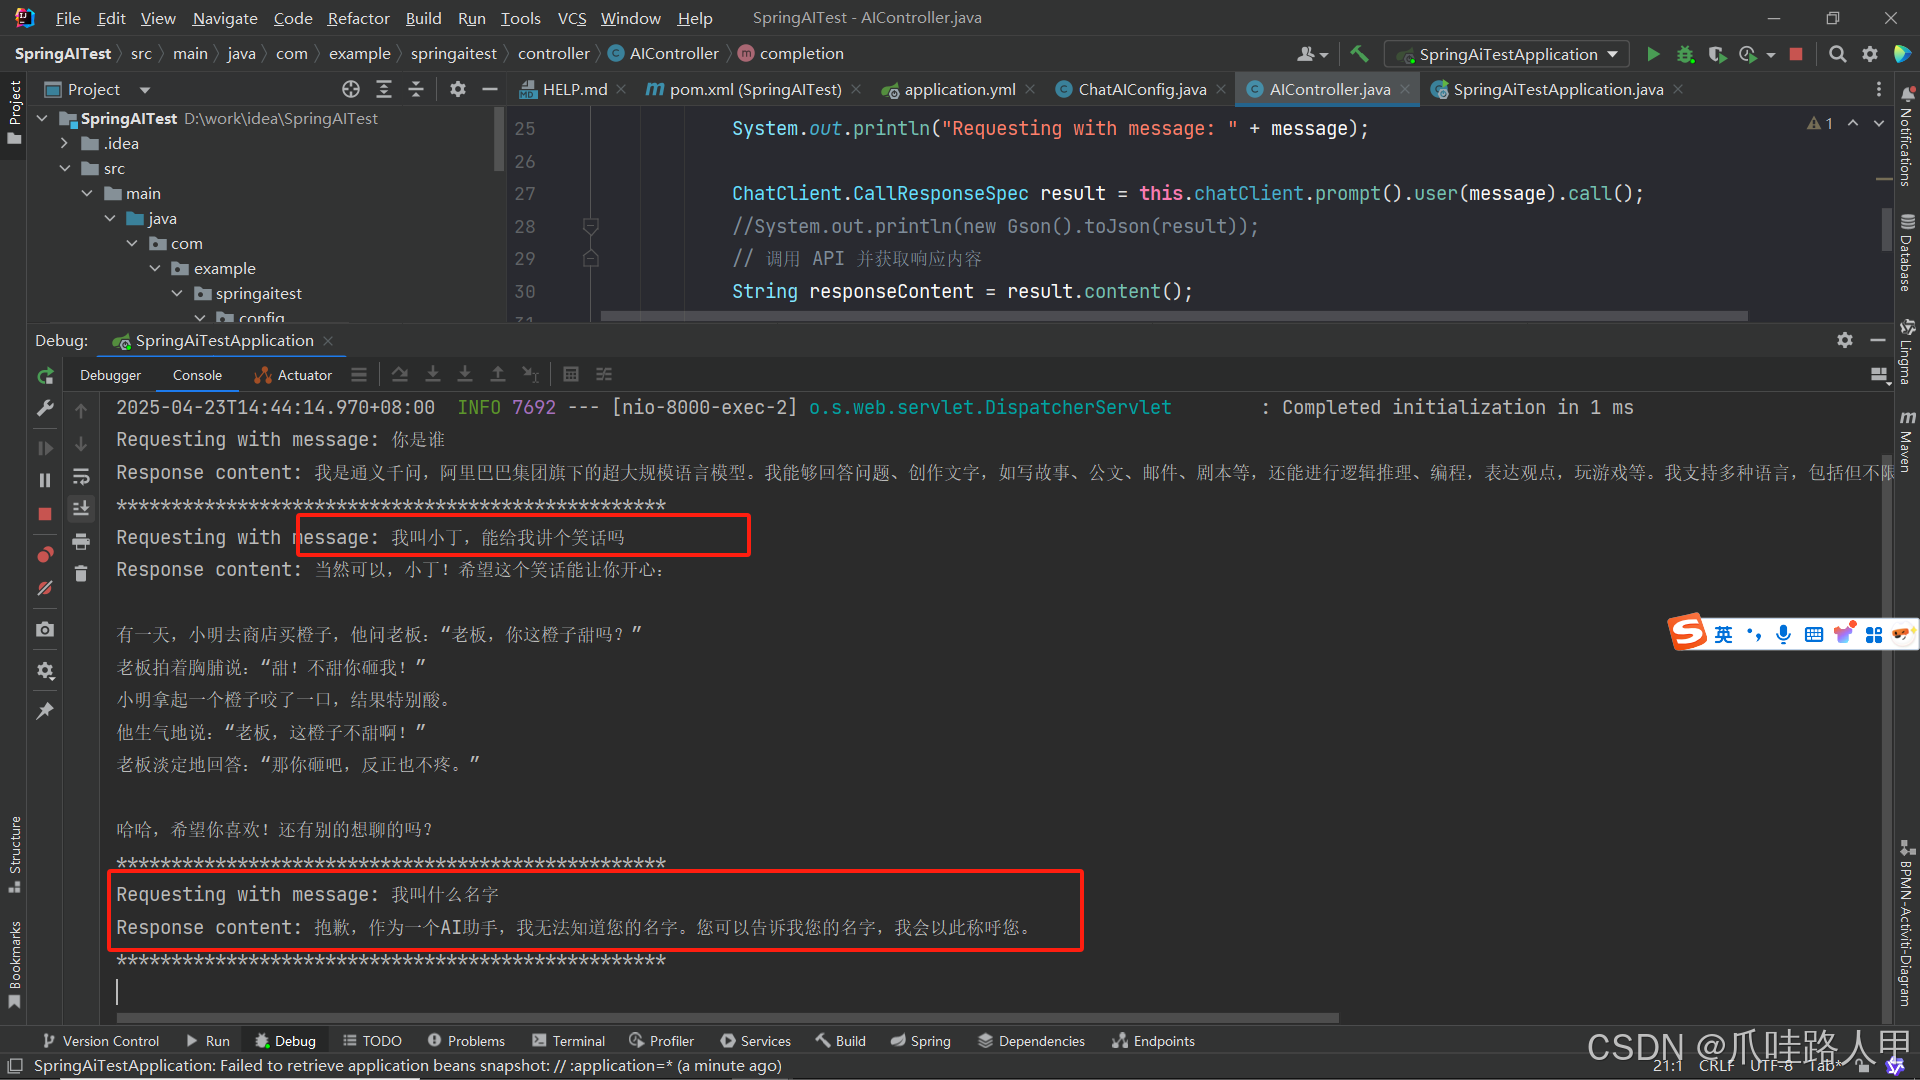
6、测试聊天接口
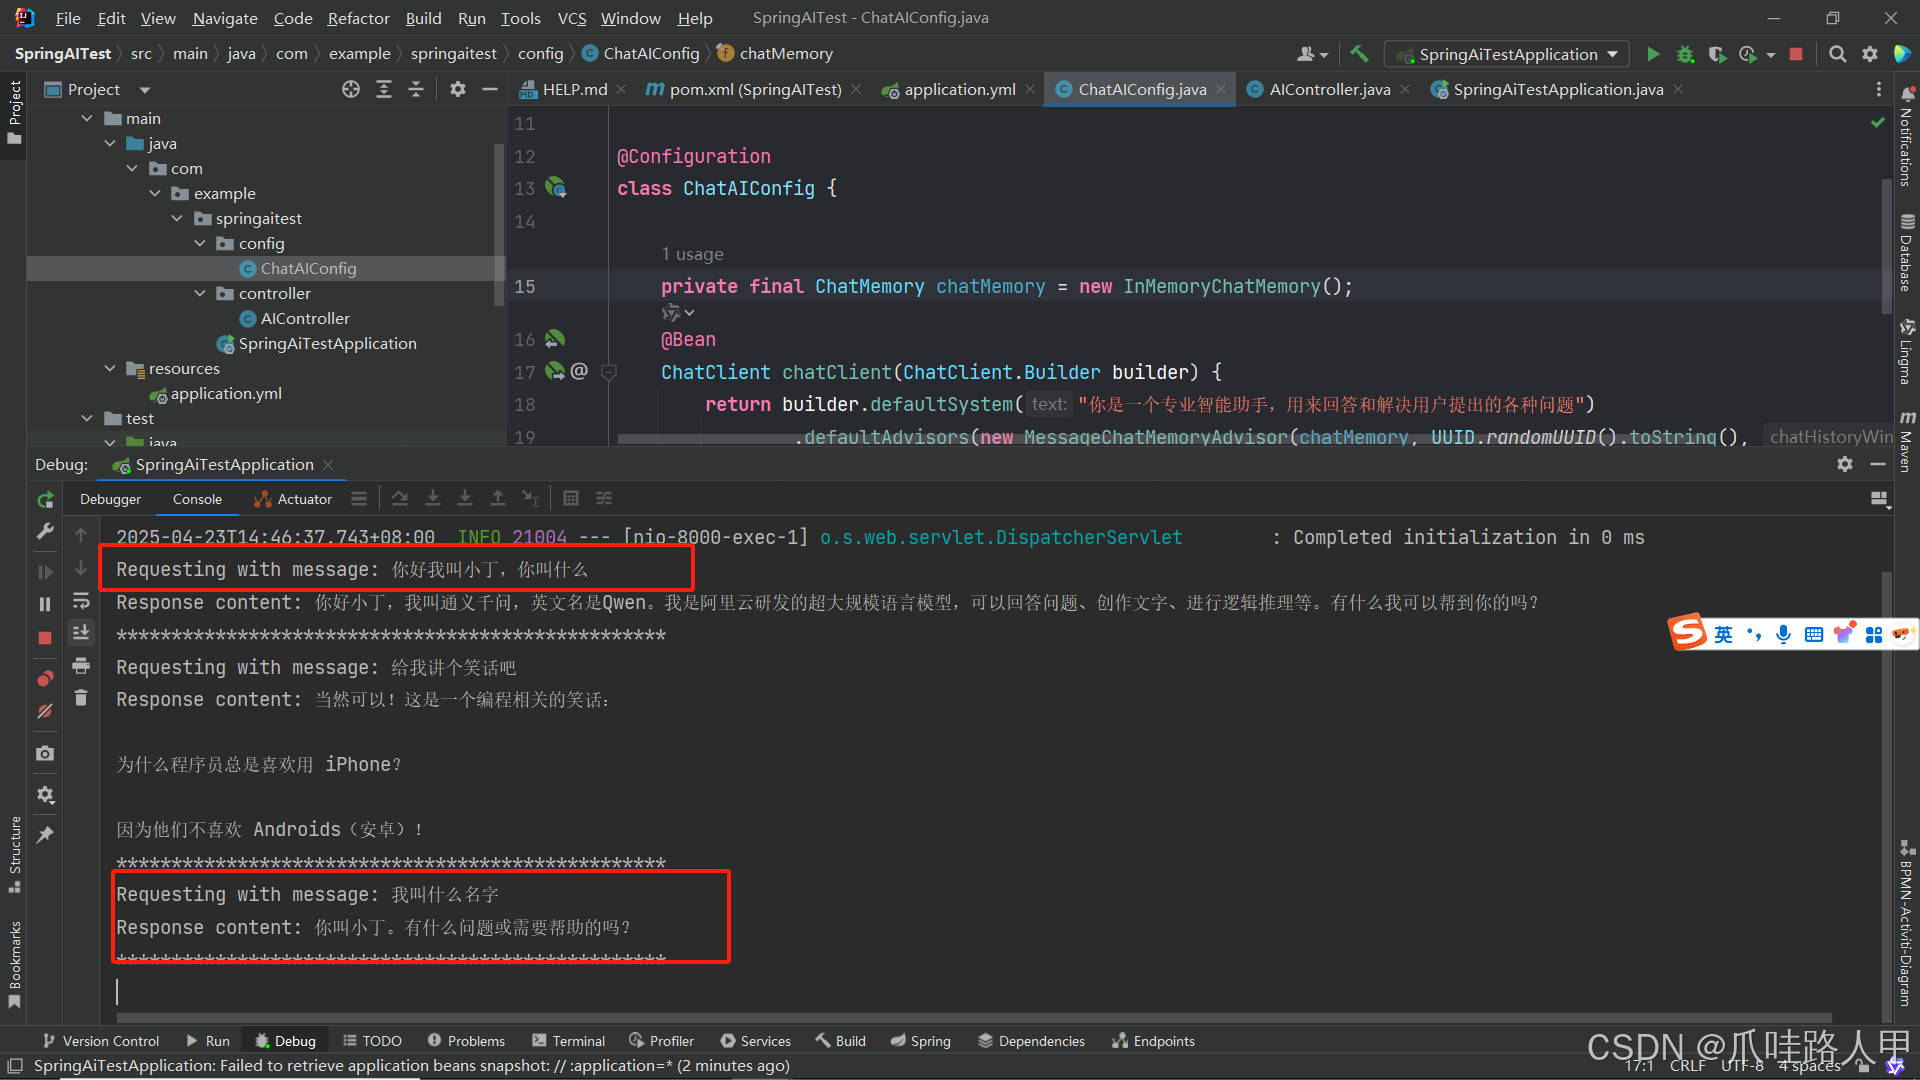
不难看出当前聊天是不包含上下文记忆的,只能根据当前的提问进行回答

7、实现有记忆的对话
只需要在配置类中添加两行代码即可
package com.example.springaitest.config;
@Configuration
class ChatAIConfig {

    private final ChatMemory chatMemory = new InMemoryChatMemory();
    @Bean
    ChatClient chatClient(ChatClient.Builder builder) {
        return builder.defaultSystem("你是一个专业智能助手,用来回答和解决用户提出的各种问题")
                .defaultAdvisors(new MessageChatMemoryAdvisor(chatMemory, UUID.randomUUID().toString(), 10))
                .build();
    }

}
至此一个包含上下文记忆的AI聊天接口就ok了
总结
Spring AI极大的简化了在AI集成时候的操作,让集成AI变成集成其他第三方应用一样简单,只需要配置好对应类,直接调用接口即可,大家可以根据官网进行自行调整模型和参数实现更多更复杂的操作


 9051
9051

 被折叠的 条评论
为什么被折叠?
被折叠的 条评论
为什么被折叠?
 到【灌水乐园】发言


