


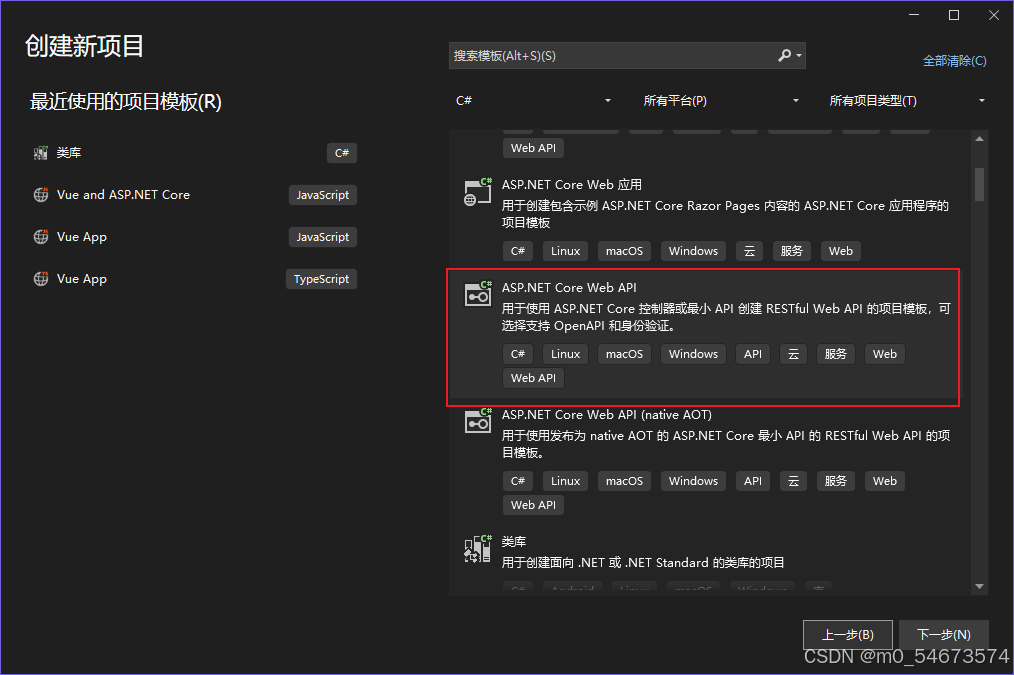
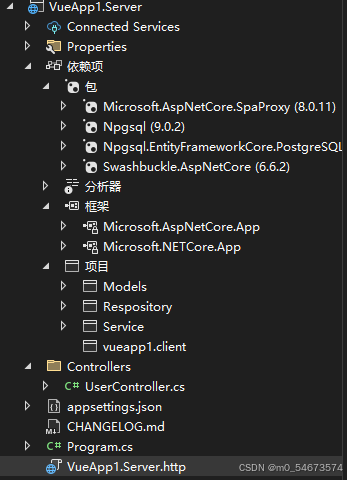
创建一个Web API项目
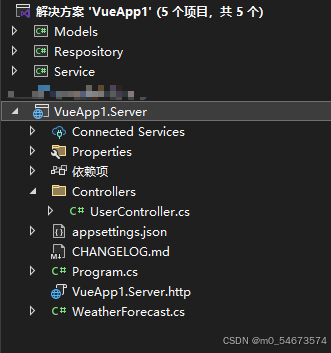
再额外创建三个类库,最终结构如图
创建一个简单的数据库表,名为UserInfo

根据数据库表创建实体类,在Models类库中新建实体类UserInfo
using System.ComponentModel.DataAnnotations;

namespace Models
{
    public class UserInfo
    {
        [Key]
        public string Account { get; set; }=string.Empty;
        public string Password { get; set; } = string.Empty;
        public string UserName { get; set; } = string.Empty;
    }
}
需要使用Nuget添加库Microsoft.EntityFrameworkCore,找到合适的版本

在Respository类库下添加一个EF框架的上下文类,名为pgDbContext
using Microsoft.EntityFrameworkCore;
using Models;

namespace Respository
{
    public class pgDbContext:DbContext
    {
        public pgDbContext(DbContextOptions<pgDbContext> options) : base(options) { }
        public DbSet<UserInfo> UserInfo { get; set; }
    }
}
在Program.cs中添加数据库连接字符串,我这里是Postgresql数据,这里使用了顶级语句
builder.Services.AddDbContext<pgDbContext>(db=>db.UseNpgsql
("Host = localhost(替换为你的地址);Port = 5432(替换为你的端口号);Username = postgres(替换为你的用户名);Password = postgres(替换为你的密码);Database = postgres(替换为你的数据库名);"));
继续在Respository库下面新建一个接口IUserRespository
using Models;

namespace Respository
{
    public interface IUserRespository
    {
        public Task<List<UserInfo>> GetAllUser();
        public Task<int> AddUser(UserInfo user);
    }
}
再创建接口的实现类,名为UserRespository
using Microsoft.EntityFrameworkCore;
using Models;

namespace Respository
{
    public class UserRespository : IUserRespository
    {
        //依赖注入
        private readonly DbContext _dbContext;
        public  UserRespository(pgDbContext dbContext)
        {
            _dbContext = dbContext;
        }

        public async Task<int> AddUser(UserInfo user)
        {
            _dbContext.Set<UserInfo>().Add(user);
            return await _dbContext.SaveChangesAsync();
        }

        public async Task<List<UserInfo>> GetAllUser()
        {
            return await _dbContext.Set<UserInfo>().ToListAsync();
        }
    }
}
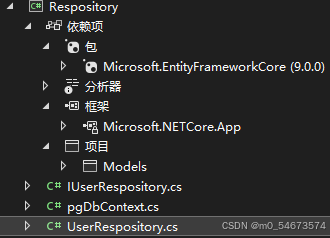
最终Respository库结构如下
同样的,在Service库下新建接口IUserService
using Models;

namespace Service
{
    public interface IUserService
    {
        public Task<int> GetUserByAccount(UserInfo userInfo);
        public Task<int> AddUser (UserInfo userInfo);
    }
}
新建其实现类
using Models;
using Respository;

namespace Service
{
    public class UserService : IUserService
    {
        private readonly IUserRespository _userRespository;
        public UserService(IUserRespository userRespository)
        {
            _userRespository = userRespository;
        }
        public Task<int> AddUser(UserInfo userInfo)
        {
            return _userRespository.AddUser(userInfo);
        }


        public async Task<int> GetUserByAccount(UserInfo userInfo)
        {
            List<UserInfo> users= await _userRespository.GetAllUser();
            return users.Where(s => s.Account == userInfo.Account &&
                 s.Password==userInfo.Password).ToList().Count;
        }

    }
}
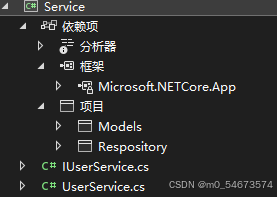
最终Service库结构如下
最后新建控制器UserController
using Microsoft.AspNetCore.Mvc;
using Models;
using Service;

namespace VueApp1.Server.Controllers
{
    [ApiController]
    [Route("/[Controller]/[action]")]
    public class UserController : ControllerBase
    {
        private readonly IUserService _userService;
        public UserController(IUserService userService)
        {
            _userService = userService;
        }

        [HttpPost]
        public int GetUser(UserInfo user)
        {
            return _userService.GetUserByAccount(user).Result;
        }

        [HttpPost]
        public Task<int> AddUser(UserInfo user)
        {
            return _userService.AddUser(user);
        }
    }
}
上面用到了依赖注入,需要在Program.cs中注册,添加两行代码
builder.Services.AddScoped<IUserRespository, UserRespository>();
builder.Services.AddScoped<IUserService, UserService>();
还需要解决跨域问题
builder.Services.AddCors(c=>c.AddPolicy("any",p=>p.AllowAnyMethod().AllowAnyHeader().AllowAnyOrigin()));


app.UseCors("any");
最终Program.cs文件为
using Microsoft.EntityFrameworkCore;
using Respository;
using Service;

var builder = WebApplication.CreateBuilder(args);

// Add services to the container.

builder.Services.AddControllers();
// Learn more about configuring Swagger/OpenAPI at https://aka.ms/aspnetcore/swashbuckle
builder.Services.AddEndpointsApiExplorer();
builder.Services.AddSwaggerGen();
builder.Services.AddDbContext<pgDbContext>(db=>db.UseNpgsql("Host = localhost;Port = 5432;Username = postgres;Password = postgres;Database = postgres;"));

//依赖注入
builder.Services.AddScoped<IUserRespository, UserRespository>();
builder.Services.AddScoped<IUserService, UserService>();

//配置跨域策略
builder.Services.AddCors(c=>c.AddPolicy("any",p=>p.AllowAnyMethod().AllowAnyHeader().AllowAnyOrigin()));

var app = builder.Build();

app.UseDefaultFiles();
app.UseStaticFiles();

// Configure the HTTP request pipeline.
if (app.Environment.IsDevelopment())
{
    app.UseSwagger();
    app.UseSwaggerUI();
}
//使用跨域策略
app.UseCors("any");

app.UseAuthorization();

app.MapControllers();

app.MapFallbackToFile("/index.html");

app.Run();


 591
591

 被折叠的 条评论
为什么被折叠?
被折叠的 条评论
为什么被折叠?
 到【灌水乐园】发言


