


Linux系统管理
目录
1.软件包管理
2.进程管理
3.磁盘管理
4.服务管理
1.软件包管理
1.1系统管理:软件包管理
Linux的安装方式有哪些?
安装软件的步骤 | 举例子 | 含义 | 使用场景 |
yum安装方法/apt | 点外卖,缺啥少啥,外卖解决 | 通过网络下载软件包,替我们安装,有依赖自动下载,并且安装 | 绝大部分,没有网自己搭建yum仓库 |
rpm安装方法,dpkg | 半成品 ,自己解决缺的的东西 | 手动下载rpm包,类似于windows的.exe文件,缺依赖自己下载 | 无网络,删除软件包 |
编译安装方法 | 自己做 | 可以自定义安装,过程比较漫长,缺少依赖自己下载依赖 | 软件进行自定义 ,一般是增加功能模块 |
二进制安装方法 | 点外卖,自取 | 举例子:绿色软件解压即用 ,得准备环境,数据库或者服务 | 如果有可以选用,首先优先选择yum |
安装方式优先选择安装方式:
1.yum优先
2.rpm包
3.二进制安装
4.编译安装
2.rpm命令安装方法
rpm命令安装方法是:增、删、改、查
rpm命令 | 选项参数及含义 | ||
安装软件包 | -ivh (-i install ) 软件包(xxx.rpm) 查看软件包是否安装上 | ||
查看软件包 | -qa (query all)` 查看软件包的内容 | ||
查看软件包内容 | -ql (list) | ||
文件或命令的绝对路径,文件或命令属于哪个软件包 | -qf | ||
修改-升级软件包操作操作 | -Uvh 升级软件包(软件包不存在,则ivh安装) | ||
删除软件包 | -e | ||
查询文件或命令属于哪个软件包 | -f | ||
更新升级软件包 | -U | ||
显示软件包所有文件列表 | -l | ||
显示详细信息 | -v | ||
显示软件包的依赖环境 | -R | ||
用“#” 号显示进度条 | -q |
2.1rpm命令安装-增加:
2.1rpm命令安装-增加:
wget命令默认下载的是当前目录,如果要下载指定的目录下是-P(大写P),如果目录不存在-P则会自动创建,当下载的时候有https加密,加上--no-check-certificate 就是不让加密下载
wget  --no-check-certificate -P  /server/tools/  https://mirrors.tuna.tsinghua.edu.cn/zabbix/zabbix/6.0/rhel/7/x86_64/zabbix-agent-6.0.0-1.el7.x86_64.rpm
[root@localhost ~]# wget  --no-check-certificate -P  /server/tools/  https://mirrors.tuna.tsinghua.edu.cn/zabbix/zabbix/6.0/rhel/7/x86_64/zabbix-agent-6.0.0-1.el7.x86_64.rpm
--2023-09-15 11:32:58--  https://mirrors.tuna.tsinghua.edu.cn/zabbix/zabbix/6.0/rhel/7/x86_64/zabbix-agent-6.0.0-1.el7.x86_64.rpm
正在解析主机 mirrors.tuna.tsinghua.edu.cn (mirrors.tuna.tsinghua.edu.cn)... 101.6.15.130, 2402:f000:1:400::2
正在连接 mirrors.tuna.tsinghua.edu.cn (mirrors.tuna.tsinghua.edu.cn)|101.6.15.130|:443... 已连接。
警告: 无法验证 mirrors.tuna.tsinghua.edu.cn 的由 “/C=US/O=Let's Encrypt/CN=R3” 颁发的证书:
  颁发的证书已经过期。
已发出 HTTP 请求,正在等待回应... 200 OK
长度:517992 (506K) [application/x-redhat-package-manager]
正在保存至: “/server/tools/zabbix-agent-6.0.0-1.el7.x86_64.rpm”

100%[=======================================================>] 517,992      349KB/s 用时 1.5s

2023-09-15 11:33:00 (349 KB/s) - 已保存 “/server/tools/zabbix-agent-6.0.0-1.el7.x86_64.rpm” [517992/517992])
[root@localhost ~]# cd /server/tools/
[root@localhost tools]# ll -h
总用量 508K
-rw-r--r--. 1 root root 506K 2月  14 2022 zabbix-agent-6.0.0-1.el7.x86_64.rpm
2.2下载完之后如何装?
1.安装
[root@localhost tools]# rpm -ivh zabbix-agent-6.0.0-1.el7.x86_64.rpm
[root@localhost tools]# rpm -ivh zabbix-agent-6.0.0-1.el7.x86_64.rpm
警告:zabbix-agent-6.0.0-1.el7.x86_64.rpm: 头V4 RSA/SHA512 Signature, 密钥 ID a14fe591: NOKEY
错误:依赖检测失败:
	libpcre2-8.so.0()(64bit) 被 zabbix-agent-6.0.0-1.el7.x86_64 需要
2. 以上操作安装遇到依赖时,先进行搜索依赖用yum的命令搜索yum provides  缺依赖的名称(libpcre2-8.so.0) ==
[root@localhost tools]# yum provides libpcre2-8.so.0
已加载插件:fastestmirror
Repodata is over 2 weeks old. Install yum-cron? Or run: yum makecache fast
Determining fastest mirrors
 * base: mirrors.aliyun.com
 * extras: mirrors.aliyun.com
 * updates: mirrors.aliyun.com
pcre2-10.23-2.el7.i686 : Perl-compatible regular expression library     #这是搜索出来的依赖在进行yum  install  -y  pcre2 安装
源    :base
匹配来源:
提供    :libpcre2-8.so.0
3.进行依赖下载
[root@localhost tools]# yum install -y pcre2
已加载插件:fastestmirror
Loading mirror speeds from cached hostfile
 * base: mirrors.aliyun.com
 * extras: mirrors.aliyun.com
 * updates: mirrors.aliyun.com
base                                                                      | 3.6 kB  00:00:00
epel                                                                      | 4.7 kB  00:00:00
extras                                                                    | 2.9 kB  00:00:00
updates                                                                   | 2.9 kB  00:00:00
(1/3): epel/x86_64/updateinfo                                             | 1.0 MB  00:00:13
(2/3): epel/x86_64/primary_db                                             | 7.0 MB  00:01:39
(3/3): updates/7/x86_64/primary_db                                        |  22 MB  00:04:59
正在解决依赖关系
--> 正在检查事务
---> 软件包 pcre2.x86_64.0.10.23-2.el7 将被 安装
--> 解决依赖关系完成

依赖关系解决

=================================================================================================
 Package              架构                  版本                       源                   大小
=================================================================================================
正在安装:
 pcre2                x86_64                10.23-2.el7                base                201 k

事务概要
=================================================================================================
安装  1 软件包

总下载量:201 k
安装大小:556 k
Downloading packages:
pcre2-10.23-2.el7.x86_64.rpm                                              | 201 kB  00:00:11
Running transaction check
Running transaction test
Transaction test succeeded
Running transaction
  正在安装    : pcre2-10.23-2.el7.x86_64                                                     1/1
  验证中      : pcre2-10.23-2.el7.x86_64                                                     1/1

已安装:
  pcre2.x86_64 0:10.23-2.el7

完毕!
4.依赖下载完之后再进行安装
[root@localhost tools]# rpm -ivh zabbix-agent-6.0.0-1.el7.x86_64.rpm
警告:zabbix-agent-6.0.0-1.el7.x86_64.rpm: 头V4 RSA/SHA512 Signature, 密钥 ID a14fe591: NOKEY
准备中...                          ################################# [100%]
正在升级/安装...
   1:zabbix-agent-6.0.0-1.el7         ################################# [100%]
2.4如何查看?查询
1.查询是否安装成功: rpm -qa 是查看所有安装的命令
[root@localhost tools]# rpm -qa |grep zabbix
zabbix-agent-6.0.0-1.el7.x86_64
2.检查软件包的内容(指的是已经安装成功的) 查软件包安装到哪里了?  一般安装完有配置文件、命令、日志等等一些文件......
格式:rpm -ql  #list
		  rpm -ql  软件包
		  rpm -ql  zabbix-agent
[root@localhost ~]# rpm -ql zabbix-agent
/etc/logrotate.d/zabbix-agent
/etc/zabbix/zabbix_agentd.conf
/etc/zabbix/zabbix_agentd.d
/usr/lib/systemd/system/zabbix-agent.service
/usr/lib/tmpfiles.d/zabbix-agent.conf
/usr/sbin/zabbix_agentd
/usr/share/doc/zabbix-agent-6.0.0
/usr/share/doc/zabbix-agent-6.0.0/AUTHORS
/usr/share/doc/zabbix-agent-6.0.0/COPYING
/usr/share/doc/zabbix-agent-6.0.0/ChangeLog
/usr/share/doc/zabbix-agent-6.0.0/NEWS
/usr/share/doc/zabbix-agent-6.0.0/README
/usr/share/doc/zabbix-agent-6.0.0/userparameter_mysql.conf
/usr/share/man/man8/zabbix_agentd.8.gz
/var/log/zabbix
/var/run/zabbix
查询某个命令或文件属于哪个软件包,一个软件包含多个命令
举例
1.比如说安装一个命令首先看属于哪个软件包?用yum 安装会失败
[root@localhost ~]# yum -y install ip
已加载插件:fastestmirror
Loading mirror speeds from cached hostfile
 * base: mirrors.aliyun.com
 * extras: mirrors.aliyun.com
 * updates: mirrors.aliyun.com
没有可用软件包 ip。
错误:无须任何处理
2.通过以上的内容得出查看这个命令属于哪个软件包? 一个软件包包含多个命令
[root@localhost ~]# which ip
/usr/sbin/ip
[root@localhost ~]# rpm -qf /usr/sbin/ip
iproute-4.11.0-25.el7_7.2.x86_64
[root@localhost ~]# rpm -qf `which ip`
iproute-4.11.0-25.el7_7.2.x86_64      #  这个是ip命令的软件包
3. yum/rpm 安装的是软件包,不是软件包里面的命令
2.5 修改-升级
1.第一步:下载高版本的软件包
[root@localhost tools]# wget --no-check-certificate https://mirrors.tuna.tsinghua.edu.cn/zabbix/zabbix/6.0/rhel/7/x86_64/zabbix-agent-6.0.1-1.el7.x86_64.rpm
--2023-09-16 13:31:43--  https://mirrors.tuna.tsinghua.edu.cn/zabbix/zabbix/6.0/rhel/7/x86_64/zabbix-agent-6.0.1-1.el7.x86_64.rpm
正在解析主机 mirrors.tuna.tsinghua.edu.cn (mirrors.tuna.tsinghua.edu.cn)... 101.6.15.130, 2402:f000:1:400::2
正在连接 mirrors.tuna.tsinghua.edu.cn (mirrors.tuna.tsinghua.edu.cn)|101.6.15.130|:443... 已连接。
警告: 无法验证 mirrors.tuna.tsinghua.edu.cn 的由 “/C=US/O=Let's Encrypt/CN=R3” 颁发的证书:
  颁发的证书已经过期。
已发出 HTTP 请求,正在等待回应... 200 OK
长度:519604 (507K) [application/x-redhat-package-manager]
正在保存至: “zabbix-agent-6.0.1-1.el7.x86_64.rpm”

100%[=======================================================>] 519,604      520KB/s 用时 1.0s

2023-09-16 13:31:45 (520 KB/s) - 已保存 “zabbix-agent-6.0.1-1.el7.x86_64.rpm” [519604/519604])
2.查看低版本的软件包
[root@localhost tools]# rpm -qa |grep zabbix
zabbix-agent-6.0.0-1.el7.x86_64
3.查看两个版本的
[root@localhost tools]# ll -h
总用量 1016K
-rw-r--r--. 1 root root 506K 2月  14 2022 zabbix-agent-6.0.0-1.el7.x86_64.rpm
-rw-r--r--. 1 root root 508K 3月   1 2022 zabbix-agent-6.0.1-1.el7.x86_64.rpm
3.直接安装新版本会报错
[root@localhost tools]# rpm -ivh zabbix-agent-6.0.1-1.el7.x86_64.rpm
警告:zabbix-agent-6.0.1-1.el7.x86_64.rpm: 头V4 RSA/SHA512 Signature, 密钥 ID a14fe591: NOKEY
准备中...                          ################################# [100%]
	file /usr/sbin/zabbix_agentd from install of zabbix-agent-6.0.1-1.el7.x86_64 conflicts with file from package zabbix-agent-6.0.0-1.el7.x86_64
4.如何解决低版本升级版本不报错的问题如下:
[root@localhost tools]# rpm -qa |grep zabbix
zabbix-agent-6.0.0-1.el7.x86_64
[root@localhost tools]# rpm -Uvh zabbix-agent-6.0.1-1.el7.x86_64.rpm
警告:zabbix-agent-6.0.1-1.el7.x86_64.rpm: 头V4 RSA/SHA512 Signature, 密钥 ID a14fe591: NOKEY
准备中...                          ################################# [100%]
正在升级/安装...
   1:zabbix-agent-6.0.1-1.el7         ################################# [ 50%]
正在清理/删除...
   2:zabbix-agent-6.0.0-1.el7         ################################# [100%]
 5.升级完再查看是否升级成功
 [root@localhost ~]# rpm -qa |grep zabbix
zabbix-agent-6.0.1-1.el7.x86_64
2.6删除软件包
yum和rpm都是安装软件包,删除软件的时候,则使用rpm命令删除
1.先过滤软件包是否存在
[root@localhost ~]# rpm -qa |grep zabbix
zabbix-agent-6.0.1-1.el7.x86_64
2.删除软件包
[root@localhost ~]# rpm -e zabbix-agent
3.查看软件包是否存在
[root@localhost ~]# rpm -qa |grep zabbix
如果yum安装不上的情况也可以是使用rpm安装
[root@localhost tools]# rpm -ivh https://mirrors.tuna.tsinghua.edu.cn/zabbix/zabbix/6.0/rhel/7/x86_64/zabbix-agent-6.0.7-1.el7.x86_64.rpm 获取https://mirrors.tuna.tsinghua.edu.cn/zabbix/zabbix/6.0/rhel/7/x86_64/zabbix-agent-6.0.7-1.el7.x86_64.rpm 警告:/var/tmp/rpm-tmp.fuzWhX: 头V4 RSA/SHA512 Signature, 密钥 ID a14fe591: NOKEY 准备中... ################################# [100%] 正在升级/安装... 1:zabbix-agent-6.0.7-1.el7 ################################# [100%]
[root@localhost tools]# rpm -qa |grep zabbix zabbix-agent-6.0.7-1.el7.x86_64
3.yum软件包
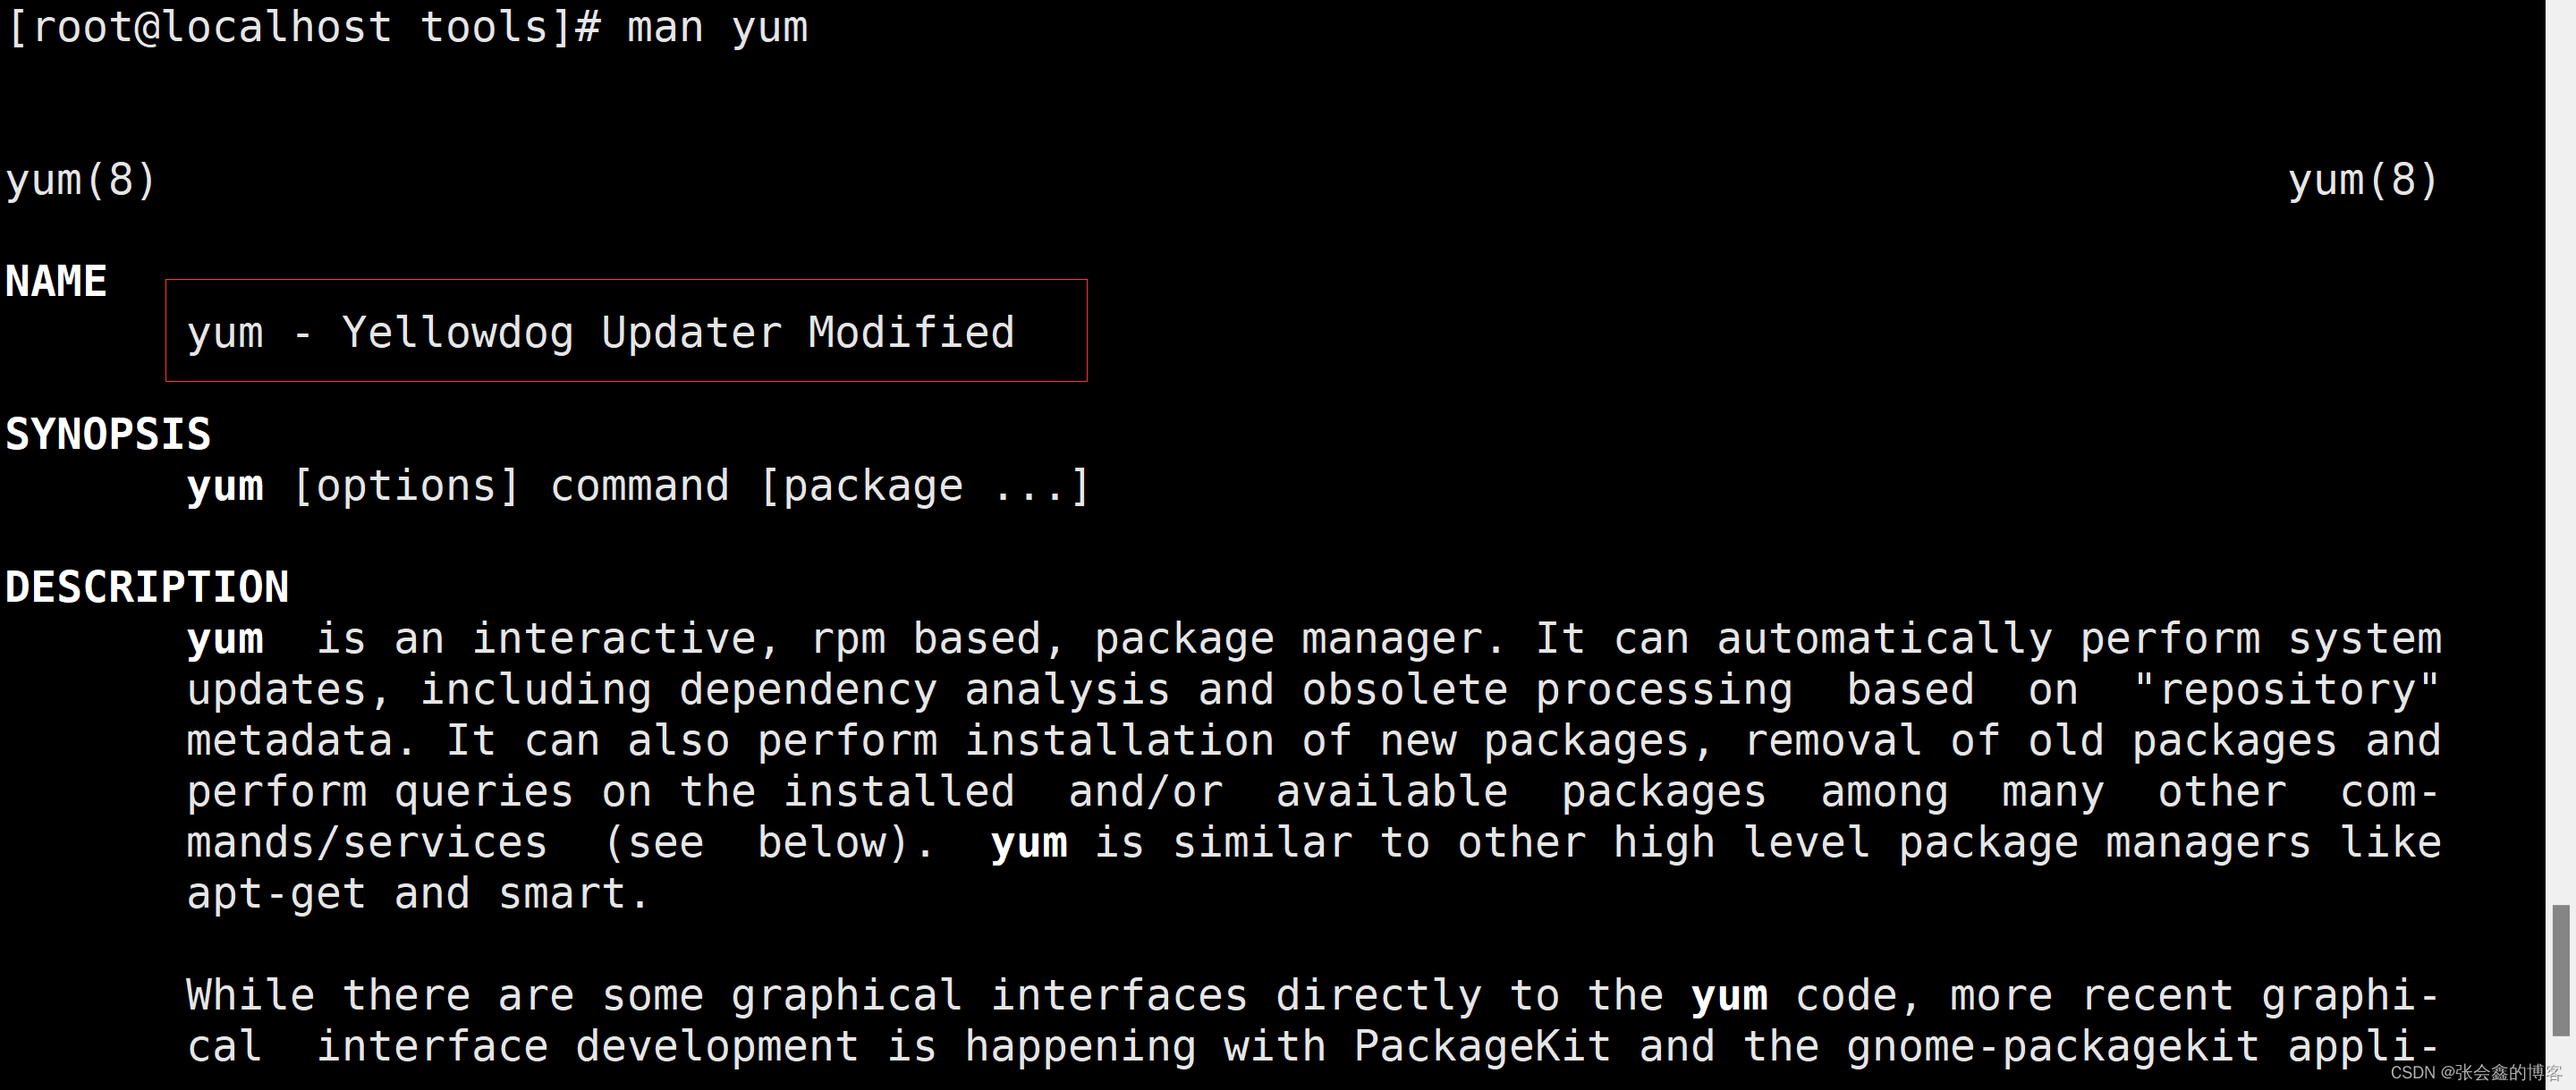
yum (yum - Yellowdog Updater Modified )软件包管理器,yum 用于安装、升级rpm软件包,自动查找解决rpm依赖关系
man yum
3.1yum命令
3.2yum安装软件操作步骤
yum命令 配置文件/etc/yum.conf
yum的仓库(yum源) 存放软件的地方,下载也是从yum仓库去下载,有本地的yum源,也可以自己搭建yum仓库 配置目录/etc/yum.repos.d/*.repo
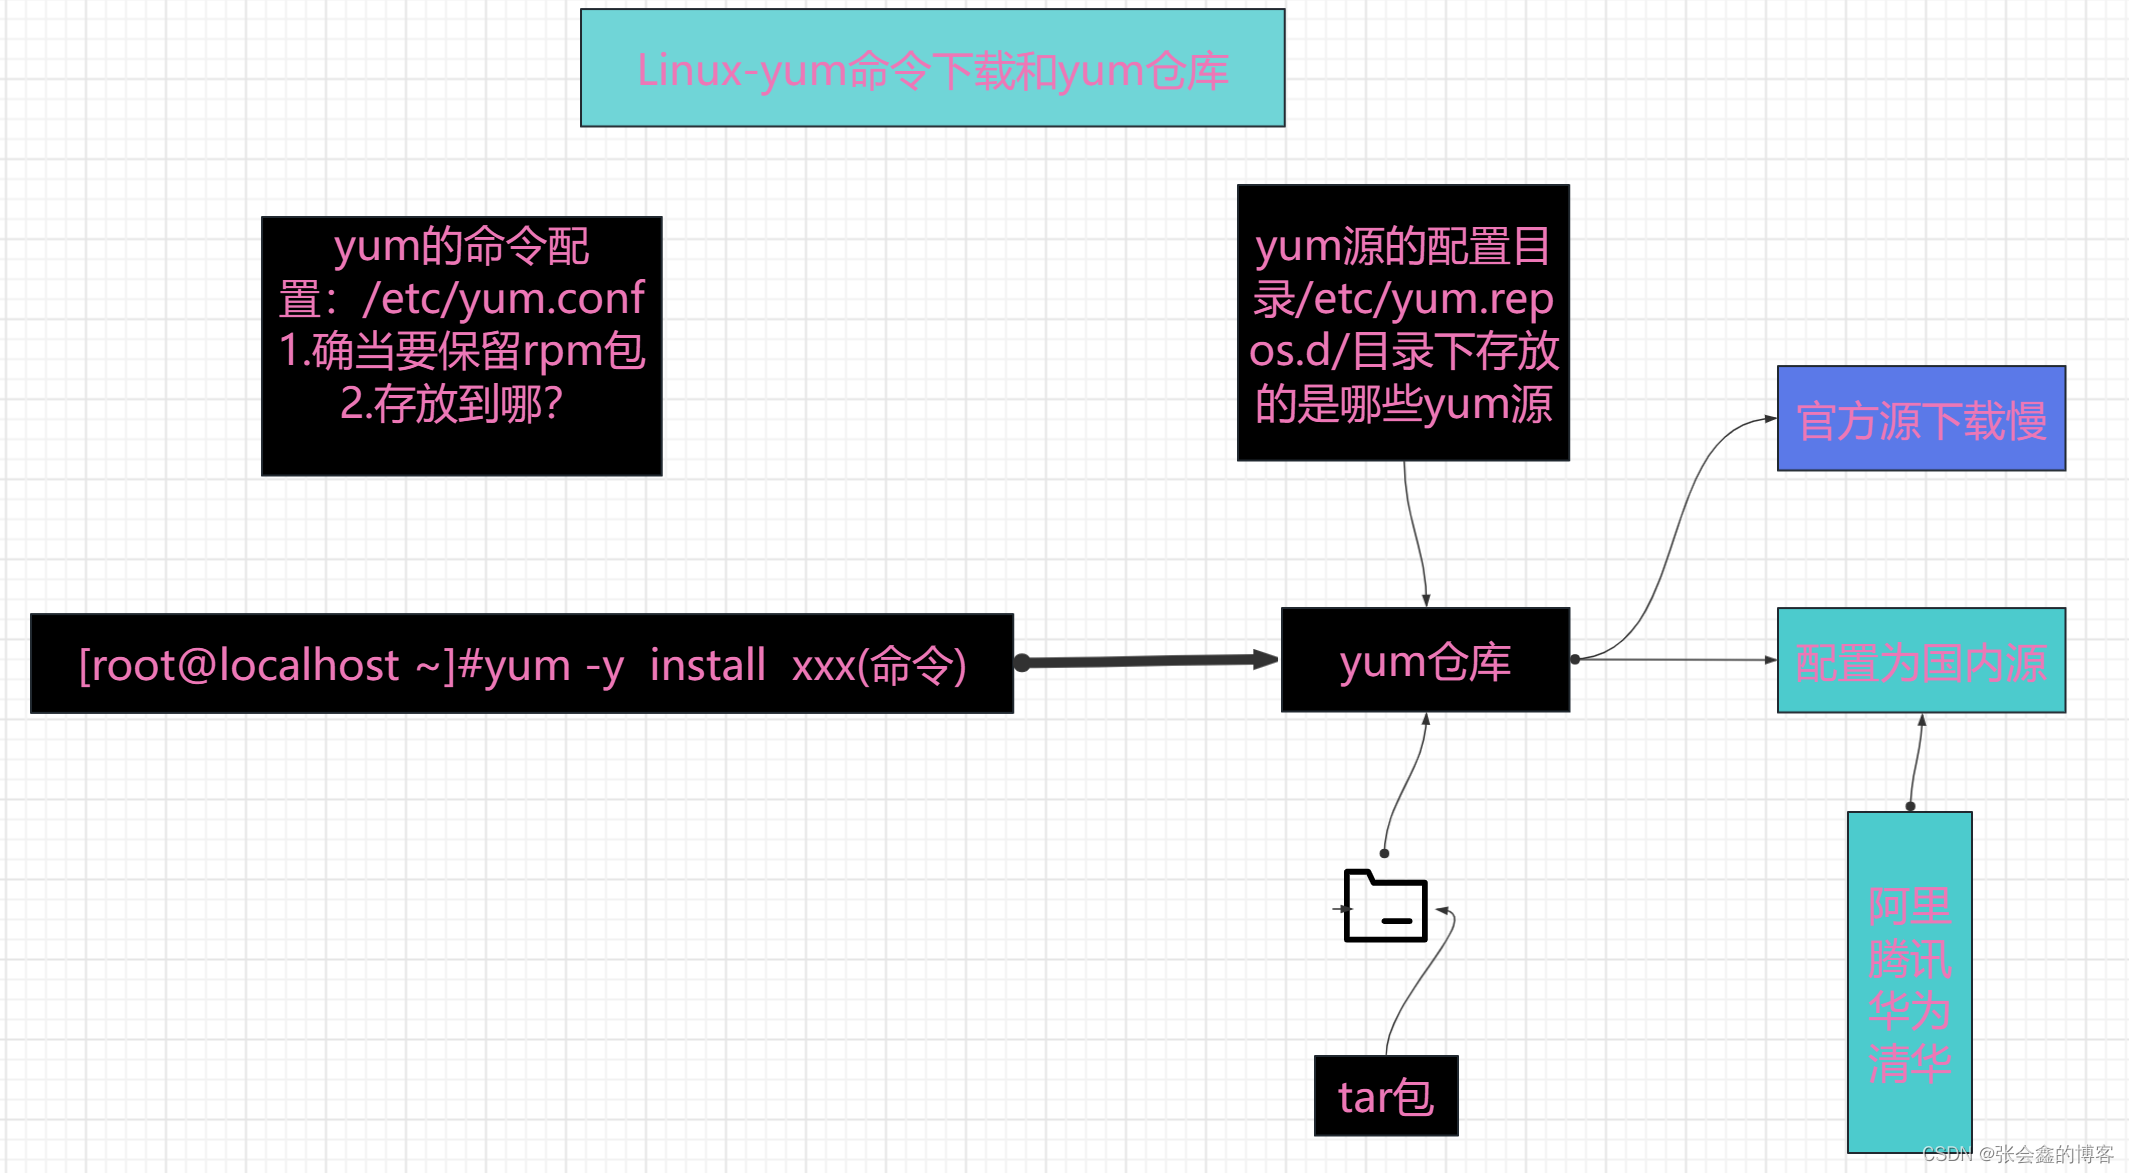
3.3(从哪里去下载)yum源的配置
虚拟机、物理服务器都需要配置yum源
使用公有云:不需要配置,都是已经配置完成的yum源
yum源的配置
生效的就有两个:
1.
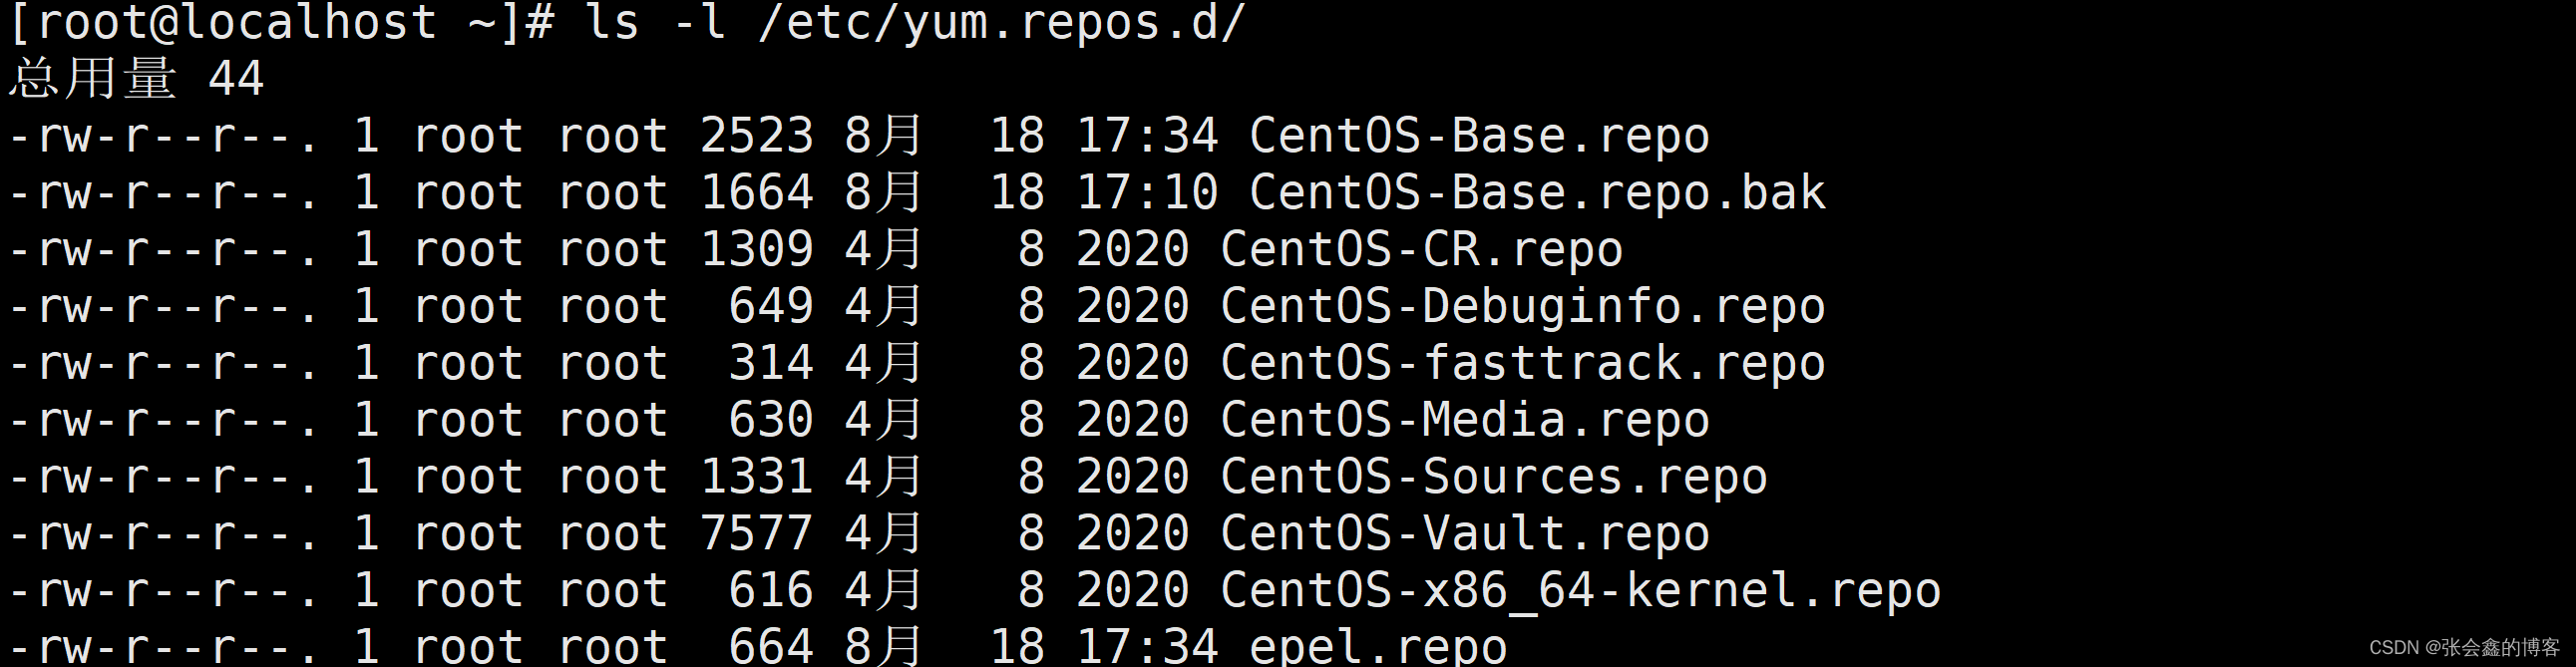
[root@localhost ~]# ls -l /etc/yum.repos.d/
总用量 44
-rw-r--r--. 1 root root 2523 8月 18 17:34 CentOS-Base.repo
-rw-r--r--. 1 root root 1664 8月 18 17:10 CentOS-Base.repo.bak
-rw-r--r--. 1 root root 1309 4月 8 2020 CentOS-CR.repo
-rw-r--r--. 1 root root 649 4月 8 2020 CentOS-Debuginfo.repo
-rw-r--r--. 1 root root 314 4月 8 2020 CentOS-fasttrack.repo
-rw-r--r--. 1 root root 630 4月 8 2020 CentOS-Media.repo
-rw-r--r--. 1 root root 1331 4月 8 2020 CentOS-Sources.repo
-rw-r--r--. 1 root root 7577 4月 8 2020 CentOS-Vault.repo
-rw-r--r--. 1 root root 616 4月 8 2020 CentOS-x86_64-kernel.repo
-rw-r--r--. 1 root root 664 8月 18 17:34 epel.repo
2.
[root@localhost ~]# ll -l /etc/yum.repos.d/CentOS-Base.repo /etc/yum.repos.d/epel.repo
-rw-r--r--. 1 root root 2523 8月 18 17:34 /etc/yum.repos.d/CentOS-Base.repo
-rw-r--r--. 1 root root 664 8月 18 17:34 /etc/yum.repos.d/epel.repo
配置文件详解
[root@localhost ~]# cat /etc/yum.repos.d/CentOS-Base.repo
# CentOS-Base.repo
#
# The mirror system uses the connecting IP address of the client and the
# update status of each mirror to pick mirrors that are updated to and
# geographically close to the client.  You should use this for CentOS updates
# unless you are manually picking other mirrors.
#
# If the mirrorlist= does not work for you, as a fall back you can try the
# remarked out baseurl= line instead.
#
#

[base]
name=CentOS-$releasever - Base - mirrors.aliyun.com
failovermethod=priority
baseurl=http://mirrors.aliyun.com/centos/$releasever/os/$basearch/
        http://mirrors.aliyuncs.com/centos/$releasever/os/$basearch/
        http://mirrors.cloud.aliyuncs.com/centos/$releasever/os/$basearch/
gpgcheck=1
gpgkey=http://mirrors.aliyun.com/centos/RPM-GPG-KEY-CentOS-7

#released updates
[updates]
name=CentOS-$releasever - Updates - mirrors.aliyun.com
failovermethod=priority
baseurl=http://mirrors.aliyun.com/centos/$releasever/updates/$basearch/
        http://mirrors.aliyuncs.com/centos/$releasever/updates/$basearch/
        http://mirrors.cloud.aliyuncs.com/centos/$releasever/updates/$basearch/
gpgcheck=1
gpgkey=http://mirrors.aliyun.com/centos/RPM-GPG-KEY-CentOS-7

#additional packages that may be useful
[extras]
name=CentOS-$releasever - Extras - mirrors.aliyun.com
failovermethod=priority
baseurl=http://mirrors.aliyun.com/centos/$releasever/extras/$basearch/
        http://mirrors.aliyuncs.com/centos/$releasever/extras/$basearch/
        http://mirrors.cloud.aliyuncs.com/centos/$releasever/extras/$basearch/
gpgcheck=1
gpgkey=http://mirrors.aliyun.com/centos/RPM-GPG-KEY-CentOS-7

#additional packages that extend functionality of existing packages
[centosplus]
name=CentOS-$releasever - Plus - mirrors.aliyun.com
failovermethod=priority
baseurl=http://mirrors.aliyun.com/centos/$releasever/centosplus/$basearch/
        http://mirrors.aliyuncs.com/centos/$releasever/centosplus/$basearch/
        http://mirrors.cloud.aliyuncs.com/centos/$releasever/centosplus/$basearch/
gpgcheck=1
enabled=0
gpgkey=http://mirrors.aliyun.com/centos/RPM-GPG-KEY-CentOS-7

#contrib - packages by Centos Users
[contrib]
name=CentOS-$releasever - Contrib - mirrors.aliyun.com
failovermethod=priority
baseurl=http://mirrors.aliyun.com/centos/$releasever/contrib/$basearch/
        http://mirrors.aliyuncs.com/centos/$releasever/contrib/$basearch/
        http://mirrors.cloud.aliyuncs.com/centos/$releasever/contrib/$basearch/
gpgcheck=1
enabled=0
gpgkey=http://mirrors.aliyun.com/centos/RPM-GPG-KEY-CentOS-7
yum源配置文件解释
yum源配置文件解释 | 选项参数及含义 | ||
[base] | yum源的名字 | ||
name | 信息 | ||
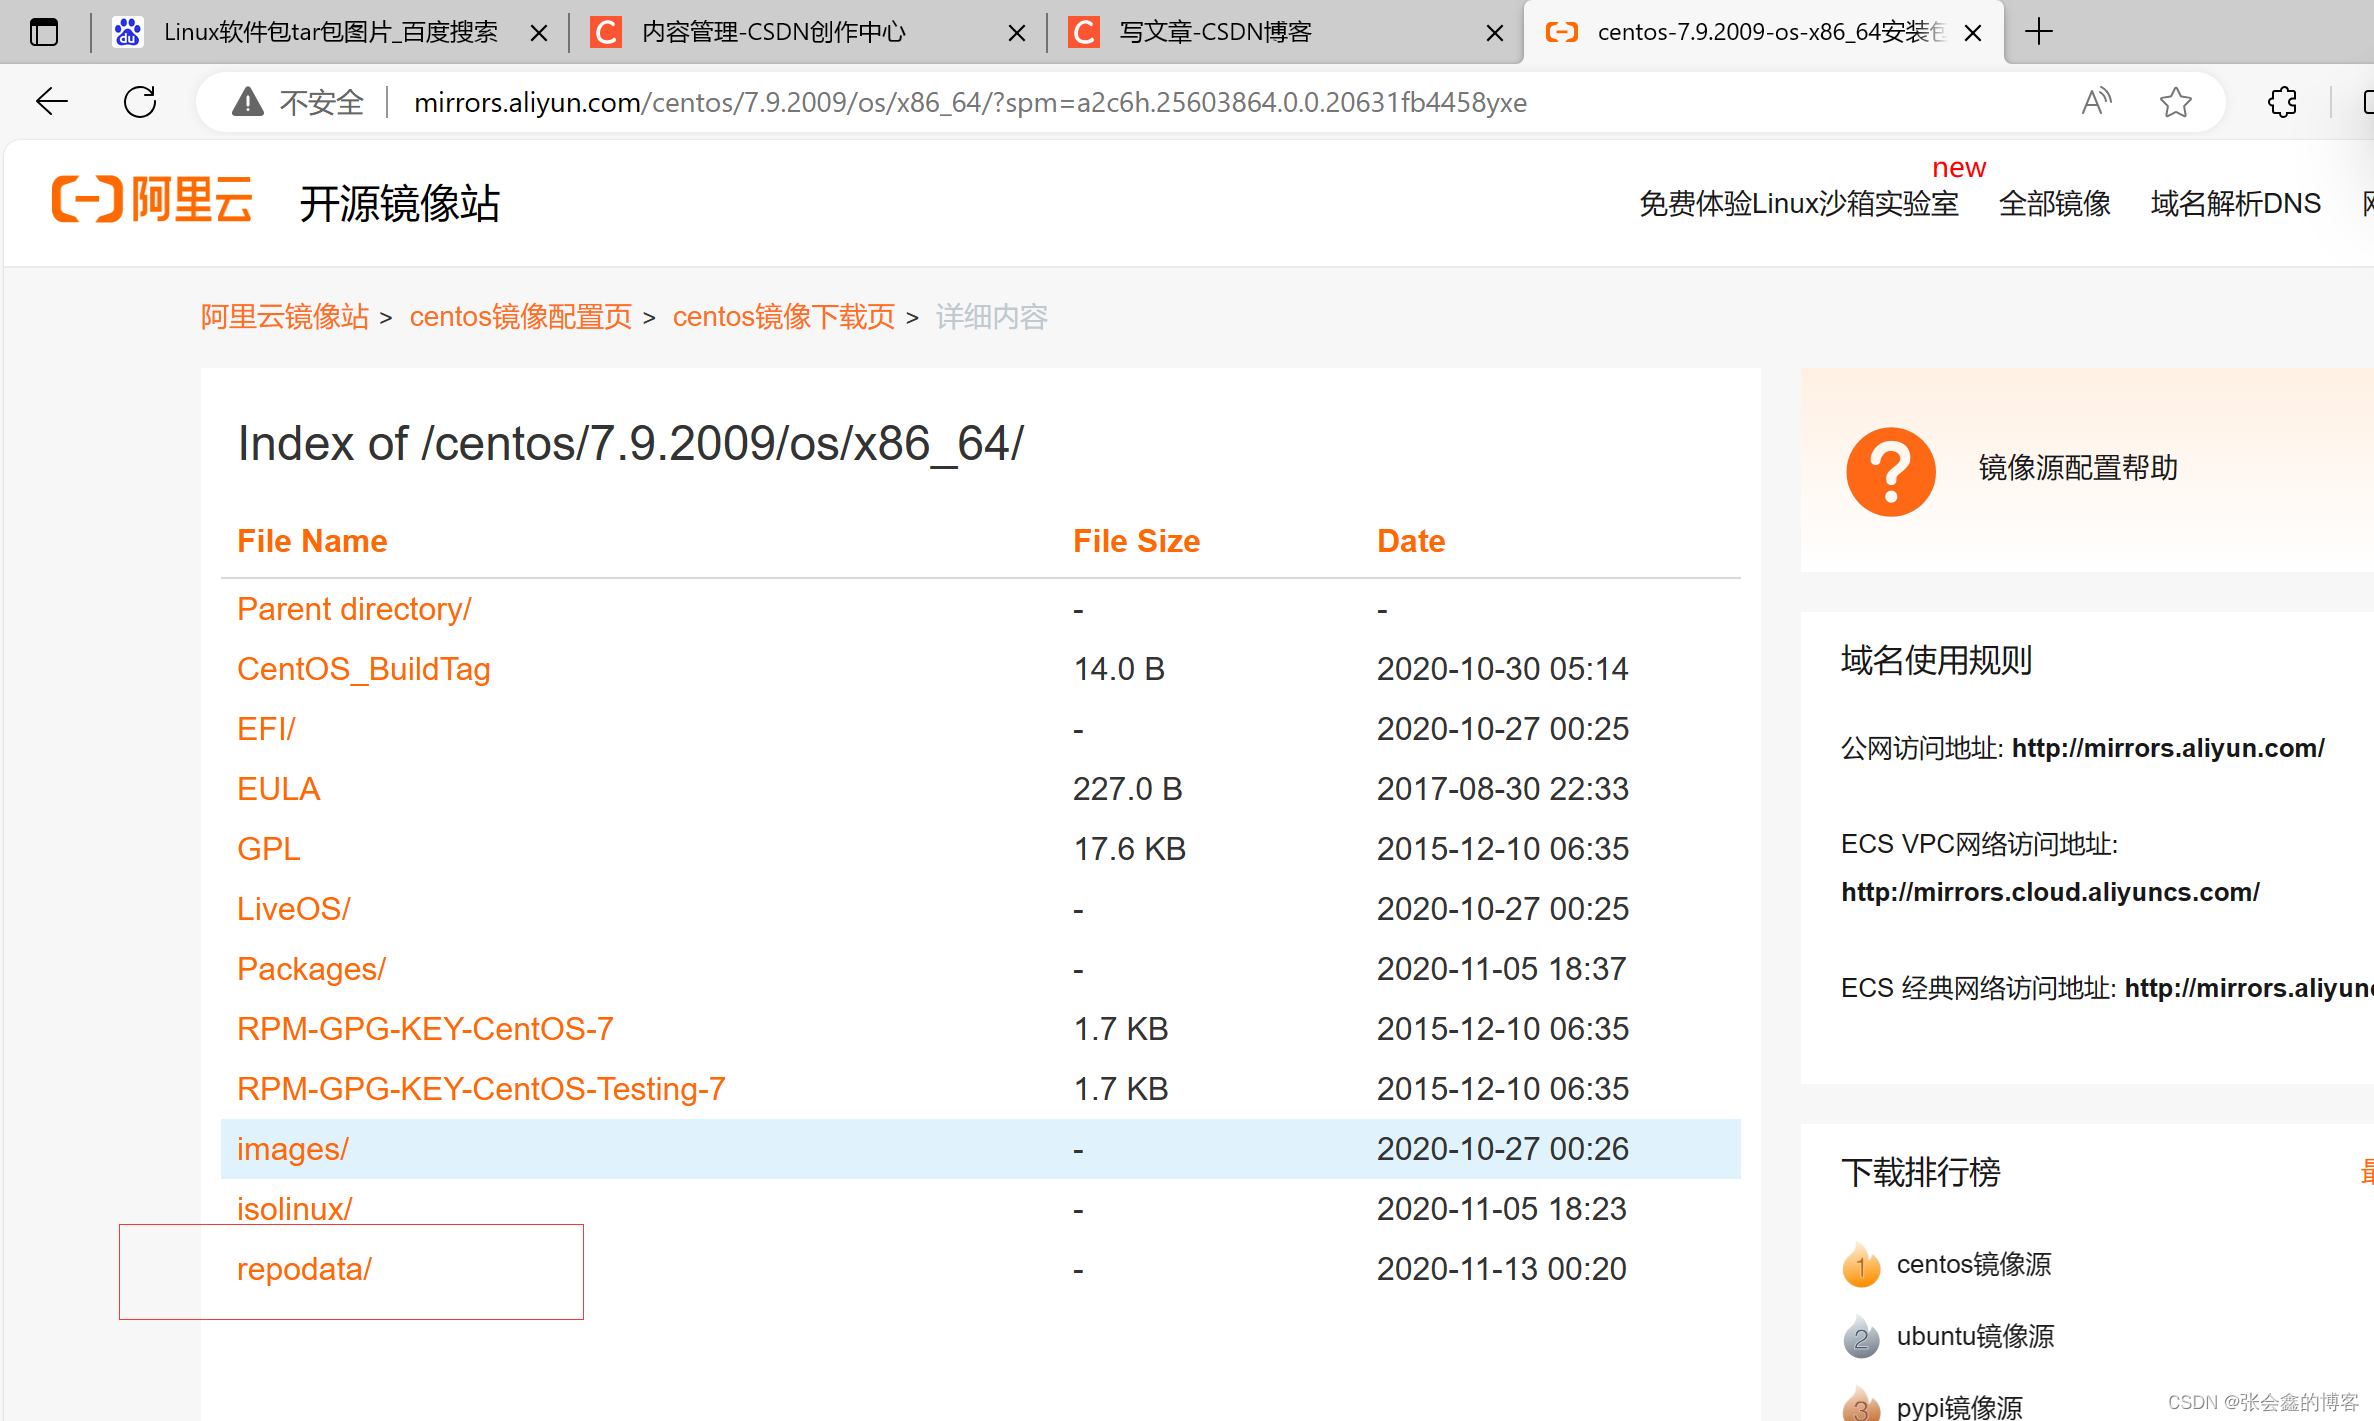
baseurl | yum源的地址,打开后访问到repodate目录,yum配置最重要的 | ||
$ | $是变量 | ||
gpgcheck=1 | 开启软件包检查,搭建的yum仓库关闭即可 | ||
gpgkey | 用于检查密钥认证 | ||
enabled=0 | 是否要开启yum源 |
怎么配置yum源(base源、epel源)
以阿里云为例子
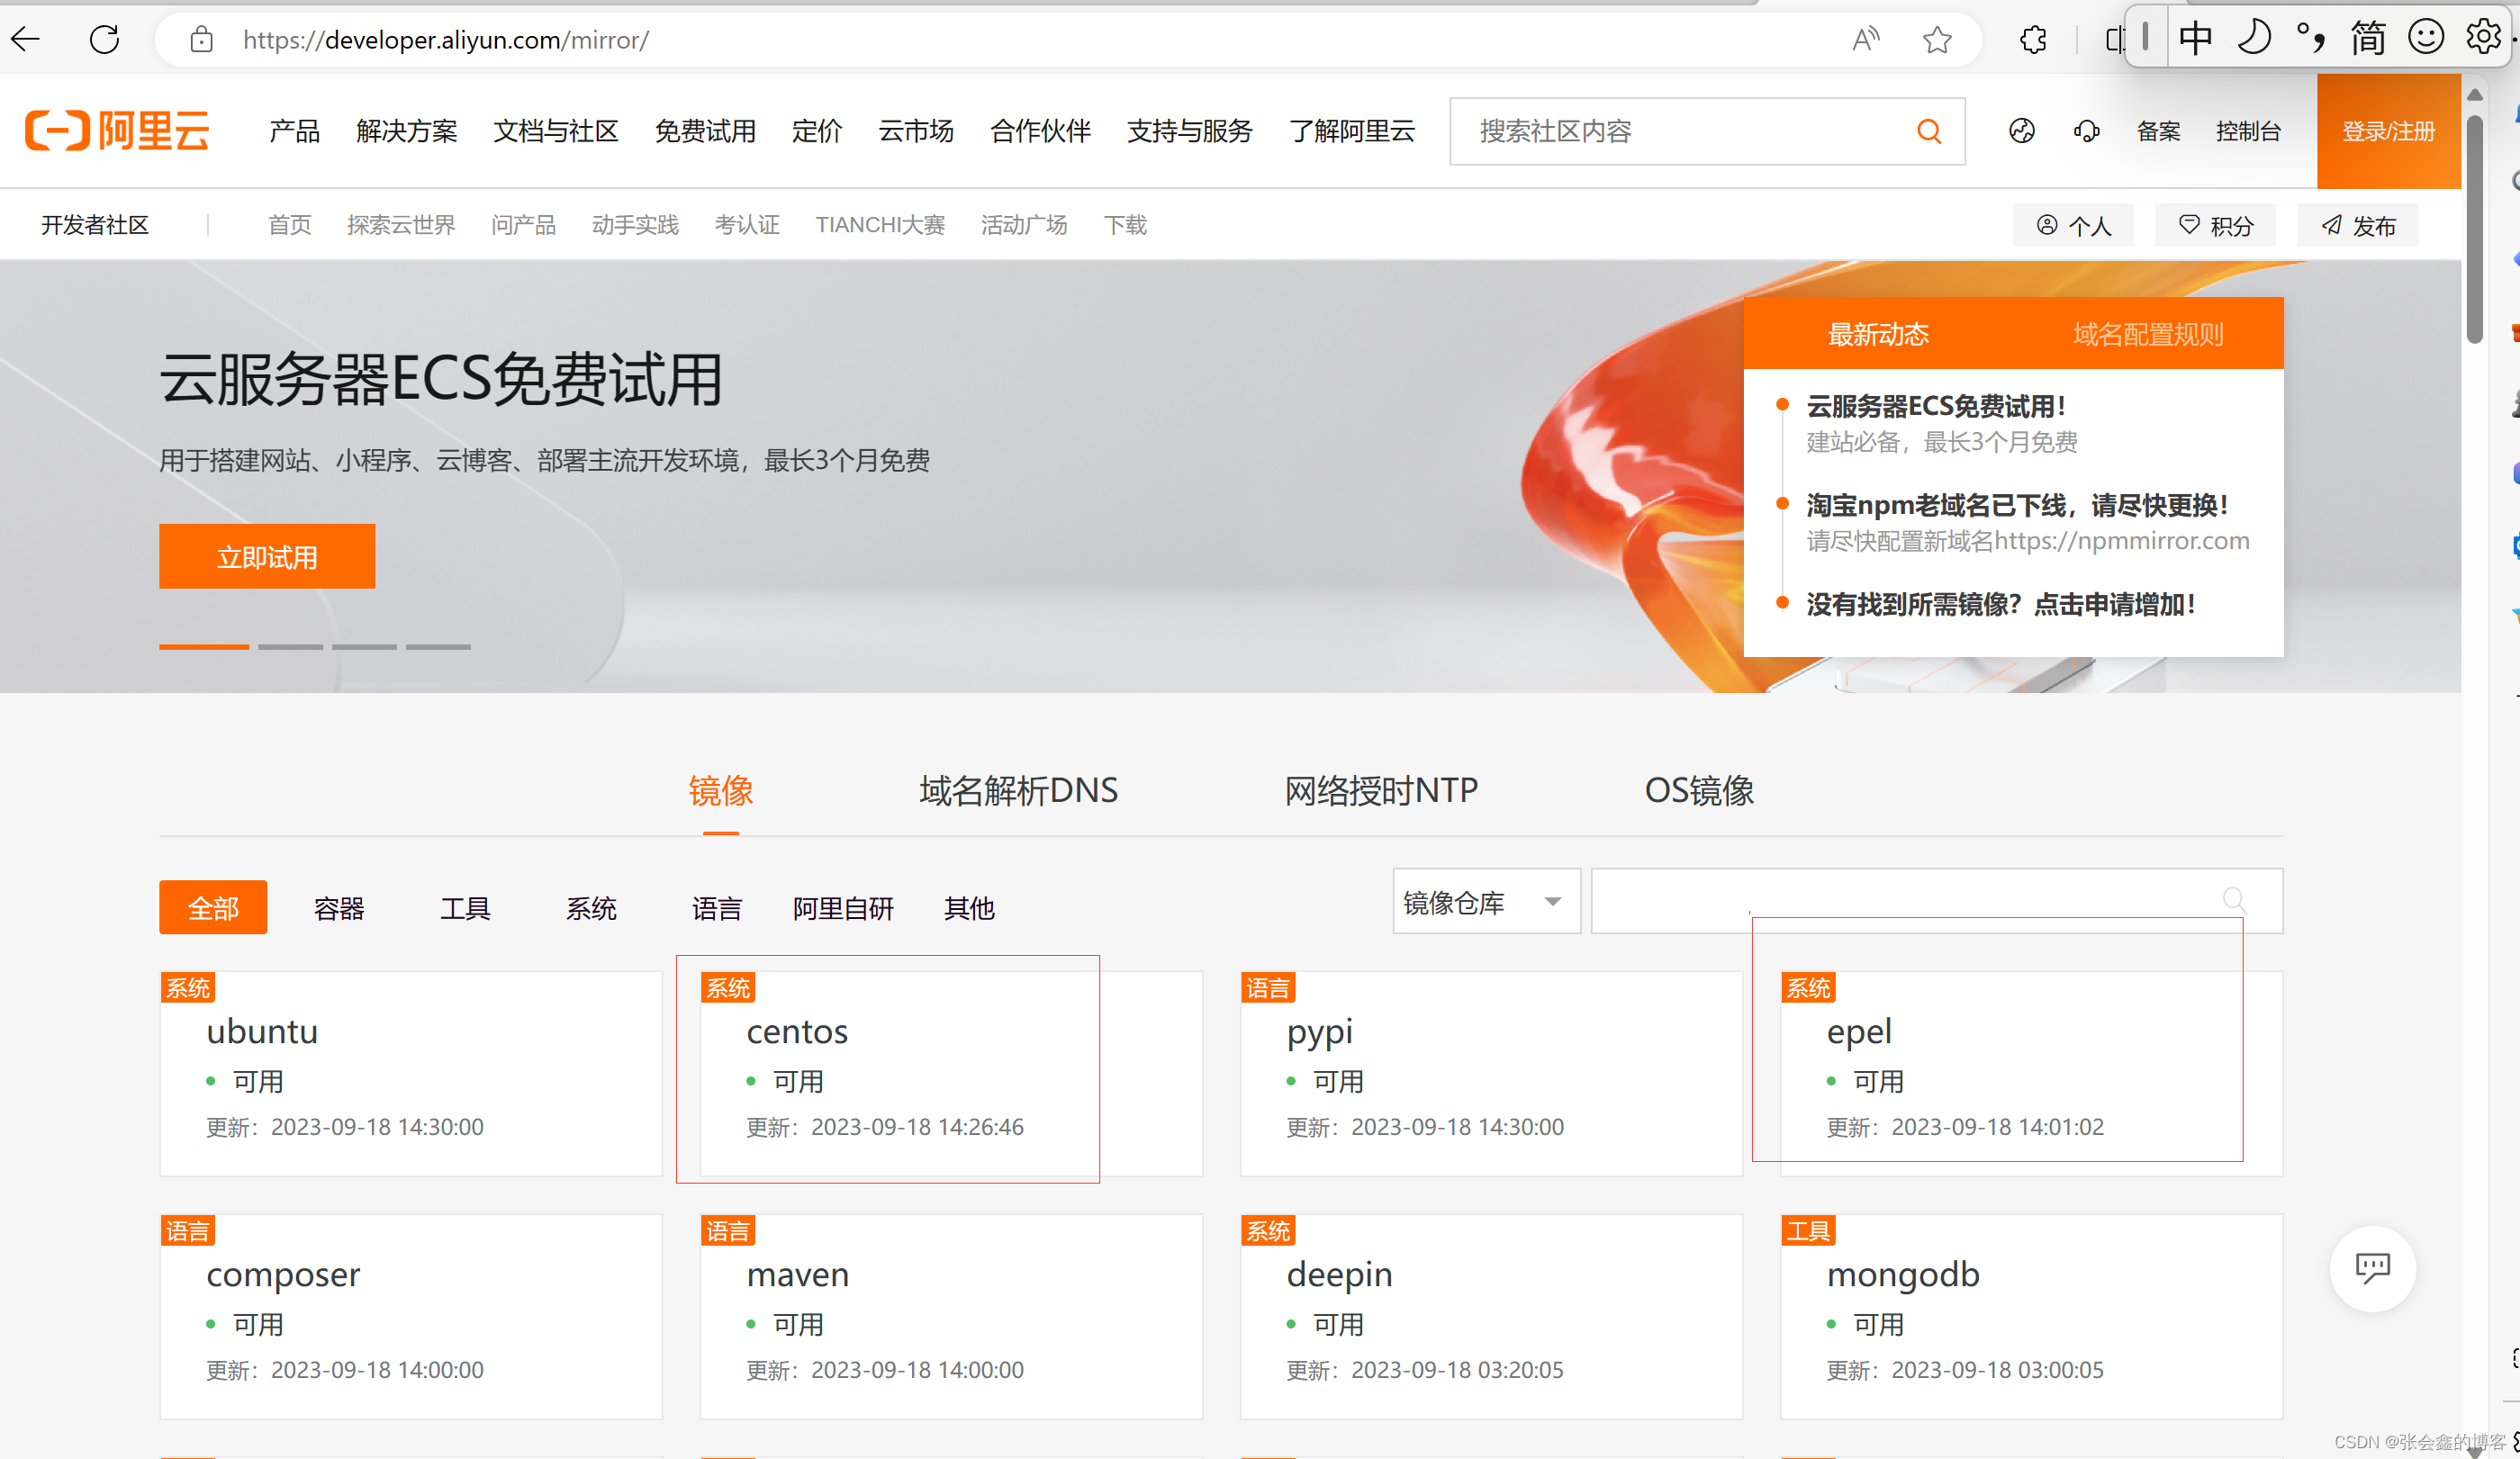
举例子:1.配置阿里的源
1.配置base源
[root@localhost yum.repos.d]# pwd
/etc/yum.repos.d
[root@localhost yum.repos.d]# ll
总用量 44
-rw-r--r--. 1 root root 2523 8月  18 17:34 CentOS-Base.repo
第一步先打开网址:
https://developer.aliyun.com/mirror/
第二步:首先备份
mv /etc/yum.repos.d/CentOS-Base.repo /etc/yum.repos.d/CentOS-Base.repo.backup
第三步:下载yum源
curl -o /etc/yum.repos.d/CentOS-Base.repo https://mirrors.aliyun.com/repo/Centos-7.repo
2.配置增强yum源    epel源
[root@localhost yum.repos.d]# pwd
/etc/yum.repos.d
[root@localhost yum.repos.d]# ll
-rw-r--r--. 1 root root  664 8月  18 17:34 epel.repo
备份:
mv /etc/yum.repos.d/epel.repo /etc/yum.repos.d/epel.repo.backup
mv /etc/yum.repos.d/epel-testing.repo /etc/yum.repos.d/epel-testing.repo.backup
下载epel源:如果没有wget命令去下载
[root@localhost yum.repos.d]# yum -y install wget
wget -O /etc/yum.repos.d/epel.repo https://mirrors.aliyun.com/repo/epel-7.repo
对系统的源进行补充:查看当前系统用的什么源,系统的软件,能找到多少个软件
[root@localhost yum.repos.d]# yum repolist
已加载插件:fastestmirror
Loading mirror speeds from cached hostfile
 * base: mirrors.aliyun.com
 * extras: mirrors.aliyun.com
 * updates: mirrors.aliyun.com
源标识                         源名称                                                      状态
!base/7/x86_64                 CentOS-7 - Base - mirrors.aliyun.com                        10,072
!epel/x86_64                   Extra Packages for Enterprise Linux 7 - x86_64              13,767
!extras/7/x86_64               CentOS-7 - Extras - mirrors.aliyun.com                         518
!updates/7/x86_64              CentOS-7 - Updates - mirrors.aliyun.com                      5,176
repolist: 29,533                        #系统能用29533个软件包
怎么配置清华源
举例子:清华源
在页面查找的很慢时,按键ctrl+f搜索查找:
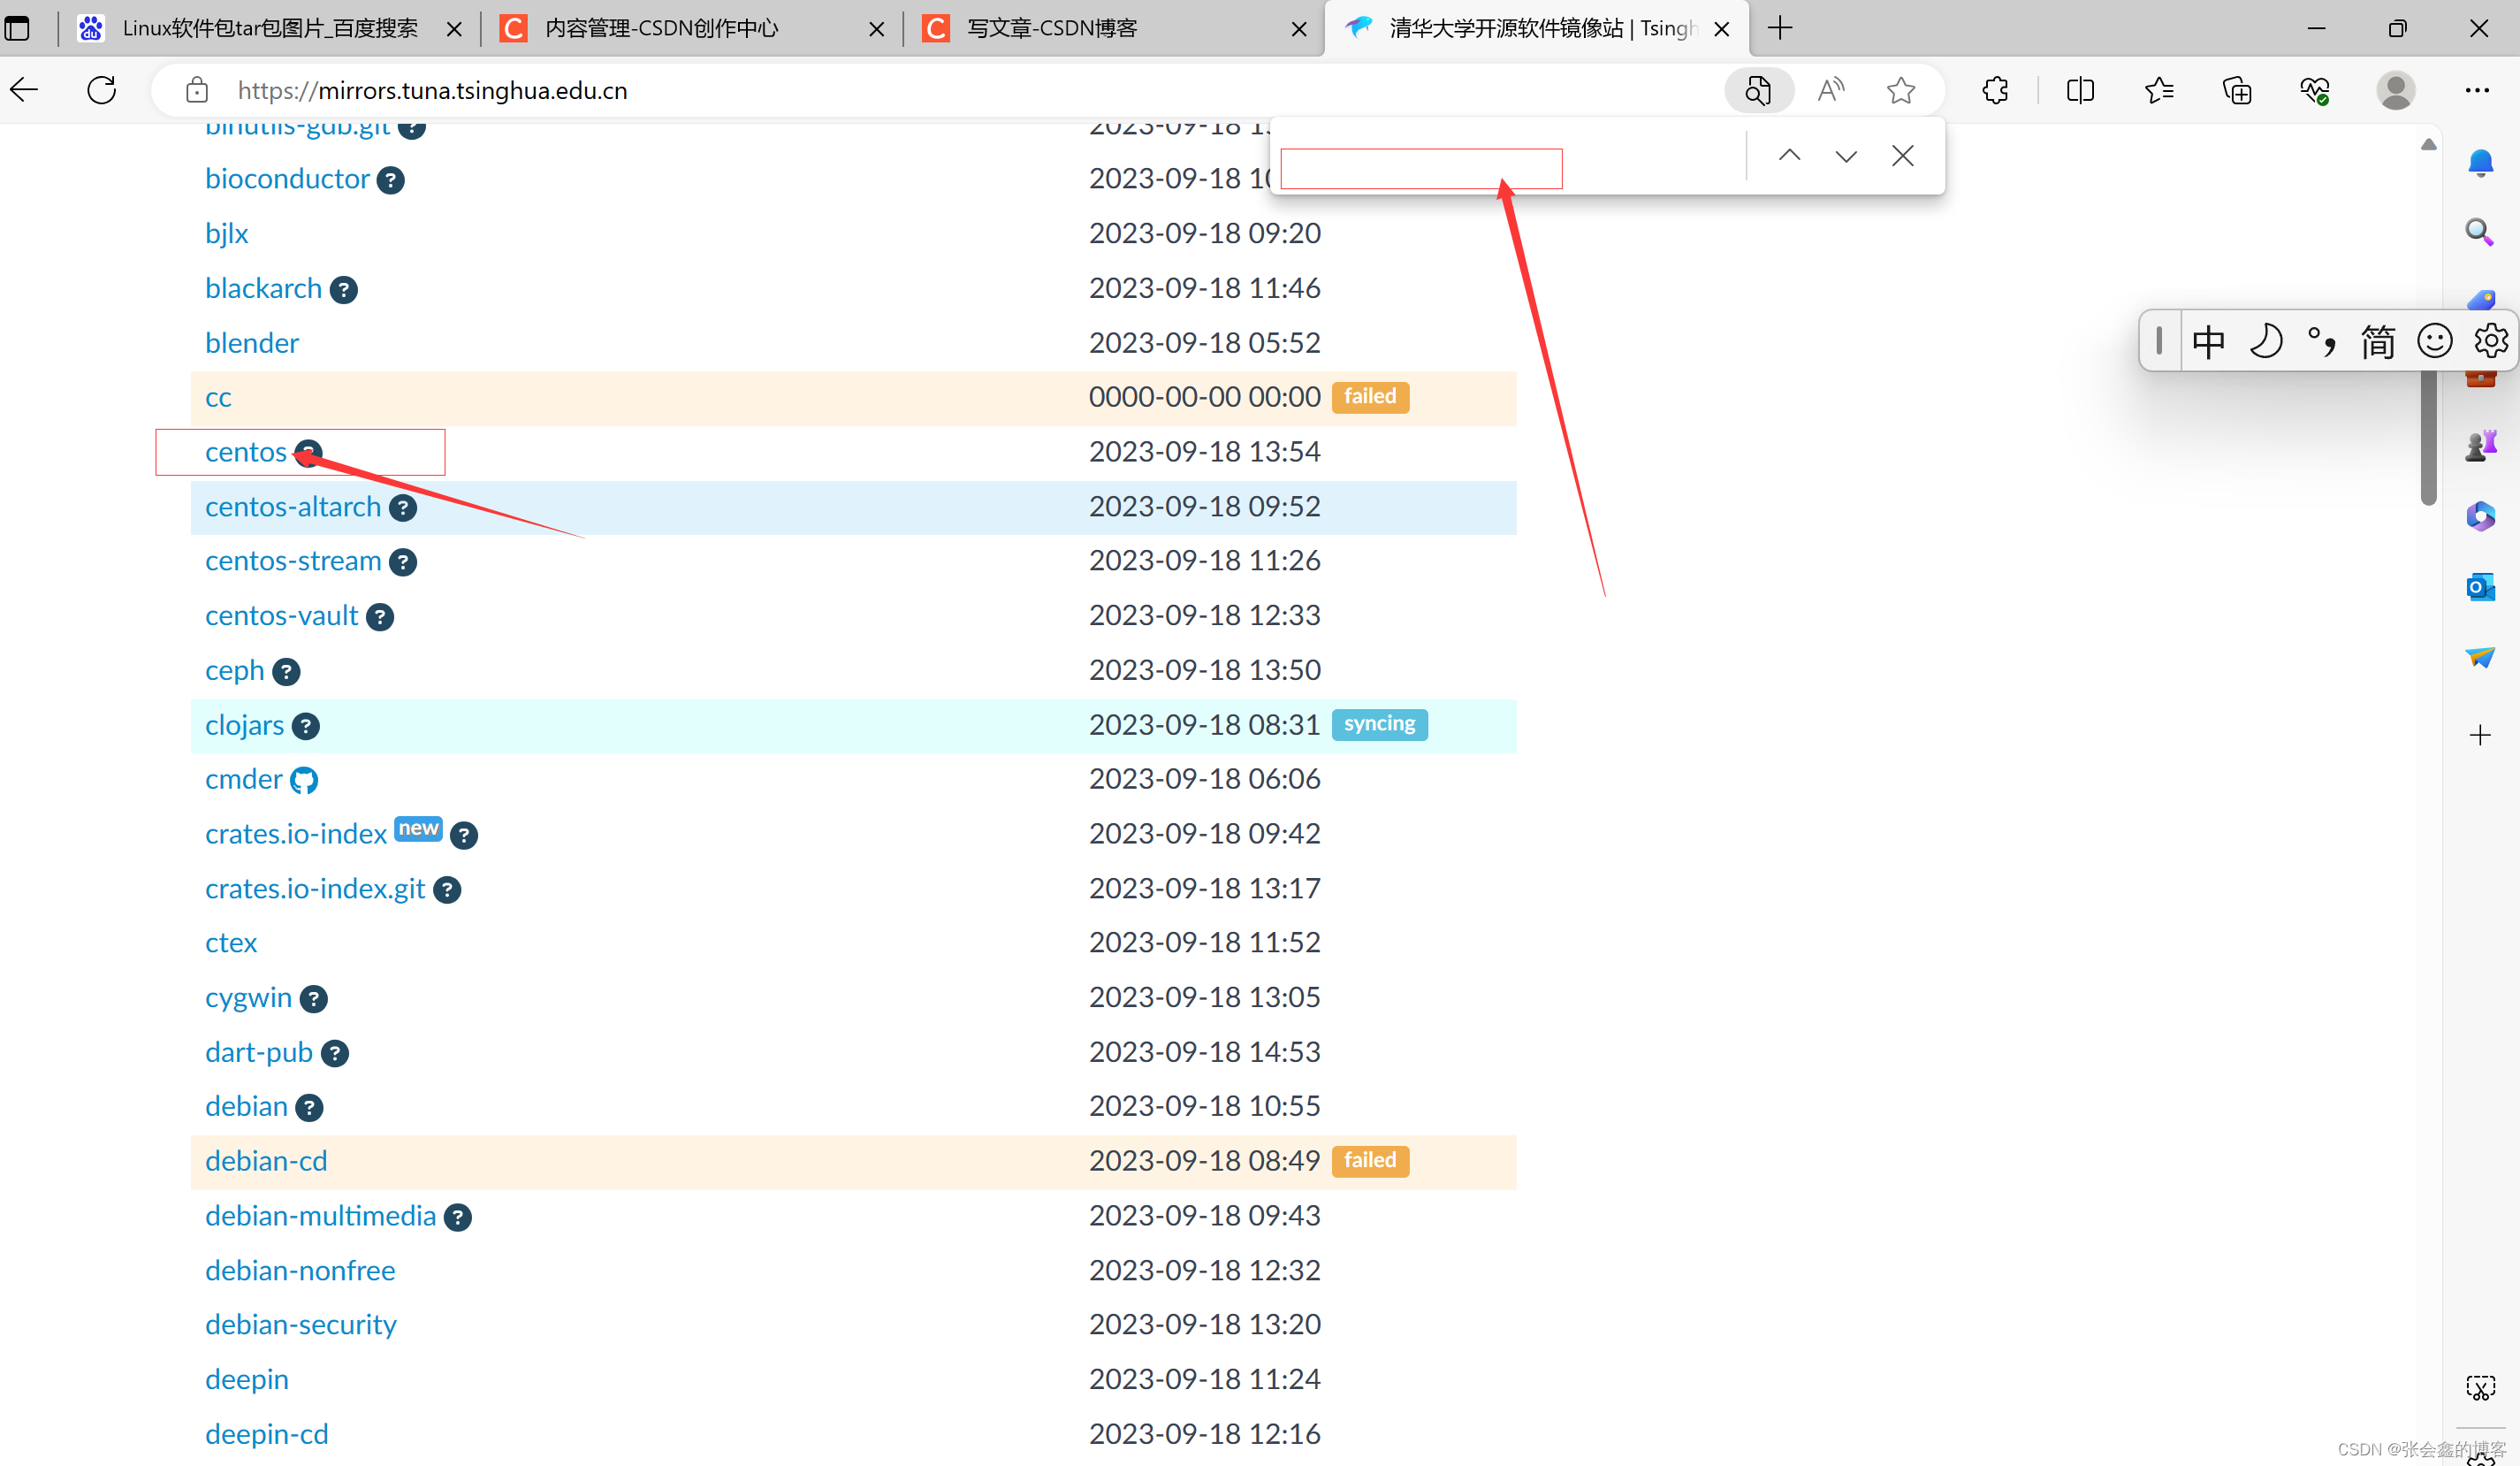
https://mirrors.tuna.tsinghua.edu.cn/
备份原始状态:把mirrorlist的所在行前面加上了#号注释
[root@localhost yum.repos.d]# cat CentOS-Base.repo.bak
# CentOS-Base.repo
#
# The mirror system uses the connecting IP address of the client and the
# update status of each mirror to pick mirrors that are updated to and
# geographically close to the client. You should use this for CentOS updates
# unless you are manually picking other mirrors.
#
# If the mirrorlist= does not work for you, as a fall back you can try the
# remarked out baseurl= line instead.
#
#
[base]
name=CentOS-$releasever - Base
mirrorlist=http://mirrorlist.centos.org/?release=$releasever&arch=$basearch&repo=os&infra=$infra
#baseurl=http://mirror.centos.org/centos/$releasever/os/$basearch/
gpgcheck=1
gpgkey=file:///etc/pki/rpm-gpg/RPM-GPG-KEY-CentOS-7
#released updates
[updates]
name=CentOS-$releasever - Updates
mirrorlist=http://mirrorlist.centos.org/?release=$releasever&arch=$basearch&repo=updates&infra=$infra
#baseurl=http://mirror.centos.org/centos/$releasever/updates/$basearch/
gpgcheck=1
gpgkey=file:///etc/pki/rpm-gpg/RPM-GPG-KEY-CentOS-7
#additional packages that may be useful
[extras]
name=CentOS-$releasever - Extras
mirrorlist=http://mirrorlist.centos.org/?release=$releasever&arch=$basearch&repo=extras&infra=$infra
#baseurl=http://mirror.centos.org/centos/$releasever/extras/$basearch/
gpgcheck=1
gpgkey=file:///etc/pki/rpm-gpg/RPM-GPG-KEY-CentOS-7
#additional packages that extend functionality of existing packages
[centosplus]
name=CentOS-$releasever - Plus
mirrorlist=http://mirrorlist.centos.org/?release=$releasever&arch=$basearch&repo=centosplus&infra=$infra
#baseurl=http://mirror.centos.org/centos/$releasever/centosplus/$basearch/
gpgcheck=1
enabled=0
gpgkey=file:///etc/pki/rpm-gpg/RPM-GPG-KEY-CentOS-7
3.下载:做了个替换
sudo sed -e 's|^mirrorlist=|#mirrorlist=|g' \
-e 's|^#baseurl=http://mirror.centos.org/centos|baseurl=https://mirrors.tuna.tsinghua.edu.cn/centos|g' \
-i.bak \
/etc/yum.repos.d/CentOS-*.repo
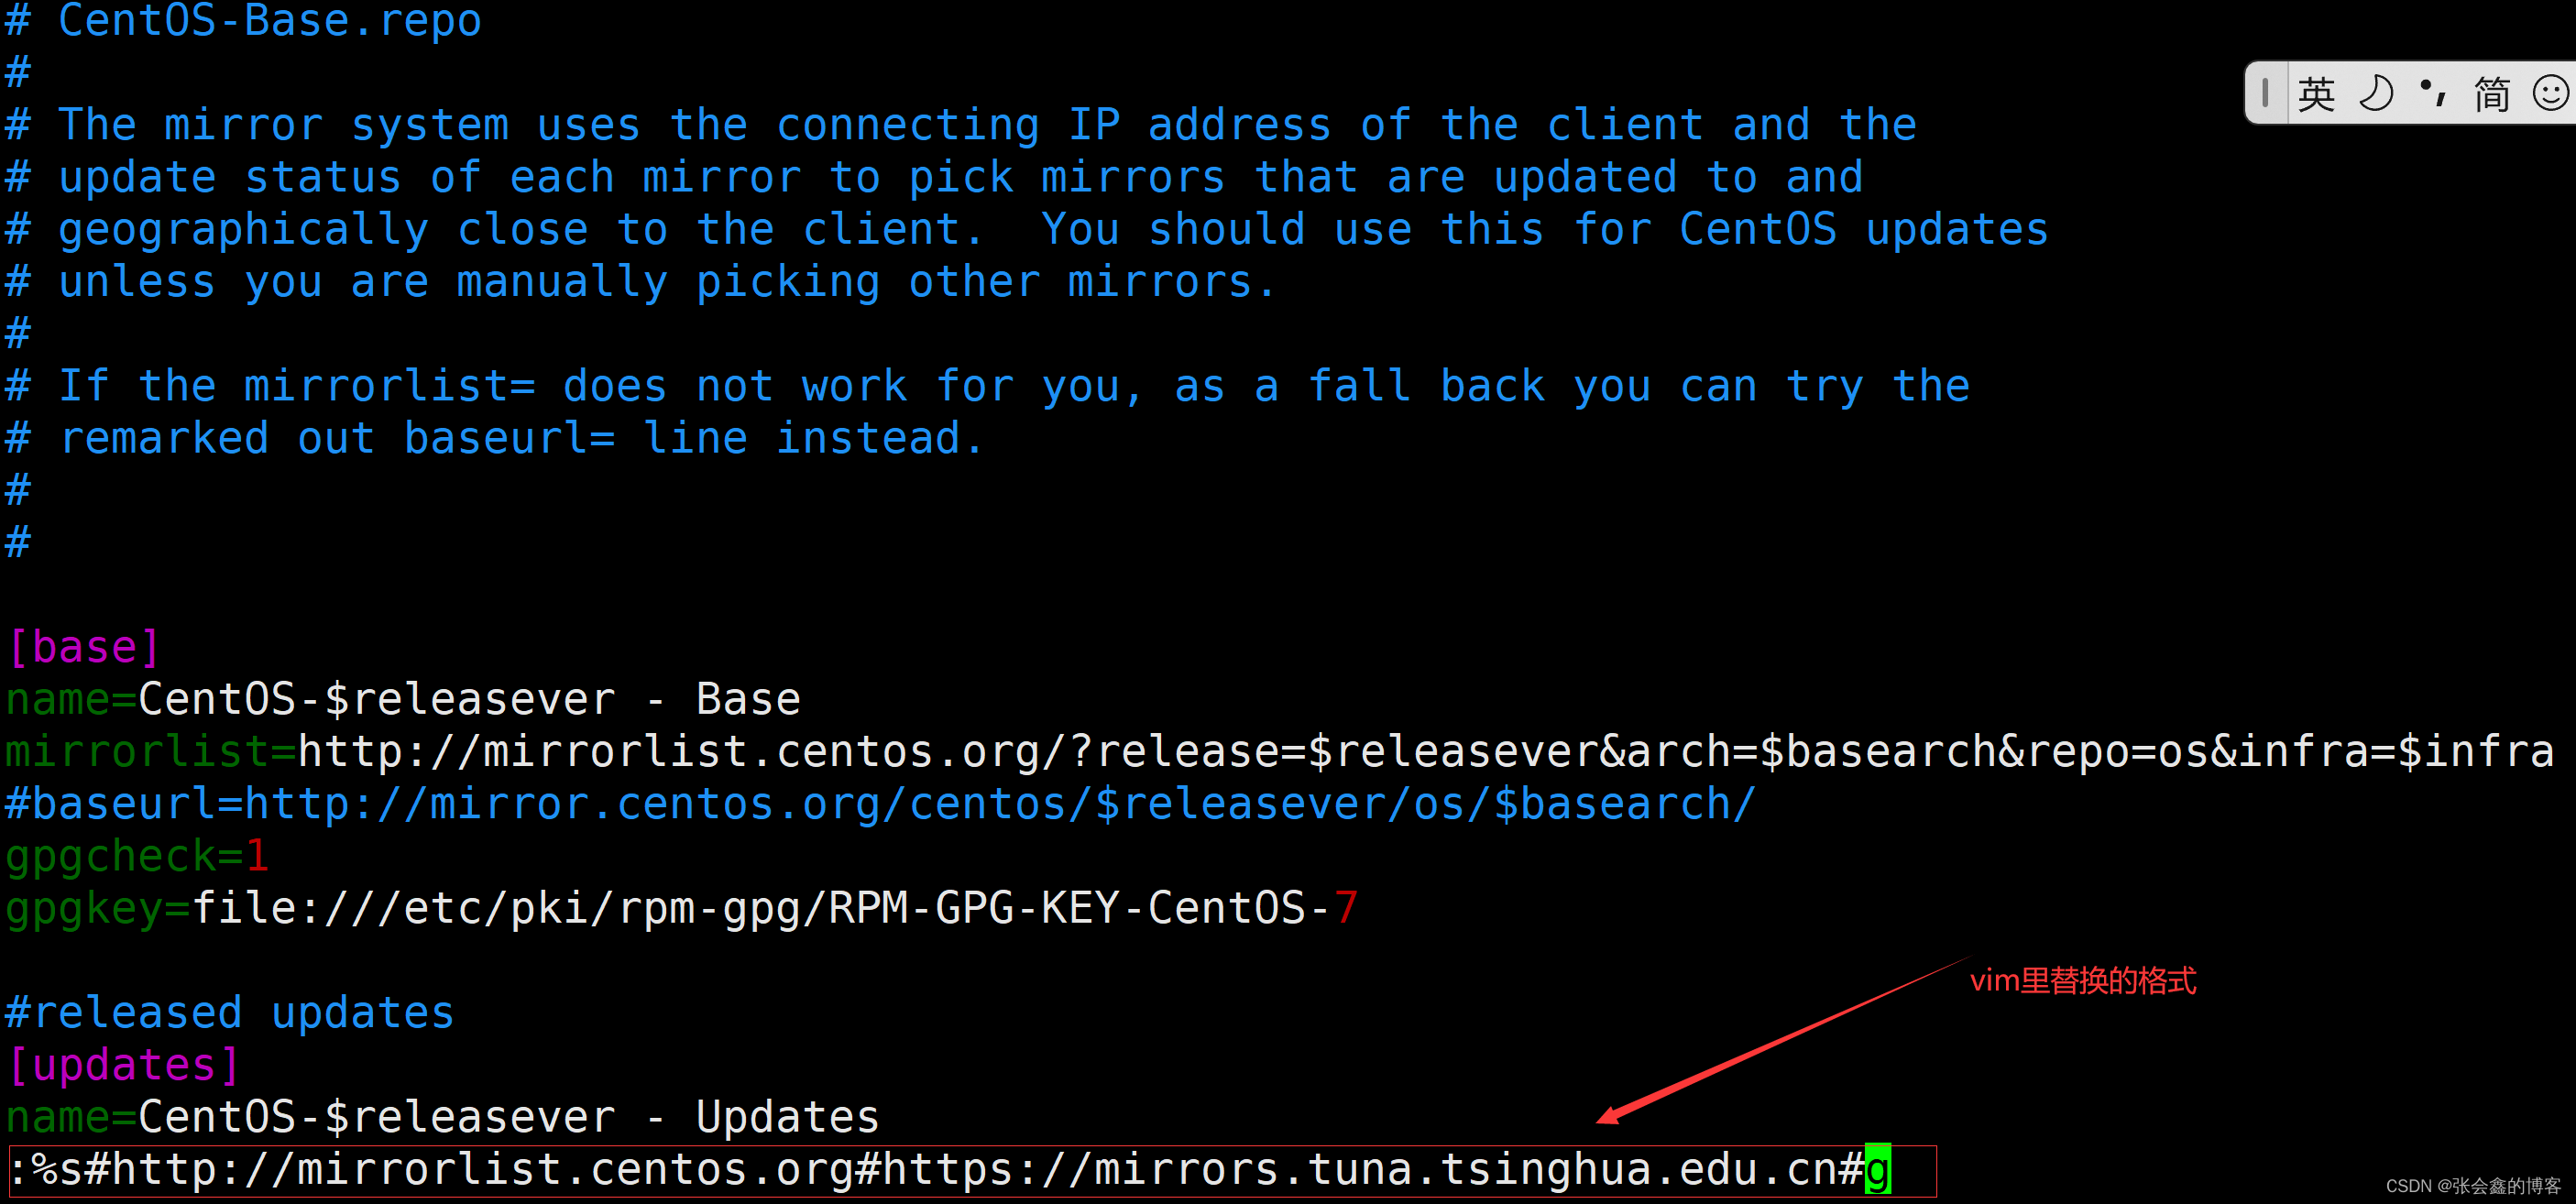
4.在vim里替换的方法:举例子(阿里替换成清华源)
vim替换的格式: :%s#去找啥#需要替换的内容#g %号是所有行,如果要替换不是所有行就把%去掉换成1-xxx行 :1,20s#去找啥#需要替换的内容#g
:%s#http://mirrorlist.centos.org#https://mirrors.tuna.tsinghua.edu.cn#g
vim编辑器替换的格式方法:
3.4yum命令如何配置(下载和保存到哪里去了)

yum命令配置文件如何去配置?
没有网络的时,可以找到有网的服务器,开启keepcache=1,下载各种服务软件,保存好缓存,用rpm包进行安装。
应对没有网的环境,在有网的环境的服务器yum下载完也会有依赖,把缓存的目录/var/cache/yum/$basearch/$releasever拷贝其它的服务器在进行安装
[root@localhost ~]# ll -h /etc/yum.conf
-rw-r--r--. 1 root root 970 4月   2 2020 /etc/yum.conf
[root@localhost ~]# find /var/cache/yum/x86_64/7/  -type f -name "*.rpm"    # 查找rpm没有是因为keepcache=1 这里没改成1
[root@localhost ~]# vim /etc/yum.conf
[main]
cachedir=/var/cache/yum/$basearch/$releasever      #缓存目录
keepcache=1(开启改为1)			# 确定是否要保留,0代表不表示缓存,如果是1会把软件包放在缓存目录cachedir=/var/cache/yum/$basearch/$releasever
测试yum从新安装:
[root@localhost ~]# yum reinstall -y xxx
yum命令的增删改查
解释 | yum命令 | ||
增加安装 | yum -y install xxx(软件命令) | ||
删除软件包(别操作这个不能使用) | yum remove xxx(软件包) | ||
更新软件包 | yum update xxx(软件包) | ||
列出软件包 | yum list xxx(软件包) | ||
不记得软件包的名称,使用搜索 | yum search xxx(软件包) | ||
获取软件包的名称 | yum info xxx(软件包) | ||
查看软件包的依赖 | yum deplist xxx(软件包) | ||
列出所有的软件包,这个可以结合less分页显示 | yum list | ||
查找某个文件属于哪个软件包 | yum provides /xxx/xxxx.def | ||
列出所有的yum | yum repolist all | ||
列举出启用的yum源 | yum repolist |
yum 增加
增加:-y 表示是否要安装,是否确认的时候默认选择yes
[root@localhost ~]# yum -y install xxx
当不小心把命令清空了情况下使用从新安装的方法:
[root@localhost ~]# yum  reinstall  -y   xxx
yum查找-搜索
根据名字搜索软件
[root@localhost ~]# yum  search all sed     # 这个虽然搜索的很细,不使用这个搜索
使用软件包内容搜索,搜索依赖属于哪个软件包
[root@localhost ~]# yum provides   命令、文件    找出这个命令或文件属于哪个软件包
查看yum源的信息
查看yum源列表:
[root@localhost ~]# yum repolist
已加载插件:fastestmirror
Loading mirror speeds from cached hostfile
 * base: mirrors.aliyun.com
 * extras: mirrors.aliyun.com
 * updates: mirrors.aliyun.com
源标识                         源名称                                                      状态
!base/7/x86_64                 CentOS-7 - Base - mirrors.aliyun.com                        10,072
!epel/x86_64                   Extra Packages for Enterprise Linux 7 - x86_64              13,767
!extras/7/x86_64               CentOS-7 - Extras - mirrors.aliyun.com                         518
!updates/7/x86_64              CentOS-7 - Updates - mirrors.aliyun.com                      5,176
repolist: 29,533
yum  list 相当于rpm -qa    显示yum仓库所有的可用软件包
[root@localhost ~]# yum list
删除软件包 yum remove,不能使用!!!要是使用则用rpm -e 删除
删除或清空本地缓存:什么时候清空,是自己搭建的时候清空 yum clean all
改-俗称升级:也是安装也可以是升级
解决bug漏洞:
[root@localhost ~]# yum -y install xxx
[root@localhost ~]# yum update     # 可以升级所有的软件,一般是安装完操作系统时升级,在生产环境下误操作否则服务就用不了
[root@localhost ~]# yum upgrade	# 可以升级所有的软件,一般是安装完操作系统时升级,在生产环境下误操作否则服务就用不了


 5121
5121

 被折叠的 条评论
为什么被折叠?
被折叠的 条评论
为什么被折叠?
 到【灌水乐园】发言


