


目录
SimpleDialog、SimpleDialogOption
PageView实现动态轮播图PageController以及AutomaticKeepAliveClientMixin
AutomaticKeepClientMixin缓存PageView页面
Flutter Key:LocalKey、GlobalKey
Widget Tree、Element Tree 和RenderObject Tree
AnimatedSwitcher以及transitionBuilder
RotationTransition 、AnimationController
Flutter路由介绍
Flutter中的路由通俗的讲就是页面跳转。在Flutter中通过Navigator组件管理路由导航。并提供了管理堆栈的方法。如:Navigator.push和Navigator.pop
Flutter中提供了两种配置路由跳转的方式:
1、基本路由
2、命名路由
Flutter中普通路由使用
如从HomePage组件跳转到SearchPage组件
1、需要在HomePage组件中引入SearchPage.dart
import '../SearchPage.dart';
2、在HomePage中通过下面方法跳转
Center(
    child: ElevatedButton(

)
)基础项目可以参考前面文章Flutter开发③——组件_m0_46427459的博客-优快云博客
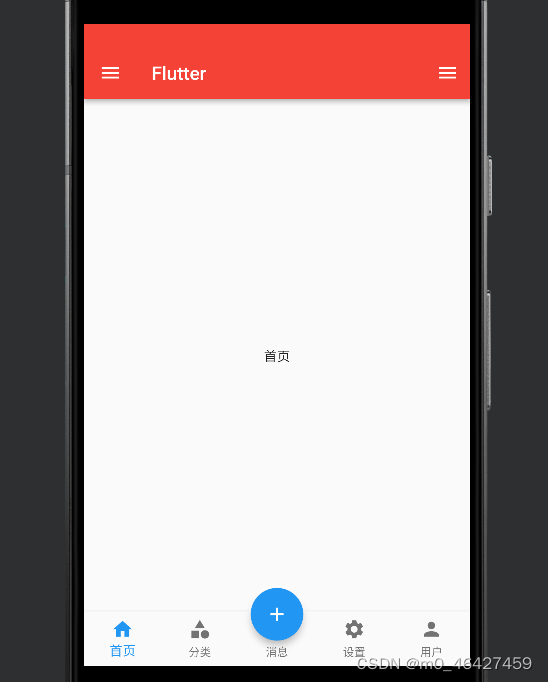
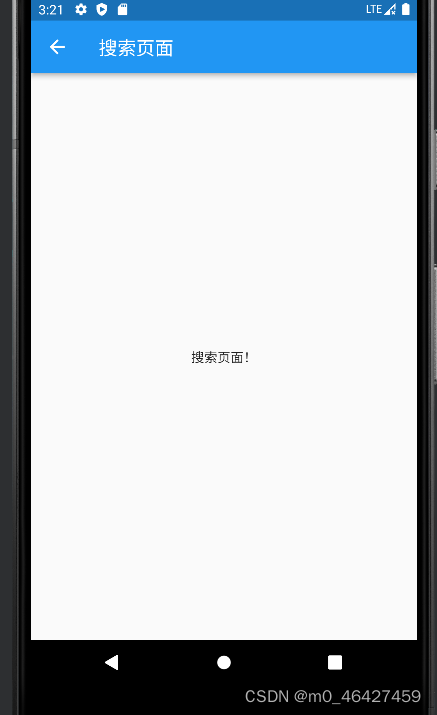
在tabs下新建一个search.dart
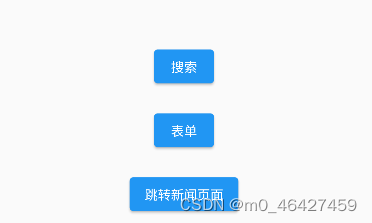
实现在首页定义一个按钮,点击时跳转到搜索页
search.dart
import 'package:flutter/material.dart';

class SearchPage extends StatefulWidget {
  const SearchPage({super.key});

  @override
  State<SearchPage> createState() => _SearchPageState();
}

class _SearchPageState extends State<SearchPage> {
  @override
  Widget build(BuildContext context) {
    return Scaffold(
      appBar: AppBar(title: const Text("搜索页面"),),
      body: const Center(child: Text("搜索页面!"),),
    );
  }
}
home.dart
import 'package:flutter/material.dart';
import './search.dart';
class HomePage extends StatefulWidget {
const HomePage({super.key});
@override
State<HomePage> createState() => _HomePageState();
}
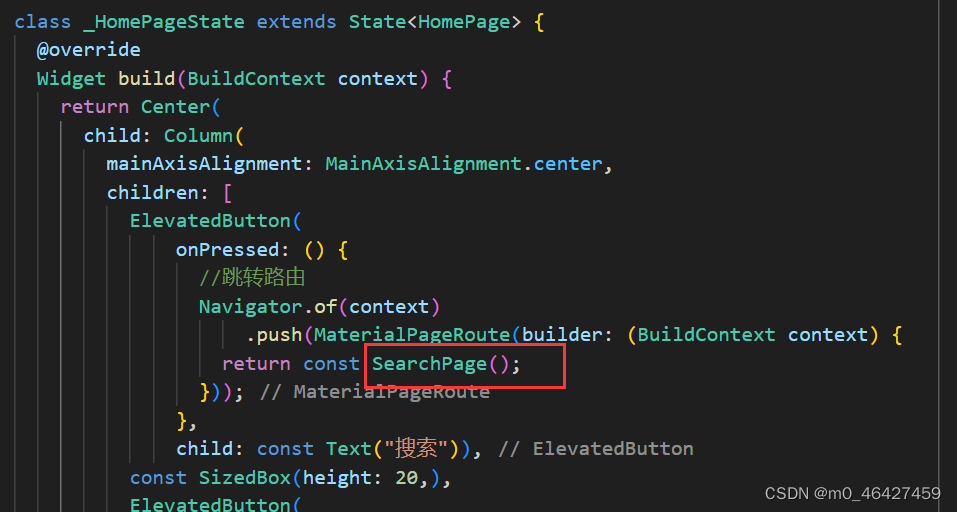
class _HomePageState extends State<HomePage> {
@override
Widget build(BuildContext context) {
return Center(
child: Column(
children: [
ElevatedButton(
onPressed: () {
//跳转路由
Navigator.of(context)
.push(MaterialPageRoute(builder: (BuildContext context) {
return const SearchPage();
}));
},
child: const Text("搜索"))
],
),
);
}
}

普通路由跳转传值
跳转传值和调用组件传值的实现方法一样。
组件传值:即定义SearchPage时构造函数定义一些参数,然后调用时传入即可
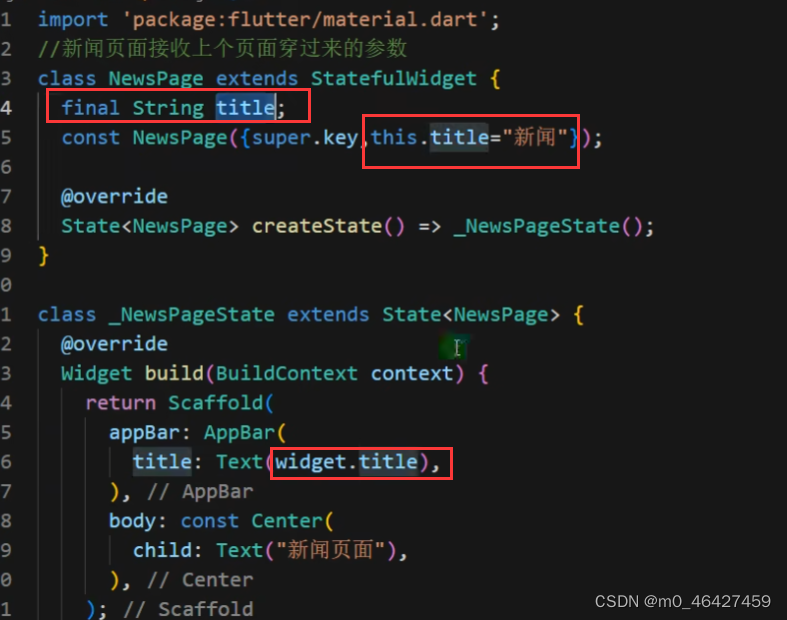
可以在_NewsPageState中通过widget获取传入的参数

路由返回上一页
news.dart Navigator.pop(context);
import 'package:flutter/material.dart';

class NewsPage extends StatefulWidget {
  final String title;

  const NewsPage({super.key, required this.title});

  @override
  State<NewsPage> createState() => _NewsPageState();
}

class _NewsPageState extends State<NewsPage> {
  @override
  void initState() {
    // TODO: implement initState
    super.initState();
    print(widget.title);
  }

  @override
  Widget build(BuildContext context) {
    return Scaffold(
      floatingActionButton: FloatingActionButton(
        onPressed: () {
          Navigator.pop(context);
        },
        child: const Icon(Icons.home),
      ),
      appBar: AppBar(
        title: Text(widget.title),
      ),
      body: const Center(
        child: Text("新闻页面"),
      ),
    );
  }
}
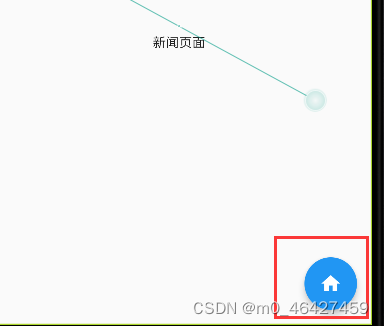 点击后就会跳转上一页
Flutter中的命名路由
可以统一管理路由。
在main.dart中的MaterialApp组件设置routes属性
main.dart
import 'package:flutter/material.dart';
import './pages/tabs.dart';
import './pages/tabs/form.dart';
import './pages/tabs/search.dart';
import './pages/tabs/news.dart';
void main(List<String> args) {
runApp(const MyApp());
}
class MyApp extends StatelessWidget {
const MyApp({super.key});
@override
Widget build(BuildContext context) {
return MaterialApp(
debugShowCheckedModeBanner: false,
title: "Flutter Demo",
theme: ThemeData(primarySwatch: Colors.blue),
initialRoute: "/", //配置起始页面
routes: {
"/": (context) => const Tabs(), //初始进入访问的页面即Tabs
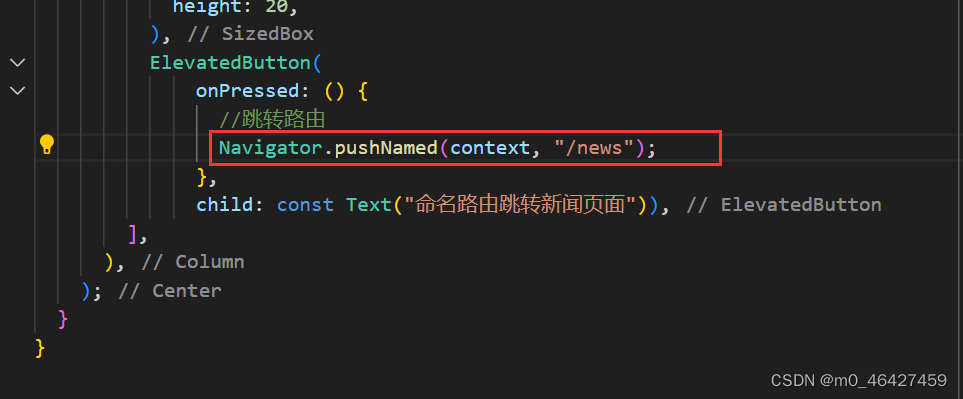
"/news": (context) => const NewsPage(title: "新闻"),
"/search": (context) => const SearchPage()
},
);
// home: const Tabs());
}
}home.dart中要跳转时:
命名路由传值
1、先定义Map类型的routes
2、调用onGenerateRoute处理
main.dart
还可以把routes、onGenerateRoute抽出去另起一个文件,然后再main.dart中引入即可。
import 'package:flutter/material.dart';
import './pages/tabs.dart';
import './pages/tabs/form.dart';
import './pages/tabs/search.dart';
import './pages/tabs/news.dart';
void main(List<String> args) {
runApp(MyApp());
}
class MyApp extends StatelessWidget {
//定义路由
Map routes = {
"/": (context) => const Tabs(), //初始进入访问的页面即Tabs
"/news": (context) => const NewsPage(title: "新闻"),
"/search": (context) => const SearchPage(),
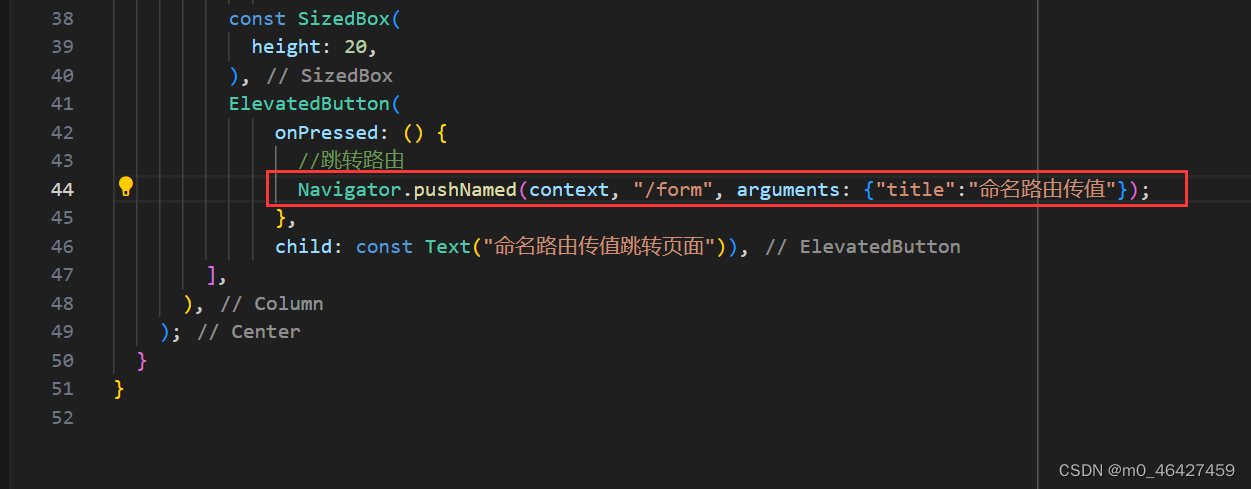
"/form": (context, {arguments}) => FormPage(arguments: arguments)
};
MyApp({
super.key,
});
@override
Widget build(BuildContext context) {
return MaterialApp(
debugShowCheckedModeBanner: false,
title: "Flutter Demo",
theme: ThemeData(primarySwatch: Colors.blue),
initialRoute: "/", //配置起始页面
// 配置onGenerateRoute 固定写法
onGenerateRoute: (RouteSettings settings) {
final String? name = settings.name; //即路由名 /news 或 /search
final Function? pageContentBuilder = routes[name]; //相当于Function,即前面定义的路由后的跳转函数:(context) => const SearchPage()
if (pageContentBuilder != null) {
if (settings.arguments != null) { //判断是否有传参
final Route route = MaterialPageRoute(
//调用前面获取到的路由函数
builder: (context) =>
pageContentBuilder(context, arguments: settings.arguments));
return route;
} else {
final Route route = MaterialPageRoute(
builder: (context) => pageContentBuilder(context));
return route;
}
}
return null;
},
);
// home: const Tabs());
}
}home.dart 新增一个命名路由传值的按钮
form.dart
要先定义arguments,构造函数也要接收该参数
import 'package:flutter/material.dart';

//其他页面跳转到Form页面进行命名路由传值
class FormPage extends StatefulWidget {
  final Map arguments;
  const FormPage({super.key, required this.arguments});

  @override
  State<FormPage> createState() => _FormPageState();
}

class _FormPageState extends State<FormPage> {
  @override
  void initState() {
    // TODO: implement initState
    super.initState();
    print(widget.arguments);
  }

  @override
  Widget build(BuildContext context) {
    return Scaffold(
      appBar: AppBar(
        title: const Text("表单"),
      ),
      body: const Center(
        child: Text("表单页面"),
      ),
    );
  }
}
Flutter返回上一级路由
Navigator.of(context).pop()
Flutter中替换路由
比如从用户中心页面跳转到registerFirst页面,然后从registerFirst页面通过pushReplacementNamed跳转到了registerSecond页面。这时点击registerSecond的返回按钮时就会直接返回用户中心。
Navigator.of(context).pushReplacementNamed('/registerThird')
在第二个页面跳转第三页面的按钮配置上面这个,相当第二个页面的的路由已经替换成registerThird,此时第三页面返回上一页即为第一页面。
Flutter返回根路由
Navigator.of(context).pushAndRemoveUntil(MaterialPageRoute(builder:(BuildContext context){return const Tabs();}),(route)=>false)
直接到首页
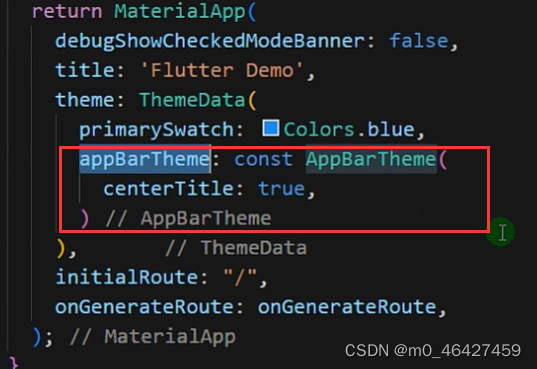
全局标题居中
Android和Ios使用同样风格的路由跳转
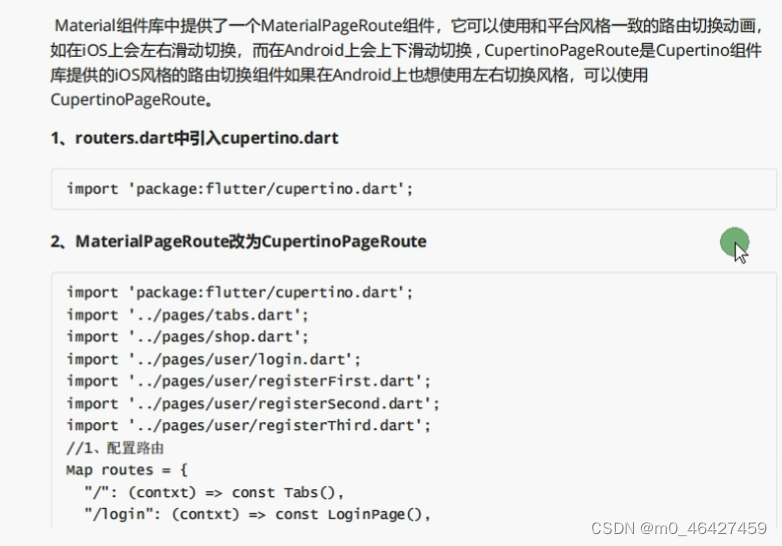
引入后将原来的MaterialPageRoute组件替换成CupertinoPageRoute组件即可
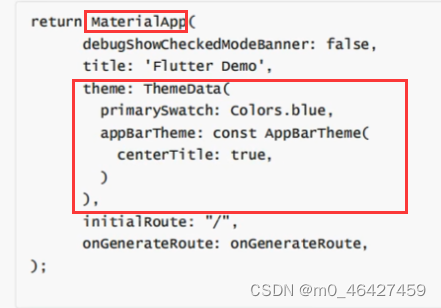
全局配置主题
Flutter Dialog 弹出框
基础代码
/lib/routers/routers.dart
import 'package:flutter/cupertino.dart';
import 'package:flutter/material.dart';
import '../pages/tabs.dart';
import '../pages/dialog.dart';

Map routes = {
  "/": (context) => const Tabs(), //初始进入访问的页面即Tabs
  "/dialog": (context) => const DialogPage(),
};

var onGenerateRoute = (RouteSettings settings) {
  final String? name = settings.name; //即路由名 /news 或 /search
  final Function? pageContentBuilder =
      routes[name]; //相当于Function,即前面定义的路由后的跳转函数:(context) => const SearchPage()
  if (pageContentBuilder != null) {
    if (settings.arguments != null) {
      //判断是否有传参
      final Route route = MaterialPageRoute(
          //调用前面获取到的路由函数
          builder: (context) =>
              pageContentBuilder(context, arguments: settings.arguments));
      return route;
    } else {
      final Route route =
          MaterialPageRoute(builder: (context) => pageContentBuilder(context));
      return route;
    }
  }
  return null;
};
/lib/main.dart
import 'package:flutter/material.dart';
import './pages/tabs.dart';
import './pages/tabs/form.dart';
import './pages/tabs/search.dart';
import './pages/tabs/news.dart';
import './routers/routers.dart';

void main(List<String> args) {
  runApp(MyApp());
}

class MyApp extends StatelessWidget {
  //定义路由
  MyApp({
    super.key,
  });
  @override
  Widget build(BuildContext context) {
    return MaterialApp(
      debugShowCheckedModeBanner: false,
      title: "Flutter Demo",
      theme: ThemeData(primarySwatch: Colors.blue),
      initialRoute: "/", //配置起始页面
      // 配置onGenerateRoute  固定写法
      onGenerateRoute: onGenerateRoute

    );
    // home: const Tabs());
  }
}
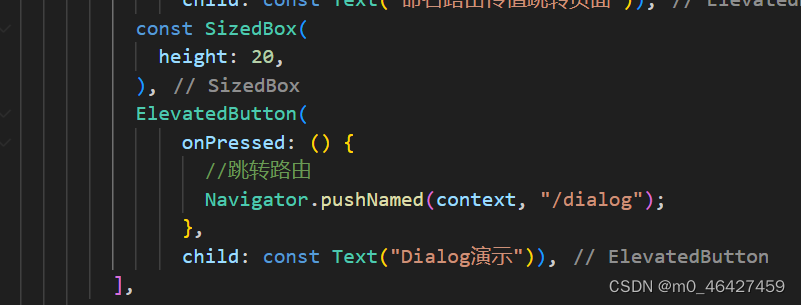
home.dart中新增一个按钮,可以跳转到dialog.dart
dialog.dart
import 'package:flutter/material.dart';

class DialogPage extends StatefulWidget {
  const DialogPage({super.key});

  @override
  State<DialogPage> createState() => _DialogPageState();
}

class _DialogPageState extends State<DialogPage> {
  void _alertDialog() {}

  void _simpleDialog() {}
  void _modelBottomSheet() {}

  void _toast() {}

  @override
  Widget build(BuildContext context) {
    return Scaffold(
      appBar: AppBar(
        title: const Text("Dialog"),
      ),
      body: Column(
        mainAxisAlignment: MainAxisAlignment.center,
        children: [
          ElevatedButton(onPressed: _alertDialog, child: const Text("alert弹出框")),
          const SizedBox(height: 20,),
          ElevatedButton(onPressed: _simpleDialog, child: const Text("select弹出框")),
          const SizedBox(height: 20,),
          ElevatedButton(onPressed: _modelBottomSheet, child: const Text("ActionSheet底部弹出框")),
          const SizedBox(height: 20,),
          ElevatedButton(onPressed: _toast, child: const Text("Toast")),
          const SizedBox(height: 20,),
        ],
      ),
    );
  }
}
AlertDialog
在上面的按钮中实现点击 "alert弹出框"按钮弹出AlertDialog
void _alertDialog() async {
    //改成异步方法
    //builder是一个方法,返回AlertDialog
    //在外部获取点击的按钮值:showDialog是个Feature异步类型,因此需要改成异步方法,并接受值;返回值需要在Navigator pop中传入
    var result = await showDialog(
        //result接受点击的值
        context: context,
        builder: (context) {
          return AlertDialog(
            title: const Text("提示信息!"),
            content: const Text("确定删除?"),
            //actions可以配置按钮组
            actions: [
              TextButton(
                  onPressed: () {
                    Navigator.of(context).pop("确定"); //点击按钮后关闭弹出框,且返回点击值
                  },
                  child: const Text("确定")),
              TextButton(
                  onPressed: () {
                    Navigator.of(context).pop("取消"); //点击按钮后关闭弹出框,且返回点击值
                  },
                  child: const Text("取消"))
            ],
          );
        });
    print(result); //打印获取的值
  }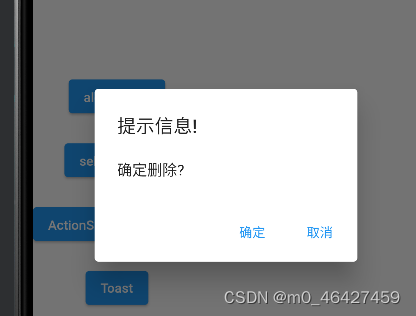

点了按钮则会返回内容,没点按钮 点击旁边灰色则会推出弹出框,此时就返回null
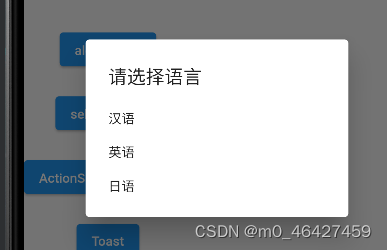
SimpleDialog、SimpleDialogOption
选择框
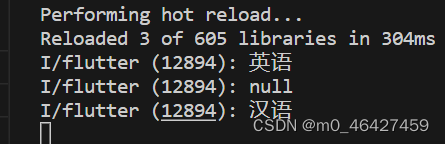
  void _simpleDialog() async {
    var result = await showDialog(
        barrierDismissible: true, //设置点击灰色背景时弹出框是否消失,默认为true会消失
        context: context,
        builder: (context) {
          return SimpleDialog(
            title: const Text("请选择语言"),
            children: [
              SimpleDialogOption(
                child: const Text("汉语"),
                onPressed: () {
                  Navigator.pop(context, "汉语"); //点击选项时关闭弹出框 并返回选择的内容
                },
              ),
              SimpleDialogOption(
                child: const Text("英语"),
                onPressed: () {
                  Navigator.pop(context, "英语"); //点击选项时关闭弹出框 并返回选择的内容
                },
              ),
              SimpleDialogOption(
                child: const Text("日语"),
                onPressed: () {
                  Navigator.pop(context, "日语"); //点击选项时关闭弹出框 并返回选择的内容
                },
              ),
            ],
          );
        });
    print(result);
  }
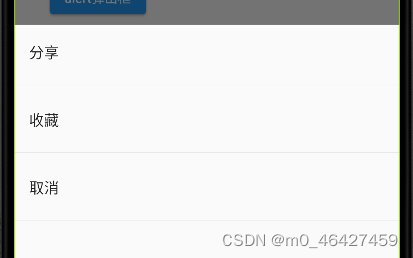
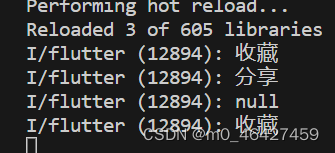
showModalBottomSheet
底部弹出框,直接调用showModalBottomSheet即可,其中build只需返回一个组件即可
  void _modelBottomSheet() async {
    var result = await showModalBottomSheet(
        context: context,
        builder: (context) {
          return Container(
            //建议外部包含一个Container 可以控制里面的区块
            child: Column(
              children: [
                ListTile(
                  title: const Text("分享"),
                  onTap: () {
                    //点击事件
                    Navigator.of(context).pop("分享");
                  },
                ),
                const Divider(),  //加个分隔符
                ListTile(
                  title: const Text("收藏"),
                  onTap: () {
                    Navigator.of(context).pop("收藏");
                  },
                ),
                const Divider(),
                ListTile(
                  title: const Text("取消"),
                  onTap: () {
                    Navigator.of(context).pop("取消");
                  },
                ),
                const Divider(),
              ],
            ),
          );
        });
    print(result);
  }
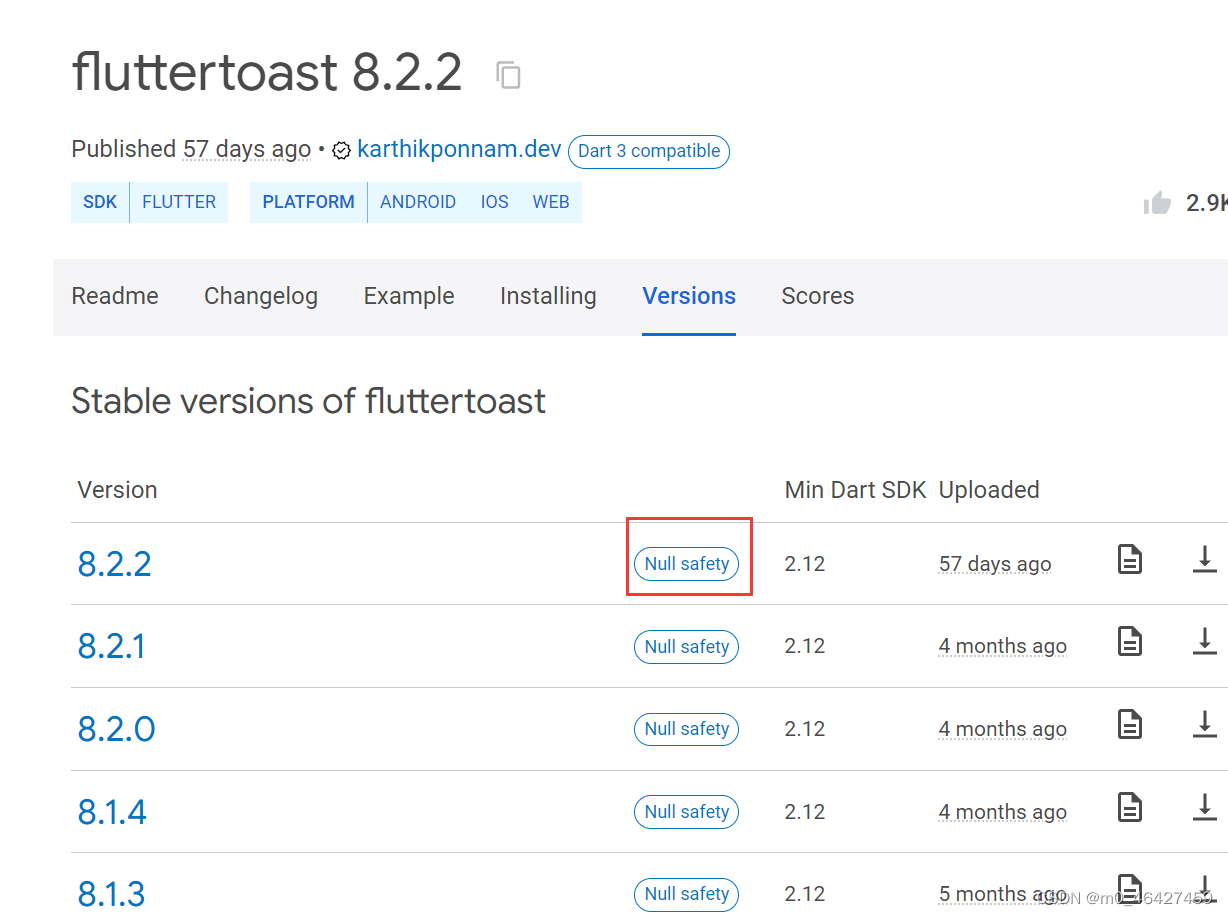
Flutter Toast
第三方插件使用
fluttertoast | Flutter Package
查看版本
空安全(Null safety)表示可以在最新版本使用,否则不能。
安装方式
参考installing
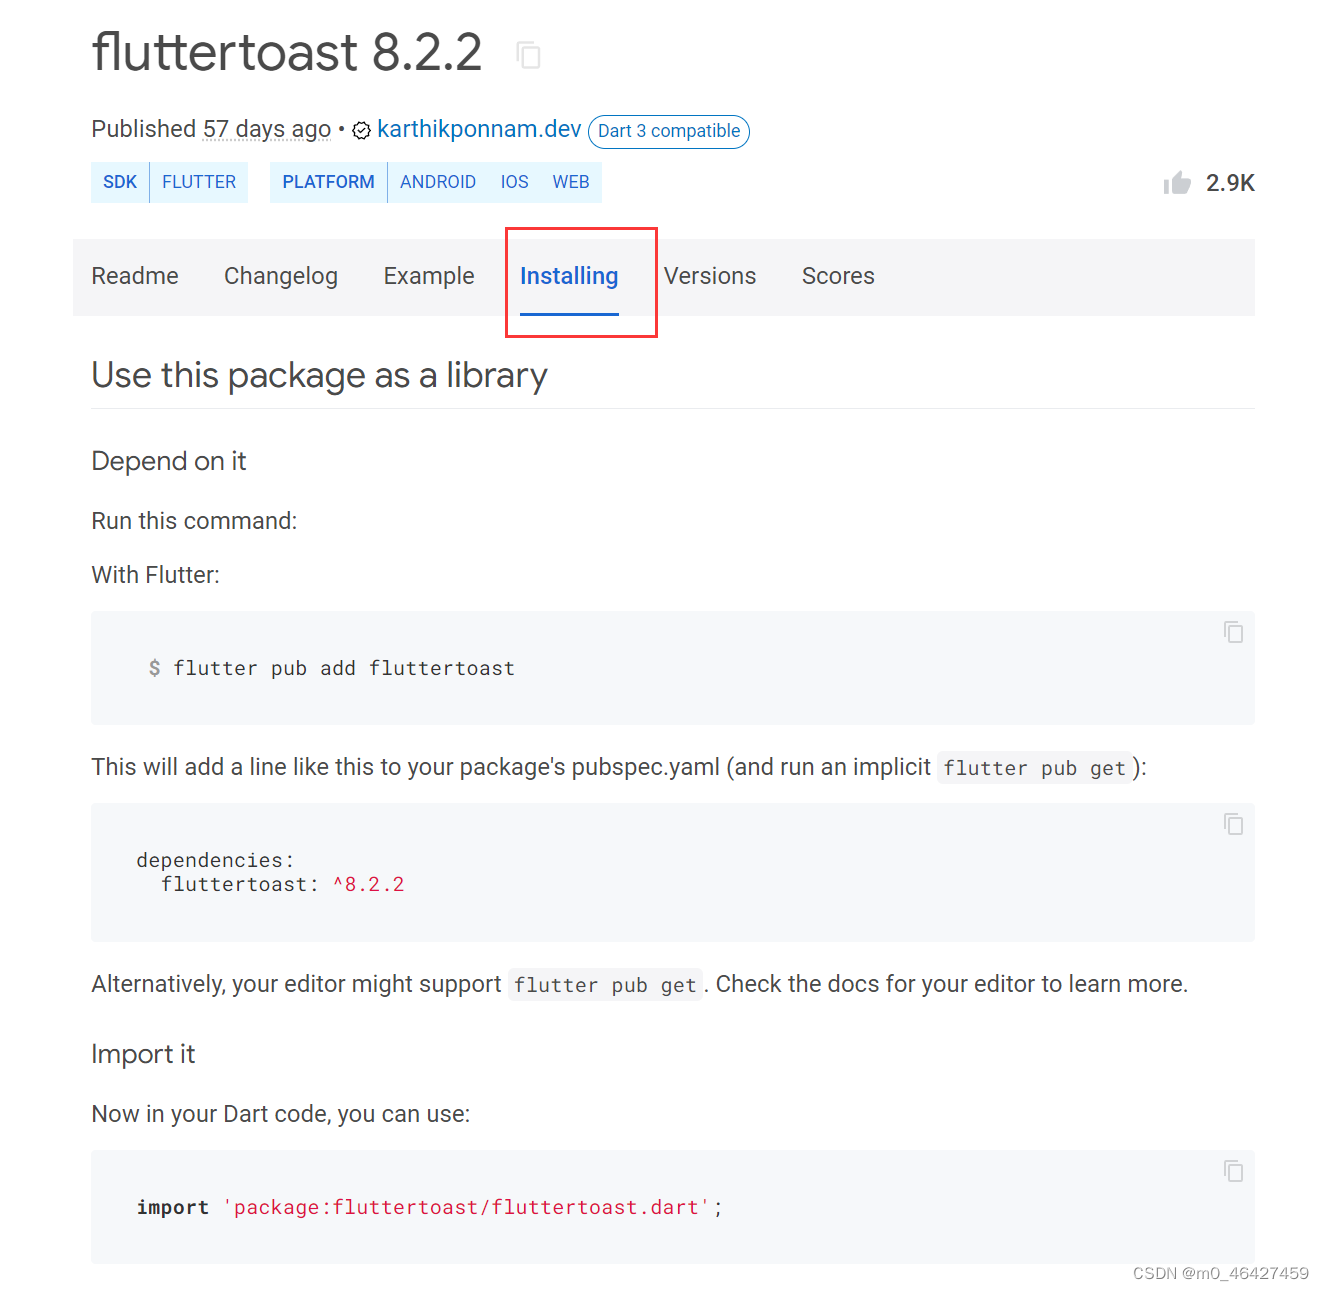
1、运行下面命令安装
flutter pub add fluttertoast2、在项目的pubspec.yaml中配置版本,保存后就会自己去安装
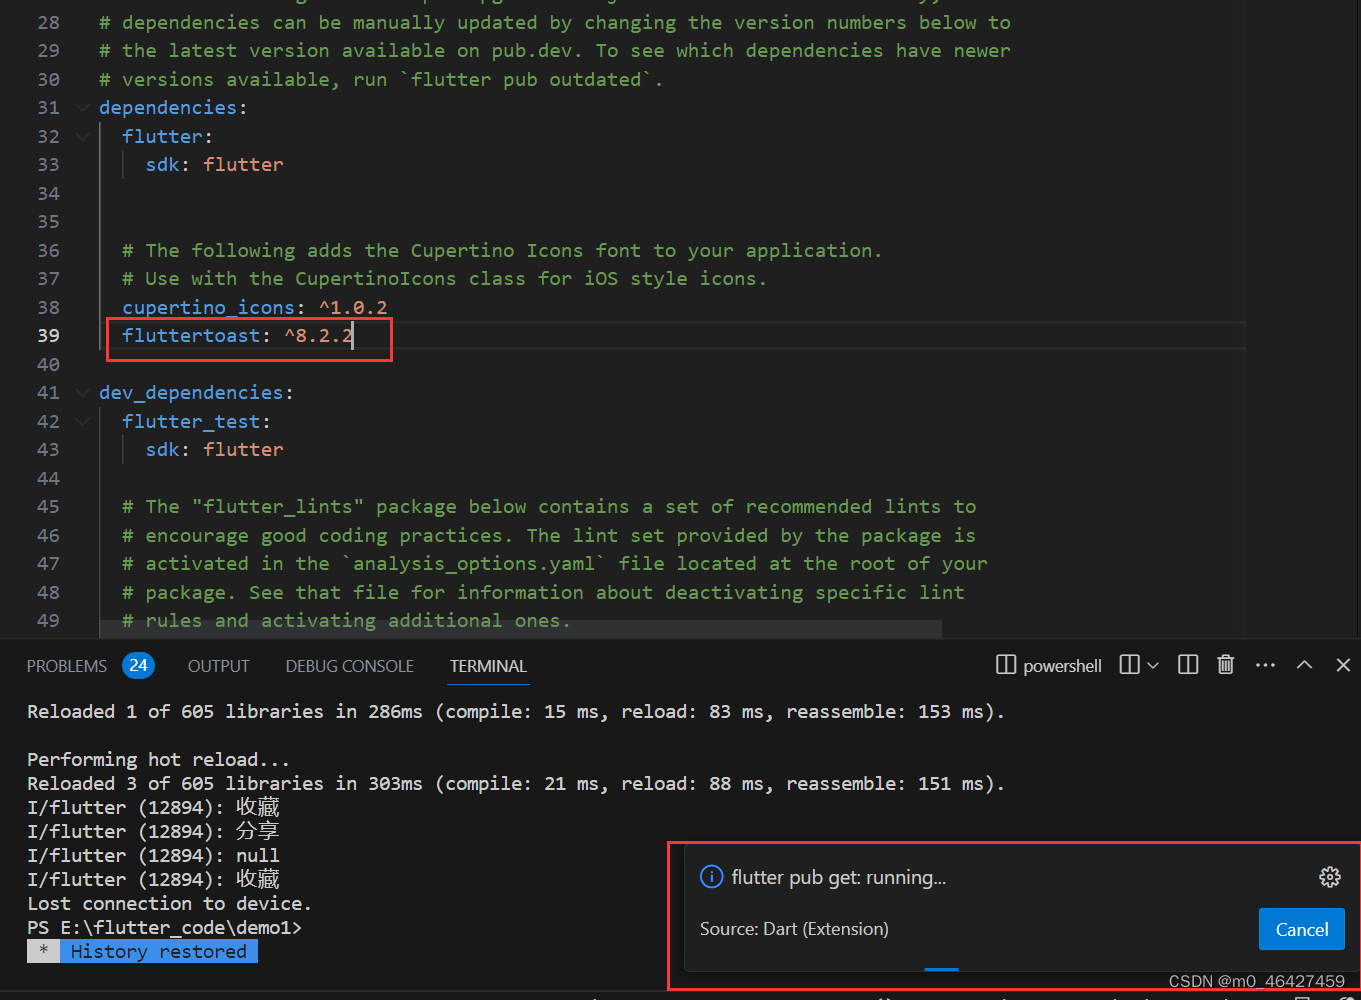
可以在output中查看安装结果,没问题就不会输出

3、引入
import 'package:fluttertoast/fluttertoast.dart';配置完插件后需要重新 flutter run运行才会加载
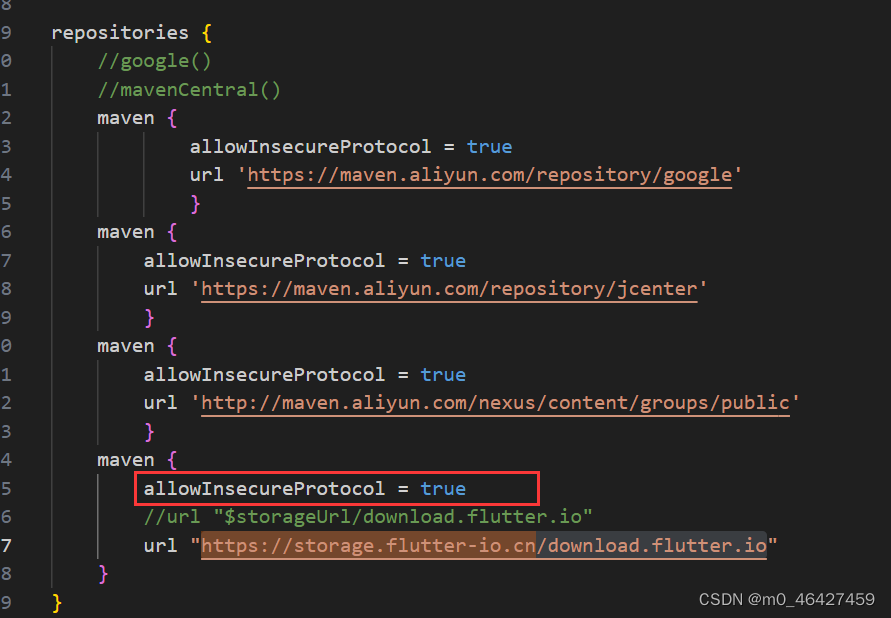
这里flutter run 一直在 Running Gradle task 'assembleDebug'...这一步很久都没有往下
应该是用到toast插件去下载 下载不了。
把yaml中的依赖注释掉就可以正常打包了。
解决方法,参考:Flutter编译卡在Running Gradle task ‘assembleDebug‘_小哥丷的博客-优快云博客
注: 文章中没没提到resolve_dependencies.gradle的https://storage.flutter-io.cn/download.flutter.io这一部分也要加上信任来源
import 'package:fluttertoast/fluttertoast.dart';
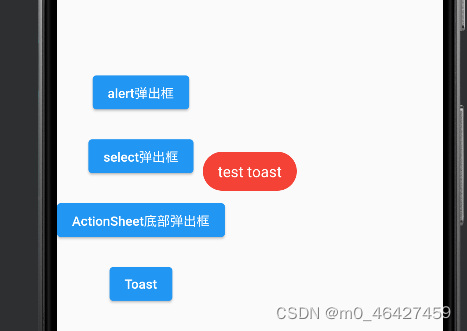
void _toast() {
Fluttertoast.showToast(
msg: "test toast",
toastLength: Toast.LENGTH_SHORT, //android设置显示时间用这个
gravity: ToastGravity.CENTER, //显示的位置
timeInSecForIosWeb: 1, //提示时间,默认1s后消失,针对ios和web平台
backgroundColor: Colors.red, //背景颜色
textColor: Colors.white, //文字颜色
fontSize: 16.0 //文本字体大小
);
}
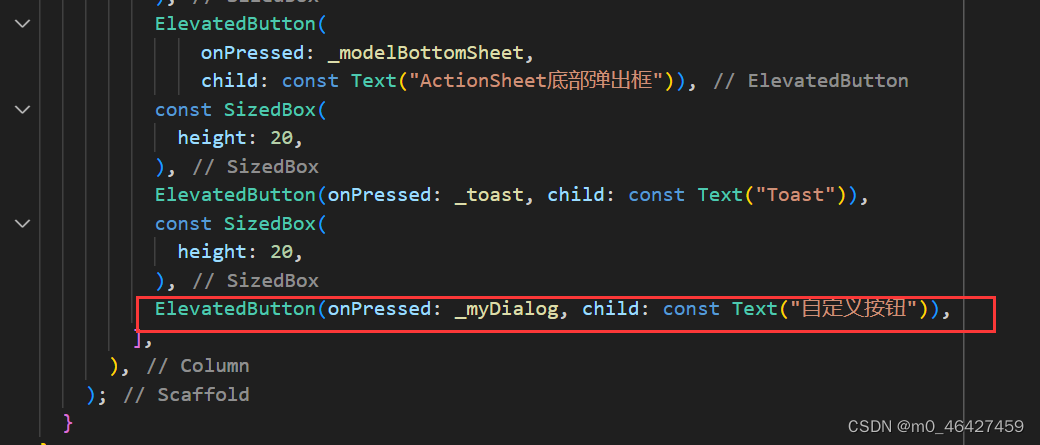
自定义Dialog
自定义Dialog对象要继承Dialog类,Dialog提供了child参数可以写试图界面,但达不到想要的效果,因为默认的Dialog背景框是满屏的。如果要完全自定义界面,就要重写build函数。
自定义一个提示的Dialog
新建文件:/lib/widget/myDialog.dart
在原本的dialog.dart中加多一个按钮 让它点击可以弹出我们自定义的Dialog
dialog.dart
  void _myDialog() async {
    var result = await showDialog(
        barrierDismissible: false, //设置点击灰色背景弹出框不消失
        context: context,
        builder: (context) {
          return MyDialog(
            title: "提示!",
            content: "提示信息",
            ontap: () {
              Navigator.pop(context, "test");
              print("close!");
            },
          );
        });
    print(result);
  }
myDialog.dart
import 'package:flutter/material.dart';

class MyDialog extends Dialog {
  final String title; //设置标题和内容可动态传入
  final String content;
  final Function()? ontap;  //设置点击函数也可传入,这里要是可空类型,因为下面ontap要求的参数类型就是Function()?
  const MyDialog({Key? key, required this.title, required this.content, required this.ontap})
      : super(key: key);

  @override
  Widget build(BuildContext context) {
    return Material(
        type: MaterialType.transparency, //设置背景透明
        child: Center(
          //直接在Material中用Container会铺满屏幕,因此现在Container外层加个Center
          child: Container(
            height: 240,
            width: 240,
            color: Colors.red,
            child: Column(
              children: [
                Padding(
                  //实现上下左右的间距
                  padding: const EdgeInsets.all(5),
                  child: Stack(
                    children: [
                      Align(
                        alignment: Alignment.centerLeft,
                        child: Text(title),
                      ),
                      Align(
                          alignment: Alignment.centerRight,
                          child: InkWell(
                            //InkWell组件可以实现一些事件,如点击等
                            child: const Icon(Icons.close),
                            onTap: ontap
                          )),
                    ],
                  ),
                ),
                const Divider(),
                Container(
                  padding: const EdgeInsets.all(10),
                  width: double.infinity,
                  child: Text(content),
                )
              ],
            ),
          ),
        ));
  }
}
PageView组件
PageView可以实现轮动图以及抖音上下滑页切换视频功能等。
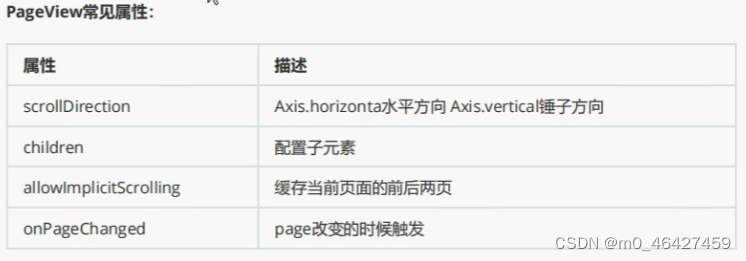
PageView常见属性
PageView使用
一样在前面的项目基础上进行操作
首先在home.dart中新增一个按钮,点击时可以跳转到pageView界面

在routers.dart中添加路由
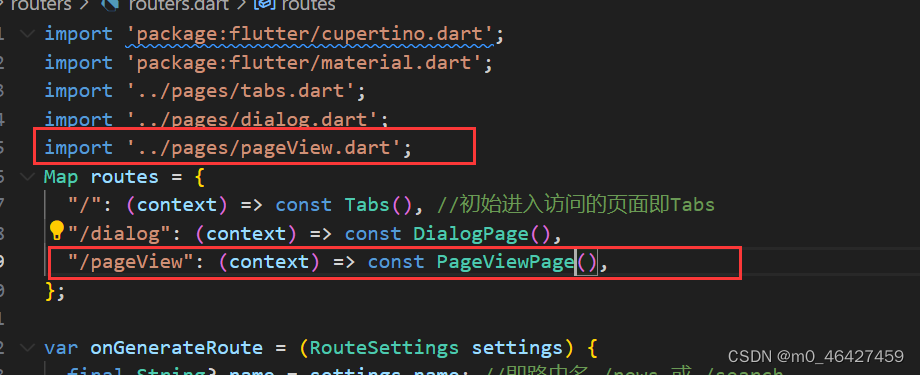
在pages目录下创建pageView.dart
import 'package:flutter/material.dart';
class PageViewPage extends StatefulWidget {
const PageViewPage({super.key});
@override
State<PageViewPage> createState() => _PageViewPageState();
}
class _PageViewPageState extends State<PageViewPage> {
@override
Widget build(BuildContext context) {
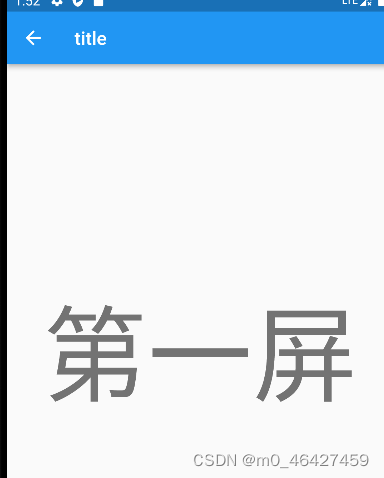
return Scaffold(
appBar: AppBar(title: const Text("title"),),
body: PageView( //PageView children中每一个元素就是一屏
children: [
Center(
child: Text("第一屏", style: Theme.of(context).textTheme.headline1,),
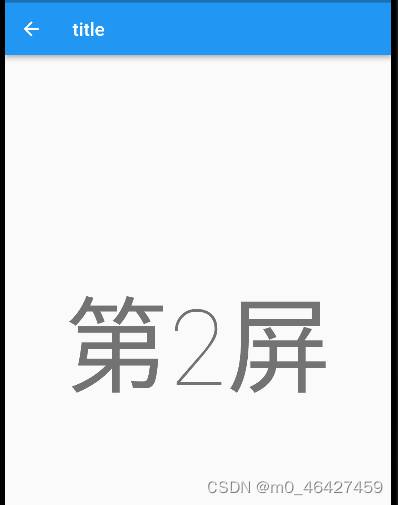
),
Center(
child: Text("第2屏", style: Theme.of(context).textTheme.headline1,),
),
Center(
child: Text("第3屏", style: Theme.of(context).textTheme.headline1,),
),
Center(
child: Text("第4屏", style: Theme.of(context).textTheme.headline1,),
)
],
)
);
}
}
属性使用:
scrollBehavior:滑动的方向,默认水平,设置为Axis.vertical即可垂直滑动
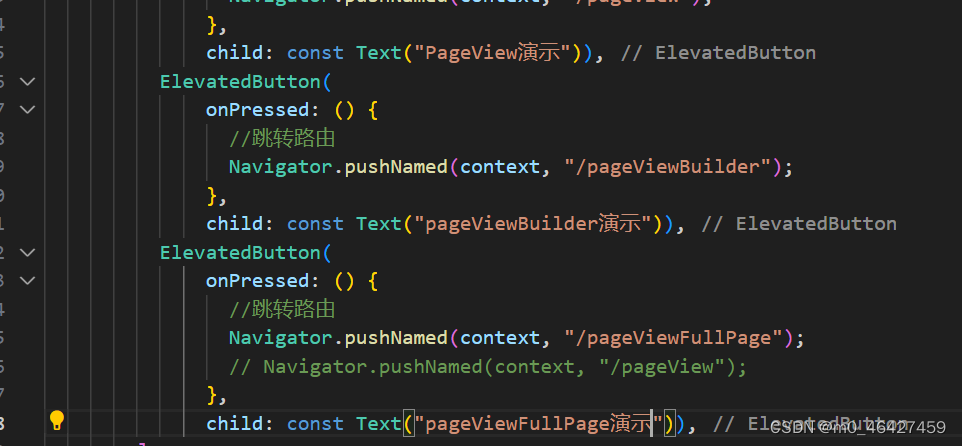
通过PageView.builder创建滑屏
class _PageViewBuilderState extends State<PageViewBuilder> {
  @override
  Widget build(BuildContext context) {
    return Scaffold(
      appBar: AppBar(title: const Text("PageViewBuilder"),),
      body: PageView.builder(
        itemCount: 10,
        itemBuilder: (context, index) {
          return Center(
            child: Text(
              "第${index + 1}屏",
              style: Theme.of(context).textTheme.headline1,
            ),
          );
        }
        ),
    );
  }
}
PageView上拉无限加载
就是通过PageView的onPageChanged属性来设置,当滑动的页面快到尾部时,再往child里面加元素
再pages目录下新建一个pageViewFullPage.dart
import 'package:flutter/material.dart';

class PageViewFullPage extends StatefulWidget {
  const PageViewFullPage({super.key});

  @override
  State<PageViewFullPage> createState() => _PageViewFullPageState();
}

class _PageViewFullPageState extends State<PageViewFullPage> {
  List<Widget> list = [];

  @override
  void initState() {
    // TODO: implement initState
    super.initState();
    for (var i = 0; i < 10; i++) {
      list.add(Center(
        child: Text(
          "第${i + 1}屏",
          style: TextStyle(fontSize: 60),
        ),
      ));
    }
  }

  @override
  Widget build(BuildContext context) {
    print("pageViewFullPage");
    return Scaffold(
        appBar: AppBar(
          title: const Text("Full Page"),
        ),
        body: PageView(
          scrollDirection: Axis.vertical,
          onPageChanged: (index) {
            print(index);
            if (index + 2 == list.length) {
              setState(() {
                for (var i = 0; i < 10 + 5; i++) {
                  list.add(Center(
                    child: Text(
                      "第${i + 1}屏",
                      style: TextStyle(fontSize: 60),
                    ),
                  ));
                }
              });
            }
          },
          children: list,
        ));
  }
}
同理routers.dart 以及home.dart要加上对应的路由和触发按钮

PageView实现轮播图
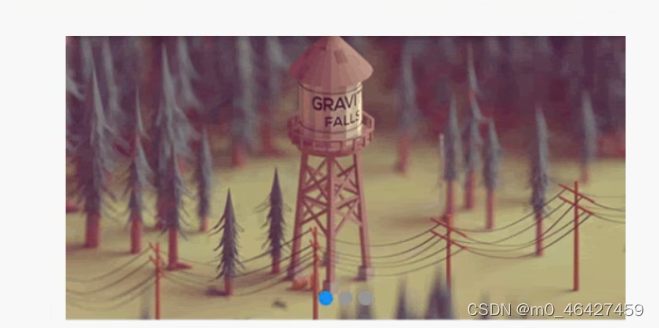
新建一个页面 pages/pageViewSwiper.dart
实现原理,在Container子元素中嵌入一个PageView即可
在pages/widget/image.dart中定义一个图片组件
import 'package:flutter/material.dart';

class ImagePage extends StatelessWidget {
  final double width;
  final double height;
  final String src;
  const ImagePage({super.key, this.width=double.infinity, this.height=200, required this.src});

  @override
  Widget build(BuildContext context) {
    return SizedBox(
      width: width,
      height: height,
      child: Image.network(src,
          fit: BoxFit.cover),
    );
  }
}
pageViewSwiper.dart
import 'package:flutter/material.dart';
import '../widget/image.dart';

class PageViewSwiper extends StatefulWidget {
  const PageViewSwiper({super.key});

  @override
  State<PageViewSwiper> createState() => _PageViewSwiperState();
}

class _PageViewSwiperState extends State<PageViewSwiper> {
  List<Widget> list = [];
  int _currentIndex = 0;
  @override
  void initState() {
    // TODO: implement initState
    super.initState();
    list = const [
      ImagePage(src: "https://www.itying.com/images/flutter/1.png"),
      ImagePage(src: "https://www.itying.com/images/flutter/2.png"),
      ImagePage(src: "https://www.itying.com/images/flutter/3.png"),
    ];
  }

  @override
  Widget build(BuildContext context) {
    return Scaffold(
        appBar: AppBar(
          title: const Text("PageViewSwiper"),
        ),
        body: Stack(
          children: [
            SizedBox(
              height: 200,
              child: PageView.builder(
                  onPageChanged: (index) {
                    print(index);
                    setState(() {
                      _currentIndex = index % list.length;
                    });
                  },
                  itemCount: 1000,
                  itemBuilder: (context, index) {
                    return list[index % list.length];
                  }),
            ),
            Positioned(
                left: 0,
                right: 0, //设置left 0 right 0 就会占满整行
                bottom: 2,
                child: Row(
                    mainAxisAlignment: MainAxisAlignment.center,
                    children: List.generate(list.length, (index) {
                      return Container(
                        margin: const EdgeInsets.all(5),
                        width: 10,
                        height: 10,
                        decoration: BoxDecoration(
                            color:_currentIndex==index?Colors.blue: Colors.grey,
                            shape: BoxShape.circle //圆
                            ),
                      );
                    }).toList()))
          ],
        ));
  }
}


PageView实现动态轮播图PageController以及AutomaticKeepAliveClientMixin
Flutter定时器
const timeout = Duration(seconds: 3);
var t= Timer.periodic(timeout, (timer){
    print("afterTimer=" + DateTime.now().toString());
    //timer.cancel()    //取消定时器
});

t.cancel();


组件销毁时取消定时器
void dispose(){
    super.dispose();
    t.cancel();
}
仍然在前面的pageViewSwiper.dart中创建定时器
在_PageViewSwiperState的initState()方法中加上如下内容创建
因此我们就可以通过定时器实现PageView的自动翻页
首先将前面pageViewSwiper.dart中的Stack抽离出来,在/pages/widget中新建一个swiper.dart
import 'package:flutter/material.dart';
import 'image.dart';
import 'dart:async';

class Swiper extends StatefulWidget {
  final double width;
  final double heigth;
  final List<String> list;
  const Swiper(
      {super.key,
      this.heigth = 200,
      this.width = double.infinity,
      required this.list});

  @override
  State<Swiper> createState() => _SwiperState();
}

class _SwiperState extends State<Swiper> {
  int _currentIndex = 0;
  List<Widget> pageList = [];
  late PageController _pageController; //通过PageController实现自动轮播
  late Timer timer;
  @override
  void initState() {
    // TODO: implement initState
    super.initState();
    _pageController = PageController(initialPage: 0); // 初始是第0页
    for (var i = 0; i < widget.list.length; i++) {
      pageList.add(ImagePage(
        src: widget.list[i],
        width: widget.width,
        height: widget.heigth,
      ));
    }
    // 五秒跳转一次
    timer = Timer.periodic(const Duration(seconds: 5), (t) {
      // duration即跳转的动作 这里milliseconds表示跳转用200毫秒  curve表示线性跳转
      _pageController.animateToPage(_currentIndex + 1,
          duration: const Duration(milliseconds: 200), curve: Curves.linear);
    });
  }

  @override
  void dispose() {
    // TODO: implement dispose
    super.dispose();
    timer.cancel();
    _pageController.dispose();
  }

  @override
  Widget build(BuildContext context) {
    return Stack(
      children: [
        SizedBox(
          height: 200,
          child: PageView.builder(
              controller: _pageController, //controller 实现控制翻页
              onPageChanged: (index) {
                setState(() {
                  _currentIndex = index % pageList.length;
                });
              },
              itemCount: 1000,
              itemBuilder: (context, index) {
                return pageList[index % pageList.length];
              }),
        ),
        Positioned(
            left: 0,
            right: 0, //设置left 0 right 0 就会占满整行
            bottom: 2,
            child: Row(
                mainAxisAlignment: MainAxisAlignment.center,
                children: List.generate(pageList.length, (index) {
                  return Container(
                    margin: const EdgeInsets.all(5),
                    width: 10,
                    height: 10,
                    decoration: BoxDecoration(
                        color:
                            _currentIndex == index ? Colors.blue : Colors.grey,
                        shape: BoxShape.circle //圆
                        ),
                  );
                }).toList()))
      ],
    );
  }
}
/pages/pageViewSwiper.dart
import 'dart:async';
import 'package:flutter/material.dart';
import '../widget/image.dart';
import '../widget/swiper.dart';
class PageViewSwiper extends StatefulWidget {
const PageViewSwiper({super.key});
@override
State<PageViewSwiper> createState() => _PageViewSwiperState();
}
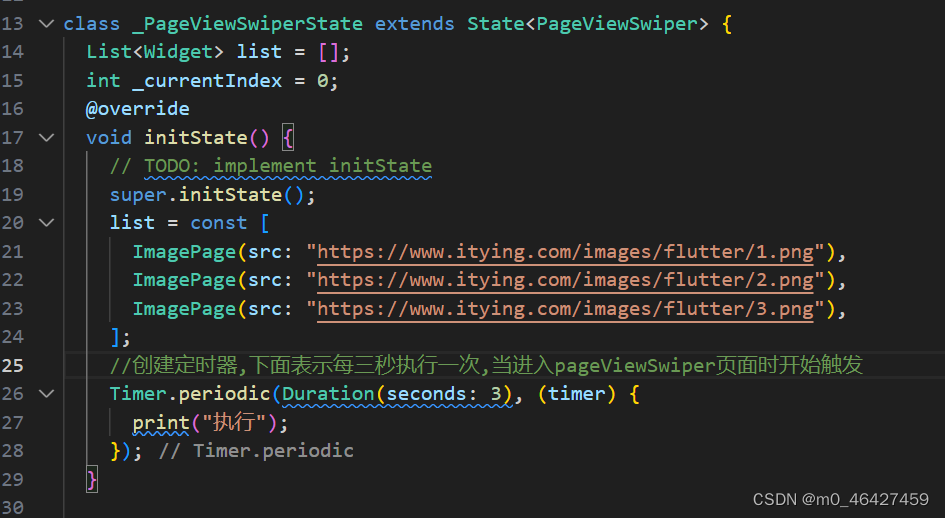
class _PageViewSwiperState extends State<PageViewSwiper> {
List<String> list = [];
int _currentIndex = 0;
@override
void initState() {
// TODO: implement initState
super.initState();
list = const [
"https://www.itying.com/images/flutter/1.png",
"https://www.itying.com/images/flutter/2.png",
"https://www.itying.com/images/flutter/3.png",
];
//创建定时器,下面表示每三秒执行一次,当进入pageViewSwiper页面时开始触发
Timer t = Timer.periodic(const Duration(seconds: 3), (timer) {
print("执行");
});
t.cancel();
}
@override
Widget build(BuildContext context) {
return Scaffold(
appBar: AppBar(
title: const Text("PageViewSwiper"),
),
body: Swiper(
list: list,
));
}
}
AutomaticKeepClientMixin缓存PageView页面
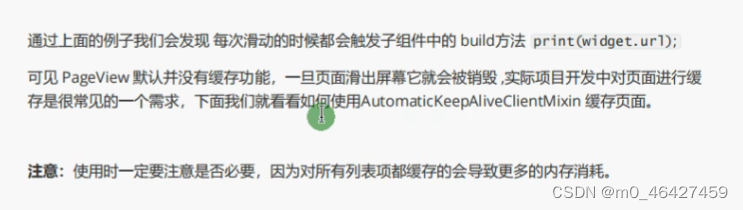
默认数据是没有缓存的 每次滑动都会执行build
页面比较多时,缓存会耗费内存。
实现方式一
1、_SwiperState 实现AutomaticKeepAliveClientMixin接口
class _SwiperState extends State<Swiper> with AutomaticKeepAliveClientMixin
2、 实现wantKeepAlive方法 并返回true
bool get wantKeepAlive => true;
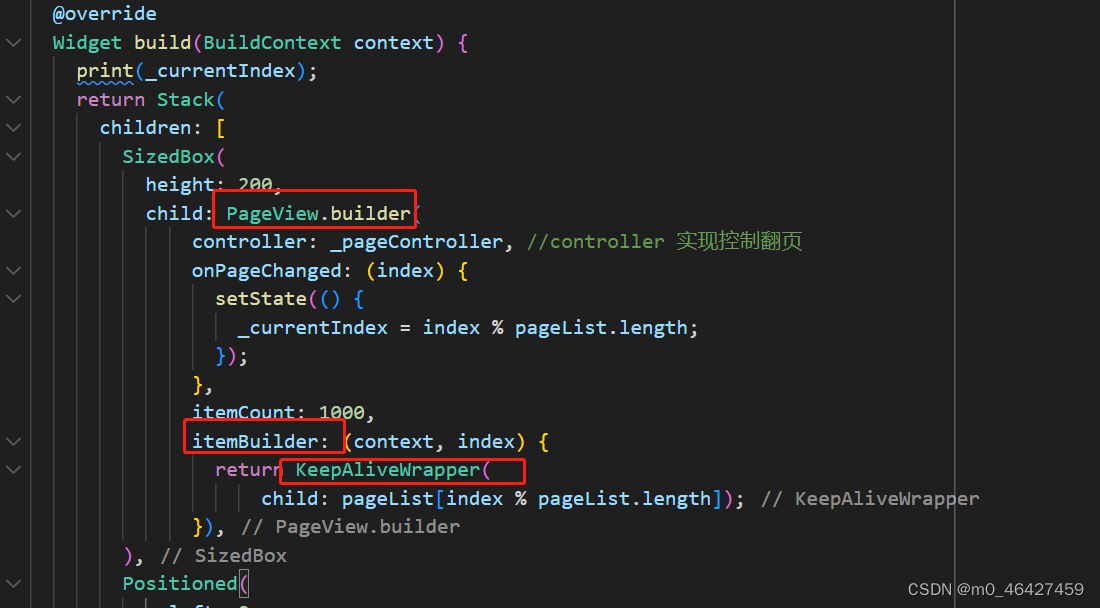
实现方式二
实现一个缓存的工具类,参考/pages/tools/keepAliveWrapper.dart中即可,使用时外层加上这个组件即可
import 'package:flutter/material.dart';

class KeepAliveWrapper extends StatefulWidget {
  const KeepAliveWrapper(
      {super.key, required this.child, this.keepAlive = true});

  final Widget? child;
  final bool keepAlive;
  @override
  State<KeepAliveWrapper> createState() => _KeepAliveWrapperState();
}

class _KeepAliveWrapperState extends State<KeepAliveWrapper>
    with AutomaticKeepAliveClientMixin {
  @override
  Widget build(BuildContext context) {
    return widget.child!;
  }

  @override
  bool get wantKeepAlive => widget.keepAlive;
  @override
  void didUpdateWidget(covariant KeepAliveWrapper oldWidget) {
    if (oldWidget.keepAlive != widget.keepAlive) {
      //keepAlive状态需要更新,实现在AutomaticKeepAliveClientMixin中
      updateKeepAlive();
    }
    super.didUpdateWidget(oldWidget);
  }
}
Flutter Key
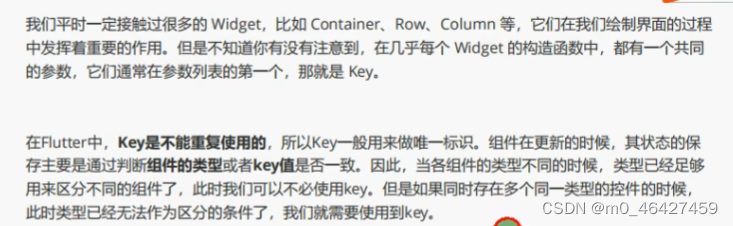
没有Key会怎样
例如:定义了一个StatefulWidget的Box,点击Box的时候可以改变Box的数字,当重新对Box排序的时候Flutter就无法识别到Box的变化
新建一个项目demo2,可参考:Flutter开发②环境搭建及入口_m0_46427459的博客-优快云博客
main.dart
import 'package:flutter/material.dart';

void main() {
  runApp(const MyApp());
}

class MyApp extends StatelessWidget {
  const MyApp({super.key});

  // This widget is the root of your application.
  @override
  Widget build(BuildContext context) {
    return MaterialApp(
      title: 'Flutter Demo',
      theme: ThemeData(
        primarySwatch: Colors.blue,
      ),
      home: const HomePage(),
    );
  }
}

class HomePage extends StatefulWidget {
  const HomePage({super.key});

  @override
  State<HomePage> createState() => _HomePageState();
}

class _HomePageState extends State<HomePage> {
  @override
  Widget build(BuildContext context) {
    return Scaffold(
        appBar: AppBar(
          title: const Text("Test"),
        ),
        body: Center(
          child: Column(
            mainAxisAlignment: MainAxisAlignment.center,
            children: const [
              Box(color: Colors.red),
              SizedBox(height: 20,),
              Box(color: Colors.yellow),
              SizedBox(height: 20,),
              Box(color: Colors.blue),
              SizedBox(height: 20,),
            ],
          ),
        ));
  }
}

class Box extends StatefulWidget {
  final Color color;
  const Box({super.key, required this.color});

  @override
  State<Box> createState() => _BoxState();
}

class _BoxState extends State<Box> {
  int _count = 0;
  @override
  Widget build(BuildContext context) {
    return SizedBox(
      height: 100,
      width: 100,
      child: ElevatedButton(
        style: ButtonStyle(
          backgroundColor: MaterialStateProperty.all(widget.color)
        ),
        child: Text(
          "$_count",

          style: Theme.of(context).textTheme.headline2,
        ),
        onPressed: () {
          setState(() {
            _count++;
          });
        },
      ),
    );
  }
}
点击按钮会增加里面的数字
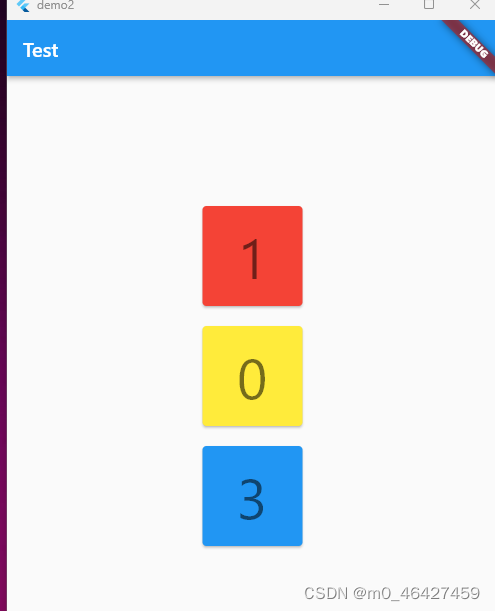
接下来我们定义一个list来存放这三个按钮,在定义一个新按钮,点击新按钮时重排刚刚三个按钮
class _HomePageState extends State<HomePage> {
  List<Widget> list = [
    Box(color: Colors.red),
    Box(color: Colors.yellow),
    Box(color: Colors.blue),
  ];
  @override
  Widget build(BuildContext context) {
    return Scaffold(
        floatingActionButton: FloatingActionButton(
          child: const Icon(Icons.refresh),
          onPressed: () {
            setState(() {
              list.shuffle(); //打乱数据
            });
          },
        ),
        appBar: AppBar(
          title: const Text("Test"),
        ),
        body: Center(
          child: Column(
              mainAxisAlignment: MainAxisAlignment.center, children: list),
        ));
  }
}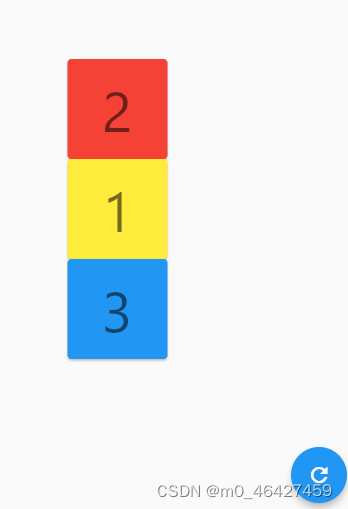

可以发现顺序变了 但是数字并没有跟着变。
因为组件更新时,状态的保存主要通过判断组件的类型或key值是否一致。这里三个都是Box类型,且没有设置key,因此Flutter底层认为Box不需要更新,所以改变list元素顺序时,list[0].count 并不会改变,就导致了Box改变了,而count没有改变。
现在要实现可以保存状态,也可以排序,只需在Box中加入key
class Box extends StatefulWidget {
  final Color color;
  const Box({Key? key, required this.color}):super(key:key);
List<Widget> list = [
Box(key:ValueKey("1"),color: Colors.red),
Box(key:ValueKey("2"),color: Colors.yellow),
Box(key:ValueKey("3"),color: Colors.blue),
];Flutter Key:LocalKey、GlobalKey
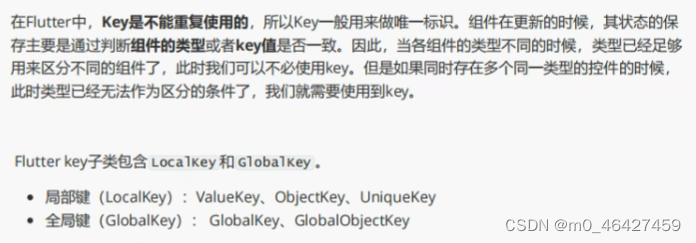
UniqueKey是唯一值,每次运行的时候会随机生成
获取屏幕的旋转方向
print(MediaQuery.of(context).orientation);
Orientation.portrait表示竖屏,Orientation.landscape表示横屏
接下来我们设置竖屏的时候 按行显示;横屏的时候按列显示
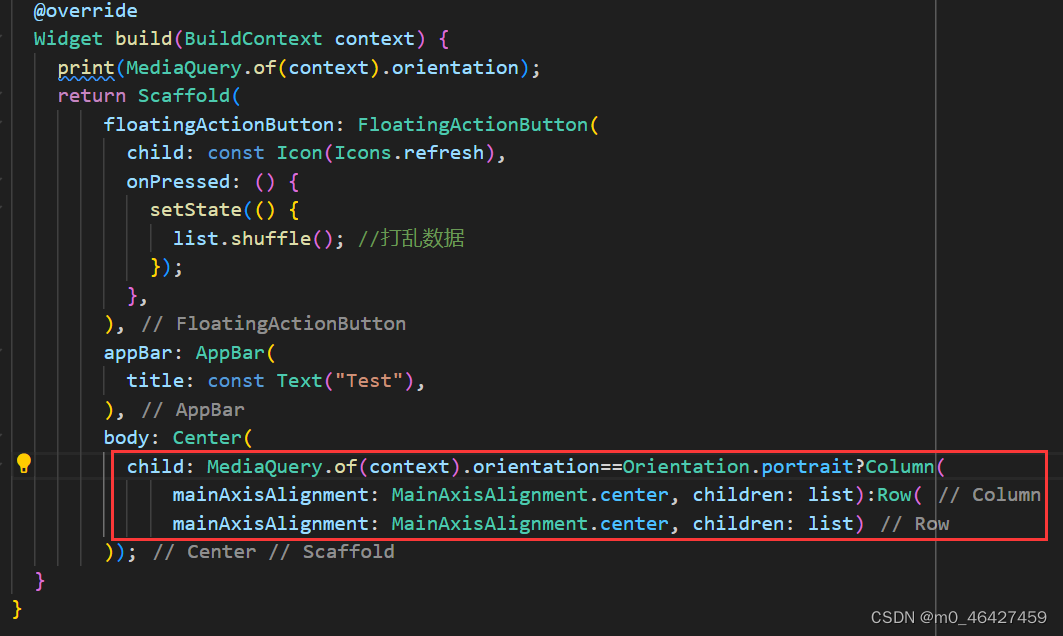
但会遇到一个问题,如果竖屏的时候count 已经增加了,切换到横屏之后count会从0开始 。
因为组件类型变了,原本是Column,后面变成了Row,所以状态没保存。
此时我们用GlobalKey来设置Box的key
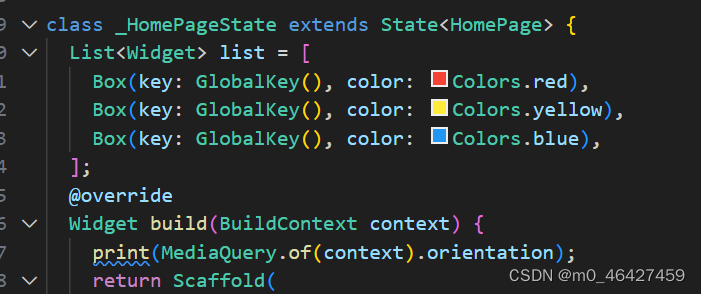
GlobalKey的子组件
![]()
在前面例子中,稍微改造一下,Scaffold中只留一个Box
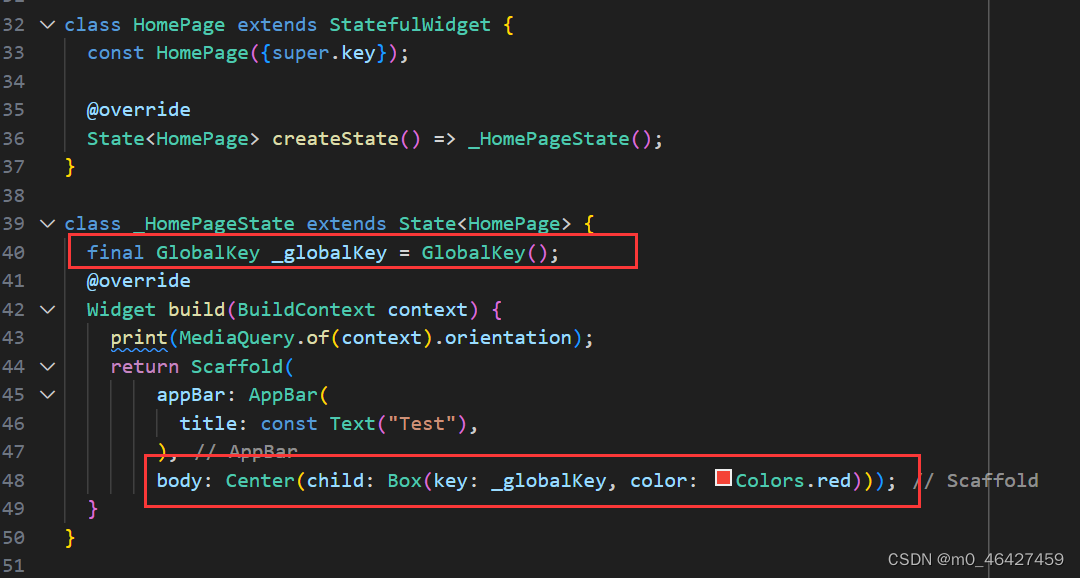
此时对于Box来说,他的父Widget即为HomePage,实现一个在HomePage中改变Box的状态
在HomePage的Scaffold中新增一个按钮,点击按钮增加Box中的count
class _HomePageState extends State<HomePage> {
  final GlobalKey _globalKey = GlobalKey();
  @override
  Widget build(BuildContext context) {
    // print(MediaQuery.of(context).orientation);
    return Scaffold(
        floatingActionButton: FloatingActionButton(
          child: Icon(Icons.add),
          onPressed: () {
            //获取子Widget的属性
            var boxState = _globalKey.currentState as _BoxState; //as类型转换
            print(boxState._count);
            setState(() {
              boxState._count++;
            });
          },
        ),
        appBar: AppBar(
          title: const Text("Test"),
        ),
        body: Center(child: Box(key: _globalKey, color: Colors.red)));
  }
}
当然也可以调用子Widget的方法
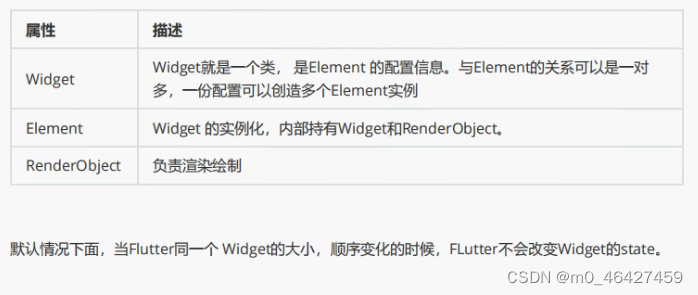
Widget Tree、Element Tree 和RenderObject Tree

class _HomePageState extends State<HomePage> {
final GlobalKey _globalKey = GlobalKey();
@override
Widget build(BuildContext context) {
// print(MediaQuery.of(context).orientation);
return Scaffold(
floatingActionButton: FloatingActionButton(
child: Icon(Icons.add),
onPressed: () {
//获取子组件的状态 调用子组件的属性
var boxState = _globalKey.currentState as _BoxState; //as类型转换
print(boxState._count);
setState(() {
boxState._count++;
});
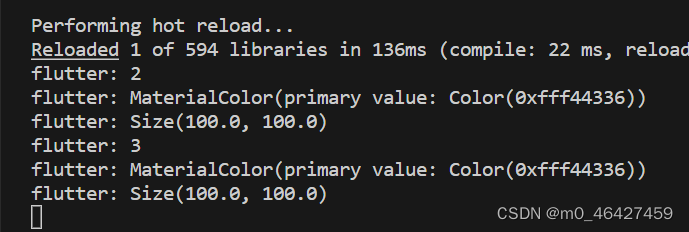
//获取子Widget 及其属性
var boxWidget = _globalKey.currentWidget as Box;
print(boxWidget.color);
//获取子组件渲染的属性
var renderBox =
_globalKey.currentContext!.findRenderObject() as RenderBox;
print(renderBox.size);
},
),
appBar: AppBar(
title: const Text("Test"),
),
body: Center(child: Box(key: _globalKey, color: Colors.red)));
}
}
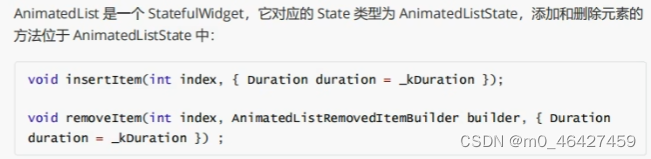
AnimatedList 实现动态列表
AnimatedList实现动画
AnimalsList和ListView功能大体相似,AnimatedList可以在列表中插入或删除节点时执行一个动画。
import 'dart:async';

import 'package:flutter/material.dart';

void main() {
  runApp(const MyApp());
}

class MyApp extends StatelessWidget {
  const MyApp({super.key});

  // This widget is the root of your application.
  @override
  Widget build(BuildContext context) {
    return MaterialApp(
      title: 'Flutter Demo',
      theme: ThemeData(
        primarySwatch: Colors.blue,
      ),
      home: const HomePage(),
    );
  }
}

class HomePage extends StatefulWidget {
  const HomePage({super.key});

  @override
  State<HomePage> createState() => _HomePageState();
}

class _HomePageState extends State<HomePage> {
  final globalKey = GlobalKey<
      AnimatedListState>(); //要定义全局key才能在点击按钮时调用AnimatedList的insert和remove方法
  //删的快的话会有问题,按钮刷新没那么快 但是数据已经不在了,因此设置一个开关,删除时按钮有一秒不可点击状态
  bool flag = true;
  List<String> list = ["1", "2"];

  Widget _buildItem(index) {
    return ListTile(
      title: Text(list[index]),
      trailing: IconButton(
        icon: const Icon(Icons.delete),
        onPressed: () {
          //执行删除
          _deleteItem(index);
        },
      ),
    );
  }

  _deleteItem(index) {
    print("删除的索引$index");
    if (flag == true) {
      flag = false;
      globalKey.currentState!.removeItem(index, (context, animation) {
        var item = _buildItem(index); //先获取要执行的元素
        list.removeAt(index); //数组中也要删除
        return FadeTransition(
          opacity: animation,
          child: item, //执行动画的元素
        );
      });
      //解决快速删除的bug
      Timer.periodic(Duration(milliseconds: 500), (timer) {
        flag = true;
        timer.cancel();
      });
    }
  }

  @override
  Widget build(BuildContext context) {
    return Scaffold(
      appBar: AppBar(
        title: const Text("AnimatedList"),
      ),
      floatingActionButton: FloatingActionButton(
        child: const Icon(Icons.add),
        onPressed: () {
          list.add("新增的数据");
          //非空断言,当非空时才会掉用 否则不调用
          globalKey.currentState!.insertItem(list.length - 1);
        },
      ),
      body: AnimatedList(
          key: globalKey,
          initialItemCount: list.length,
          itemBuilder: ((context, index, animation) {
            return FadeTransition(opacity: animation, child: _buildItem(index));
          })),
    );
  }
}

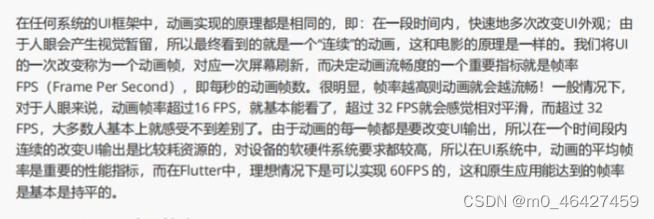
Flutter动画
动画原理
Flutter中的动画
隐式动画、显示动画、自定义隐式动画、自定义显式动画、Hero动画
隐式动画

AnimatedContainer
AnimatedContainer的属性和Container属性基本一样,当AnimatedContainer属性改变的时候就会触发动画
class _HomePageState extends State<HomePage> {
  bool flag = true;
  @override
  Widget build(BuildContext context) {
    return Scaffold(
      floatingActionButton: FloatingActionButton(
        child: const Icon(Icons.add),
        onPressed: () {
          setState(() {
            flag = !flag;
          });
        },
      ),
      appBar: AppBar(
        title: const Text("Title"),
      ),
      body: Center(
          child: AnimatedContainer(
            duration: const Duration(milliseconds: 100),  //动画持续的时长
        width: flag ? 200 : 300,
        height: flag ? 200 : 300,
        transform: flag?Matrix4.translationValues(0, 0, 0):Matrix4.translationValues(100, 0, 0),  //平移
        color: Colors.yellow,
      )),
    );
  }
}
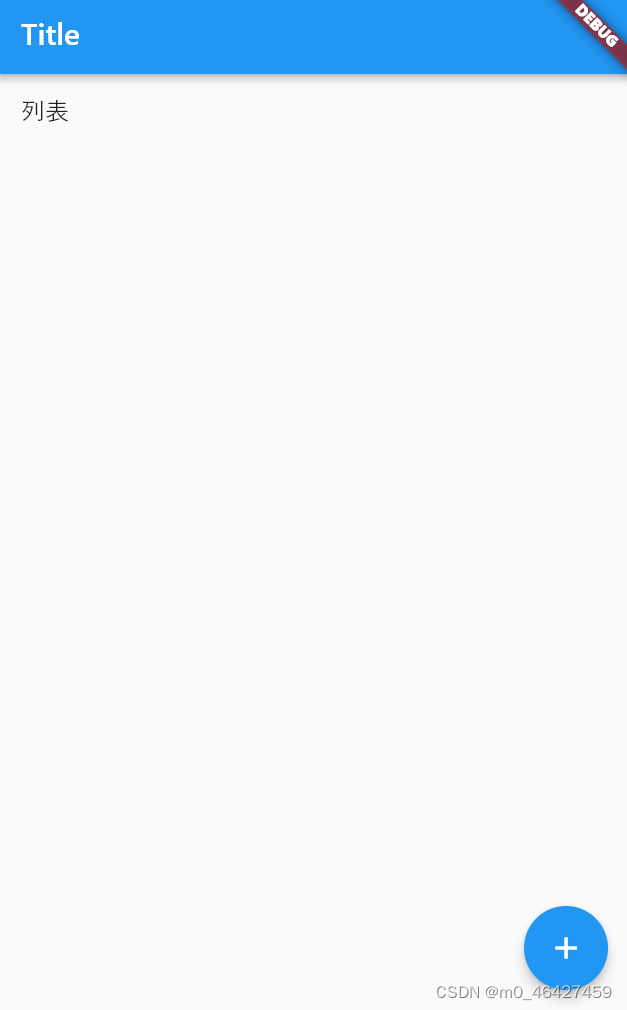
实现一个点击按钮时挡住一部分的动画
class _HomePageState extends State<HomePage> {
  bool flag = true;
  @override
  Widget build(BuildContext context) {
    return Scaffold(
      floatingActionButton: FloatingActionButton(
        child: const Icon(Icons.add),
        onPressed: () {
          setState(() {
            flag = !flag;
          });
        },
      ),
      appBar: AppBar(
        title: const Text("Title"),
      ),
      body: Stack(
        children: [
          ListView(
            children: const[
              ListTile(title: Text("列表"),)
            ],
          ),
          Positioned(
            left: 0,
            top: 0,
            bottom: 0,
            child: AnimatedContainer(
              duration: const Duration(milliseconds: 100),
              width: 200,
              height: double.infinity,
              transform: flag?Matrix4.translationValues(-200, 0, 0):Matrix4.translationValues(0, 0, 0),
              color: Colors.yellow,
              ))
        ],
      )
    );
  }
}

AnimatedPadding
用法与AnimatedContainer基本一直
class _HomePageState extends State<HomePage> {
  bool flag = true;
  @override
  Widget build(BuildContext context) {
    return Scaffold(
      floatingActionButton: FloatingActionButton(
        child: const Icon(Icons.add),
        onPressed: () {
          setState(() {
            flag = !flag;
          });
        },
      ),
      appBar: AppBar(
        title: const Text("Title"),
      ),
      body: AnimatedPadding(
curve: Curves.bounceInOut,//可以设置动画的效果
        duration: const Duration(milliseconds: 300),
        padding: EdgeInsets.fromLTRB(10, flag?10:400, 0, 0),
        child: Container(
          width: 100,
          height: 100,
          color: Colors.red,
        ),
      )
    );
  }
}
AnimatedOpacity
设置透明度的组件,可以设置透明度变化的动画
class _HomePageState extends State<HomePage> {
  bool flag = true;
  @override
  Widget build(BuildContext context) {
    return Scaffold(
      floatingActionButton: FloatingActionButton(
        child: const Icon(Icons.add),
        onPressed: () {
          setState(() {
            flag = !flag;
          });
        },
      ),
      appBar: AppBar(
        title: const Text("Title"),
      ),
      body: Center(
        child: AnimatedOpacity(
        opacity: flag?0.1:1,
        duration: const Duration(milliseconds: 300),
        curve: Curves.easeIn,
        child: Container(
          width: 100,
          height: 100,
          color: Colors.red,
        ),
        ),
      )
    );
  }
}
AnimatedPositioned
定位组件,可以实现位置变化时的动画
class _HomePageState extends State<HomePage> {
  bool flag = true;
  @override
  Widget build(BuildContext context) {
    return Scaffold(
      floatingActionButton: FloatingActionButton(
        child: const Icon(Icons.add),
        onPressed: () {
          setState(() {
            flag = !flag;
          });
        },
      ),
      appBar: AppBar(
        title: const Text("Title"),
      ),
      body: Stack(
        children: [
          ListView(
            children: const [
              ListTile(title: Text("列表"),),
              ListTile(title: Text("列表"),),
              ListTile(title: Text("列表"),),
              ListTile(title: Text("列表"),),
              ListTile(title: Text("列表"),),
              ListTile(title: Text("列表"),),
            ],
          ),
          AnimatedPositioned(
            duration: const Duration(milliseconds: 500),
            right: flag?10:300,
            top: flag?10:500,
            child: Container(
            width: 60,
            height: 60,
            color: Colors.blue
          ))
        ],
      )
    );
  }
}
AnimatedDefaultText
文本样式改变时的动画
class _HomePageState extends State<HomePage> {
bool flag = true;
@override
Widget build(BuildContext context) {
return Scaffold(
floatingActionButton: FloatingActionButton(
child: const Icon(Icons.add),
onPressed: () {
setState(() {
flag = !flag;
});
},
),
appBar: AppBar(
title: const Text("Title"),
),
body: Center(
child: Container(
alignment: Alignment.center,
width: 300,
height: 300,
color: Colors.blue,
child: AnimatedDefaultTextStyle(
duration: const Duration(milliseconds: 300),
style: TextStyle(fontSize: flag?20:50),
child: const Text("hello"),
),
),
)
);
}
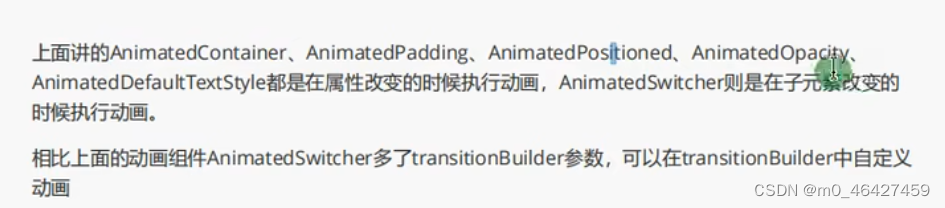
}AnimatedSwitcher以及transitionBuilder
例:载入页面前显示一个loading动画,加载完毕后显示对应的内容
class _HomePageState extends State<HomePage> {
  bool flag = true;
  @override
  Widget build(BuildContext context) {
    return Scaffold(
      floatingActionButton: FloatingActionButton(
        child: const Icon(Icons.add),
        onPressed: () {
          setState(() {
            flag = !flag;
          });
        },
      ),
      appBar: AppBar(
        title: const Text("Title"),
      ),
      body: Center(
        child: Container(
          alignment: Alignment.center,
          width: 300,
          height: 300,
          color: Colors.yellow,
          child: AnimatedSwitcher(
            duration: const Duration(milliseconds: 300),
            child: flag?const CircularProgressIndicator():Image.network("https://www.itying.com/images/flutter/2.png"),
            )
        ),
      )
    );
  }
}
默认的动画效果是淡入淡出效果,可以通过transitionBuilder改变动画的效果
transitionBuilder: ((child, animation) {
                  return ScaleTransition(
                    scale: animation,
                    child: child,
                  );
                }),
此时动画就是缩放的效果,也可以缩放的效果和淡入淡出效果一起:
transitionBuilder: ((child, animation) {
                  return ScaleTransition(
                    scale: animation,
                    child: FadeTransition(
                      opacity: animation,
                      child: child,
                    )
                  );
                }),
如果子元素只有一个组件,比如Text,想要实现改变文字内容也有动画,此时按正常方式只改变了文字,但底层还是同一个子元素,因此并不会有动画。所以要给子元素设置key为UniqueKey()即可。
显式动画

RotationTransition 、AnimationController
class _HomePageState extends State<HomePage>
    with SingleTickerProviderStateMixin {
  late AnimationController _controller;

  @override
  void initState() {
    // TODO: implement initState
    super.initState();
    _controller = AnimationController(
        vsync:
            this, //让程序和手机的刷新频率统一;vsync需要一个TickerProvider,因此HomePageState要实现相关类SingleTickerProviderStateMixin
        duration: const Duration(milliseconds: 300))
      ..repeat();
  }

  @override
  Widget build(BuildContext context) {
    return Scaffold(
      floatingActionButton: FloatingActionButton(
        child: const Icon(Icons.refresh),
        onPressed: () {
          _controller.stop();
        },
      ),
      appBar: AppBar(
        title: const Text("RotationTransition"),
      ),
      body: Center(
          child: RotationTransition(
        turns: _controller,
        child: const FlutterLogo(
          size: 60,
        ),
      )),
    );
  }
}
repeat() 一直重复动画
stop() 停止动画
forward() 开始一次动画
reset() 重置
reverse() 反向翻转一次动画
FadeTransition
ScaleTransition
class _HomePageState extends State<HomePage>
    with SingleTickerProviderStateMixin {
  late AnimationController _controller;

  @override
  void initState() {
    // TODO: implement initState
    super.initState();
    _controller = AnimationController(
        vsync:
            this, //让程序和手机的刷新频率统一;vsync需要一个TickerProvider,因此HomePageState要实现相关类SingleTickerProviderStateMixin
        duration: const Duration(milliseconds: 300),
        lowerBound: 0.5,
        upperBound: 1.5
        )
      ;
  }

  @override
  Widget build(BuildContext context) {
    return Scaffold(
      floatingActionButton: FloatingActionButton(
        child: const Icon(Icons.refresh),
        onPressed: () {
          _controller.repeat();
        },
      ),
      appBar: AppBar(
        title: const Text("RotationTransition"),
      ),
      body: Center(
          child: Column(
        children: [
          ScaleTransition(
            scale: _controller,
            child: Container(
              width: 100,
              height: 100,
              color: Colors.red,
            ),
          ),
          const SizedBox(
            height: 40,
          ),
          Row(
            mainAxisAlignment: MainAxisAlignment.spaceEvenly,
            children: [
              ElevatedButton(
                  onPressed: () {
                    _controller.forward();
                  },
                  child: const Text("forward")),
                  ElevatedButton(
                  onPressed: () {
                    _controller.reverse();
                  },
                  child: const Text("reverse")),
                  ElevatedButton(
                  onPressed: () {
                    _controller.stop();
                  },
                  child: const Text("stop")),
                  ElevatedButton(
                  onPressed: () {
                    _controller.reset();
                  },
                  child: const Text("reset"))
            ],
          )
        ],
      )),
    );
  }
}
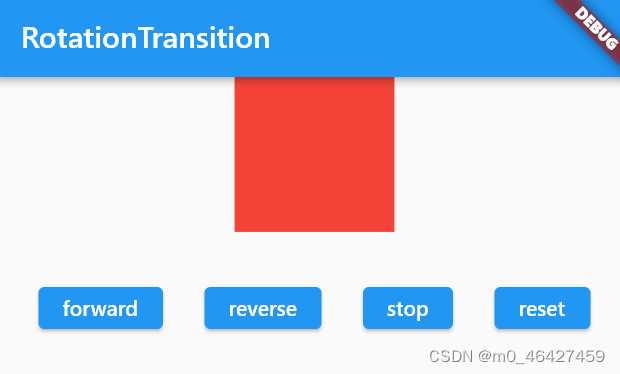
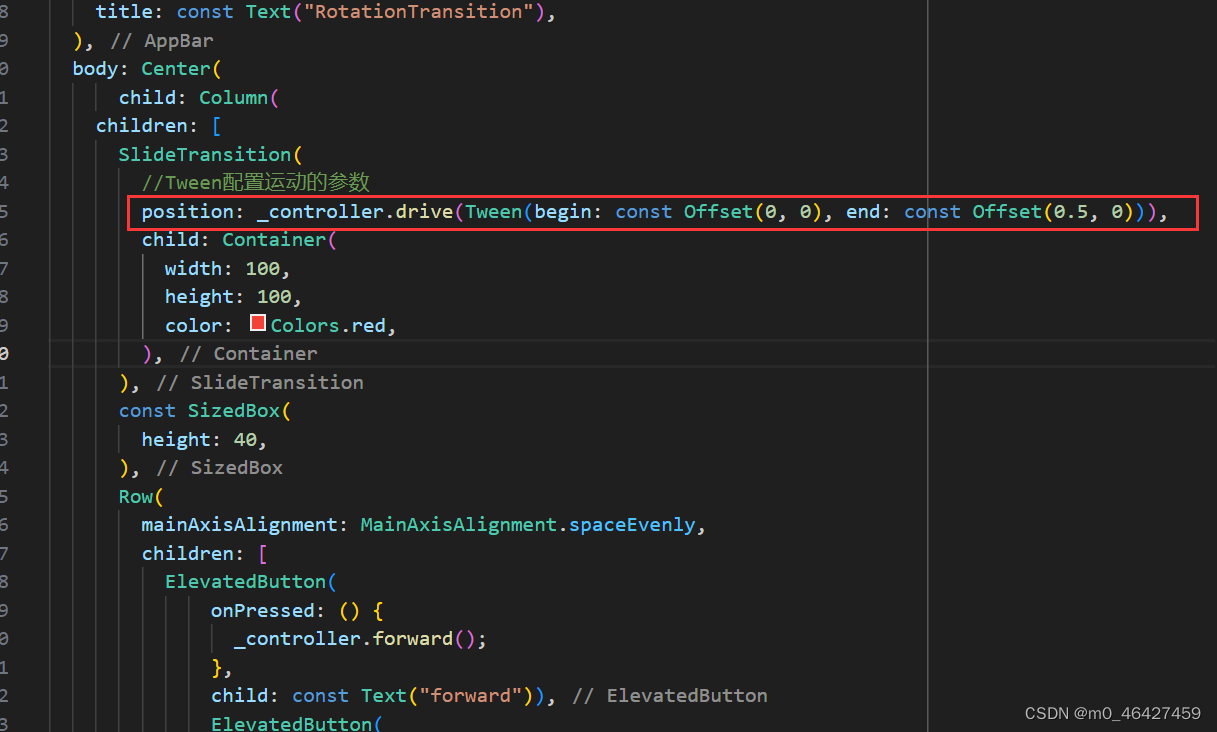
SlideTransition
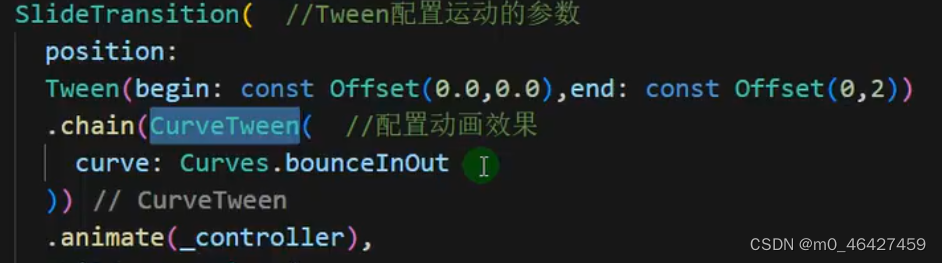
负责平移的显示动画组件,使用时需要通过position属性传入一个Animated表示位移程度,通常借助Tween实现。
如果需要配置动画效果,只需Tween继续调用chain()方法,
AnimatedIcon
用于提供动画图标的组件,是一个显示动画组件,需要通过progress属性传入动画控制器,且需要由Icon属性传入动画图标数据
class _HomePageState extends State<HomePage>
    with SingleTickerProviderStateMixin {
  late AnimationController _controller;

  @override
  void initState() {
    // TODO: implement initState
    super.initState();
    _controller =
        AnimationController(vsync: this, duration: const Duration(seconds: 1));
  }

  @override
  Widget build(BuildContext context) {
    return Scaffold(
      floatingActionButton: FloatingActionButton(
        child: Icon(Icons.refresh),
        onPressed: () {
          _controller.repeat(reverse: true);
        },
      ),
      appBar: AppBar(
        title: const Text("demo"),
      ),
      body: Center(
          child: Column(
        mainAxisAlignment: MainAxisAlignment.center,
        children: [
          AnimatedIcon(
            icon: AnimatedIcons.close_menu,
            progress: _controller,
            size: 40,
          ),
          const SizedBox(
            height: 40,
          ),
          AnimatedIcon(
            icon: AnimatedIcons.home_menu,
            progress: _controller,
            size: 40,
          ),
          const SizedBox(
            height: 40,
          ),
          AnimatedIcon(
            icon: AnimatedIcons.search_ellipsis,
            progress: _controller,
            size: 40,
          ),
          const SizedBox(
            height: 40,
          ),
        ],
      )),
    );
  }
}

AnimatedIcons有一些默认的动画效果,比如从home->menu,但如果要实现从search->home,如何实现呢?通过显式动画来实现
class _HomePageState extends State<HomePage>
    with SingleTickerProviderStateMixin {
  late AnimationController _controller;
  bool flag = true;
  @override
  void initState() {
    // TODO: implement initState
    super.initState();
    _controller =
        AnimationController(vsync: this, duration: const Duration(seconds: 1));
  }

  @override
  Widget build(BuildContext context) {
    return Scaffold(
        floatingActionButton: FloatingActionButton(
          child: const Icon(Icons.refresh),
          onPressed: () {
            flag ? _controller.forward() : _controller.reverse();
            flag = !flag;
          },
        ),
        appBar: AppBar(
          title: const Text("demo"),
        ),
        body: Center(
          child: Stack(
            children: [
              ScaleTransition(
                scale: _controller.drive(Tween(begin: 0.0, end: 1.0)
                    .chain(CurveTween(curve: const Interval(0.5, 1)))),
                child: const Icon(Icons.close, size: 40),
              ),
              ScaleTransition(
                //search从1-0变淡消失,且在0-0.5秒内完成
                scale: _controller.drive(Tween(begin: 1.0, end: 0.0)
                    .chain(CurveTween(curve: const Interval(0, 0.5)))),
                child: const Icon(Icons.search, size: 40),
              ),
            ],
          ),
        ));
  }
}
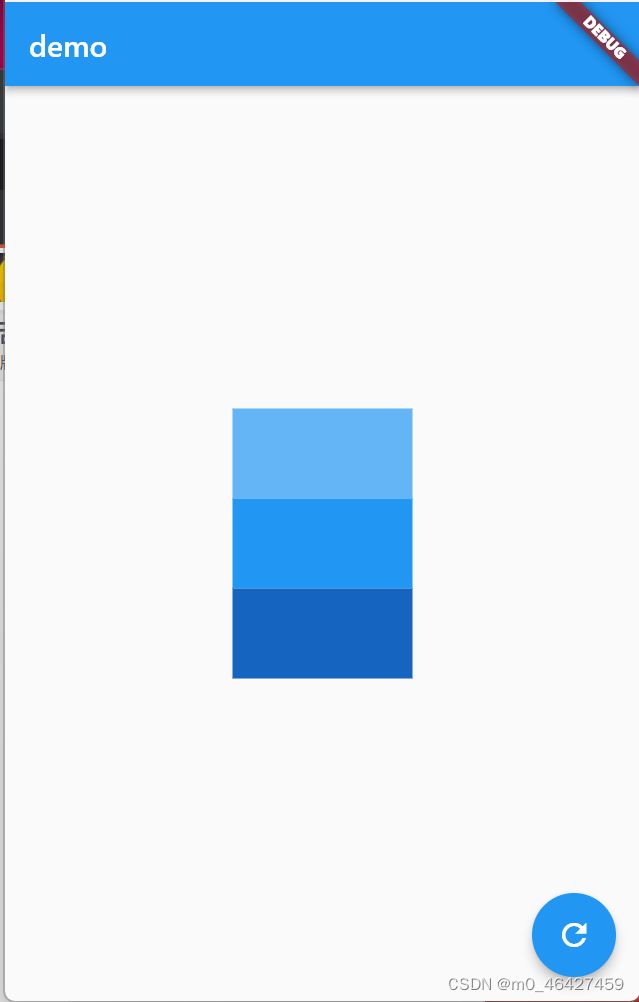
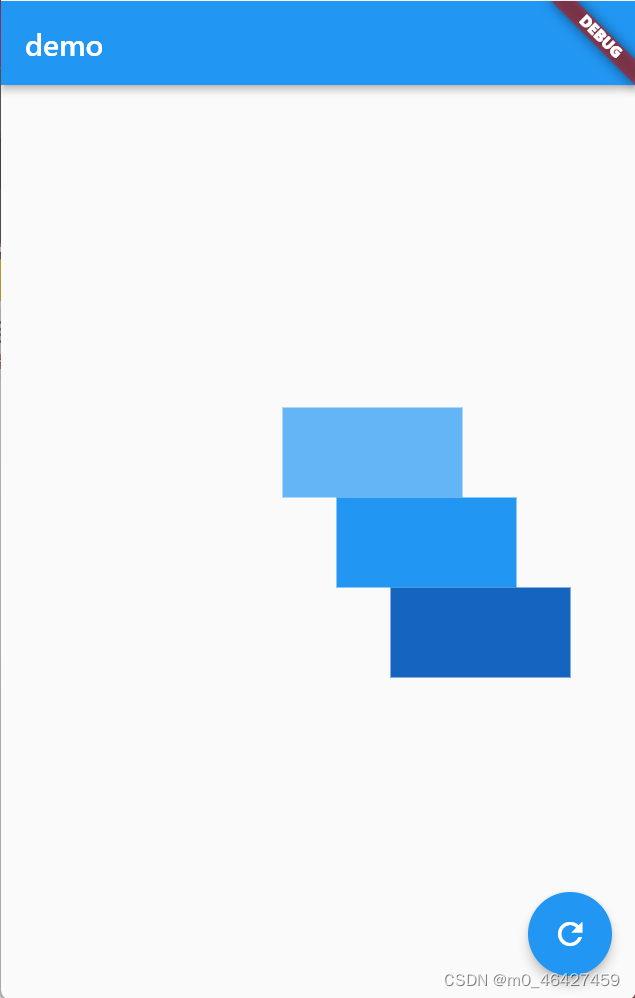
SlideTransition实现交错动画
实现下面三个元素依次移动
class _HomePageState extends State<HomePage>
    with SingleTickerProviderStateMixin {
  late AnimationController _controller;
  bool flag = true;
  @override
  void initState() {
    // TODO: implement initState
    super.initState();
    _controller =
        AnimationController(vsync: this, duration: const Duration(seconds: 1));
  }

  @override
  Widget build(BuildContext context) {
    return Scaffold(
        floatingActionButton: FloatingActionButton(
          child: const Icon(Icons.refresh),
          onPressed: () {
            flag ? _controller.forward() : _controller.reverse();
            flag = !flag;
          },
        ),
        appBar: AppBar(
          title: const Text("demo"),
        ),
        body: Center(
          child: Column(
            mainAxisAlignment: MainAxisAlignment.center,
            children: [
              SlideTransition(position: _controller.drive(Tween(begin: const Offset(0.0, 0.0), end: const Offset(0.3, 0.0)).chain(CurveTween(curve: const Interval(0, 0.2)))), child: Container(
                width: 120,
                height: 60,
                color: Colors.blue[300],
              ),),

              SlideTransition(position: _controller.drive(Tween(begin: const Offset(0.0, 0.0), end: const Offset(0.6, 0.0)).chain(CurveTween(curve: const Interval(0.2, 0.4)))), child: Container(
                width: 120,
                height: 60,
                color: Colors.blue[500],
              ),),
              SlideTransition(position: _controller.drive(Tween(begin: const Offset(0.0, 0.0), end: const Offset(0.9, 0.0)).chain(CurveTween(curve: const Interval(0.4, 0.6)))), child: Container(
                width: 120,
                height: 60,
                color: Colors.blue[800],
              ),),
            ],
          )
        ));
  }
}
Hero动画

photo_view插件
支持预览图片,可放大、缩小、滑动图标
官方地址:photo_view | Flutter Package
1、配置依赖
dependencies:
  photo_view: ^0.14.0
2、引入
import 'package:photo_view/photo_view.dart';3、单张图片的预览
class _TestPageState extends State<TestPage> {
  @override
  Widget build(BuildContext context) {
    return Scaffold(
      appBar: AppBar(title: const Text("test"),),
      body: Container(
        child: PhotoView(
        imageProvider: const NetworkImage("https://www.itying.com/images/flutter/2.png"),
      ),
      )
    );
  }
}
4、多张图片的预览
import 'package:photo_view/photo_view_gallery.dart';class _TestPageState extends State<TestPage> {
late List listData;
@override
void initState() {
// TODO: implement initState
super.initState();
listData = [
{"imageUrl": "https://www.itying.com/images/flutter/1.png"},
{"imageUrl": "https://www.itying.com/images/flutter/2.png"},
{"imageUrl": "https://www.itying.com/images/flutter/3.png"},
];
}
@override
Widget build(BuildContext context) {
return Scaffold(
appBar: AppBar(
title: const Text("test"),
),
body: PhotoViewGallery.builder(
itemCount: listData.length,
builder: ((context, index) {
return PhotoViewGalleryPageOptions(imageProvider: NetworkImage(listData[index]["imageUrl"]));
})),
);
}
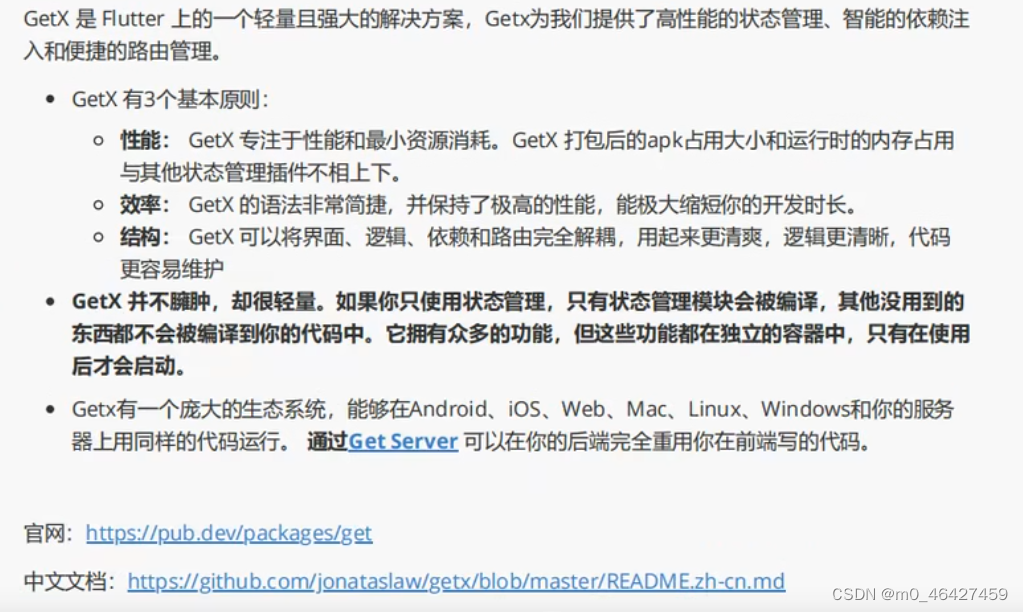
}Getx
状态管理
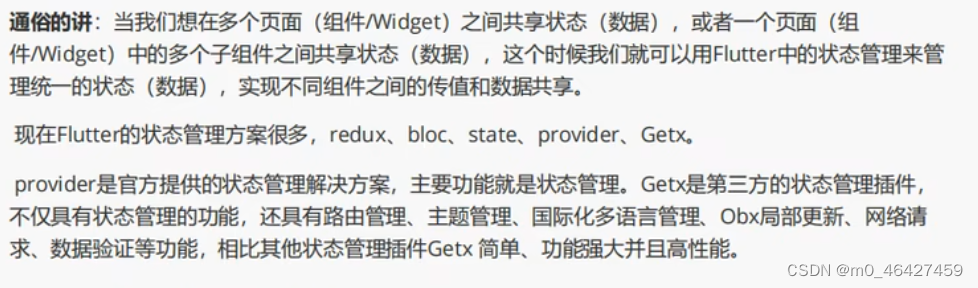
Flutter Getx介绍
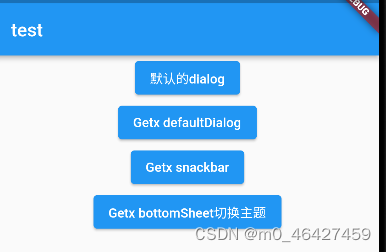
Getx中的Dialog以及改变主题
安装
将get添加到pubspec.yaml
dependencies:
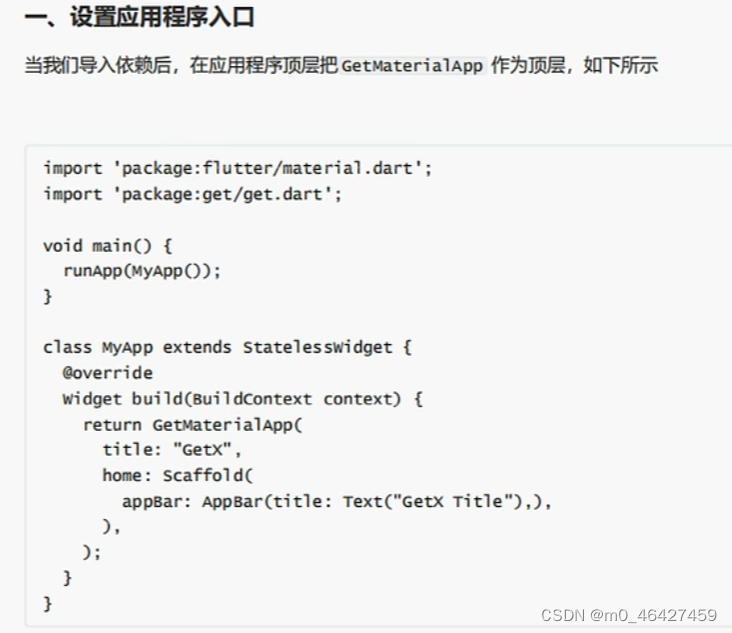
get: ^4.6.5使用getx的dialog需要将原本项目的MaterialApp改成GetMaterialApp
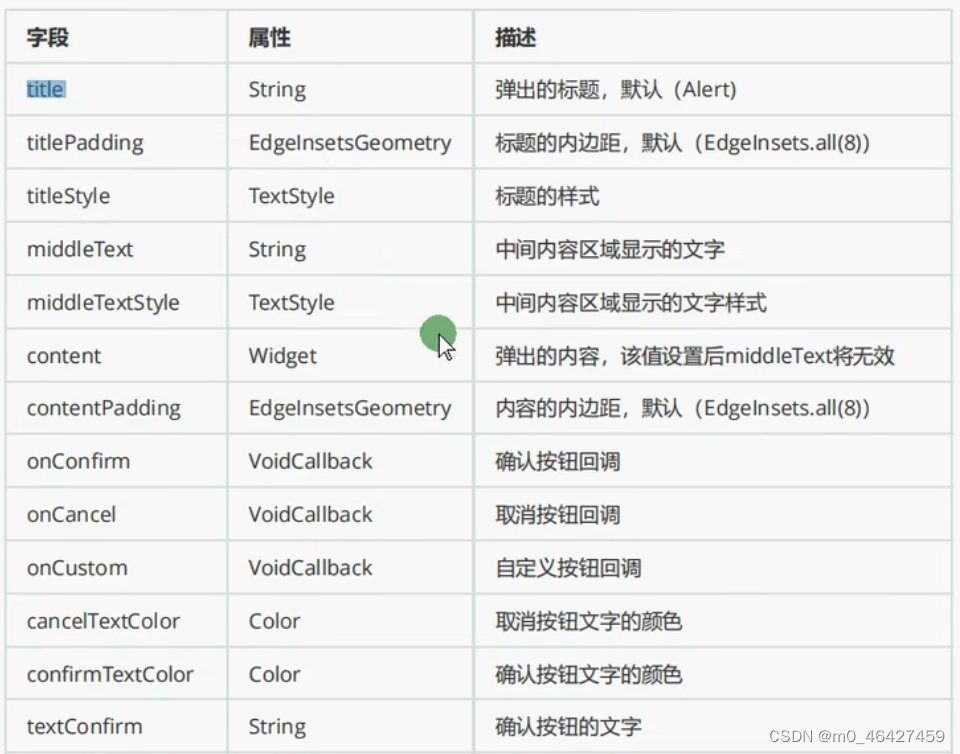
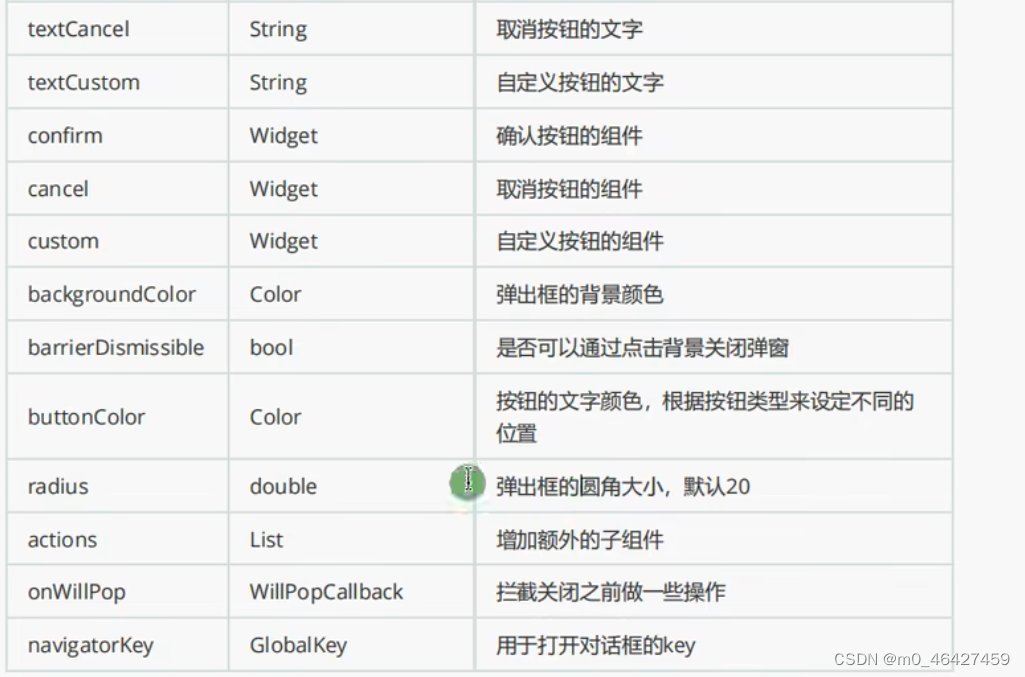
调用defalutDialog
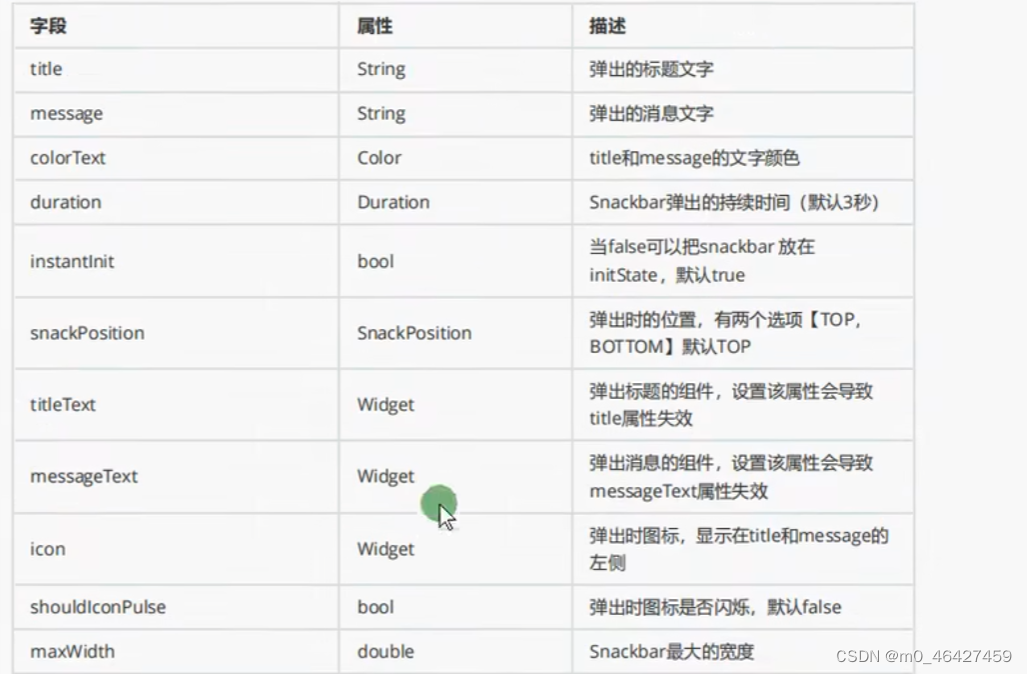
调用snackbar
snackbar与toast有点相似,如果想在程序中触发某些特定的事件后,需要快速弹出快捷消息,可以使用snack。
通过Get.snackbar()来显示snackbar

案例
import 'package:flutter/material.dart';
import 'package:get/get.dart';

void main() {
  runApp(const MyApp());
}

class MyApp extends StatelessWidget {
  const MyApp({super.key});

  // This widget is the root of your application.
  @override
  Widget build(BuildContext context) {
    return GetMaterialApp(
      title: 'Flutter Demo',
      theme: ThemeData(
        primarySwatch: Colors.blue,
      ),
      home: const HomePage(),
    );
  }
}

class HomePage extends StatefulWidget {
  const HomePage({super.key});

  @override
  State<HomePage> createState() => _HomePageState();
}

class _HomePageState extends State<HomePage> {
  void _alertDialog(context) async {
    var result = await showDialog(
        context: context,
        barrierDismissible: false, //点击背景是是否消失弹出框
        builder: (context) {
          return AlertDialog(
            title: const Text("提示信息!"),
            content: const Text("确定删除吗?"),
            actions: [
              TextButton(
                  onPressed: () {
                    print("ok");
                    Navigator.of(context).pop("ok");
                  },
                  child: const Text("确定")),
              TextButton(
                  onPressed: () {
                    print("cancel");
                    Navigator.of(context).pop("取消");
                  },
                  child: const Text("取消")),
            ],
          );
        });
    print(result);
  }

  @override
  Widget build(BuildContext context) {
    return Scaffold(
      appBar: AppBar(
        title: const Text("test"),
      ),
      body: Center(
        child: Column(
          children: [
            ElevatedButton(
                onPressed: () {
                  _alertDialog(context);
                },
                child: const Text("默认的dialog")),
            ElevatedButton(
                onPressed: () {
                  Get.defaultDialog(
                    title: "提示信息!",
                    middleText: "确定删除?",
                    confirm: ElevatedButton(
                        onPressed: () {
                          print("确定");
                          //相当于Navigator.of(context).pop("取消");
                          Get.back();
                        },
                        child: const Text("确定")),
                    cancel: ElevatedButton(
                        onPressed: () {
                          print("取消");
                          Get.back();
                        },
                        child: const Text("取消")),
                  );
                },
                child: const Text("Getx defaultDialog")),
            ElevatedButton(
                onPressed: () {
                  //snackPosition显示的位置
                  Get.snackbar("提示?", "您还未登录!",
                      snackPosition: SnackPosition.BOTTOM);
                },
                child: const Text("Getx snackbar")),
            ElevatedButton(
                onPressed: () {
                  Get.bottomSheet(Container(
                    color: Get.isDarkMode?Colors.black26:Colors.white,
                    height: 200,
                    child: Column(
                      children: [
                        ListTile(
                          leading: Icon(
                            Icons.wb_sunny_outlined,
                            color: Get.isDarkMode?Colors.white:Colors.black87,
                          ),
                          title: Text(
                            "白天模式",
                            style: TextStyle(color: Get.isDarkMode?Colors.white:Colors.black87),
                          ),
                          //监听事件 背景变成白色
                          onTap: () {
                            Get.changeTheme(ThemeData.light());
                            Get.back();
                          },
                        ),
                        ListTile(
                          leading: Icon(
                            Icons.wb_sunny,
                            color: Get.isDarkMode?Colors.white:Colors.black87,
                          ),
                          title: Text(
                            "夜晚模式",
                            style: TextStyle(color: Get.isDarkMode?Colors.white:Colors.black87),
                          ),
                          onTap: () {
                            Get.changeTheme(ThemeData.dark());
                            Get.back();
                          },
                        ),
                      ],
                    ),
                  ));
                },
                child: const Text("Getx bottomSheet切换主题"))
          ],
        ),
      ),
    );
  }
}
Getx路由管理
Getx封装了Navigation,无需context可进行跳转,使用Get.to()即可进行路由跳转,Getx路由跳转简化了跳转动画设置、动画时长定义、动画曲线设置。
Get.to()实现普通路由跳转
Getx页面跳转功能
//Naviagtion实现的跳转路由
Navigator.pushNamed(context, "/registerFirst")
//Getx实现的跳转路由
Get.toNamed("/login")
Get.toNames("/shop", arguments:{"id":20})


//Naviagtion返回上一级页面
Navigator.of(context).pop()
//Getx返回上一级页面
Get.back()


//Naviagtion返回根页面
Naviagtor.of(context).pushAndRemoveUntil(
    MaterialPageRoute(builder:(BuildContext context){return const Tabs(index:4);}), (route) => false
)
//Getx返回根页面
Get.ofAll(const Tabs(index:4))


//进入下一个页面,但没有返回上一个页面的选项(用于闪屏页,登录页)
Get.off(NextScreen())
Getx配置路由以及动画
使用defaultTransition配置默认动画

GetPage配置动态路由
import 'package:flutter/material.dart';
import './pages/tabs.dart';
import './pages/tabs/form.dart';
import './pages/tabs/search.dart';
import './pages/tabs/news.dart';
import 'package:get/get.dart';

void main(List<String> args) {
  runApp(const MyApp());
}

class MtApp extends StatefulWidget {
  const MtApp({super.key});

  @override
  State<MtApp> createState() => _MtAppState();
}

class _MtAppState extends State<MtApp> {
  @override
  Widget build(BuildContext context) {
    return GetMaterialApp(
      debugShowCheckedModeBanner: false,
      title: "Getx Demo",
      theme: ThemeData(
        primarySwatch: Colors.blue,
        appBarTheme: const AppBarTheme(
          centerTitle: true
        )
      ),
      initialRoute: "/",
      defaultTransition: Transition.rightToLeftWithFade,
      getPages: [
        GetPage(name: "/", page: () => const Tabs()),
        GetPage(name: "/login", page: () => const LoginPage()),
        GetPage(
          name: "/registerFirst",
          page: () => const RegisterFirstPage(),
          transition: Transition.rightToLeft
          ),
        GetPage(name: "/registerSecond", page: () => const RegisterSecondPage()),

      ],
    );
  }
}
在新页面使用Get.arguments即可获取上个页面的传值
Flutter Getx中间件配置
参考:https://github.com/jonataslaw/getx/blob/master/README.zh-cn.md
中间件:路由前或路由后的操作
比如在进入某个页面前先判断用户是否登录,未登录则不允许继续访问。
简单使用
import 'package:flutter/cupertino.dart';
import 'package:get/get.dart';
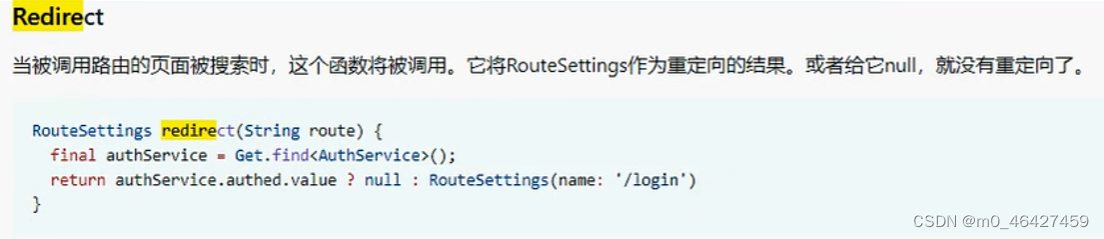
class ShopMiddleware extends GetMiddleware {
//重写跳转方法
@override
RouteSettings? redirect(String? route) {
//route 为调用中间件的路由
return const RouteSettings(name: "/login"); //跳转到登录页面
// return null;则不做任何操作
}
}
GetPage中配置中间件
GetPage(name: "/shop", page:()=> const ShopPage(), middlewares:[ShopMiddleWare()])多个中间件的优先级
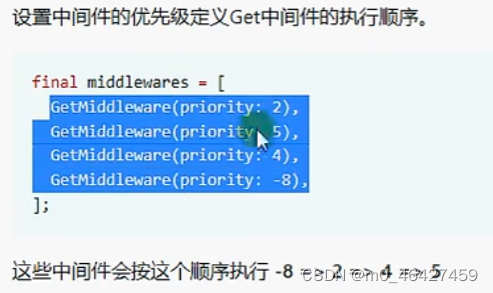
更多使用参考文档:https://github.com/jonataslaw/getx
Getx状态管理
状态管理
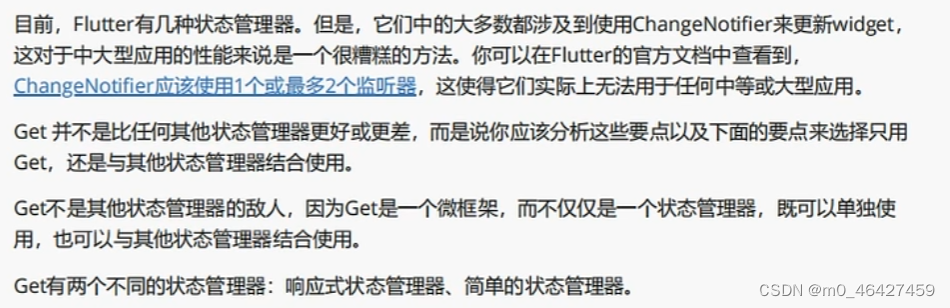
响应式状态管理器
GetX将响应式编程变得非常简单。
- 不需要创建StreamControllers
- 不需要为每个变量创建一个StreamBuilder
- 不需要为每个状态创建一个类
- 不需要为一个初始值创建一个get
使用Getx的响应式编程同setState一样简单。有一个名称变量,每次改变它时,所有使用它的组件都会自动刷新。
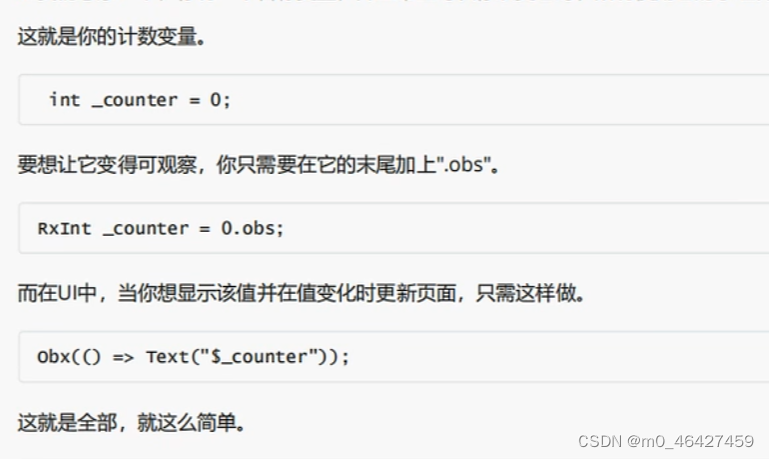
计数器
import 'package:flutter/material.dart';
import 'package:get/get.dart';

void main() {
  runApp(const MyApp());
}

class MyApp extends StatelessWidget {
  const MyApp({super.key});

  // This widget is the root of your application.
  @override
  Widget build(BuildContext context) {
    return GetMaterialApp(
      title: 'Flutter Demo',
      theme: ThemeData(
        primarySwatch: Colors.blue,
      ),
      home: HomePage(),
    );
  }
}

class HomePage extends StatelessWidget {
  final RxInt _counter = 0.obs;
  HomePage({super.key});

  @override
  Widget build(BuildContext context) {
    return Scaffold(
      appBar: AppBar(
        title: const Text("test"),
      ),
      body: Center(
        child: Column(
          mainAxisAlignment: MainAxisAlignment.center,
          children: [
            Obx(() => Text("${_counter.value}"))  //Obx实现局部更新,不用每次执行build 有点Vue的感觉
          ],
        ),
      ),
      floatingActionButton: FloatingActionButton(
        child: const Icon(Icons.add),
        onPressed: () {
          _counter.value++;
        },
      ),
    );
  }
}
Obx也可以通过return 来返回
final RxString _username = "zhangsan".obs;
Obx(() {
              return Text(
                _username.value,
                style: Theme.of(context).textTheme.subtitle2,
              );
            })
上面int、string类型的响应式变量修改时都是修改value,如果是list则不需要,如list.add("")即可增加元素。
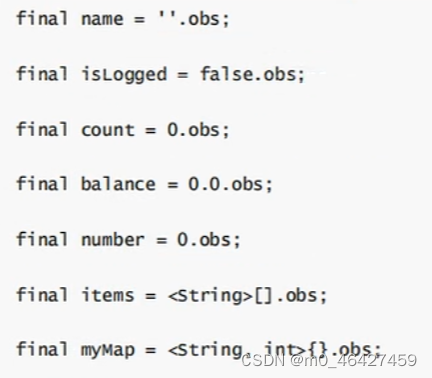
声明响应式变量的三种方式
1、使用Rx{Type}

2、使用Rx,规定泛型Rx
final name = Rx<String>('');
final isLogged = Rx<Bool>(false);
final count = Rx<Int>(0);
final balance = Rx<Double>(0.0);
final number = Rx<Num>(0);
final items = Rx<List<String>>([]);
final map = Rx<Map<String, int>>({});
自定义类
final user = Rx<User>();
3、实用、简单的方法,添加.obs作为value的属性
类的响应式
方法一、普通类中定义响应式变量
import 'package:get/get.dart';

class Person{
    RxString name = "zhangsan".obs;
    RxInt age = 18.obs;
}


使用时:
var p = Person();
p.name.value;  //或p.name即可

改变时:
p.name.value = "xxx";


方法二、普通类中普通变量 创建类实例时定义响应式
class Animal{
    String username;
    int age;
    Animal(this.username, this.age);
}


使用时:
var a = Animal("test", 2).obs;
a.value.username;

改变时:
a.value.username="xxx";
a.value=a.value


 320
320

 被折叠的 条评论
为什么被折叠?
被折叠的 条评论
为什么被折叠?
 到【灌水乐园】发言


