


首先,我们先把界面的框架图画出来,示意图如下:
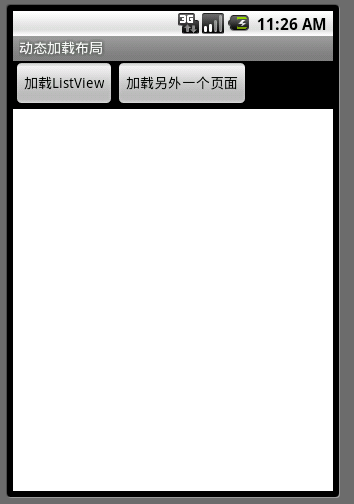
中间白色部门是一个线性布局文件,我喜欢在画图的时候用不同的颜色将一块布局标示出来,方便查看。布局文件代码如下:
<?
xml version="1.0" encoding="utf-8"
?>
< LinearLayout xmlns:android ="http://schemas.android.com/apk/res/android"
android:orientation ="vertical" android:layout_width ="fill_parent"
android:layout_height ="fill_parent" >
< LinearLayout android:orientation ="horizontal"
android:layout_width ="wrap_content" android:layout_height ="wrap_content" >
< Button android:text ="加载ListView" android:id ="@+id/Button01"
android:layout_width ="wrap_content" android:layout_height ="wrap_content" >
</ Button >
< Button android:text ="加载另外一个页面" android:id ="@+id/Button02"
android:layout_width ="wrap_content" android:layout_height ="wrap_content" ></ Button >
</ LinearLayout >
< LinearLayout android:id ="@+id/LinearLayout01" android:background ="#FFFFFF"
android:layout_width ="fill_parent" android:layout_height ="fill_parent" ></ LinearLayout >
</ LinearLayout >
从上面的效果图可以看出,那块白色的线性布局是用来动态加载传进来的布局文件。好了,我们就来做如果把布局文件动态的加载进来。下面我们一步一步来实现这个效果,首先,先把需要的 XML 勾画出来,分为步骤如下。
- 新建一个布局用来存放 ListView 页面,代码如下:
<? xml version="1.0" encoding="UTF-8" ?>
< LinearLayout android:id ="@+id/layout"
android:layout_width ="fill_parent" android:layout_height ="fill_parent"
xmlns:android ="http://schemas.android.com/apk/res/android" >
< ListView android:id ="@+id/ListView01" android:layout_width ="wrap_content"
android:layout_height ="wrap_content" ></ ListView >
</ LinearLayout >
- 新建一个 ListView 每一行数据的样式,代码如下:
<? xml version="1.0" encoding="UTF-8" ?>
< LinearLayout android:id ="@+id/LinearLayout01"
android:layout_width ="fill_parent" android:layout_height ="fill_parent"
xmlns:android ="http://schemas.android.com/apk/res/android" >
< TextView android:text ="@+id/TextView01" android:id ="@+id/TextView01"
android:layout_width ="wrap_content" android:layout_height ="wrap_content" ></ TextView >
</ LinearLayout >
- 新建另外一个页面,用来区分此页面是动态加载的,代码如下:
<? xml version="1.0" encoding="UTF-8" ?>
< LinearLayout android:id ="@+id/hellolayout"
android:layout_width ="fill_parent" android:layout_height ="fill_parent"
xmlns:android ="http://schemas.android.com/apk/res/android" >
< TextView android:text ="HELLO"
android:layout_width ="wrap_content" android:layout_height ="wrap_content" ></ TextView >
</ LinearLayout >
- 实现ListView 的添充数据,这里不详细介绍如何填充ListView 每行数据,有不解的朋友可以回头看我写的文章:点击这里 ,代码如下:
package com.terry;
import java.util.ArrayList;
import java.util.HashMap;
import android.content.Context;
import android.view.LayoutInflater;
import android.view.View;
import android.view.ViewGroup;
import android.widget.BaseAdapter;
import android.widget.TextView;
public class listAdapter extends BaseAdapter {
ArrayList < HashMap < String, Object >> list = new ArrayList < HashMap < String, Object >> ();
private LayoutInflater inflater;
public listAdapter(Context contex)
{
inflater = LayoutInflater.from(contex);
HashMap < String, Object > map = new HashMap < String, Object > ();
for ( int i = 0 ; i < 10 ; i ++ ) {
map.put( " name " , " 例子 " );
list.add(map);
}
}
@Override
public int getCount() {
// TODO Auto-generated method stub
return list.size();
}
@Override
public Object getItem( int position) {
// TODO Auto-generated method stub
return list.get(position);
}
@Override
public long getItemId( int position) {
// TODO Auto-generated method stub
return position;
}
@Override
public View getView( int position, View convertView, ViewGroup parent) {
// TODO Auto-generated method stub
final viewHolder myHolder;
if (convertView == null ) {
myHolder = new viewHolder();
convertView = inflater.inflate(R.layout.list_view_row, null );
myHolder.tv = (TextView)convertView.findViewById(R.id.TextView01);
convertView.setTag(myHolder);
}
else
{
myHolder = (viewHolder)convertView.getTag();
}
myHolder.tv.setText(list.get(position).get( " name " ).toString());
return convertView;
}
}
- 项目大纲如下图:

- 好了,到此我们的准备工作就己经完成,接下来就是要教大家如何实现动态加载上面所画的布局页面了,先看一下效果图:

点击第一个按钮

点击第二个按钮
-
动态加载代码如下:
package com.terry;
import android.app.Activity;
import android.graphics.Color;
import android.os.Bundle;
import android.view.LayoutInflater;
import android.view.View;
import android.view.View.OnClickListener;
import android.widget.Button;
import android.widget.LinearLayout;
import android.widget.ListView;
import android.widget.TextView;
public class dynaActivity extends Activity {
/** Called when the activity is first created. */
@Override
public void onCreate(Bundle savedInstanceState) {
super .onCreate(savedInstanceState);
setContentView(R.layout.main);
final LayoutInflater inflater = LayoutInflater.from( this );
Button btn = (Button) findViewById(R.id.Button01);
Button btn2 = (Button) findViewById(R.id.Button02);
final LinearLayout lin = (LinearLayout) findViewById(R.id.LinearLayout01);
btn.setOnClickListener( new OnClickListener() {
@Override
public void onClick(View v) {
// TODO Auto-generated method stub
LinearLayout layout = (LinearLayout) inflater.inflate(
R.layout.listview, null ).findViewById(R.id.layout);
ListView lv = (ListView)layout.getChildAt( 0 );
lv.setAdapter( new listAdapter(dynaActivity. this ));
lin.removeAllViews();
lin.addView(layout);
}
});
-
//关键就是先找出要放到哪,然后再新建自己的View,加到要放的布局里就OK
-
btn2.setOnClickListener( new OnClickListener() {
@Override
public void onClick(View v) {
// TODO Auto-generated method stub
LinearLayout layout = (LinearLayout) inflater.inflate(
R.layout.hello, null ).findViewById(R.id.hellolayout);
TextView lv = (TextView)layout.getChildAt( 0 );
lv.setTextColor(Color.RED);
lin.removeAllViews();
lin.addView(layout);
}
});
}
} -


 被折叠的 条评论
为什么被折叠?
被折叠的 条评论
为什么被折叠?
 到【灌水乐园】发言


