


 本文介绍了如何在Windows Phone 8和Windows Phone Silverlight 8.1应用中使用相机闪光灯。通过Microsoft.Devices.PhotoCamera类,你可以编程方式设置相机的闪光灯模式。详细步骤包括在XAML中添加按钮,初始化相机,切换不同闪光灯模式等。


关于style:
<EventSetter Event="Loaded"Handler="Button_Loaded"/>
1. Style的有效范围
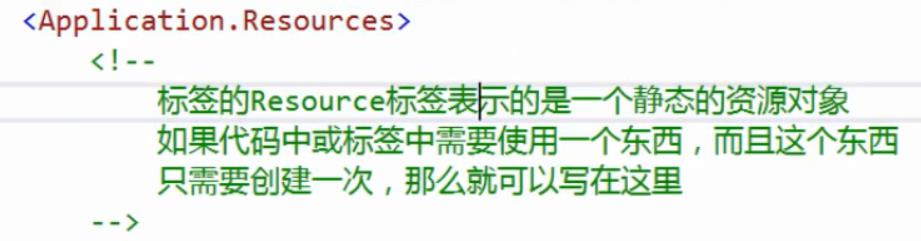
1.1 如果在Application.Resources中声明Style,则它的有效范围是整个程序


<Application.Resources>
        <ResourceDictionary>
            <ResourceDictionary.MergedDictionaries>
                <ResourceDictionary Source="Themes/Style.xaml" />
                <ResourceDictionary Source="Themes/Generic.xaml" />
            </ResourceDictionary.MergedDictionaries>
        </ResourceDictionary>
    </Application.Resources>
1.2 如果在Window.Resources中声明Style,则它的有效范围是当前窗体
<Window.Resources>
            <Style TargetType="Button">
                <Setter Property="Width" Value="75"></Setter>
                <Setter Property="Height" Value="85"></Setter>
                <EventSetter Event="Click" Handler="Button_Click"></EventSetter>
            </Style>
  </Window.Resources>
1.3 如果在其他控件(例如Grid)的Resources中声明Style,则它的有效范围就是这个控件
<Grid.Resources>
            <Style TargetType="Button">
                <Setter Property="Width" Value="75"></Setter>
                <Setter Property="Height" Value="85"></Setter>
                <EventSetter Event="Click" Handler="Button_Click"></EventSetter>
            </Style>
  </Grid.Resources>
注:
Style中如果只写了TargetType="Button",没有写x:Key,则Style有效范围内的Button的Style默认都是这个Style。
Style中如果写x:Key=“buttonStyle1”了,则引用此Style的方法为Style="{StaticResource buttonStyle1}"
3. TargetType
如果没有给Style指定TargetType,则在写Style时,必须给每个属性添加类型,这样不同的类型可以共用同一个Style:
<Style x:Key="Style1">
            <Setter Property="Button.Width" Value="80"></Setter>
            <Setter Property="Button.Height" Value="80"></Setter>
            <Setter Property="TextBlock.Text" Value="HelloWorld"></Setter>
        </Style>
注:将Style1同时指定给Button和TextBlock,Button会自动忽略不适用它们的属性Text。而二者公有的属性Height,Width,对二者都有效。


button按钮:
comobox下拉控件:

关于在c#中添加控件:


布局控件中添加:

border边框控件:


stackpanel:
messagedialog:


slider滑动控件:

flyout浮出控件:

< Button > < Button.Flyout > < Flyout > <!-- 浮出的UI内容 --> </ Flyout > </ Button.Flyout > </ Button >
从控件的XAML语法中可以看出,Flyout控件本身就是一种辅助性的控件,它必须要与其他的控件结合起来使用才可以,那么通常会将Flyout控件附加到一个Button控件上直接相应Button控件的单击事件,因此Button控件拥有Flyout属性以简化附加和打开 Flyout 控件。单击按钮时,附加到按钮的浮出控件自动打开,这是不需要处理任何事件即可打开浮出控件。那么对于非Button控件是不是不能使用Flyout控件呢?那么答案肯定是否定的,非Button控件也一样可以使用Flyout控件,你也可以使用FlyoutBase.AttachedFlyout附加属性,将 Flyout 控件附加到任何FrameworkElement对象。因为Flyout控件是必须要相应某个用户的操作的,Button控件是默认关联到了Click事件,如果是用FlyoutBase.AttachedFlyout附加属性来添加Flyout控件的这种情况下,就必须响应FrameworkElement控件上的交互,例如 Tapped,并在你的代码中打开Flyout控件。示例代码如下所示:
XAML 代码:
< TextBlock Text =" Tapped事件触发Flyout" Tapped ="TextBlock_Tapped" > < FlyoutBase.AttachedFlyout > < Flyout > <!-- 浮出的UI内容 --> </ Flyout > </ FlyoutBase.AttachedFlyout > </ TextBlock >
C# 代码:
private void TextBlock_Tapped( object sender, TappedRoutedEventArgs e){ FrameworkElement element = sender as FrameworkElement; if (element != null ) { FlyoutBase.ShowAttachedFlyout(element); }}
从上文我们知道了Flyout控件的两种创建方式,一种是通过Button控件的Flyout属性添加,另外的一种就是通过FlyoutBase.AttachedFlyout附件属性给任何的FrameworkElement对象来添加。那么在Windows Phone上Flyout控件一共有6种不同的类型:Flyout、DatePickerFlyout、TimePickerFlyout、PickerFlyout、ListPickerFlyout和MenuFlyout。
(1 )Flyout
Flyout类型表示用于处理自定义的浮出窗口的。Flyout控件经常会使用的事件是Closed、Opened和Opening事件,分别表示是在关闭、已打开和正在打开的三种时机触发的时间,在实际的程序开发中通常会在Closed事件处理程序中来获取用户的操作结果。同时这三种事件也是其他类型的Flyout控件的共性,所以你可以把Flyout类型的Flyout控件是最简单和最基本的Flyout控件。
(2 )DatePickerFlyout 和TimePickerFlyout
DatePickerFlyout类型表示是选择日期的浮出窗口;TimePickerFlyout表示是选择时间的浮出窗口。DatePickerFlyout与TimePickerFlyout类型的Flyout控件实际上是和TimePicker与DatePicker控件是非常类似的,只不过Flyout控件可以监控到TimePicker与DatePicker控件的弹出时机。
(3 )PickerFlyout 和ListPickerFlyout
PickerFlyout表示是选择的浮出窗口,可以在页面底下添加确认的菜单栏用于用户进行确认;ListPickerFlyout表示是列表形式展示的浮出窗口,需要通过集合数据绑定来呈现列表的选择。PickerFlyout和ListPickerFlyout类型的Flyout控件是选择类型的浮出窗口,它们与其他的Flyout控件的主要区别是提供了选中确认的时间分别是PickerFlyout对应的Confirmed事件和ListPickerFlyout对应的ItemsPicked事件,而需要注意的是ListPickerFlyout需要通过数据绑定来实现选择的列表,关于数据绑定的知识在后续的章节还会进行更加详细的介绍。
(4 )MenuFlyout
MenuFlyout表示是上下文菜单的选择浮出窗口。一个MenuFlyout会包含若干个MenuFlyoutItem,每个MenuFlyoutItem表示一个选项,用户可以进行单击,同时同时通过MenuFlyoutItem的Click单击事件来处理用户的单击请求。MenuFlyout还有一个很大的特点就是当用户当其弹出的时候,会把程序页面的其他部分会往里面凹下去以强调弹出的MenuFlyout浮出层。
下面给出Flyout控件的示例:6种类型的Flyout控件的使用和Button与非Button控件对Flyout控件的集成。
datepicker日期选择控件:
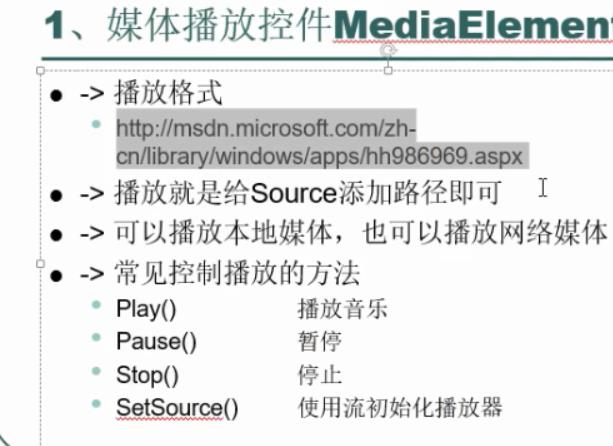
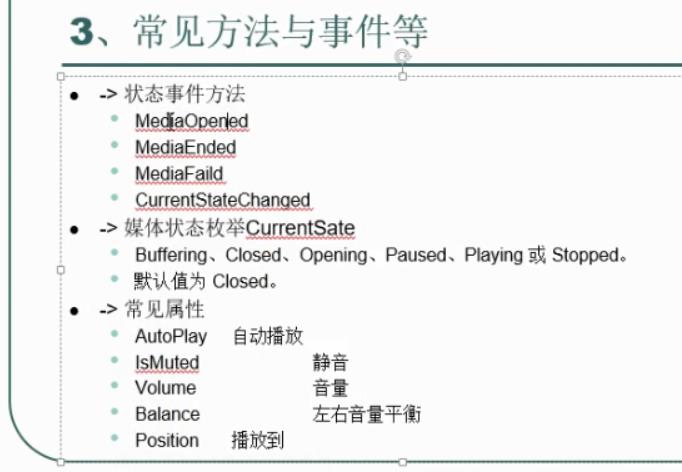
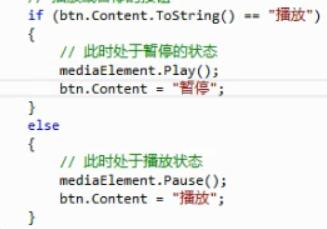
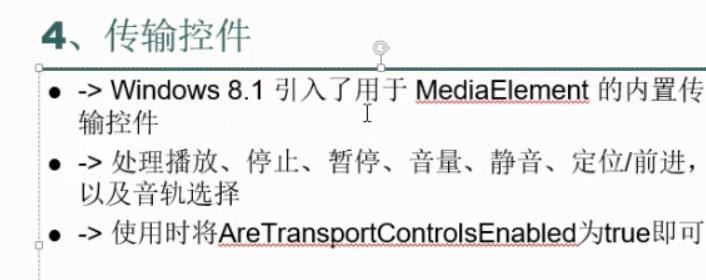
媒体控件:
listview控件:
菜单控件:
canvas控件:
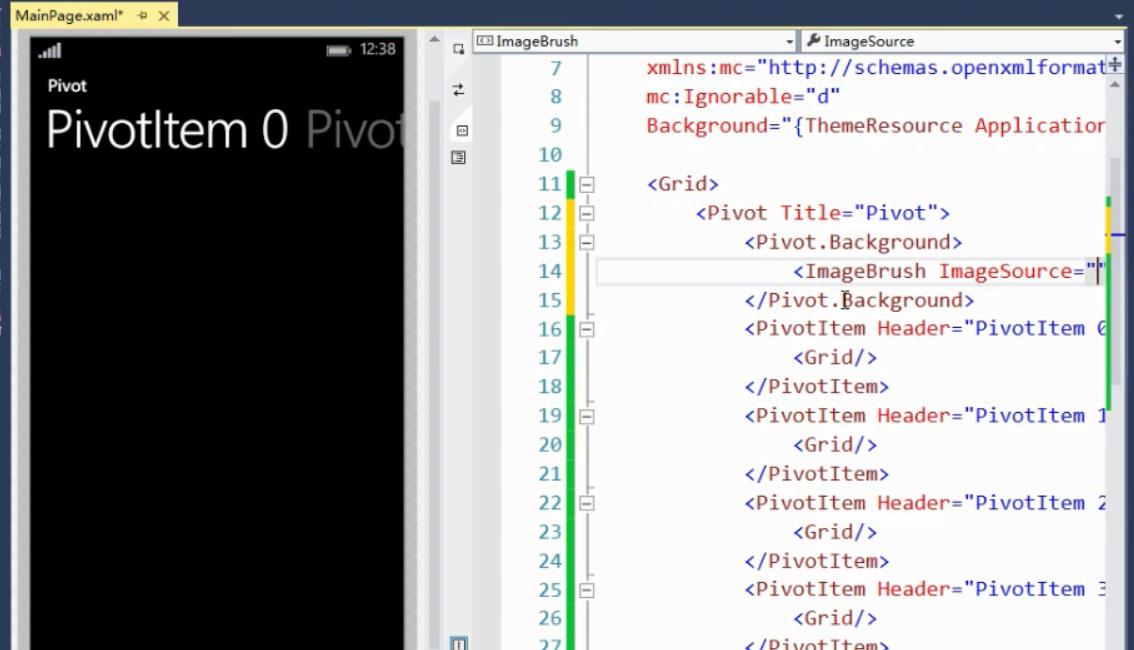
pivot控件(透视应用容器):
控件属性继承:
图形控件:
f12:

关于messagedialog方法的一些注意:
MessageDialog类有以下常用方法和属性:
ShowAsync():异步弹出消息框.
Commands:添加命令,在弹出框界面上同步添加相应的按钮.
DefaultCommandIndex:设置默认按钮的索引,按ENTER键将激活该索引对应的命令按钮
CancelCommandIndex:设置取消退出按钮的索引,按ESC键将激活该索引对应的命令按钮
Title:弹出消息框的标题
async:用于方法申明时,此关键字是告诉编译器在这个方法体内可能会有await关键字。
await:用于异步操作时的模拟同步等待,声明有此关键字的异步操作需等待异步操作完成之后才继续往下运行,但是不会阻塞UI线
程。
注意:使用await关键字的方法体,必须使用async声明方法
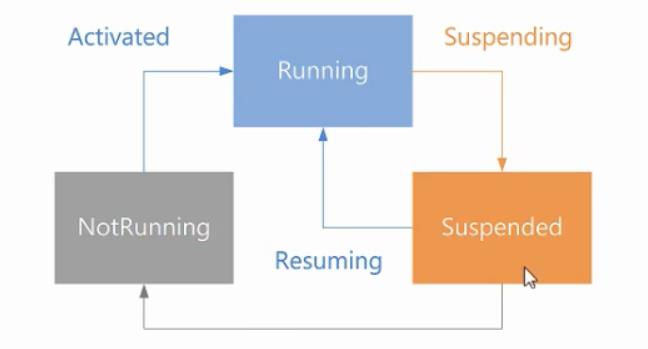
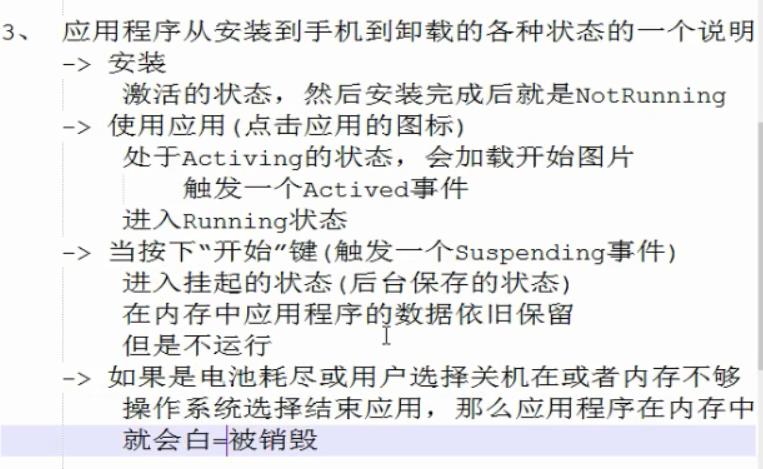
wp8.1的软件状态:
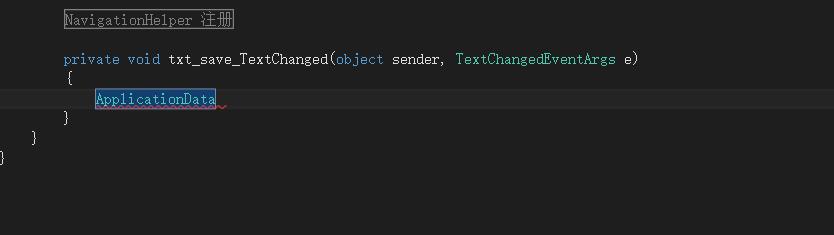
注册存储:


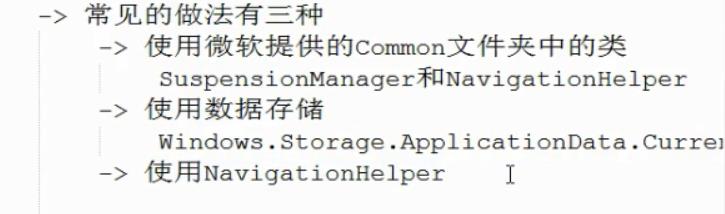
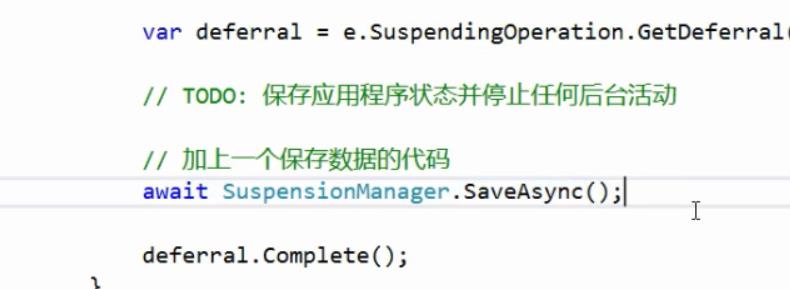
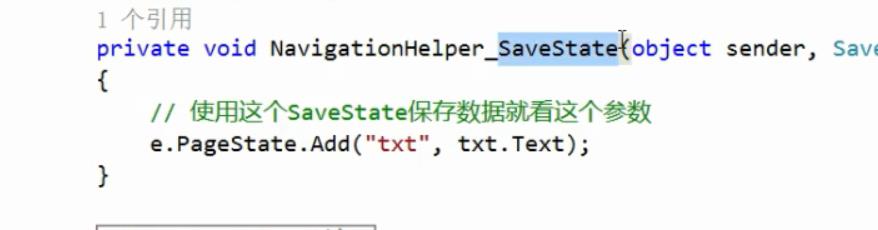
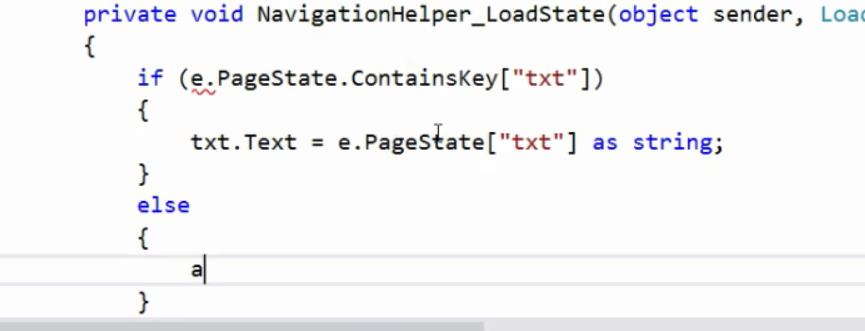
挂起数据存储:
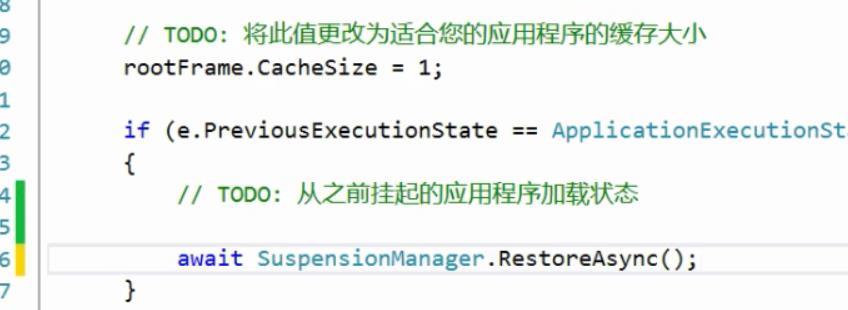
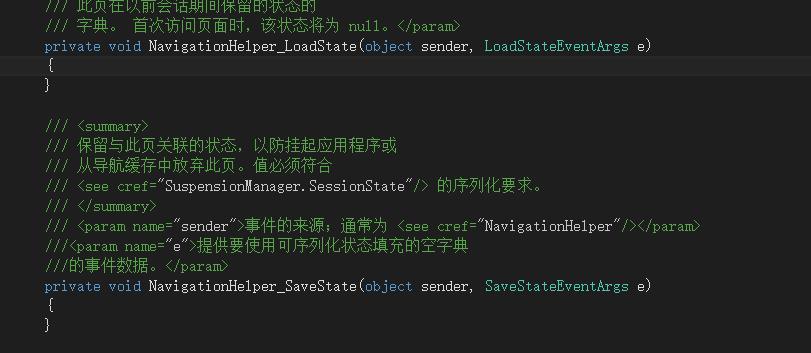
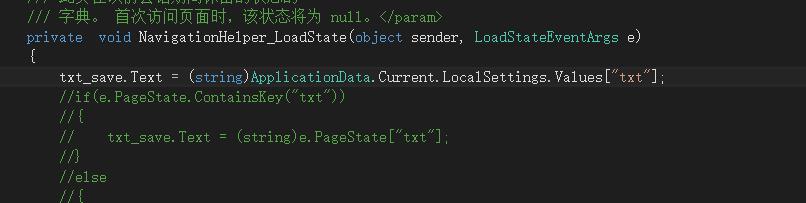
在基础页代码行找到loadstate和savestate事件
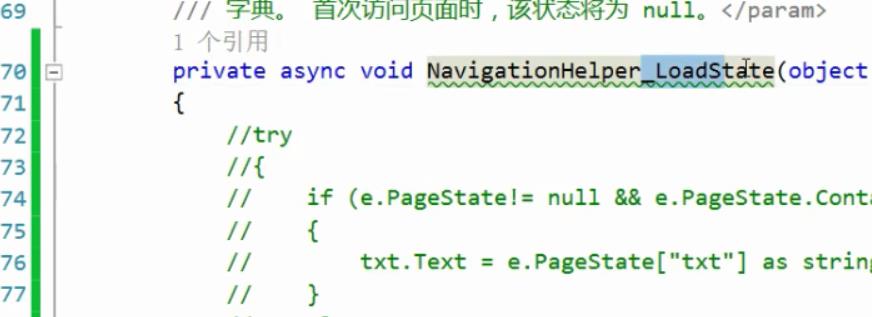

关于try与catch:
扩展语法形如:

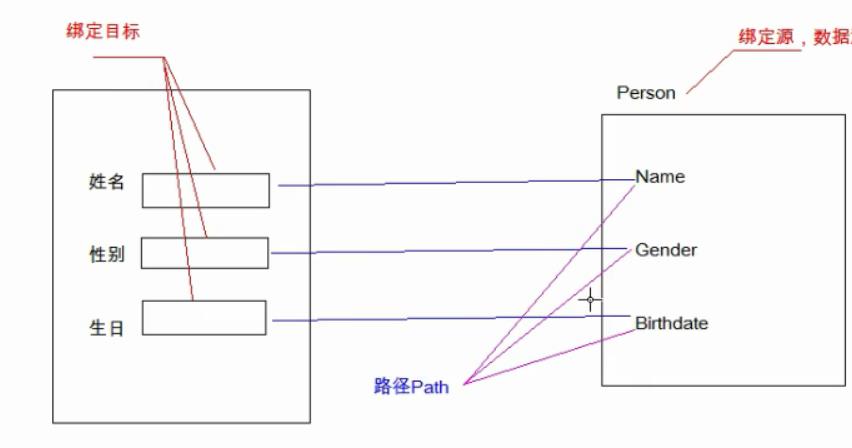
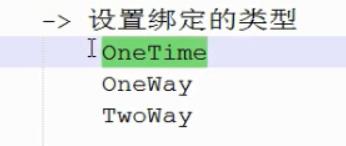
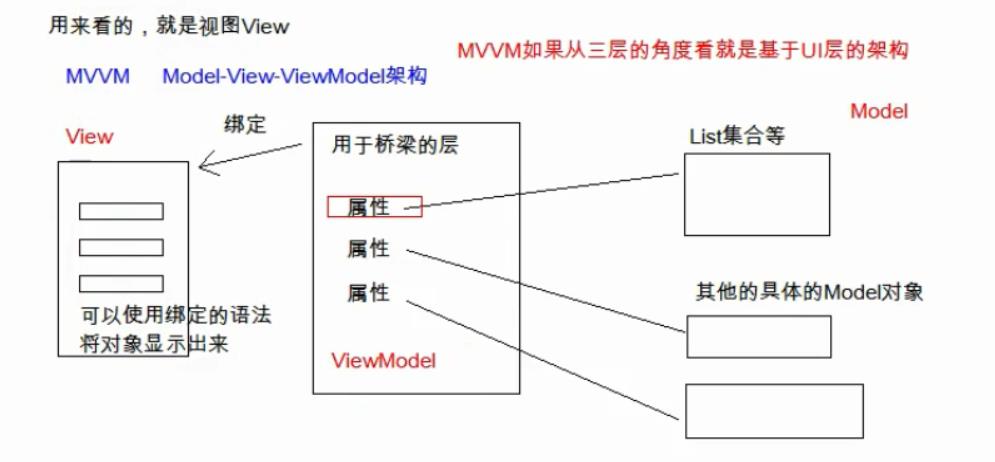
数据绑定类型:
 i
i

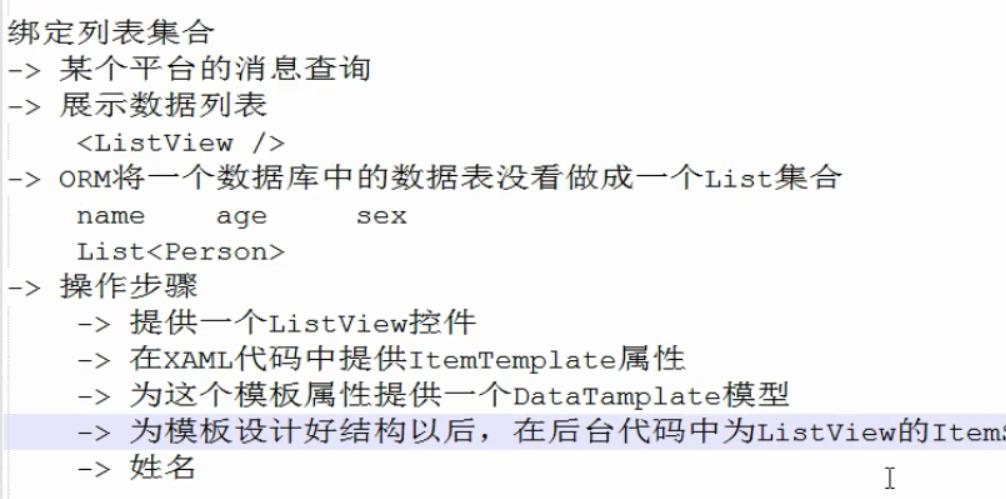
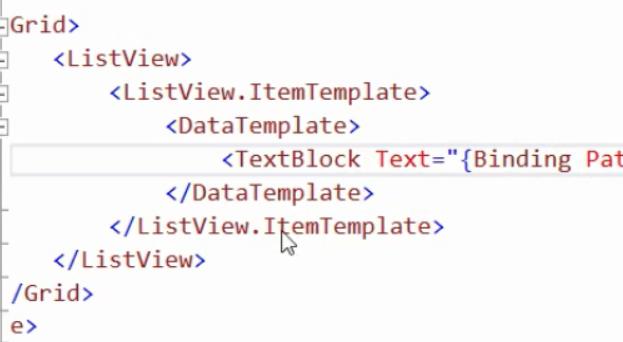
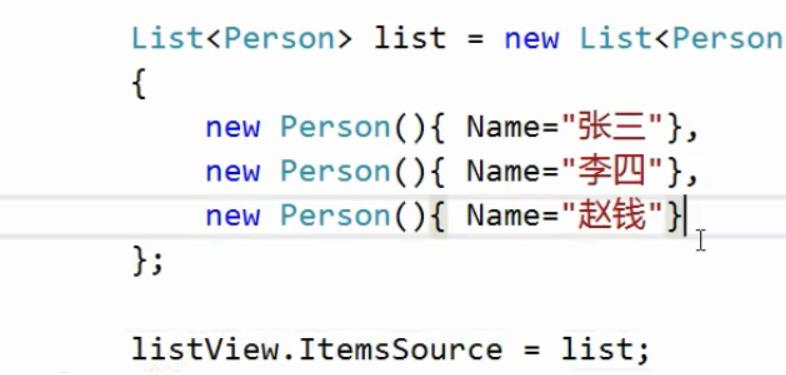
绑定列表集合:
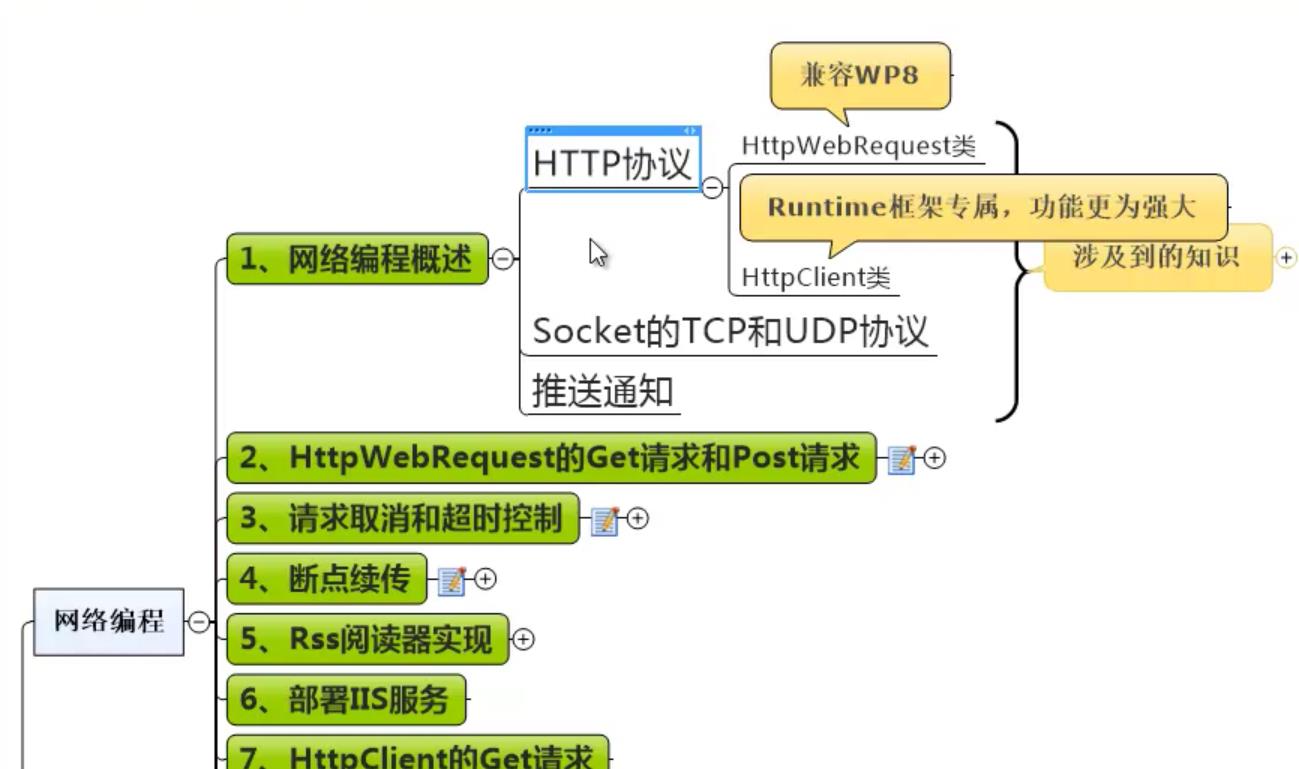
网络数据请求:
生命周期按钮:

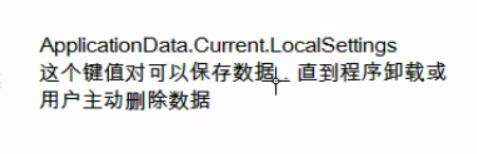
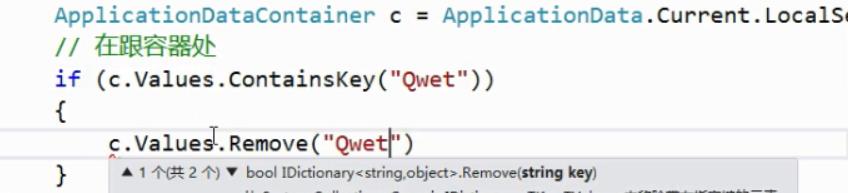
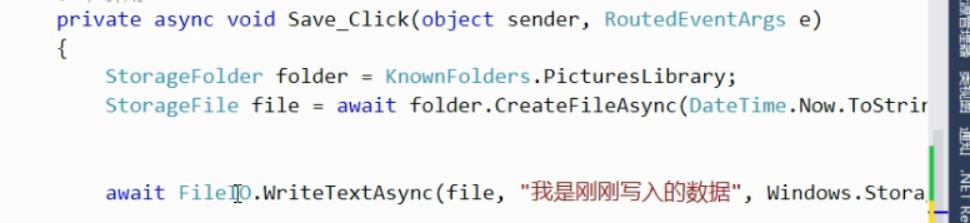
applicationdata.current.localsettings:


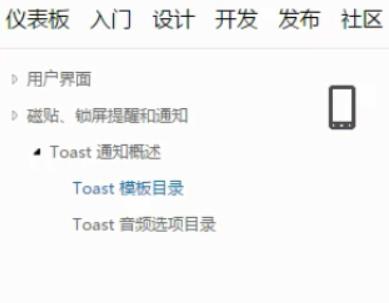
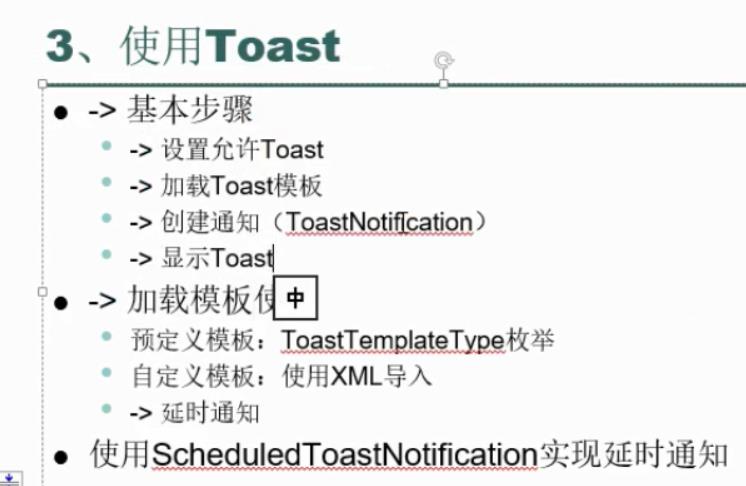
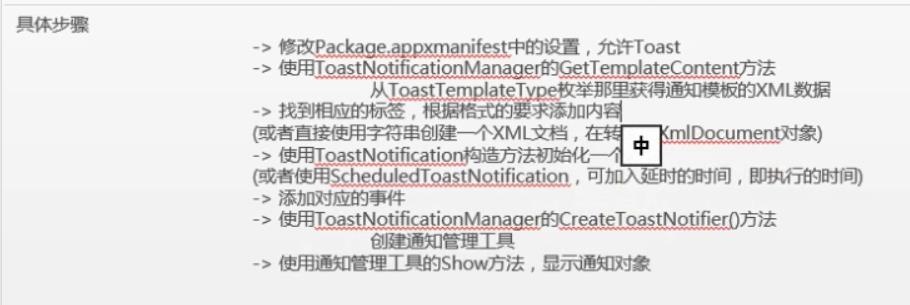
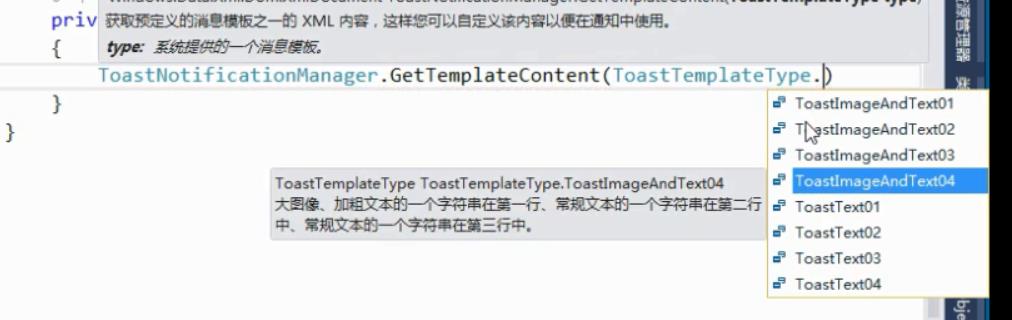
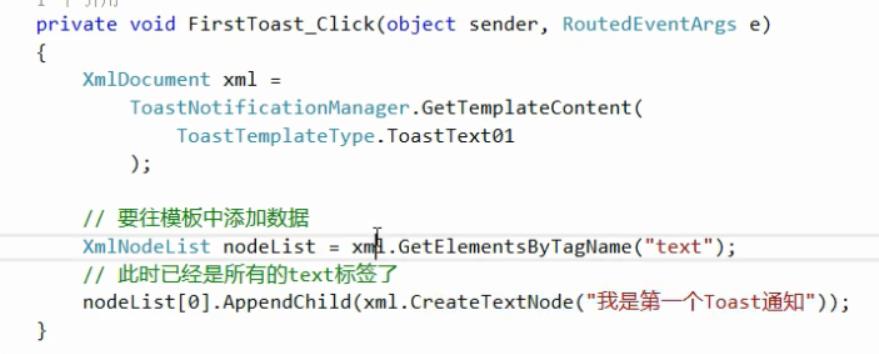
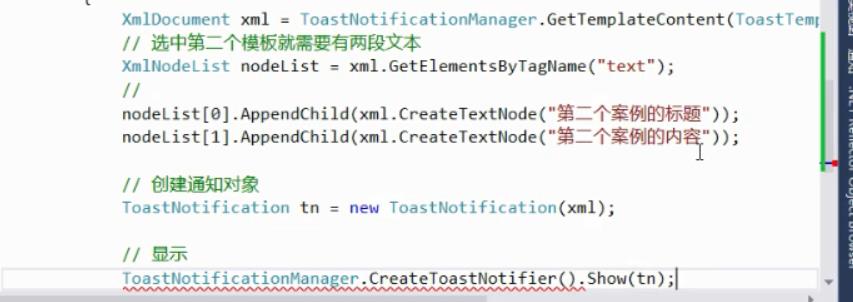
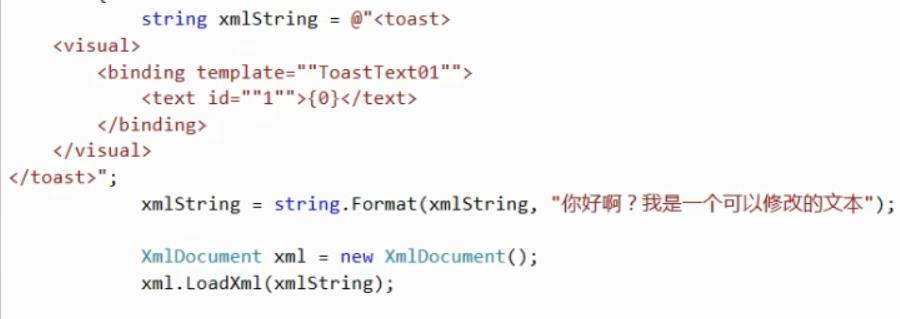
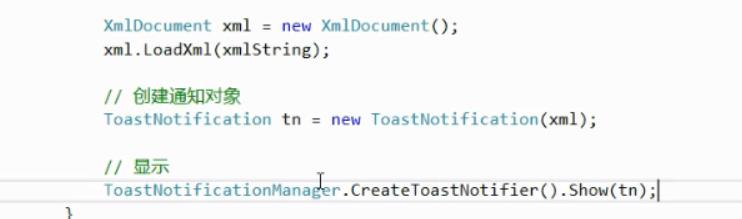
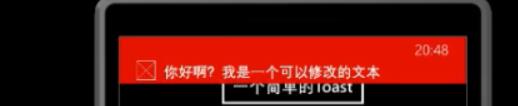
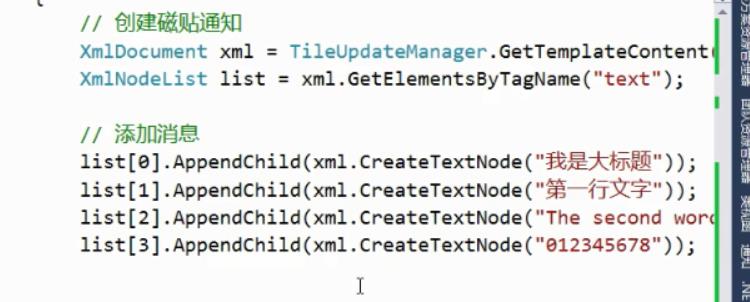
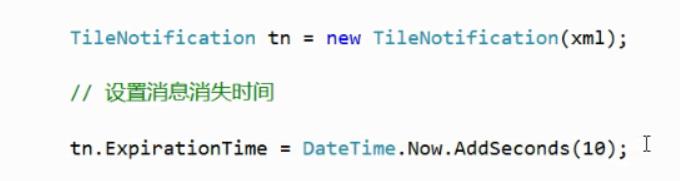
toast(通知):


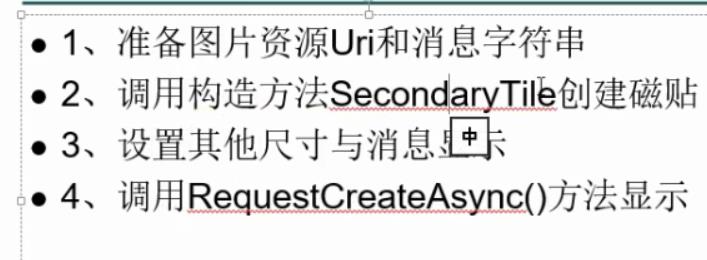
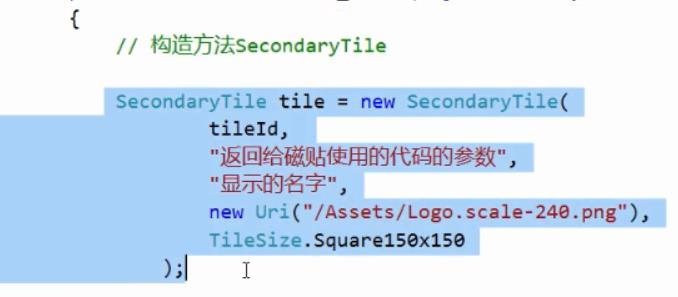
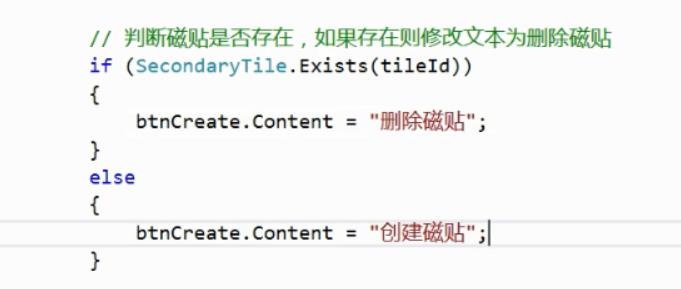
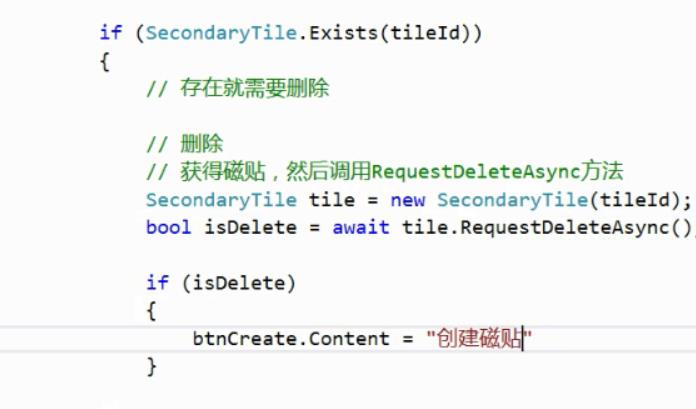
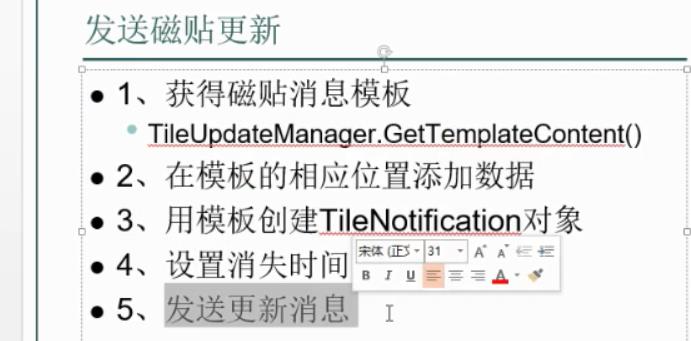
磁贴设计


注意:


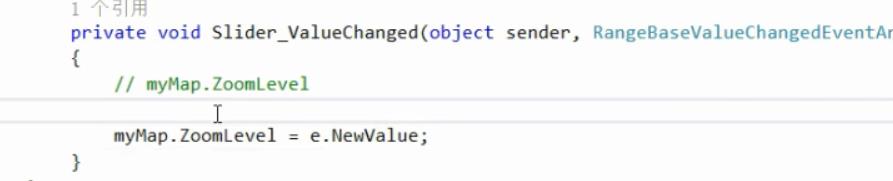
c#代码中的一些问题(参数 sender 与 e):

 指的是该事件的主体控件(利用这个可以为控件命名)
 指的是 传入的值。

 属性,并把
属性,并把


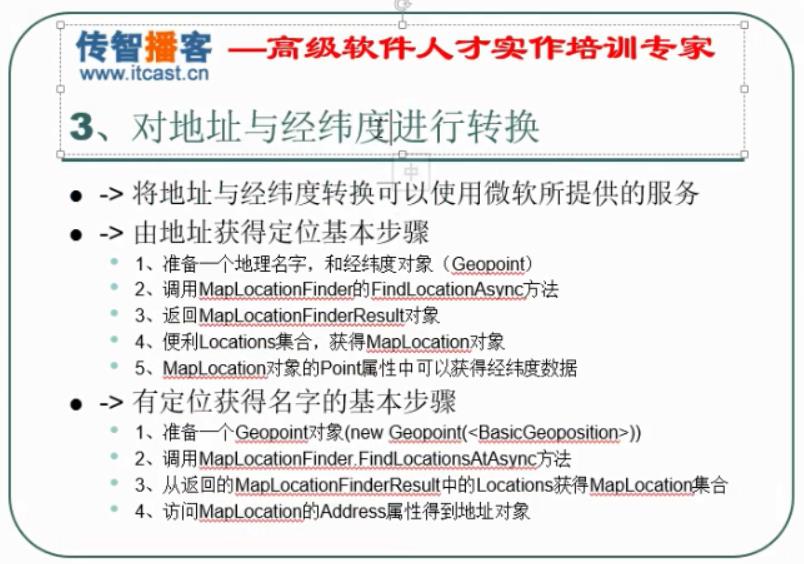
地址与经纬度之间的转化:
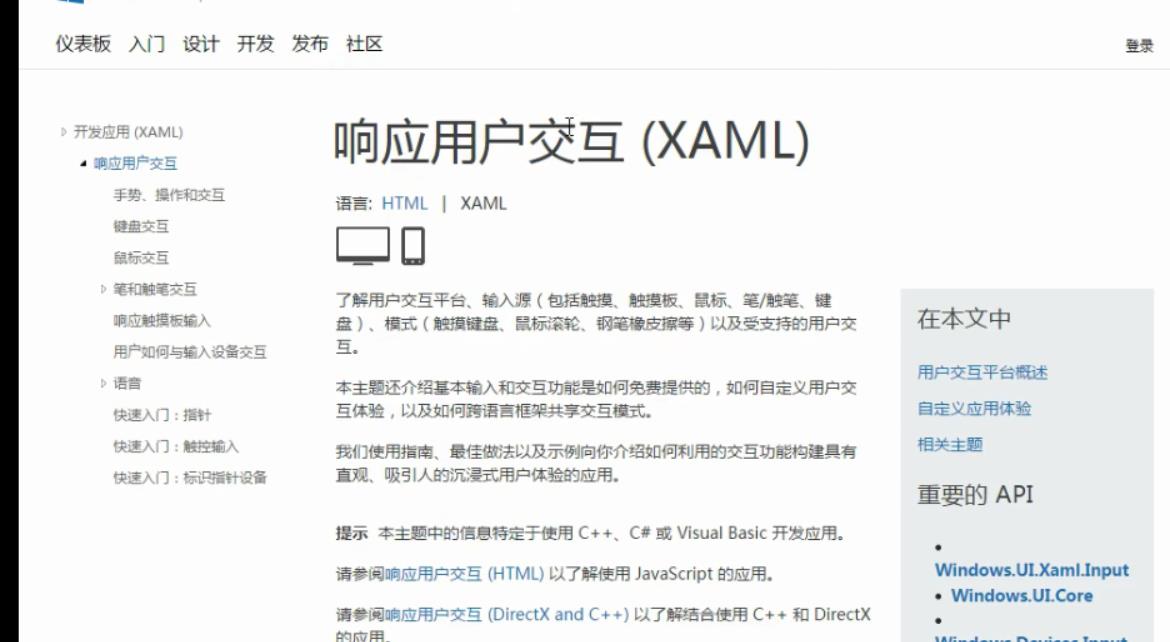
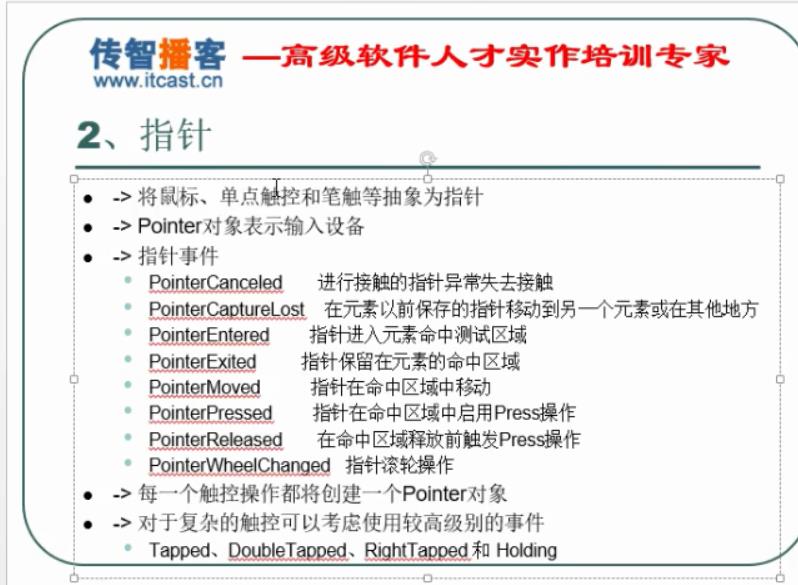
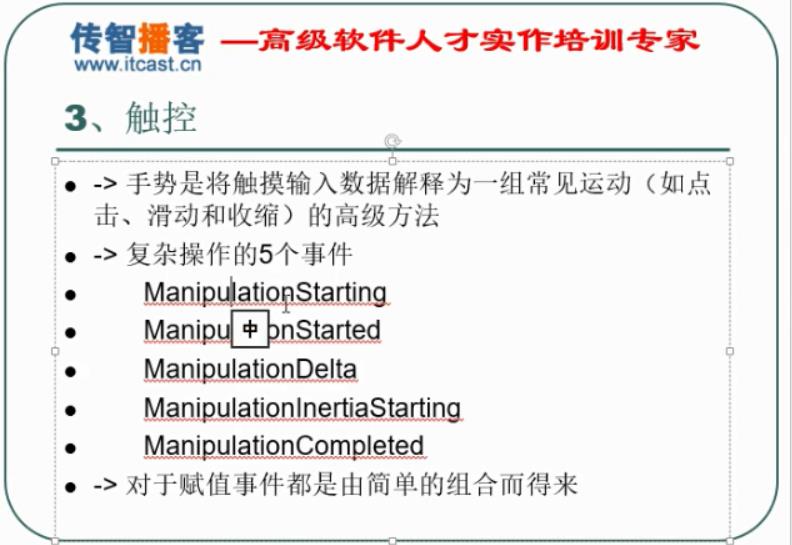
复杂触摸的处理(点按,双按,长按)

多点触控与复杂事件:


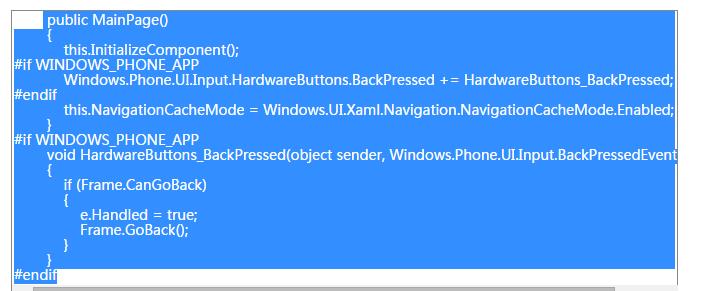
处理后退键:
publicMainPage(){this.InitializeComponent();#if WINDOWS_PHONE_APPWindows.Phone.UI.Input.HardwareButtons.BackPressed+=HardwareButtons_BackPressed;#endifthis.NavigationCacheMode=Windows.UI.Xaml.Navigation.NavigationCacheMode.Enabled;}#if WINDOWS_PHONE_APPvoidHardwareButtons_BackPressed(object sender,Windows.Phone.UI.Input.BackPressedEventArgs e){if(Frame.CanGoBack){
                e.Handled=true;Frame.GoBack();}}#endif

      链接跳转:
跳转到 应用下载页面:Windows Phone 8.1 中可以使用这个链接跳转到应用评论页面:
await Windows.System.Launcher.LaunchUriAsync(
newUri("ms-windows-store:reviewapp?appid="+CurrentApp.AppId));
注:需添加命名空间
开发笔记:如何在应用内跳转到微软商店中查看开发者名下全部应用列表
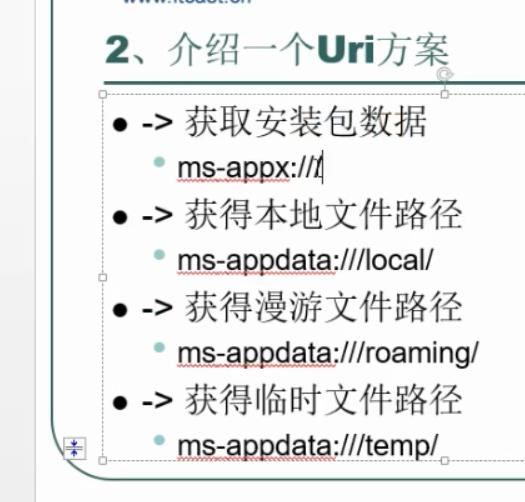
我们可以很容易地使用微软的文件和URI协议的Windows Phone8,直接启动Windows应用程序商店,以显示在您的出版商名称的应用程序列表。一个小例子已经如下。
//function to display the application list
public async void launch()
{
//以"深圳九幽网络科技有限公司"为例:
await Windows.System.Launcher.LaunchUriAsync(new Uri("zune:search?publisher=深圳九幽网络科技有限公司"));
}调用上述功能后,您将得到进入发行商名下APP列表,记得修改链接中的“publisher=”为您的发行商名称哦!

检测双击的方法:
以下是双击检测的方法:
longLastExitAttemptTick=DateTime.Ticks;privatevoidBackButtonPressHandler(...){long thisTick =DateTime.Ticks;if(LastExitAttemptTick- thisTick <[specified amount]){//退出代码}elseLastExitAttemptTick=DateTime.Ticks;}
开发wp8.1 app 添加邮箱反馈功能,using Windows.ApplicationModel.Email; 方法如下
privateasyncvoid SendEmailTask()
        {
            var emailMessage = new EmailMessage();
            emailMessage.Subject = "subject";
            emailMessage.Body = "body";
            emailMessage.To.Add(new EmailRecipient("emailAddress"));
            await EmailManager.ShowComposeNewEmailAsync(emailMessage);
        }
注:配合 TextBlock中的
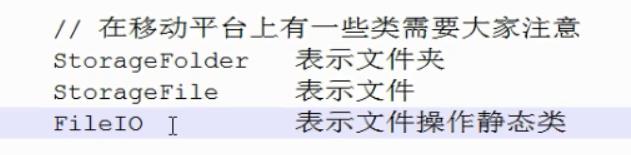
sqlite操作
如何在 Windows Phone 8 的应用中使用相机闪光灯
2014/6/18
适用于:Windows Phone 8 和 Windows Phone Silverlight 8.1 | Windows Phone OS 7.1
从 Windows Phone OS 7.1 开始,您可以使用 Microsoft.Devices.PhotoCamera 类以编程方式访问手机的相机。本主题介绍如何采用编程方式设置相机闪光灯模式。本主题是如何为 Windows Phone 8 创建基本相机应用的继续,并且假定您已在该主题中创建了基本相机项目。
| 提示: |
|---|
| 从 Windows Phone 8 开始,应用可以将 PhotoCaptureDevice 类用于高级捕获方案。PhotoCaptureDevice 允许应用控制照片属性,例如 ISO、曝光补偿和手动对焦位置(在手机上可用时)。本主题没有演示PhotoCaptureDevice;有关使用此类的更多信息,请参见 Windows Phone 8 的高级照片拍摄。 |
本主题与基本相机示例相对应。
Windows Phone 支持 FlashMode 枚举中的下列闪光灯模式。
| 闪光灯模式 | 描述 |
|---|---|
| Off | 相机闪光灯已禁用。 |
| On | 相机闪光灯已启用。 |
| RedEyeReduction | 红眼消除已启用。 |
| 自动 | 相机闪光灯在自动模式下使用。 |
| 重要说明: |
|---|
| 并非所有设备都支持所有闪光灯模式;重要的是在使用之前,调用 IsFlashModeSupported(FlashMode) 方法来确认可用的模式。 |
实现相机闪光灯
本节提供在您的应用中实现闪光灯模式配置所需的代码。
实现相机闪光灯的步骤
-
打开在如何为 Windows Phone 8 创建基本相机应用中创建的基本相机项目。
-
在主页 XAML 文件 MainPage.xaml 的 StackPanel 元素中添加以下代码,放在名为 ShutterButton 的 Button 元素下面。该代码为相机闪光灯的按钮。
<ButtonName="FlashButton"Content="Fl:TBD"Click="changeFlash_Clicked"FontSize="26"FontWeight="ExtraBold"Height="75"/>
-
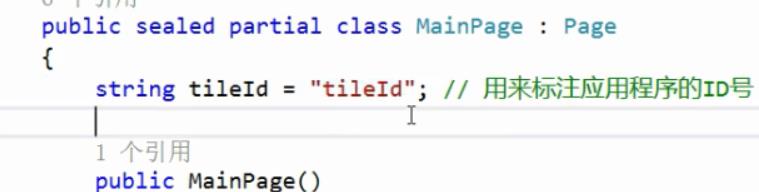
打开主页的代码隐藏文件 MainPage.xaml.cs,在 MainPage 类构造函数上面添加以下变量声明:
-
在 MainPage.xaml.cs 中,向 OnNavigatedTo 方法中添加以下代码,放在 Disable UI 注释下面。
该代码禁用闪光灯按钮。当设备上的相机不可用时使用。
-
在 MainPage.xaml.cs 中,向 cam_Initialized 方法中添加以下代码,放在 txtDebug 语句下面。
该代码显示 FlashButton 按钮上的当前闪光灯模式。
-
在 MainPage.xaml.cs 中,向 MainPage 类添加以下代码。该代码通过每次按按钮时切换到另一种闪光灯模式来实现 changeFlash_Clicked 的事件处理程序。
// Activate a flash mode.// Cycle through flash mode options when the flash button is pressed.privatevoid changeFlash_Clicked(object sender, RoutedEventArgs e)
    {

        switch (cam.FlashMode)
        {
            case FlashMode.Off:
                if (cam.IsFlashModeSupported(FlashMode.On))
                {
                    // Specify that flash should be used.
                    cam.FlashMode = FlashMode.On;
                    FlashButton.Content = "Fl:On";
                    currentFlashMode = "Flash mode: On";
                }
                break;
            case FlashMode.On:
                if (cam.IsFlashModeSupported(FlashMode.RedEyeReduction))
                {
                    // Specify that the red-eye reduction flash should be used.
                    cam.FlashMode = FlashMode.RedEyeReduction;
                    FlashButton.Content = "Fl:RER";
                    currentFlashMode = "Flash mode: RedEyeReduction";
                }
                elseif (cam.IsFlashModeSupported(FlashMode.Auto))
                {
                    // If red-eye reduction is not supported, specify automatic mode.
                    cam.FlashMode = FlashMode.Auto;
                    FlashButton.Content = "Fl:Auto";
                    currentFlashMode = "Flash mode: Auto";
                }
                else
                {
                    // If automatic is not supported, specify that no flash should be used.
                    cam.FlashMode = FlashMode.Off;
                    FlashButton.Content = "Fl:Off";
                    currentFlashMode = "Flash mode: Off";
                }
                break;
            case FlashMode.RedEyeReduction:
                if (cam.IsFlashModeSupported(FlashMode.Auto))
                {
                    // Specify that the flash should be used in the automatic mode.
                    cam.FlashMode = FlashMode.Auto;
                    FlashButton.Content = "Fl:Auto";
                    currentFlashMode = "Flash mode: Auto";
                }
                else
                {
                    // If automatic is not supported, specify that no flash should be used.
                    cam.FlashMode = FlashMode.Off;
                    FlashButton.Content = "Fl:Off";
                    currentFlashMode = "Flash mode: Off";
                }
                break;
            case FlashMode.Auto:
                if (cam.IsFlashModeSupported(FlashMode.Off))
                {
                    // Specify that no flash should be used.
                    cam.FlashMode = FlashMode.Off;
                    FlashButton.Content = "Fl:Off";
                    currentFlashMode = "Flash mode: Off";
                }
                break;
        }

        // Display current flash mode.this.Dispatcher.BeginInvoke(delegate()
        {
            txtDebug.Text = currentFlashMode;
        });
    }
-
在设备上,通过选择“调试 | 启动调试”菜单命令来运行应用。


 11
11

 被折叠的 条评论
为什么被折叠?
被折叠的 条评论
为什么被折叠?
 到【灌水乐园】发言


