


 本文档详细介绍了如何在CentOS7服务器上搭建私人Git仓库,配置SSH密钥,创建post-receive钩子以实现Hexo博客的自动化部署。同时,教程还涵盖了安装Nginx作为反向代理,以展示博客内容,并提供了修改nginx.conf配置的步骤。此外,还讲解了如何在服务器上安装node.js,最后在本地通过Hexo进行部署。
欢迎访问我的个人博客哦
前言
本教程建立在本地hexo博客已搭建完成的基础上
如hexo博客未搭建完成,请参考以下视频教程:
B站Up主CodeSheep的Hexo博客搭建教程
服务器操作系统 : Centos7.7 64位
通过ssh工具连接到服务器
一、搭建私人Git仓库
1.验证是否安装git
git --verison		#检查是否装有git
yum install -y git
2.创建git用户,配置其sudo权限
useradd git
sudo passwd git
sudo chmod 740 /etc/sudoers		#修改/etc/sudoers为可写
vi /etc/sudoers
打开/etc/sudoers文件后,在root ALL=(ALL) ALL后添加git ALL=(ALL) ALL,保存退出。

3.本地生成SSH密钥
如果你不想每次使用公钥时输入密码,这一步最好不要设置密码
ssh-keygen -t rsa
本地生成路径如下


其中id_rsa.pub这个公钥就是我们需要的,将里面的内容复制下来。
4.与服务器建立信任
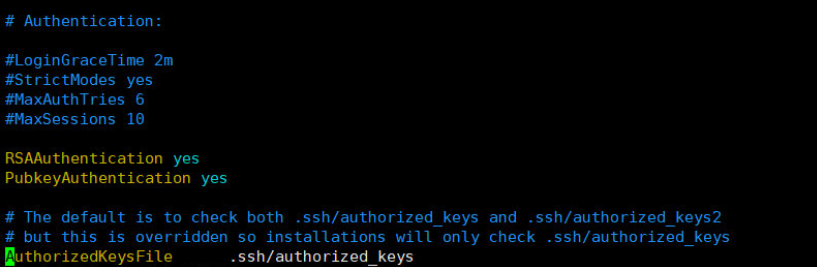
在bash中输入vim /etc/ssh/sshd_config,将RSAAuthentication和PubkeyAuthentication 修改为yes,
AuthorizedKeysFile修改为.ssh/authorized_keys
SSH认证
su git    # 切换到git用户,接下来的操作都通过git用户完成
sudo mkdir ~/.ssh
vim ~/.ssh/authorized_keys
将之前得到的id_rsa.pub公钥复制粘贴到authorized_keys中
chmod 600 ~/.ssh/authorzied_keys
chmod 700 ~/.ssh
如果你在本地通过ssh git@你的服务器ip命令,能够连接到服务器,说明前面的步骤没有问题。
5.创建git仓库并设置钩子函数
su root
cd /home/git   # 在 git 用户目录下创建
git init --bare blog.git
chown git:git -R blog.git	#更改拥有者为git
新建 post-receive 文件
vim blog.git/hooks/post-receive
填入以下内容,其中 /home/hexo 为网站目录,根据自己的填入,:wq保存退出。
#!/bin/sh
git --work-tree=/home/hexo --git-dir=/home/git/blog.git checkout -f
保存后,要赋予这个文件可执行权限。
chmod +x /home/git/blog.git/hooks/post-receive
6.为了安全禁用git的bash权限
sudo chmod 400 /etc/sudoers   # 不要忘记,将/etc/sudoers改为只读
vim /etc/passwd             # 禁用git用户bash权限
将git:x:1003:1003:,,,:/home/git:/bin/bash改成git:x:1003:1003:,,,:/home/git:/usr/bin/git-shell,
这样git就不可用bash了。
二、服务器上安装Nginx
1.安装Nginx
yum install openssl     # SSL功能需要openssl库
yum install zlib         # gzip模块需要zlib库
yum install pcre			# rewrite模块需要pcre库

# 安装Nginx需要的库
rpm -Uvh http://nginx.org/packages/centos/7/noarch/RPMS/nginx-release-centos-7-0.el7.ngx.noarch.rpm

# 安装 Nginx
yum install nginx

# 启动 Nginx服务
systemctl start nginx
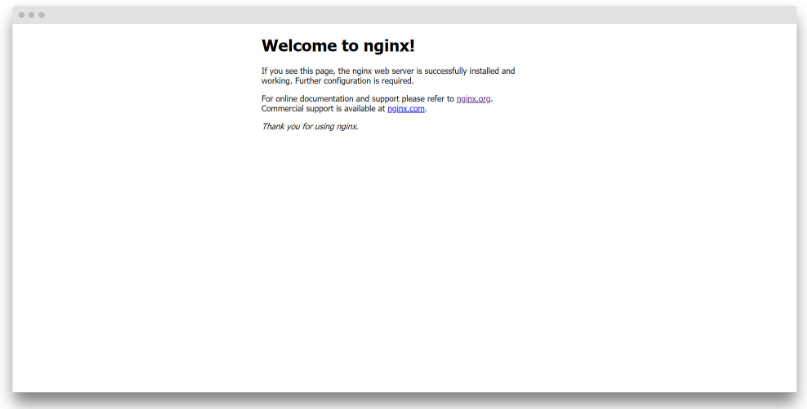
在浏览器中输入服务器IP ,显示:
新版nginx欢迎界面会不太一样
说明安装成功
云服务器厂商会设置默认安全组,请确保自己的80端口已开放
2.修改nginx.conf配置(不要忘记结尾分号’;’)
vim /etc/nginx/nginx.conf
将user属性从nginx修改为root,否则无法访问Hexo部署位置:
user root;
在http标签下,添加如下设置
server {
  # 侦听80端口
  listen 80;
  # 域名
  server_name www.catnipball.xyz;
  #默认请求
  location / {
    # 网站根目录,此处为你的Hexo部署位置
    root /home/hexo;
    index index.html index.htm;
  }
}
配置文件修改后,通过nginx -s reload重启Nginx。
新版nginx配置文件会不太一样,如果不能正常访问,可以考虑直接复制下面提供的配置文件
user  root;
worker_processes  1;

error_log  /var/log/nginx/error.log warn;
pid        /var/run/nginx.pid;


events {
    worker_connections  1024;
}


http {
    include       /etc/nginx/mime.types;
    default_type  application/octet-stream;

    log_format  main  '$remote_addr - $remote_user [$time_local] "$request" '
                      '$status $body_bytes_sent "$http_referer" '
                      '"$http_user_agent" "$http_x_forwarded_for"';

    access_log  /var/log/nginx/access.log  main;

    sendfile        on;
    #tcp_nopush     on;

    keepalive_timeout  65;

    #gzip  on;
    server {

      listen 80;

      server_name www.catnipball.xyz;

      location / {
        root /home/hexo;
        index  index.html  index.htm;
      }
    }

    include /etc/nginx/conf.d/*.conf;
}
三、服务器安装node.js
yum install -y nodejs
node -v 	#查看node.js版本
npm -v  	#查看npm版本
四、本地Hexo部署
在本地hexo安装目录下找到_config.yml文件,在最下方#Deployment处修改
# Deployment
# Docs: https://hexo.io/docs/deployment.html
deploy:
  type: git
  repo: git@你的服务器ip:/home/git/blog.git
  branch: master
修改完成后在本地hexo clean hexo g hexo d即可将博客推至远端


 948
948


 到【灌水乐园】发言


