solr集群搭建
使用solrj管理solr集群
把搜索功能切换到集群版
添加商品同步索引库。 Activemq
Activemq
b)发送消息
c)接收消息
使用Solrj管理SolrCloud
添加文档
@Test
public void showSolrCloudAdd() throws Exception{
	//参数是zookeeper的地址列表,使用逗号分隔
	CloudSolrServer cloudSolrServer=new CloudSolrServer("192.168.0.245:2181,192.168.0.245:2182,192.168.0.245:2183");
	cloudSolrServer.setDefaultCollection("collection2");
	SolrInputDocument document=new SolrInputDocument();
	document.addField("id", "solrCloud01");
	document.addField("item_title", "测试商品");
	document.addField("item_price", "100");
	cloudSolrServer.add(document);
	cloudSolrServer.commit();

}
查询文档
创建一个CloudSolrServer对象,其他处理和单机版一致
@Test
public void showSolrCloudQuery()throws Exception{
	CloudSolrServer cloudSolrServer=new CloudSolrServer("192.168.0.245:2181,192.168.0.245:2182,192.168.0.245:2183");
	cloudSolrServer.setDefaultCollection("collection2");
	SolrQuery query=new SolrQuery();
	query.setQuery("*:*");
	QueryResponse response = cloudSolrServer.query(query);
	SolrDocumentList solrDocumentList = response.getResults();
	System.out.println("总记录数"+solrDocumentList.getNumFound());
	for (SolrDocument solrDocument : solrDocumentList) {
		System.out.println(solrDocument.get("id"));
		System.out.println(solrDocument.get("item_title"));
		System.out.println(solrDocument.get("item_price"));

	}
}
搜索功能切换到集群
<?xml version="1.0" encoding="UTF-8"?>
<beans xmlns="http://www.springframework.org/schema/beans"
	xmlns:context="http://www.springframework.org/schema/context" xmlns:p="http://www.springframework.org/schema/p"
	xmlns:aop="http://www.springframework.org/schema/aop" xmlns:tx="http://www.springframework.org/schema/tx"
	xmlns:xsi="http://www.w3.org/2001/XMLSchema-instance"
	xsi:schemaLocation="http://www.springframework.org/schema/beans http://www.springframework.org/schema/beans/spring-beans-4.2.xsd
	http://www.springframework.org/schema/context http://www.springframework.org/schema/context/spring-context-4.2.xsd
	http://www.springframework.org/schema/aop http://www.springframework.org/schema/aop/spring-aop-4.2.xsd http://www.springframework.org/schema/tx http://www.springframework.org/schema/tx/spring-tx-4.2.xsd
	http://www.springframework.org/schema/util http://www.springframework.org/schema/util/spring-util-4.2.xsd">
	<!-- 单机版solr服务配置 -->
	<!-- <bean id="httpSolrServer" class="org.apache.solr.client.solrj.impl.HttpSolrServer">
		<constructor-arg index="0" value="http://192.168.0.154:8080/solr/collection1"/>
	</bean> -->

	<!-- 集群版solr服务 -->
	<bean id="cloudSolrServer" class="org.apache.solr.client.solrj.impl.CloudSolrServer">
		<constructor-arg name="zkHost" value="192.168.0.245:2181,192.168.0.245:2182,192.168.0.245:2183"></constructor-arg>
		<property name="defaultCollection" value="collection2"></property>
	</bean>

</beans>
页面删除所有
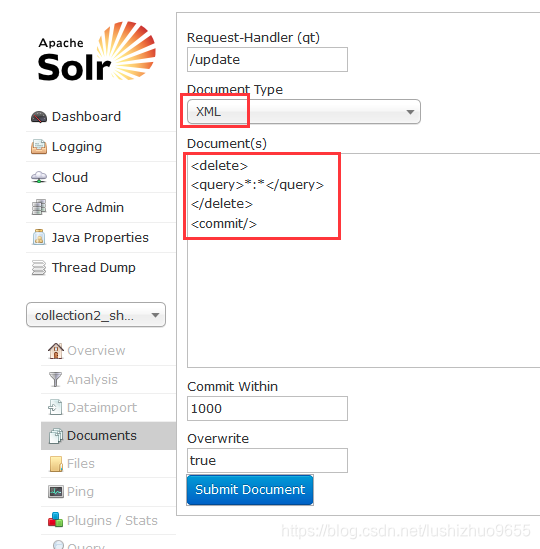
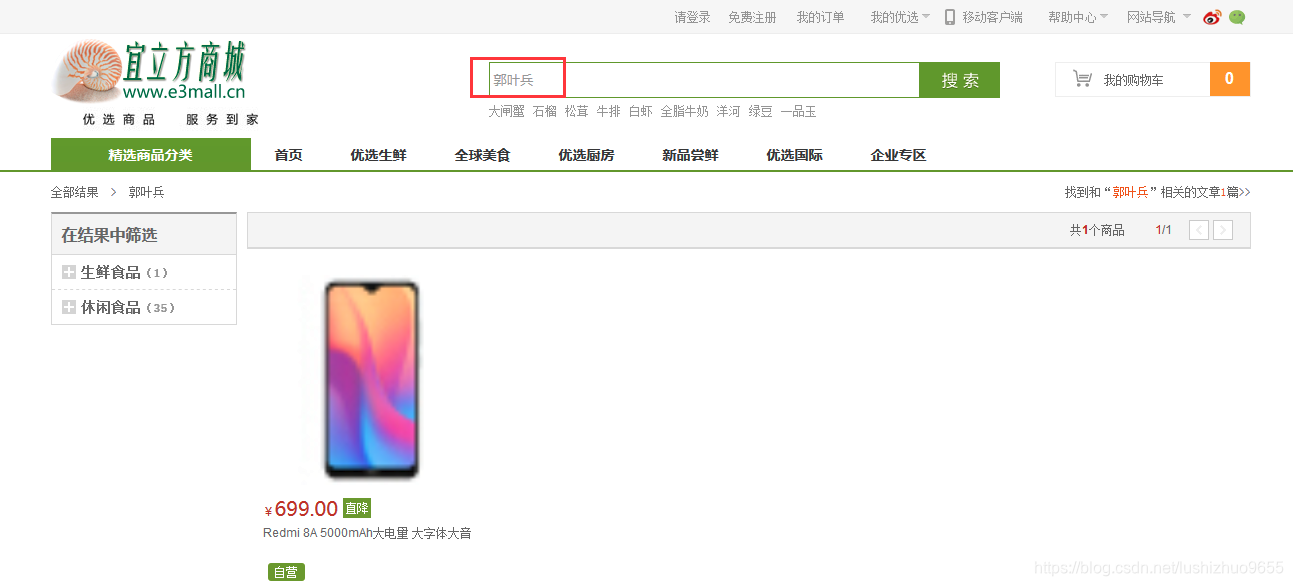
只需要修改配置文件,然后重新导入数据到索引库查询即可
添加商品同步索引库。 Activemq
方案一:在taotao-manager中,添加商品的业务逻辑中,添加一个同步索引库的业务逻辑。
缺点:业务逻辑耦合度高,业务拆分不明确
方案二:业务逻辑在taotao-search中实现,调用服务在taotao-manager实现。业务逻辑分开。
缺点:服务之间的耦合度变高。服务的启动有先后顺序。
方案三:使用消息队列。MQ是一个消息中间件。
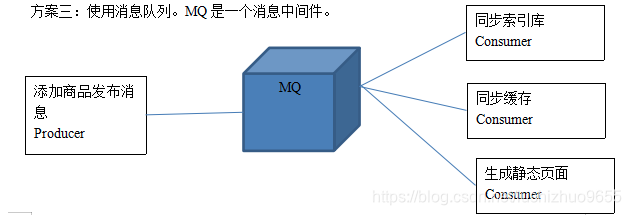
MQ是一个消息中间件,ActiveMQ、RabbitMQ、kafka
ActiveMQ
ActiveMQ 是Apache出品的。ActiveMQ 是一个完全支持JMS1.1和J2EE 1.4规范的 JMS Provider实现
ActiveMQ的消息形式
对于消息的传递有两种类型:
一种是点对点的,即一个生产者和一个消费者一一对应;
另一种是发布/订阅模式,即一个生产者产生消息并进行发送后,可以由多个消费者进行接收。
JMS定义了五种不同的消息正文格式
StreamMessage -- Java原始值的数据流
MapMessage--一套名称-值对
TextMessage--一个字符串对象
ObjectMessage--一个序列化的 Java对象
BytesMessage--一个字节的数据流
ActiveMQ的安装 https://blog.youkuaiyun.com/lushizhuo9655/article/details/109187834
进入http://activemq.apache.org/下载ActiveMQ
ActiveMQ的使用方法
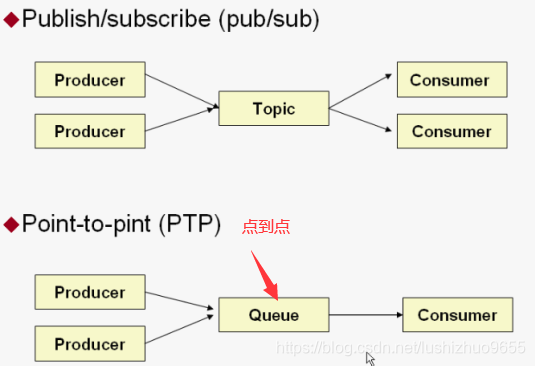
Queue
在e3-manager-service的pom中添加依赖
<!-- activemq客户端依赖的jar包 -->
<dependency>
   <groupId>org.apache.activemq</groupId>
   <artifactId>activemq-all</artifactId>
</dependency>
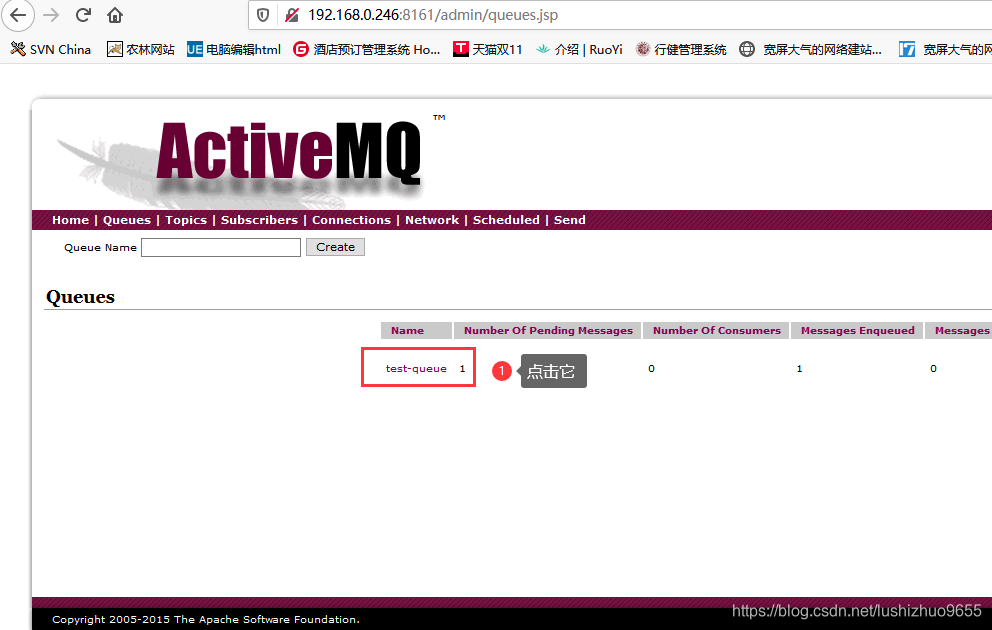
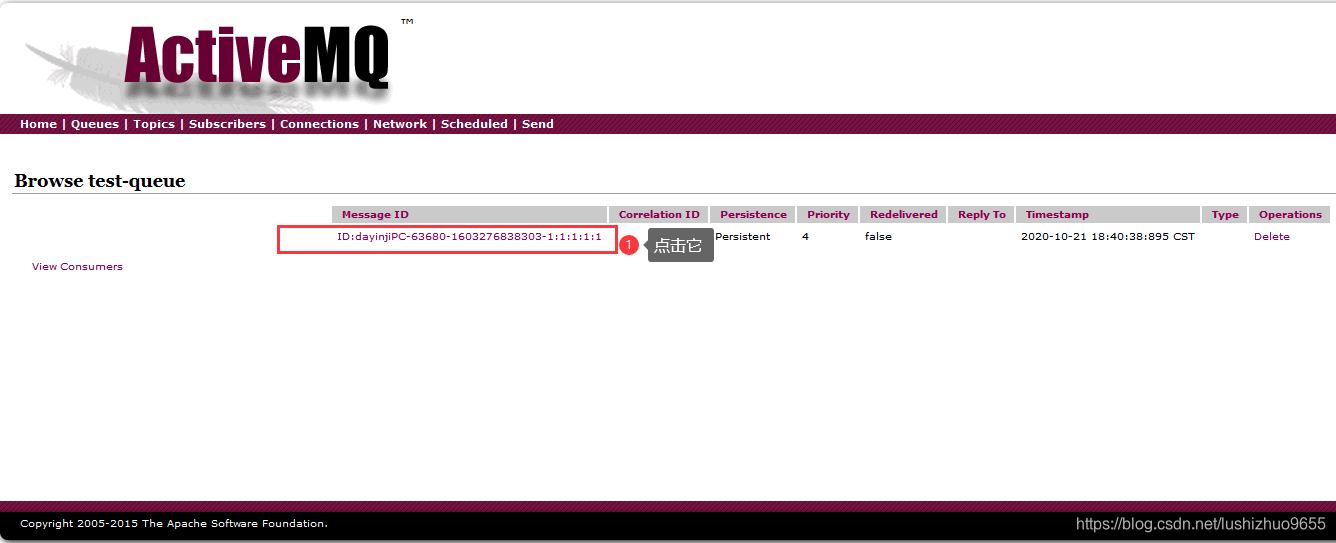
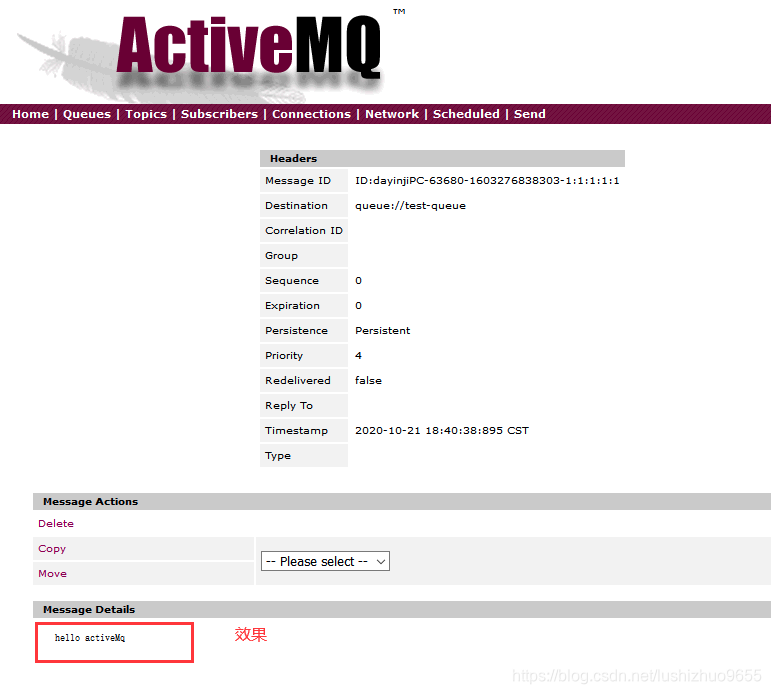
Producer
生产者:生产消息,发送端。
第一步:创建ConnectionFactory对象,需要指定服务端ip及端口号。
第二步:使用ConnectionFactory对象创建一个Connection对象。
第三步:开启连接,调用Connection对象的start方法。
第四步:使用Connection对象创建一个Session对象。
第五步:使用Session对象创建一个Destination对象(topic、queue),此处创建一个Queue对象。
第六步:使用Session对象创建一个Producer对象。
第七步:创建一个Message对象,创建一个TextMessage对象。
第八步:使用Producer对象发送消息。
第九步:关闭资源。
@Test
public void testQueueProducer() throws Exception{
	ConnectionFactory connectionFactory =new ActiveMQConnectionFactory("tcp://192.168.0.246:61616");
	Connection connection = connectionFactory.createConnection();
	connection.start();
	//第一个参数:是否开启事务。true:开启事务,第二个参数忽略。
	//第二个参数:当第一个参数为false时,才有意义。消息的应答模式。1、自动应答2、手动应答。一般是自动应答。
	Session session = connection.createSession(false, Session.AUTO_ACKNOWLEDGE);
	//参数:队列的名称。
	Queue queue = session.createQueue("test-queue");
	// 使用Session对象创建一个Producer对象。
	MessageProducer producer = session.createProducer(queue);
	// 创建一个Message对象,创建一个TextMessage对象。
	/*TextMessage message = new ActiveMQTextMessage();
	message.setText("hello activeMq");*/
	TextMessage textMessage = session.createTextMessage("hello activeMq");
	// 使用Producer对象发送消息。
	producer.send(textMessage);
	//关闭资源。
	producer.close();
	session.close();
	connection.close();

}
Consumer
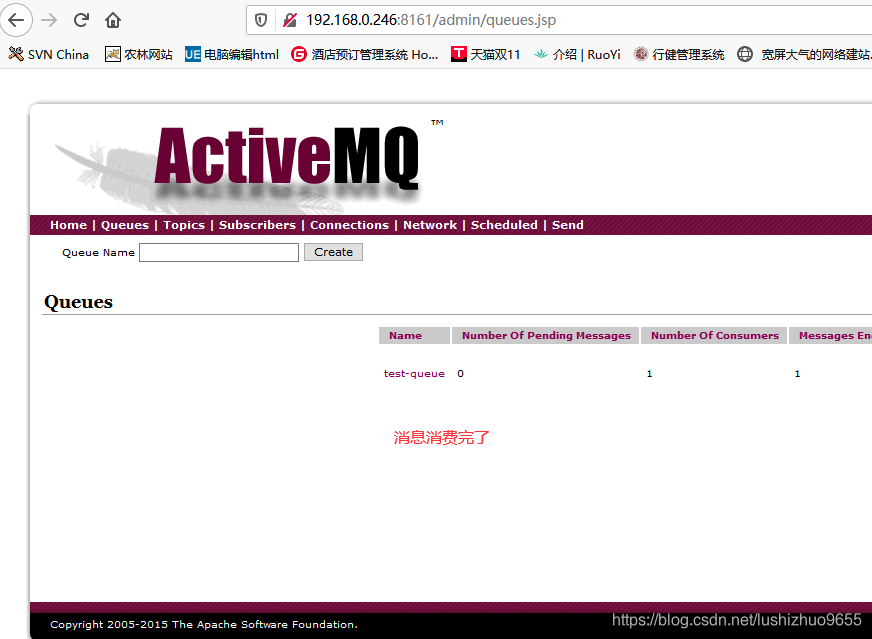
消费者:接收消息。
第一步:创建一个ConnectionFactory对象。
第二步:从ConnectionFactory对象中获得一个Connection对象。
第三步:开启连接。调用Connection对象的start方法。
第四步:使用Connection对象创建一个Session对象。
第五步:使用Session对象创建一个Destination对象。和发送端保持一致queue,并且队列的名称一致。
第六步:使用Session对象创建一个Consumer对象。
第七步:接收消息。
第八步:打印消息。
第九步:关闭资源
@Test
public void testQueueConsumer() throws Exception {
	// 第一步:创建一个ConnectionFactory对象。
	ConnectionFactory connectionFactory = new ActiveMQConnectionFactory("tcp://192.168.0.246:61616");
	// 第二步:从ConnectionFactory对象中获得一个Connection对象。
	Connection connection = connectionFactory.createConnection();
	// 第三步:开启连接。调用Connection对象的start方法。
	connection.start();
	// 第四步:使用Connection对象创建一个Session对象。
	Session session = connection.createSession(false, Session.AUTO_ACKNOWLEDGE);
	// 第五步:使用Session对象创建一个Destination对象。和发送端保持一致queue,并且队列的名称一致。
	Queue queue = session.createQueue("test-queue");
	// 第六步:使用Session对象创建一个Consumer对象。
	MessageConsumer consumer = session.createConsumer(queue);
	// 第七步:接收消息。
	consumer.setMessageListener(new MessageListener() {
		@Override
		public void onMessage(Message message) {
			try {
				TextMessage textMessage = (TextMessage) message;
				String text = null;
				//取消息的内容
				text = textMessage.getText();
				// 第八步:打印消息。
				System.out.println(text);
			} catch (JMSException e) {
				e.printStackTrace();
			}
		}
	});
	//等待键盘输入
	System.in.read();
	// 第九步:关闭资源
	consumer.close();
	session.close();
	connection.close();
}

Topic
Producer
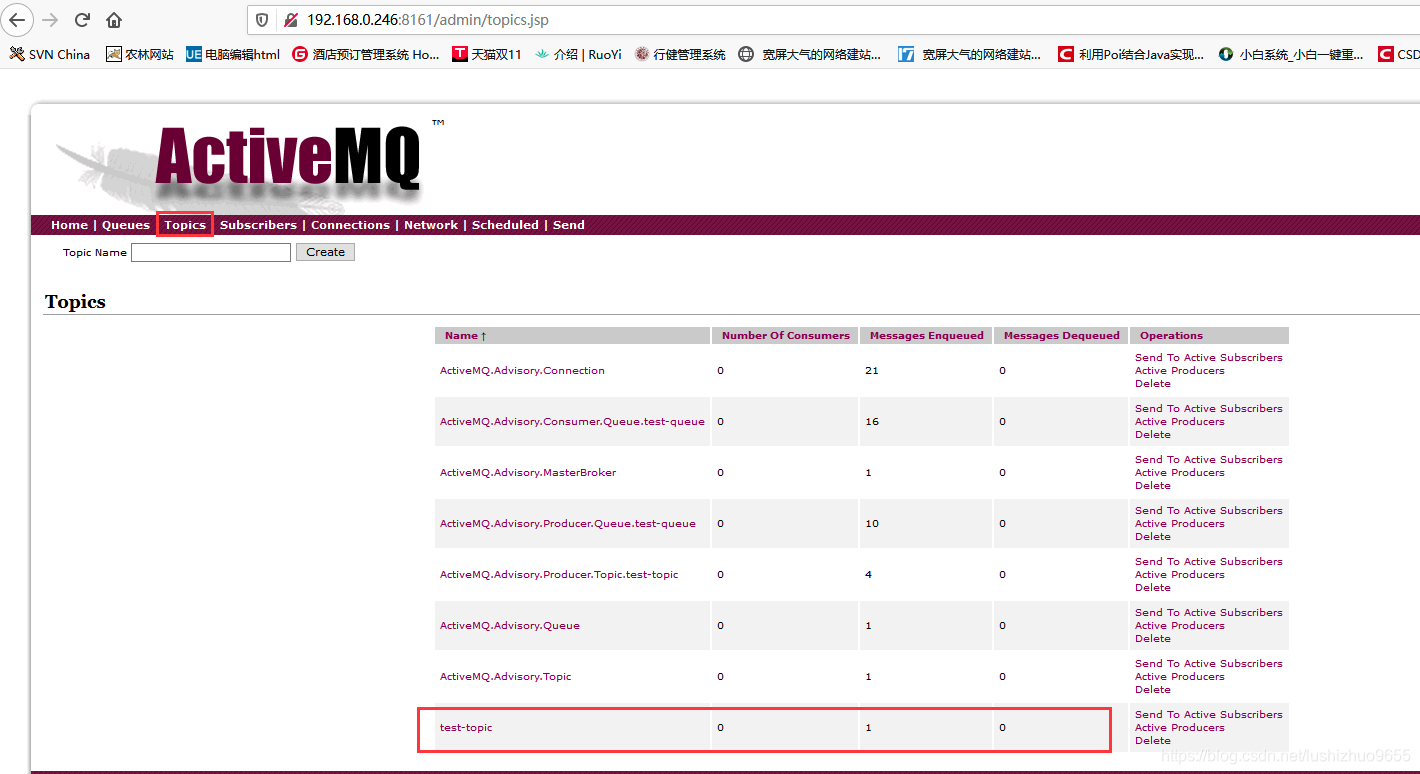
这一步不一样:使用Session对象创建一个Destination对象(topic、queue),此处创建一个Topic对象。
@Test
public void testTopicProducer() throws Exception {
	ConnectionFactory connectionFactory=new ActiveMQConnectionFactory("tcp://192.168.0.246:61616");
	Connection connection = connectionFactory.createConnection();
	connection.start();
	Session session = connection.createSession(false, Session.AUTO_ACKNOWLEDGE);
	Topic topic = session.createTopic("test-topic");
	MessageProducer producer = session.createProducer(topic);
	TextMessage textMessage = session.createTextMessage("hello activeMq,this is my topic test");
	// 使用Producer对象发送消息。
	producer.send(textMessage);
	producer.close();
	session.close();
	connection.close();

}
Consumer
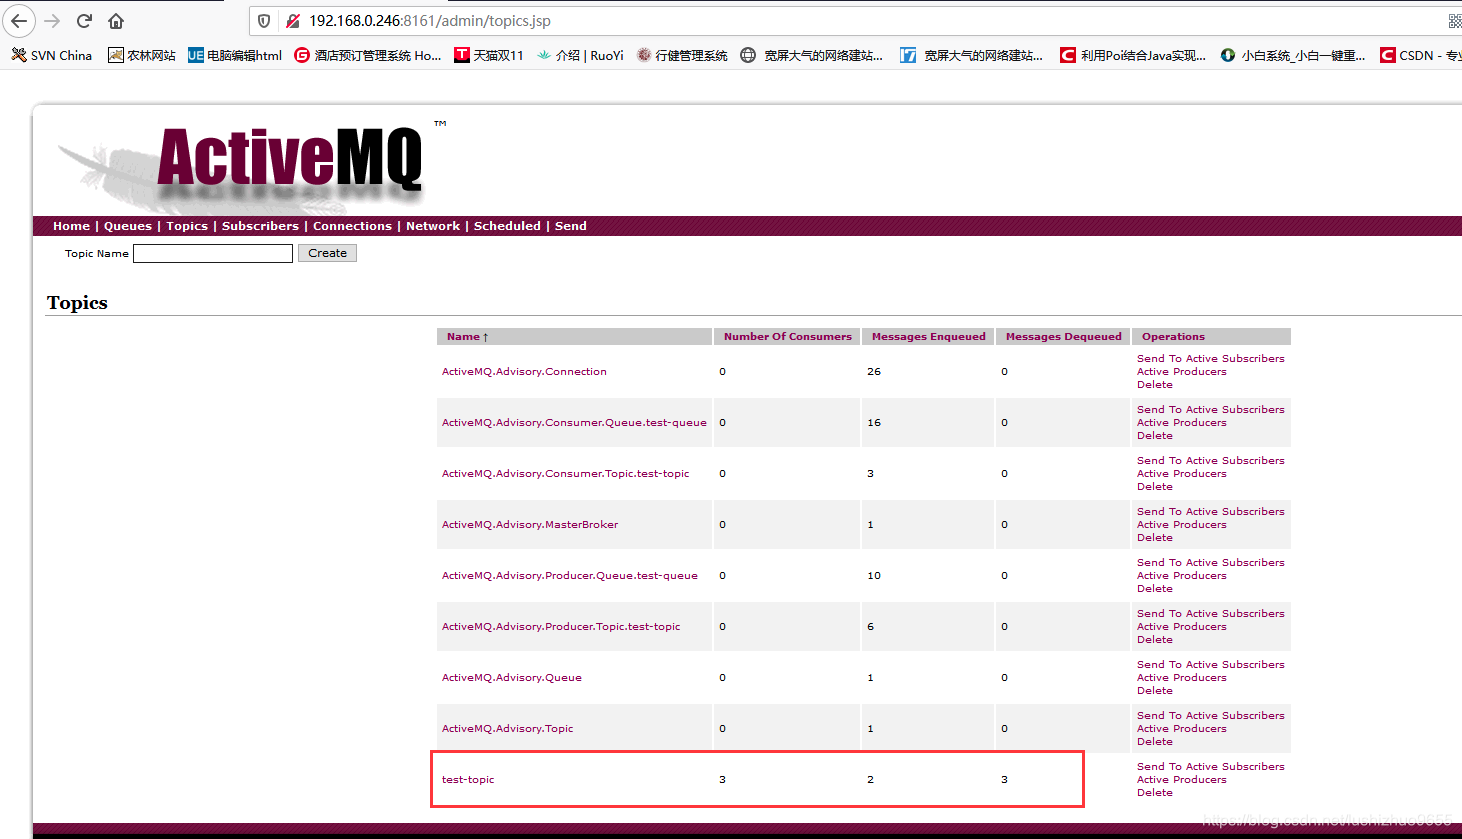
这一步不一样:使用Session对象创建一个Destination对象。和发送端保持一致topic,并且话题的名称一致。
反复执行这个方法(因为消费者可以有多个)
@Test
public void testTopicConsumer() throws Exception {
	ConnectionFactory connectionFactory = new ActiveMQConnectionFactory("tcp://192.168.0.246:61616");
	Connection connection = connectionFactory.createConnection();
	connection.start();
	Session session = connection.createSession(false, Session.AUTO_ACKNOWLEDGE);
	Topic topic = session.createTopic("test-topic");
	MessageConsumer consumer = session.createConsumer(topic);
	consumer.setMessageListener(new MessageListener() {

		@Override
		public void onMessage(Message message) {
			try {
				TextMessage textMessage = (TextMessage) message;
				String text = null;
				text = textMessage.getText();
				System.out.println(text);
			} catch (JMSException e) {
				e.printStackTrace();
			}
		}
	});
	System.out.println("topic的消费端01。。。。。");
	// 等待键盘输入
	System.in.read();
	consumer.close();
	session.close();
	connection.close();
}
全局异常处理
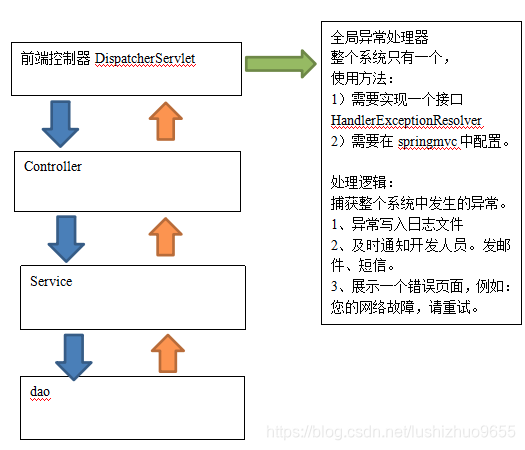
创建全局异常处理器
public class GlobalExceptionResolver implements HandlerExceptionResolver{
	private static final Logger logger = LoggerFactory.getLogger(GlobalExceptionResolver.class);
	@Override
	public ModelAndView resolveException(HttpServletRequest request, HttpServletResponse response, Object handler,
			Exception ex) {
			//打印控制台
			ex.printStackTrace();
			//写日志文件
			logger.error("系统发生异常", ex);
			//发邮件、发短信
			//Jmail:可以查找相关的资料
			//需要在购买短信。调用第三方接口即可。
			//展示错误页面
			ModelAndView modelAndView = new ModelAndView();
			modelAndView.addObject("message", "系统发生异常,请稍后重试");
			modelAndView.setViewName("error/exception");
			return modelAndView;
	}

}
Springmvc中配置异常处理器
![]()
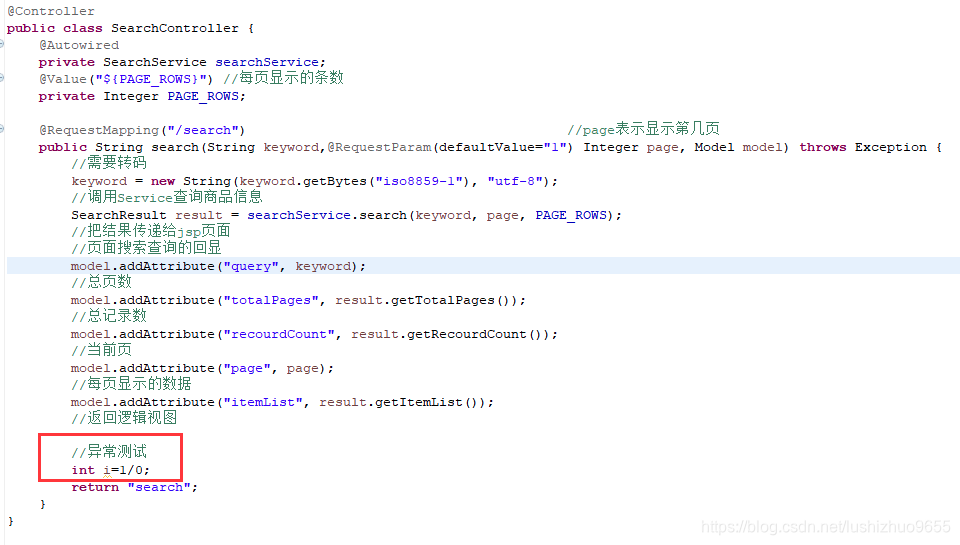
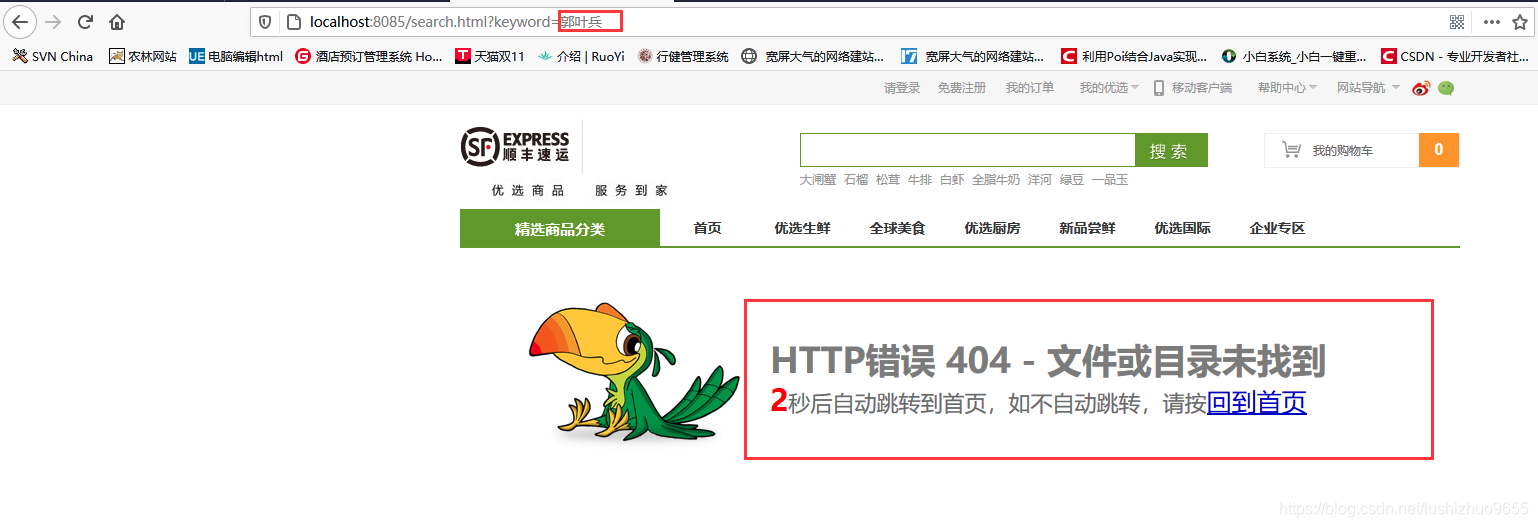
效果:


 本文介绍如何使用Solrj管理Solr集群,包括添加文档、查询文档等操作,并详细讲解了通过ActiveMQ实现消息队列的配置与使用方法。


 154
154


