


 本文详细介绍了如何在Jetty中集成并部署Solr,包括下载、解压、配置及启动步骤,最终实现Solr核心Admin界面的访问。
1.分别下载jetty-6.0.2和solr-3.6.1
http://mirror.mel.bkb.net.au/pub/apache/lucene/solr/3.6.1/apache-solr-3.6.1.tgz
http://dist.codehaus.org/jetty/jetty-6.0.x/jetty-6.0.2.zip
2.安装jetty
解压jetty-6.0.2至E:\Program Files\jetty6。
解压apache-solr-3.6.1\dist\apache-solr-3.6.1.war 重新命名为solr,并将solr放入E:\Program Files\jetty6\webapps目录下 。
将apache-solr-3.6.1\example\solr拷贝至E:\Program Files\jetty6\webapps\solr目录下并重新命名为bbs
3.将E:\Program Files\jetty6\webapps\solr\bbs\solr.xml移动到上一级目录,即E:\Program Files\jetty6\webapps\solr\目录下
内容修改如下:
<?xml version="1.0" encoding="UTF-8" ?>
<!--
 Licensed to the Apache Software Foundation (ASF) under one or more
 contributor license agreements.  See the NOTICE file distributed with
 this work for additional information regarding copyright ownership.
 The ASF licenses this file to You under the Apache License, Version 2.0
 (the "License"); you may not use this file except in compliance with
 the License.  You may obtain a copy of the License at

     http://www.apache.org/licenses/LICENSE-2.0

 Unless required by applicable law or agreed to in writing, software
 distributed under the License is distributed on an "AS IS" BASIS,
 WITHOUT WARRANTIES OR CONDITIONS OF ANY KIND, either express or implied.
 See the License for the specific language governing permissions and
 limitations under the License.
-->

<!--
   This is an example of a simple "solr.xml" file for configuring one or
   more Solr Cores, as well as allowing Cores to be added, removed, and
   reloaded via HTTP requests.

   More information about options available in this configuration file,
   and Solr Core administration can be found online:
   http://wiki.apache.org/solr/CoreAdmin
-->

<!--
 All (relative) paths are relative to the installation path

  persistent: Save changes made via the API to this file
  sharedLib: path to a lib directory that will be shared across all cores
-->
<solr persistent="false">

  <!--
  adminPath: RequestHandler path to manage cores.
    If 'null' (or absent), cores will not be manageable via request handler
  -->
  <cores adminPath="/admin/cores">
    <core name="bbs" instanceDir="bbs" />
  </cores>
</solr>
修改bbs\conf\schema.xml对应的name为bbs
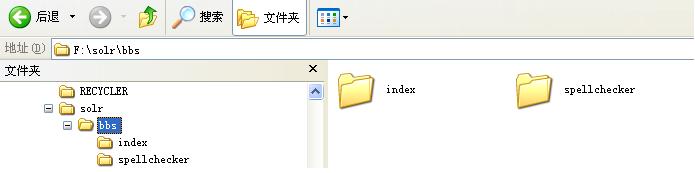
修改bbs\conf\solrconfig.xml里索引数据存放的位置为<dataDir>${solr.data.dir:F:\solr\bbs}</dataDir>
4.启动jetty
cmd进入 E:\Program Files\jetty6 目录,执行
java -Dsolr.solr.home="E:\Program Files\jetty6\webapps\solr" -jar start.jar
然后在浏览器里输入 http://localhost:8080/solr/,你会看到Admin_bbs了,并且在bbs接口数据文件f:\solr\bbs下生成index和spellchecker两个文件夹


 2048
2048

 被折叠的 条评论
为什么被折叠?
被折叠的 条评论
为什么被折叠?
 到【灌水乐园】发言


