


 本文介绍如何在SpringBoot项目中添加Jsp支持,并利用Filter和Session、Cookie实现在关闭浏览器后仍能自动登录的功能。通过在pom.xml中引入Jsp依赖,创建webapp目录作为源代码,定义UserController和PageController处理页面跳转,AutoLoginFilter过滤并处理自动登录逻辑,UserService处理用户业务,结合MyBatis逆向工程进行数据持久层操作。详细步骤和代码示例可在GitHub找到。
需求:
在index页面,点击登录,跳转到login页面。
在login页面登录用户,并打上自动登录√,登录用户名和密码登录系统。
关闭浏览器,打开index页面,实现用户自动登录。
demo代码地址https://github.com/lping2008/AutologinSpringboot
步骤:
1. pom中引入Jsp支持(重要)
tomcat-embed-jasper Spring Boot官方是不支持Jsp页面的。原因如下:
1) jsp智能打包为War包,不支持jar格式,只能在标准容器里面跑(tomcat,jetty)
2)内嵌的jetty目前不支持jsps
3) UnderTow不支持JSPs
4) jsp自定义页面不能覆盖spring boot默认的错误页面
<?xml version="1.0" encoding="UTF-8"?>
<project xmlns="http://maven.apache.org/POM/4.0.0" xmlns:xsi="http://www.w3.org/2001/XMLSchema-instance"
	xsi:schemaLocation="http://maven.apache.org/POM/4.0.0 http://maven.apache.org/xsd/maven-4.0.0.xsd">
	<modelVersion>4.0.0</modelVersion>

	<groupId>com.plin</groupId>
	<artifactId>SpringBootAutoLogin</artifactId>
	<version>0.0.1-SNAPSHOT</version>
	<packaging>war</packaging>

	<name>SpringBootAutoLogin</name>
	<description>Demo project for Spring Boot</description>

	<parent>
		<groupId>org.springframework.boot</groupId>
		<artifactId>spring-boot-starter-parent</artifactId>
		<version>2.0.2.RELEASE</version>
		<relativePath/> <!-- lookup parent from repository -->
	</parent>

	<properties>
		<project.build.sourceEncoding>UTF-8</project.build.sourceEncoding>
		<project.reporting.outputEncoding>UTF-8</project.reporting.outputEncoding>
		<java.version>1.8</java.version>
	</properties>

	<dependencies>
		<dependency>
			<groupId>org.springframework.boot</groupId>
			<artifactId>spring-boot-starter-data-jpa</artifactId>
		</dependency>
		<dependency>
			<groupId>org.springframework.boot</groupId>
			<artifactId>spring-boot-starter-web</artifactId>
		</dependency>
		<dependency>
			<groupId>org.mybatis.spring.boot</groupId>
			<artifactId>mybatis-spring-boot-starter</artifactId>
			<version>1.3.2</version>
		</dependency>
		<dependency>
			<groupId>mysql</groupId>
			<artifactId>mysql-connector-java</artifactId>
			<scope>runtime</scope>
		</dependency>
		<dependency>
			<groupId>org.apache.tomcat.embed</groupId>
			<artifactId>tomcat-embed-jasper</artifactId>
			<scope>provided</scope>
		</dependency>
		<dependency>
			<groupId>org.springframework.boot</groupId>
			<artifactId>spring-boot-starter-test</artifactId>
			<scope>test</scope>
		</dependency>

		<!--配置SpringBoot的热部署 -->
		<dependency>
			<groupId>org.springframework.boot</groupId>
			<artifactId>spring-boot-devtools</artifactId>
			<optional>true</optional>
		</dependency>
	</dependencies>

	<build>
		<plugins>
			<plugin>
				<groupId>org.springframework.boot</groupId>
				<artifactId>spring-boot-maven-plugin</artifactId>
			</plugin>
		</plugins>
	</build>


</project>
2. 手动添加webapp文件,并在webapp右键-Build Path->Use as Source Folder

3. 项目结构图

4. UserController
@Controller
public class UserController {

	@Autowired
	private IUserService userService;
	@RequestMapping("/user/login")
	public String login(User user,HttpServletRequest request,HttpServletResponse response) throws IOException, ServletException {
		User userExist = userService.login(user.getUsername(), user.getPassword());
		if(userExist!=null) {
			// 自动登录
			String autologin = request.getParameter("autologin");
			String username = user.getUsername();
			String password = user.getPassword();
			if ("on".equals(autologin)) {
				// 勾选了自动登录,就将用户名与密码存储到cookie中.
				Cookie cookie = new Cookie("autologin",
						URLEncoder.encode(username , "utf-8") + "%springboot%" + password );
				cookie.setMaxAge(7 * 24 * 60 * 60);
				cookie.setPath("/");
				response.addCookie(cookie);
			} else {
				Cookie cookie = new Cookie("autologin",
						URLEncoder.encode(username, "utf-8") + "%springboot%" + password);
				cookie.setMaxAge(0);
				cookie.setPath("/");
				response.addCookie(cookie);
			}

			// 登录成功后,将用户存储到session中.
			request.getSession().invalidate();
			//将用户对象返回到前端
			request.getSession().setAttribute("user", user);
			request.setAttribute("username", username);
//			response.sendRedirect(request.getContextPath() + "/index");
			return "redirect:/index";
		}else {
			request.setAttribute("login.message", "用户名或密码错误");
//			request.getRequestDispatcher("/login").forward(request,
//					response);
			return "login";
		}
	}
}
5. PageController 用于页面跳转
@Controller
public class PageController {
	@RequestMapping("/")
	public String showIndex(){
		return "index";
	}

	@RequestMapping("/{page}")
	public String showPage(@PathVariable String page){
		return page;
	}
}
5.1 index.jsp和login.jsp
<%@ page language="java" contentType="text/html; charset=UTF-8"
pageEncoding="UTF-8"%>
<!DOCTYPE html PUBLIC "-//W3C//DTD HTML 4.01 Transitional//EN" "http://www.w3.org/TR/html4/loose.dtd">
<html>
<head>
<meta http-equiv="Content-Type" content="text/html; charset=UTF-8">
<title>bookebuy login</title>
</head>
<body>
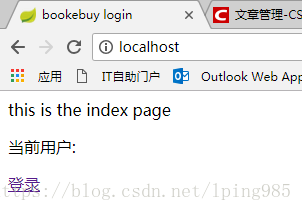
this is the index page <p>
<c:if test="${not empty user }">
当前用户:${user.username}<p>
</c:if>
<a href="http://localhost/login">登录</a>
</body>
</html><%@ page language="java" contentType="text/html; charset=UTF-8"
pageEncoding="UTF-8"%>
<!DOCTYPE html PUBLIC "-//W3C//DTD HTML 4.01 Transitional//EN" "http://www.w3.org/TR/html4/loose.dtd">
<html>
<head>
<meta http-equiv="Content-Type" content="text/html; charset=UTF-8">
<title>login</title>
</head>
<body>
login page
${login.message }<p>
<form action="/user/login" method="post">
username:<input type="text" name="username"><p>
password:<input type="password" name="password"><p>
<input type="checkbox" name="autologin" value="on" />自动登陆
<input type="submit" value="登录">
</form>
</body>
</html>6. AutoLoginFilter 过滤网页,除了regist和login相关的页面,实现自动登录。
@Configuration
public class AutoLoginFilter implements Filter {
	@Autowired
	IUserService service;
	public void init(FilterConfig filterConfig) throws ServletException {
	}
	public void doFilter(ServletRequest request, ServletResponse response,
			FilterChain chain) throws IOException, ServletException {
		// 1.强转
		HttpServletRequest req = (HttpServletRequest) request;
		HttpServletResponse resp = (HttpServletResponse) response;
		// 2.操作

		// 2.1判断当前用户是否登录
		User user = (User) req.getSession().getAttribute("user");
		if (user == null) { // user为null说明用户没有登录,可以进行自动登录操作
			// 2.2 得到访问的资源路径
			String uri = req.getRequestURI();
			String contextPath = req.getContextPath();
			String path = uri.substring(contextPath.length());
			if (!("/regist.jsp".equalsIgnoreCase(path)
					|| "/login".equalsIgnoreCase(path) || "/regist"
						.equalsIgnoreCase(path))) {
				// 符合条件的是可以进行自动登录操作的.

				// 2.3 得到cookie,从cookie中获取username,password
				Cookie[] cookies = req.getCookies();
				Cookie cookie = null;
				if (cookies != null ) {
					for (Cookie c : cookies) {
						if (c.getName().equals("autologin")) {
							cookie = c;
						}
					}
				}

				if (cookie != null) {
					// 说明有用户名与密码,可以进行自动登录
					String username = cookie.getValue().split("%springboot%")[0];
					String password = cookie.getValue().split("%springboot%")[1];

					// 2.4调用UserService方法进行登录操作.
					try {
						User existUser = service.login(username, password);

						if (existUser != null) {
							// 可以进行登录操作
							req.getSession().setAttribute("user", existUser);
						}
					} catch (Exception e) {
						e.printStackTrace();
					}
				}

			}

		}
		// 3.放行
		chain.doFilter(req, resp);
	}
	public void destroy() {
	}
}
7. UserService
@Service
public class UserServiceImpl implements IUserService{
	@Autowired
	private UserMapper userMapper;

	@Override
	public User login(String username,String password) {
		UserExample example = new UserExample();
		Criteria criteria = example.createCriteria();
		if(username!=null) {
			criteria.andUsernameEqualTo(username);
			List<User> list = userMapper.selectByExample(example );
			if (list!=null) {
				for (User user : list) {
					if(user.getPassword().equals(password)) {
						return user;
					}
				}
			}
		}
		return null;
	}
}
8. MyBatis 的持久层Mapper采用逆向工程。
9. 测试

关闭浏览器后打开


 2791
2791

 被折叠的 条评论
为什么被折叠?
被折叠的 条评论
为什么被折叠?
 到【灌水乐园】发言


