


 本文介绍了一种增强服务器安全性的方法——双因素认证,通过结合Google Authenticator和SSH密钥,为服务器访问提供双重保护。文章详细讲解了安装配置过程及如何在Xshell中实现。
浅谈服务器设置"双子验证"
双子验证
为了保证连接服务器的安全,一般都是选择用xshell配合公钥的手法来访问,但是这个也存在私钥失窃的风险,为了保证数据安全,再加一层验证手段。
- 双子验证包含:
- 基于时间的一次性密码
Time-based One-time Password(TOTP)算法。Google Authenticator用作服务器应用程序 - 基于SSH协议的
xshell密钥访问
- 基于时间的一次性密码
Google Authenticator
-
安装Google Authenticator
yum -y install Google Authenticator -
运行应用程序
google-authenticator -
提供了二维码连接以及超级数字密码
[root@Centos6 ~]#google-authenticator
https://www.google.com/chart?chs=200x200&chld=M|0&cht=qr&chl=otpauth://totp/root@Centos6.localdomain%3Fsecret%3DB2OLIRUTI4P72DP6
Your new secret key is: B2OLIRUTI4P72DP6
Your verification code is 796823
Your emergency scratch codes are:
  86797884
  13337815
  76420985
  59997949
  46300756
- 这个应用程序为你提供一个密钥、验证码和恢复码。把它们放在安全的地方。如果你丢失了手机,恢复码是访问服务器的唯一方式。
- 该应用程序提供了一系列问题。下面的片段展示了如何进行合理的安全设置:
Do you want authentication tokens to be time-based (y/n) y
Do you want me to update your "/home/user/.google_authenticator" file (y/n)? y
- 设置手机验证
- 在你的手机上安装验证器应用程序(FreeOTP)。Google Authenticator 会在屏幕上显示一个二维码。打开手机上的 FreeOTP 应用程序,选择添加新账户,在应用程序顶部选择二维码形状工具,然后扫描二维码即可。设置完成后,在每次远程连接服务器时,你必须提供验证器应用程序生成的随机数。
- 编辑服务端的sshd的pam模块
vim /etc/pam.d/sshdsed -i '1a\auth required pam_google_authenticator.so' /etc/pam.d/sshd添加下行保存
配置SSH的密钥验证
- 先用xshell跟服务器建立一个连接
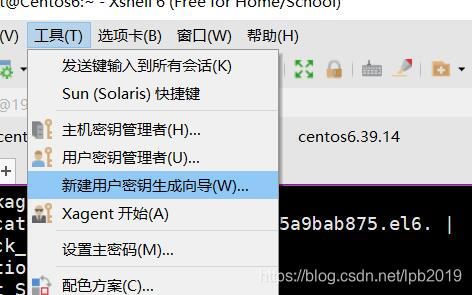
- 在xshell里面生成密钥对
- 把生成的公钥文件传给服务器端
cat id_rsa.pub >> /root/.ssh/auauthorized_keys
chmod 600 authorized_keys - 修改服务端配置文件/etc/ssh/sshd_config
sed -i 's/.*ChallengeResponseAuthentication.*/ChallengeResponseAuthentication yes/' /etc/ssh/sshd_config
sed -i 's/.*PasswordAuthentication.*/PasswordAuthentication no/' /etc/ssh/sshd_config - 重启sshd服务
systemctl restart sshd
一键配置Google Authenticator脚本
#安装epel
yum install -y epel-release.noarch
yum makecache
#安装google authenticator
yum install -y google-authenticator.x86_64


echo -e "\033[31mDo you want me to update your "/root/.google_authenticator" file? (y/n) y"
echo -e "\033[31m你希望我更新你的“/root/.google_authenticator”文件吗(y/n)?\033[0m"
echo -e "\033[31mDo you want to disallow multiple uses of the same authentication"
echo -e "\033[31mtoken? This restricts you to one login about every 30s, but it increases"
echo -e "\033[31myour chances to notice or even prevent man-in-the-middle attacks (y/n) y"
echo -e "\033[31m你希望禁止多次使用同一个验证令牌吗?这限制你每次登录的时间大约是30秒, 但是这加大了发现或甚至防止中间人攻击的可能性(y/n)?\033[0m"
echo -e "\033[31mBy default, a new token is generated every 30 seconds by the mobile app."
echo -e "\033[31mIn order to compensate for possible time-skew between the client and the server,"
echo -e "\033[31mwe allow an extra token before and after the current time. This allows for a"
echo -e "\033[31mtime skew of up to 30 seconds between authentication server and client. If you"
echo -e "\033[31mexperience problems with poor time synchronization, you can increase the window"
echo -e "\033[31mfrom its default size of 3 permitted codes (one previous code, the current"
echo -e "\033[31mcode, the next code) to 17 permitted codes (the 8 previous codes, the current"
echo -e "\033[31mcode, and the 8 next codes). This will permit for a time skew of up to 4 minutes"
echo -e "\033[31mbetween client and server."
echo -e "\033[31mDo you want to do so? (y/n) y"
echo -e "\033[31m默认情况下,令牌保持30秒有效;为了补偿客户机与服务器之间可能存在的时滞,\033[0m"
echo -e "\033[31m我们允许在当前时间前后有一个额外令牌。如果你在时间同步方面遇到了问题, 可以增加窗口从默认的3个可通过验证码增加到17个可通过验证码,\033[0m"
echo -e "\033[31m这将允许客户机与服务器之间的时差增加到4分钟。你希望这么做吗(y/n)?\033[0m"
echo -e "\033[31mIf the computer that you are logging into isn't hardened against brute-force"
echo -e "\033[31mlogin attempts, you can enable rate-limiting for the authentication module."
echo -e "\033[31mBy default, this limits attackers to no more than 3 login attempts every 30s."
echo -e "\033[31mDo you want to enable rate-limiting? (y/n) y"
echo -e "\033[31m如果你登录的那台计算机没有经过固化,以防范运用蛮力的登录企图,可以对验证模块\033[0m"
echo -e "\033[31m启用尝试次数限制。默认情况下,这限制攻击者每30秒试图登录的次数只有3次。 你希望启用尝试次数限制吗(y/n)?\033[0m"
echo -e "\033[32m 在App Store 搜索Google Authenticator 进行App安装 \033[0m"


google-authenticator


#/etc/pam.d/sshd文件,修改或添加下行保存
#auth required pam_google_authenticator.so
sed -i '1a\auth       required     pam_google_authenticator.so' /etc/pam.d/sshd
#编辑/etc/ssh/sshd_config找到下行
#ChallengeResponseAuthentication no
#更改为
#ChallengeResponseAuthentication yes
sed -i 's/.*ChallengeResponseAuthentication.*/ChallengeResponseAuthentication yes/' /etc/ssh/sshd_config

#重启SSH服务
service sshd restart
**完**


 277
277


 到【灌水乐园】发言


