


 本文介绍如何使用OpenCV合成运动模糊、对焦模糊及噪点模糊的图像,通过自定义函数实现不同类型的模糊效果,适用于图像预处理和数据增强。
之前需要评估图像质量来筛选成像质量不错的图片,去除由于对焦,运动等造成的模糊图像,所以在构建数据集的时候考虑用opencv对清晰的图片进行处理获得模糊的图片从而进行训练。
运动模糊图像
一般来说,运动模糊的图像都是朝同一方向运动的,那么就可以利用cv2.filter2D函数。
import numpy as np

def motion_blur(image, degree=10, angle=20):
    image = np.array(image)

    # 这里生成任意角度的运动模糊kernel的矩阵, degree越大,模糊程度越高
    M = cv2.getRotationMatrix2D((degree/2, degree/2), angle, 1)
    motion_blur_kernel = np.diag(np.ones(degree))
    motion_blur_kernel = cv2.warpAffine(motion_blur_kernel, M, (degree, degree))

    motion_blur_kernel = motion_blur_kernel / degree
    blurred = cv2.filter2D(image, -1, motion_blur_kernel)
    # convert to uint8
    cv2.normalize(blurred, blurred, 0, 255, cv2.NORM_MINMAX)
    blurred = np.array(blurred, dtype=np.uint8)
    return blurred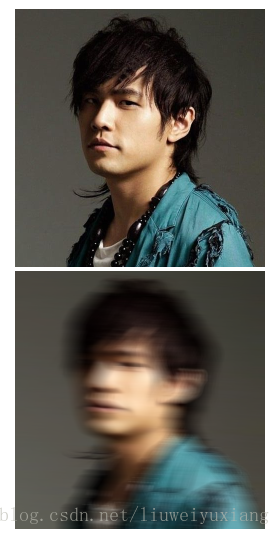
对焦模糊
opencv提供了GaussianBlur函数(具体参见这里).
image = cv2.GaussianBlur(image, ksize=(degree, degree), sigmaX=0, sigmaY=0)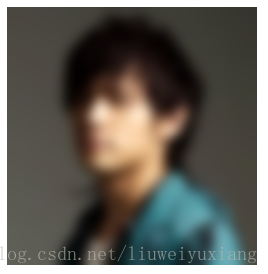
噪点
其实就是在每个像素点添加随机扰动:
def gaussian_noise(image, degree=None):
    row, col, ch = image.shape
    mean = 0
    if not degree:
        var = np.random.uniform(0.004, 0.01)
    else:
        var = degree
    sigma = var ** 0.5
    gauss = np.random.normal(mean, sigma, (row, col, ch))
    gauss = gauss.reshape(row, col, ch)
    noisy = image + gauss
    cv2.normalize(noisy, noisy, 0, 255, norm_type=cv2.NORM_MINMAX)
    noisy = np.array(noisy, dtype=np.uint8)
    return noisy
参考:
- https://www.packtpub.com/mapt/book/application_development/9781785283932/2/ch02lvl1sec21/motion-blur
- https://docs.opencv.org/2.4/doc/tutorials/imgproc/gausian_median_blur_bilateral_filter/gausian_median_blur_bilateral_filter.html
- https://docs.opencv.org/3.0-beta/doc/py_tutorials/py_imgproc/py_geometric_transformations/py_geometric_transformations.html
原文链接:python利用opencv合成模糊图像


 924
924

 被折叠的 条评论
为什么被折叠?
被折叠的 条评论
为什么被折叠?
 到【灌水乐园】发言


