


多页面应用(MPA)
概念:
每一次页面跳转的时候,后台服务器都会返回一个新的html文档,这种类型的网站也就是多页网站,也叫做多页应用
优势:
- 页面之间的解耦
-
更利于SEO
多页面打包基本思路:
每个页面对应一个entry,一个html-webpack-plugin
缺点:每次新增或删除页面都需要修改webpack配置
多页面应用通用打包方案
动态获取entry和设置html-webpack-plugin
利用glob.sync entry:glob.sync(path.join(__dirname,'./src*/index.js'))
上面我们简单的理了一下思路,那么下面我们就开始操作:
1.安装依赖
cnpm i glob html-webpack-plugin -D
2.src下新建文件,目录如下图:
meta.html是我用来资源内联的,可以忽略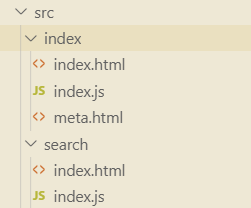
3.package.json中配置命令(个人习惯)

4.webpack.config.js中配置:
"use strict";

const path=require('path');
const HtmlWebpackPlugin=require('html-webpack-plugin');
const glob=require('glob');

const setMPA = () => {
    const entry = {};
    const htmlWebpackPlugins = [];

    // glob.sync同步获取匹配目录下的文件
    const entryFiles = glob.sync(path.join(__dirname, './src/*/index.js'));

    Object.keys(entryFiles)
        .map(index=>{
            const entryFile=entryFiles[index];
            const match = entryFile.match(/src\/(.*)\/index\.js/)

            const pageName=match&&match[1];

            entry[pageName]=entryFile;

            htmlWebpackPlugins.push(
                new HtmlWebpackPlugin({
                    template: path.join(__dirname, `src/${pageName}/index.html`),
                    filename: `${pageName}.html`,
                    chunks: ['vendors', pageName],
                })
            )

        })
    return {
        entry,
        htmlWebpackPlugins
    }
}
const { entry, htmlWebpackPlugins } = setMPA();

module.exports={
    entry:entry,
    output: {
        path: path.join(__dirname, 'dist'),
        filename: '[name]_[chunkhash:8].js'
    },
    mode:"production",
    module:{
    },
    plugins:[

    ].concat(htmlWebpackPlugins)
}
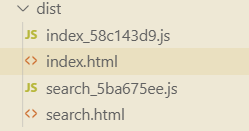
5.npm run start打包。
最后我们看一下效果:


 1442
1442

 被折叠的 条评论
为什么被折叠?
被折叠的 条评论
为什么被折叠?
 到【灌水乐园】发言


