


一、示例,我们从最简单的GET命令开始。
RBucket<Object> t = redissonClient.getBucket("syncTradeUid_idOff");
int idOff = (int)t.get();
二、springboot的Redission自动配置
@Order(value = 4001)
@ConditionalOnProperty("redisson.password")
@Configuration
@EnableConfigurationProperties({RedissonProperties.class})
public class RedissonAutoConfiguration {

    public RedissonAutoConfiguration() {
       System.out.println("==========================redis 初始化成功=======================");
    }

    @Autowired
    private RedissonProperties redissonProperties;

    @Bean(name = "redissonClient")
    @ConditionalOnProperty(name="redisson.address")
    RedissonClient redissonSingle() {
        Config config = new Config();
        config.setCodec(new FastJsonCodec());
        SingleServerConfig serverConfig = config.useSingleServer()
                .setAddress(redissonProperties.getAddress())
                .setTimeout(redissonProperties.getTimeout())
                .setConnectionPoolSize(redissonProperties.getConnectionPoolSize())
                .setConnectionMinimumIdleSize(redissonProperties.getConnectionMinimumIdleSize());

        if(!StrUtil.isEmpty(redissonProperties.getPassword())) {
            serverConfig.setPassword(redissonProperties.getPassword());
        }

        return Redisson.create(config);
    }

    /**
     * 哨兵模式自动装配
     * @return
     */
    @Bean(name = "redissonClient")
    @ConditionalOnProperty(name="redisson.masterName")
    RedissonClient redissonSentinel() {
        Config config = new Config();
        config.setCodec(new FastJsonCodec());
        SentinelServersConfig serverConfig = config.useSentinelServers().addSentinelAddress(redissonProperties.getSentinelAddresses())
                .setMasterName(redissonProperties.getMasterName())
                .setTimeout(redissonProperties.getTimeout())
                .setMasterConnectionPoolSize(redissonProperties.getMasterConnectionPoolSize())
                .setSlaveConnectionPoolSize(redissonProperties.getSlaveConnectionPoolSize())
                .setReadMode(ReadMode.SLAVE);

        if(!StrUtil.isEmpty(redissonProperties.getPassword())) {
            serverConfig.setPassword(redissonProperties.getPassword());
        }
        return Redisson.create(config);
    }


}
application.properites
#单机
redisson.address = redis://127.0.0.1:6379
redisson.password =

#哨兵
#redisson.masterName=BF-20190319DBXF
#redisson.schema=redis://
#redisson.sentinelAddresses=redis://127.0.0.1:26379,redis://127.0.0.1:26479,redis://127.0.0.1:26579
#redisson.password=
三、REDISSION自动配置初始化流程
1.从Redisson.create(config)创建redission对象开始。Redission继承于
RedissonClient
2. 创建连接管理器对象
org.redisson.config.ConfigSupport
public static ConnectionManager createConnectionManager(Config configCopy) {
UUID id = UUID.randomUUID();
if (configCopy.getMasterSlaveServersConfig() != null) {
validate(configCopy.getMasterSlaveServersConfig());
return new MasterSlaveConnectionManager(configCopy.getMasterSlaveServersConfig(), configCopy, id);
} else if (configCopy.getSingleServerConfig() != null) {
validate(configCopy.getSingleServerConfig());
return new SingleConnectionManager(configCopy.getSingleServerConfig(), configCopy, id);
} else if (configCopy.getSentinelServersConfig() != null) {
validate(configCopy.getSentinelServersConfig());
return new SentinelConnectionManager(configCopy.getSentinelServersConfig(), configCopy, id);
} else if (configCopy.getClusterServersConfig() != null) {
validate(configCopy.getClusterServersConfig());
return new ClusterConnectionManager(configCopy.getClusterServersConfig(), configCopy, id);
} else if (configCopy.getReplicatedServersConfig() != null) {
validate(configCopy.getReplicatedServersConfig());
return new ReplicatedConnectionManager(configCopy.getReplicatedServersConfig(), configCopy, id);
} else if (configCopy.getConnectionManager() != null) {
return configCopy.getConnectionManager();
}else {
throw new IllegalArgumentException("server(s) address(es) not defined!");
}
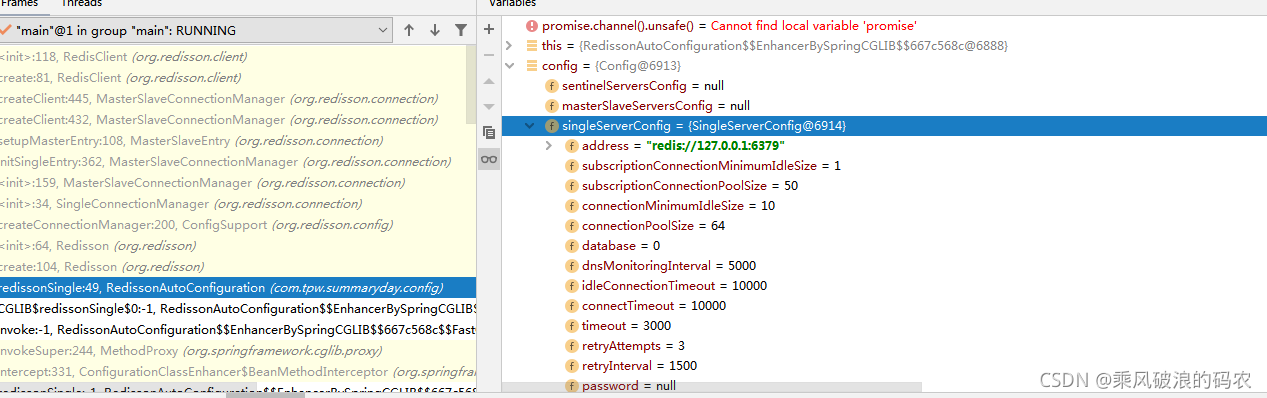
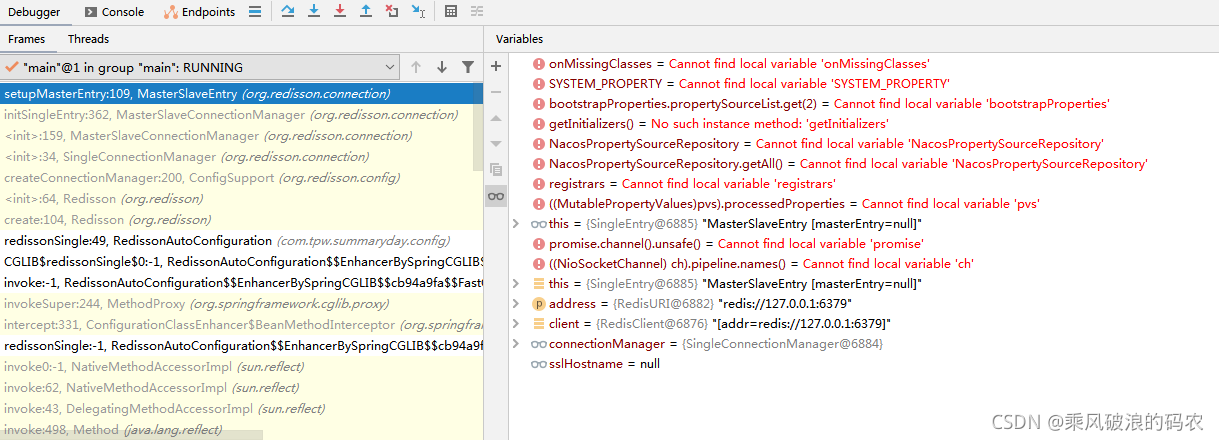
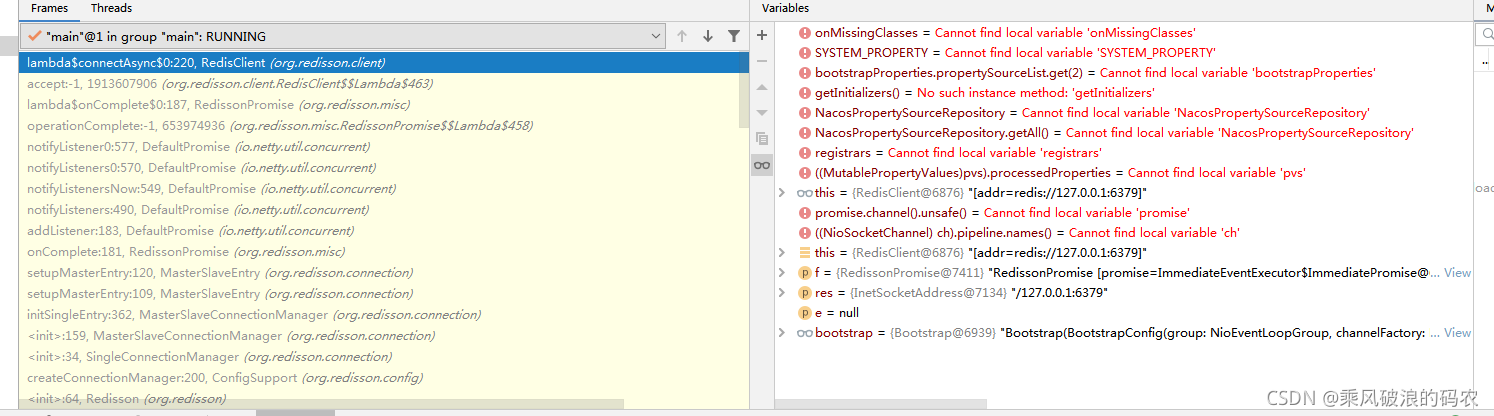
}3.先看下MasterSlaveEntry->setupMasterEntry,这里会创建RedisClient,以及连接REDIS服务器。
org.redisson.connection.MasterSlaveEntry

public RFuture<RedisClient> setupMasterEntry(RedisURI address) {
        RedisClient client = connectionManager.createClient(NodeType.MASTER, address, sslHostname);
        return setupMasterEntry(client);
    }
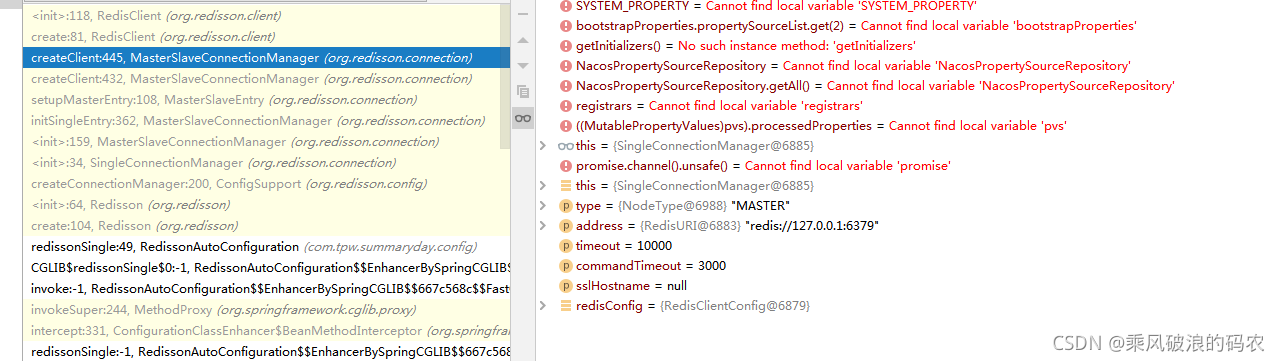
4.创建RedisClient,这里面单机也是使用主从管理器,即是只有主没有从。统一起来。
org.redisson.connection.MasterSlaveConnectionManager

@Override
    public RedisClient createClient(NodeType type, RedisURI address, int timeout, int commandTimeout, String sslHostname) {
        RedisClientConfig redisConfig = createRedisConfig(type, address, timeout, commandTimeout, sslHostname);
        return RedisClient.create(redisConfig);
    }
5.在RedisClient会创建NEETY的bootstrap,channel,handler.
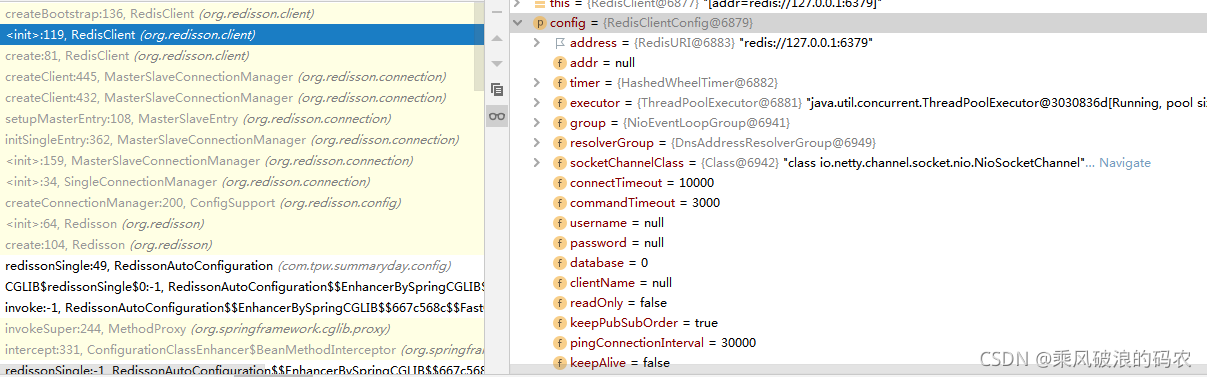
org.redisson.client.RedisClient

private Bootstrap createBootstrap(RedisClientConfig config, Type type) {
        Bootstrap bootstrap = new Bootstrap()
                        .resolver(config.getResolverGroup())
                        .channel(config.getSocketChannelClass())
                        .group(config.getGroup());

        bootstrap.handler(new RedisChannelInitializer(bootstrap, config, this, channels, type));
        bootstrap.option(ChannelOption.CONNECT_TIMEOUT_MILLIS, config.getConnectTimeout());
        bootstrap.option(ChannelOption.SO_KEEPALIVE, config.isKeepAlive());
        bootstrap.option(ChannelOption.TCP_NODELAY, config.isTcpNoDelay());
        config.getNettyHook().afterBoostrapInitialization(bootstrap);
        return bootstrap;
    }
6.我们再看下RedisChannelInitializer,有添加哪些inBounder,outBounder
org.redisson.client.handler.RedisChannelInitializer
 @Override
    protected void initChannel(Channel ch) throws Exception {
        initSsl(config, ch);

        if (type == Type.PLAIN) {
            ch.pipeline().addLast(new RedisConnectionHandler(redisClient));
        } else {
            ch.pipeline().addLast(new RedisPubSubConnectionHandler(redisClient));
        }

        ch.pipeline().addLast(
            connectionWatchdog,
            CommandEncoder.INSTANCE,
            CommandBatchEncoder.INSTANCE,
            new CommandsQueue());

        if (pingConnectionHandler != null) {
            ch.pipeline().addLast(pingConnectionHandler);
        }

        if (type == Type.PLAIN) {
            ch.pipeline().addLast(new CommandDecoder(config.getAddress().getScheme()));
        } else {
            ch.pipeline().addLast(new CommandPubSubDecoder(config));
        }

        ch.pipeline().addLast(new ErrorsLoggingHandler());

        config.getNettyHook().afterChannelInitialization(ch);
} 
7.创建好RedisClient后,开始连接REDIS服务器。这里首先异步解析地址,解析成功后,在添加到写连接池时会创建和添加连接,在创建连接时会去连接REDIS服务器。
 org.redisson.connection. MasterSlaveEntry
 private RFuture<RedisClient> setupMasterEntry(RedisClient client) {
        RPromise<RedisClient> result = new RedissonPromise<RedisClient>();
        result.onComplete((res, e) -> {
            if (e != null) {
                client.shutdownAsync();
            }
        });
        RFuture<InetSocketAddress> addrFuture = client.resolveAddr();
        addrFuture.onComplete((res, e) -> {
            if (e != null) {
                result.tryFailure(e);
                return;
            }

            masterEntry = new ClientConnectionsEntry(
                    client,
                    config.getMasterConnectionMinimumIdleSize(),
                    config.getMasterConnectionPoolSize(),
                    config.getSubscriptionConnectionMinimumIdleSize(),
                    config.getSubscriptionConnectionPoolSize(),
                    connectionManager,
                    NodeType.MASTER);

            int counter = 1;
            if (config.getSubscriptionMode() == SubscriptionMode.MASTER) {
                counter++;
            }

            CountableListener<RedisClient> listener = new CountableListener<>(result, client, counter);
            RFuture<Void> writeFuture = writeConnectionPool.add(masterEntry);
            writeFuture.onComplete(listener);

        });

        return result;
    }
8.查看连接REDIS服务器过程
org.redisson.connection.pool.ConnectionPool.
private void initConnections(ClientConnectionsEntry entry, RPromise<Void> initPromise, boolean checkFreezed) {
        int minimumIdleSize = getMinimumIdleSize(entry);

        if (minimumIdleSize == 0 || (checkFreezed && entry.isFreezed())) {
            initPromise.trySuccess(null);
            return;
        }

        AtomicInteger initializedConnections = new AtomicInteger(minimumIdleSize);
        int startAmount = Math.min(10, minimumIdleSize);
        AtomicInteger requests = new AtomicInteger(startAmount);
        for (int i = 0; i < startAmount; i++) {
            createConnection(checkFreezed, requests, entry, initPromise, minimumIdleSize, initializedConnections);
        }
    }
在这里可以看到会初始化10个客户端连接到连接池。
9.从连接池去申请创建连接
ConnectionPool
private void createConnection(boolean checkFreezed, AtomicInteger requests, ClientConnectionsEntry entry, RPromise<Void> initPromise,
            int minimumIdleSize, AtomicInteger initializedConnections) {

        acquireConnection(entry, new Runnable() {

            @Override
            public void run() {
                RPromise<T> promise = new RedissonPromise<T>();
                createConnection(entry, promise);
                promise.onComplete((conn, e) -> {


                });
            }
        });

    }
10.最终创建连接是在RedisClient.connectAsync这个异步连接方法中。
  public RFuture<RedisConnection> connectAsync() {
        final RPromise<RedisConnection> f = new RedissonPromise<RedisConnection>();

        RFuture<InetSocketAddress> addrFuture = resolveAddr();
        addrFuture.onComplete((res, e) -> {
            if (e != null) {
                f.tryFailure(e);
                return;
            }

            ChannelFuture channelFuture = bootstrap.connect(res);
        });

        return f;
    }
11.在连接成功后,RedisConnectionHandler.channelRegistered方法中创建连接对象。
    @Override
    public void channelRegistered(ChannelHandlerContext ctx) throws Exception {
        if (connection == null) {
            connection = createConnection(ctx);
        }
        super.channelRegistered(ctx);
    }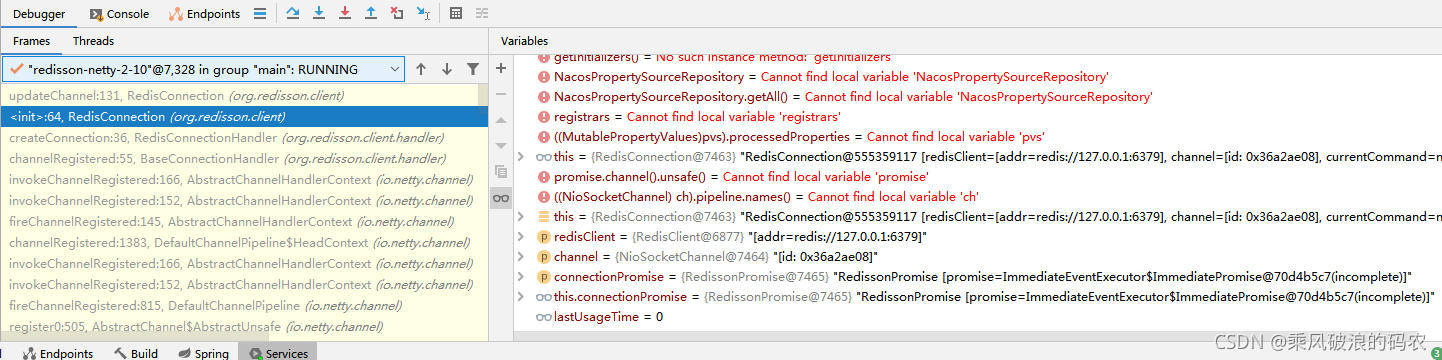
12.在这里对channel赋值,保存。这里每个channel里面会有一个RedisConnection的属性。
RedisConnection
public void updateChannel(Channel channel) {
this.channel = channel;
channel.attr(CONNECTION).set(this);
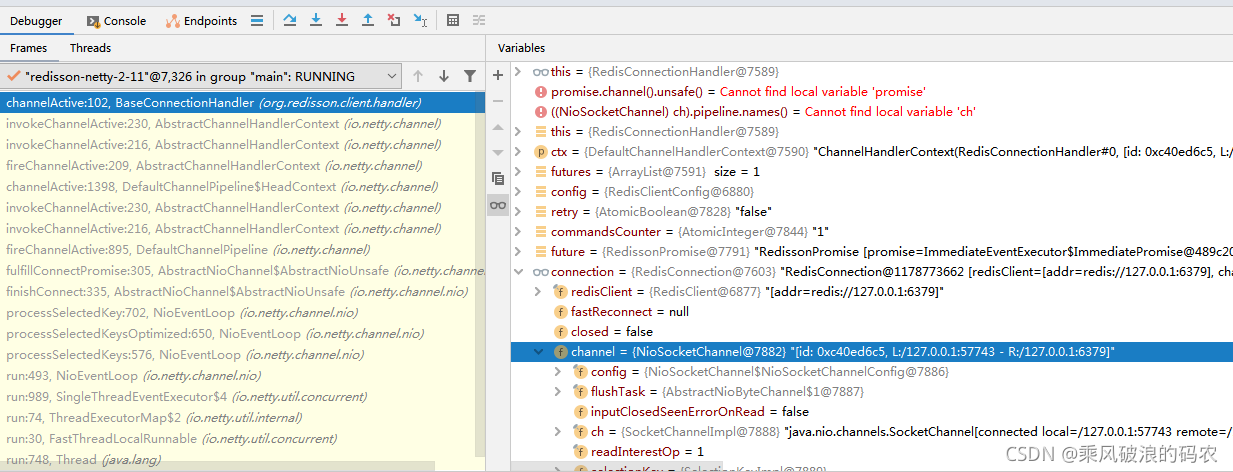
}13.在连接成功后发送PING心跳命令
 BaseConnectionHandler
@Override
    public void channelActive(final ChannelHandlerContext ctx) {
        List<RFuture<Object>> futures = new ArrayList<RFuture<Object>>();

        RedisClientConfig config = redisClient.getConfig();
        if (config.getPassword() != null) {
            RFuture<Object> future;
            if (config.getUsername() != null) {
                future = connection.async(RedisCommands.AUTH, config.getUsername(), config.getPassword());
            } else {
                future = connection.async(RedisCommands.AUTH, config.getPassword());
            }
            futures.add(future);
        }futures.add(future);
        }
        if (config.getPingConnectionInterval() > 0) {
            RFuture<Object> future = connection.async(RedisCommands.PING);
            futures.add(future);
        }


        final AtomicBoolean retry = new AtomicBoolean();
        final AtomicInteger commandsCounter = new AtomicInteger(futures.size());
        for (RFuture<Object> future : futures) {
            future.onComplete((res, e) -> {
                if (e != null) {
                    if (e instanceof RedisLoadingException) {
                        if (retry.compareAndSet(false, true)) {
                            ctx.executor().schedule(() -> {
                                channelActive(ctx);
                            }, 1, TimeUnit.SECONDS);
                        }
                        return;
                    }
                    connection.closeAsync();
                    connectionPromise.tryFailure(e);
                    return;
                }
                if (commandsCounter.decrementAndGet() == 0) {
                    ctx.fireChannelActive();
                    connectionPromise.trySuccess(connection);
                }
            });
        }
    }
四、发送命令过程。
1.首先从RedissionBucket的set方法
,这里面的 commandExecutor来源于connectionManager中的命令执行器。
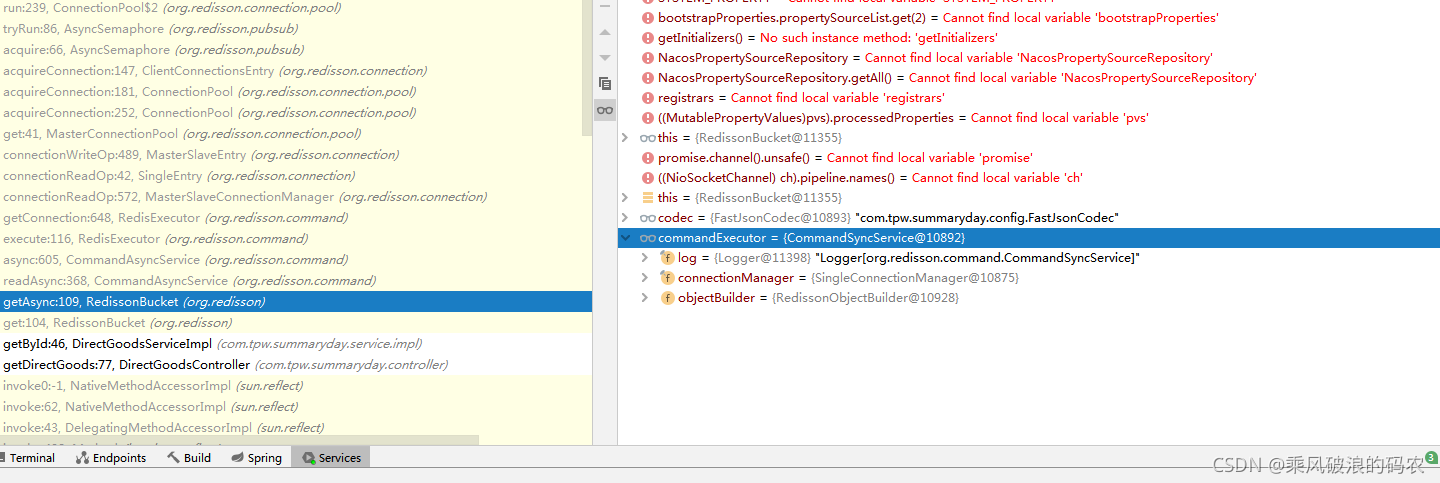
2.然后进行入到RedisExecutor中的execute方法,去异步执行命令。这里首先从连接池获取连接,然后在异步连接成功后,发送命令。
  public void execute() {
        codec = getCodec(codec);

        RFuture<RedisConnection> connectionFuture = getConnection();

        connectionFuture.onComplete((connection, e) -> {

            sendCommand(attemptPromise, connection);

            writeFuture.addListener(new ChannelFutureListener() {
                @Override
                public void operationComplete(ChannelFuture future) throws Exception {
                    checkWriteFuture(writeFuture, attemptPromise, connection);
                }
            });

            releaseConnection(attemptPromise, connectionFuture);
        });

    }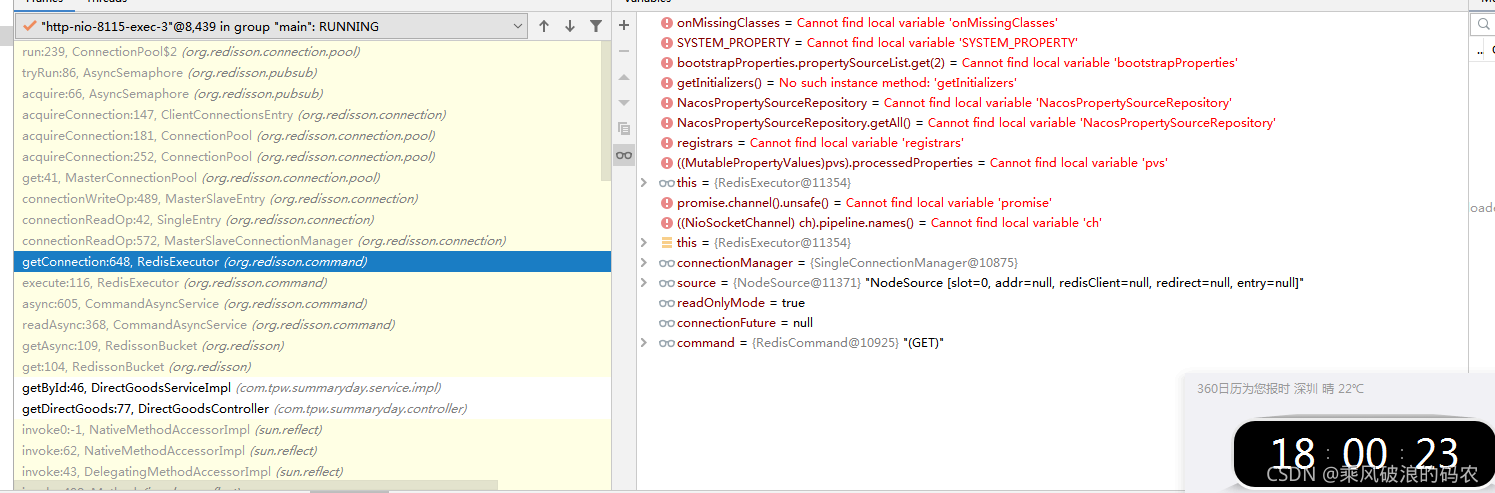
3.获取连接是从连接池中获取。根据读写模式从连接管理器中选择可用连接返回。
RedisExecutor
protected RFuture<RedisConnection> getConnection() {
if (readOnlyMode) {
connectionFuture = connectionManager.connectionReadOp(source, command);
} else {
connectionFuture = connectionManager.connectionWriteOp(source, command);
}
return connectionFuture;
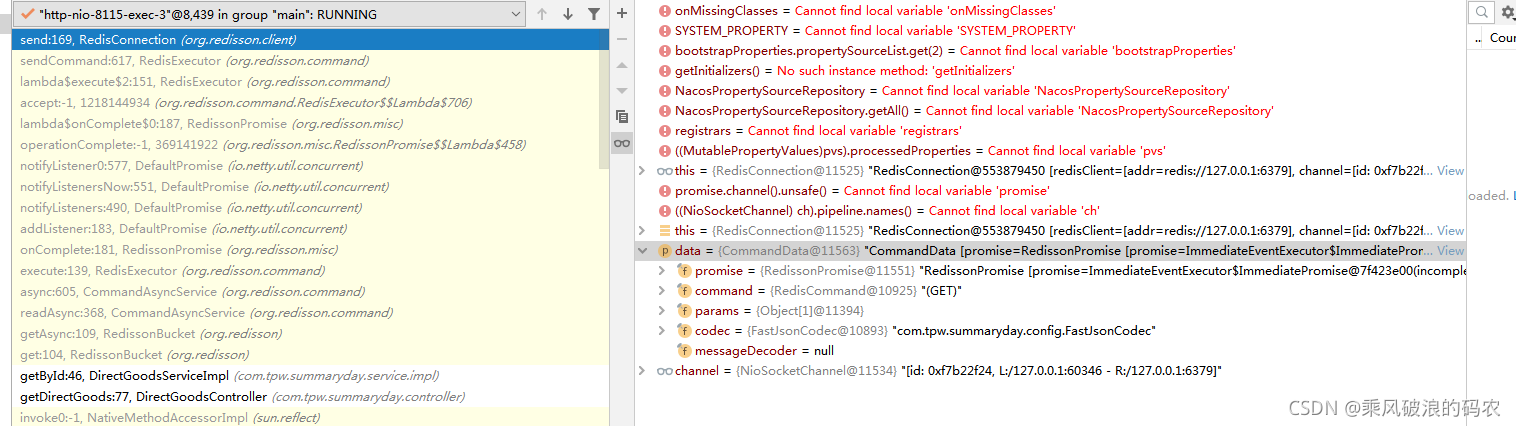
}3.接着调用RedisConnection的send向channel写入数据。
RedisConnection
public <T, R> ChannelFuture send(CommandData<T, R> data) {
        return channel.writeAndFlush(data);
    }
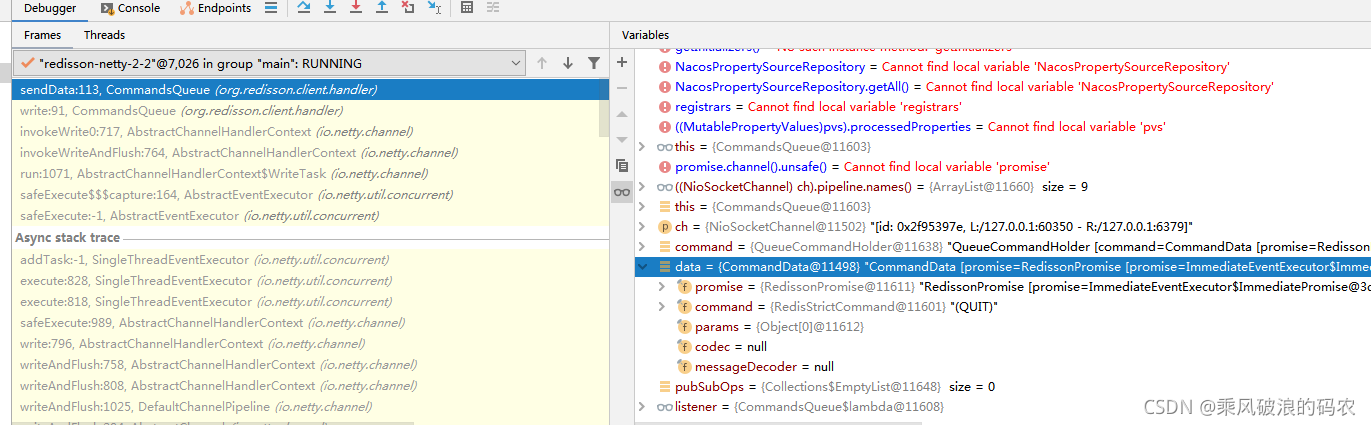
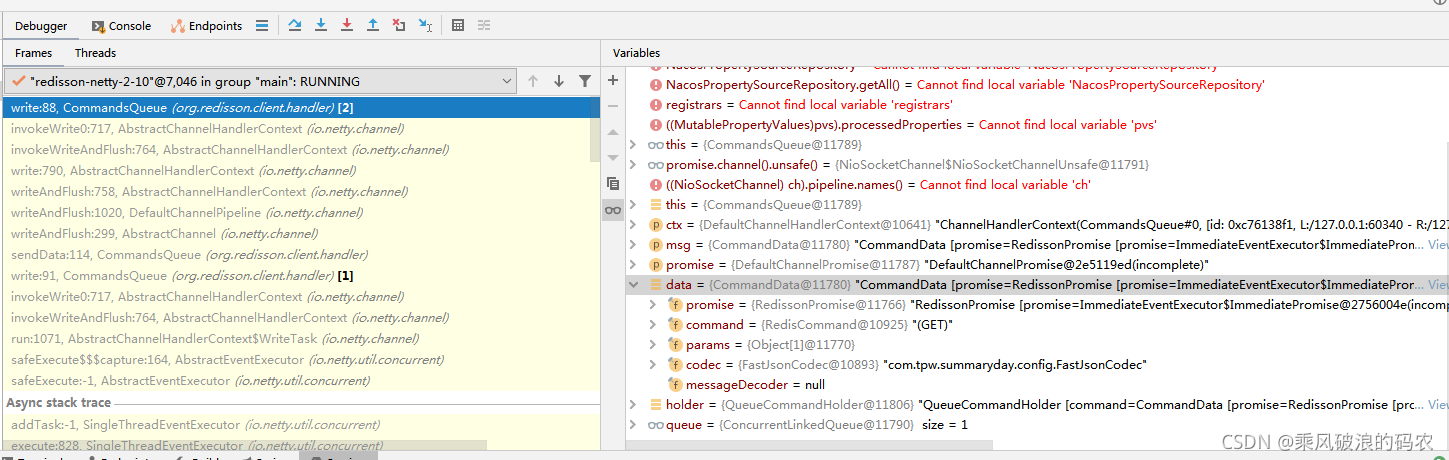
4.netty的inBoundHandler中有一个CommandsQueue,为一个命令同步队列,同一时刻一个连接只有一个命令在执行,执行完后,再执行下一个命令。
 org.redisson.client.handler.CommandsQueue
private void sendData(Channel ch) {
        QueueCommandHolder command = queue.peek();
        if (command != null && command.trySend()) {
            QueueCommand data = command.getCommand();
            List<CommandData<Object, Object>> pubSubOps = data.getPubSubOperations();
            if (!pubSubOps.isEmpty()) {
                for (CommandData<Object, Object> cd : pubSubOps) {
                    for (Object channel : cd.getParams()) {
                        ch.pipeline().get(CommandPubSubDecoder.class).addPubSubCommand((ChannelName) channel, cd);
                    }
                }
            } else {
                ch.attr(CURRENT_COMMAND).set(data);
            }

            command.getChannelPromise().addListener(listener);
            ch.writeAndFlush(data, command.getChannelPromise());
        }
} 
五、接收数据回调过程。
1.接收inhandler, 在收到数据后,从attr中的current_command属性中取出数据。
 CommandDecoder
@Override
    protected final void decode(ChannelHandlerContext ctx, ByteBuf in, List<Object> out) throws Exception {
        QueueCommand data = ctx.channel().attr(CommandsQueue.CURRENT_COMMAND).get();

        if (state() == null) {
            state(new State());
        }

        if (data == null) {
            while (in.writerIndex() > in.readerIndex()) {
                int endIndex = skipCommand(in);

                try {
                    decode(ctx, in, data);
                } catch (Exception e) {
                    in.readerIndex(endIndex);
                    throw e;
                }
            }
        } else {
            int endIndex = 0;
            if (!(data instanceof CommandsData)) {
                endIndex = skipCommand(in);
            }

            try {
                decode(ctx, in, data);
            } catch (Exception e) {
                if (!(data instanceof CommandsData)) {
                    in.readerIndex(endIndex);
                }
                throw e;
            }
        }
    }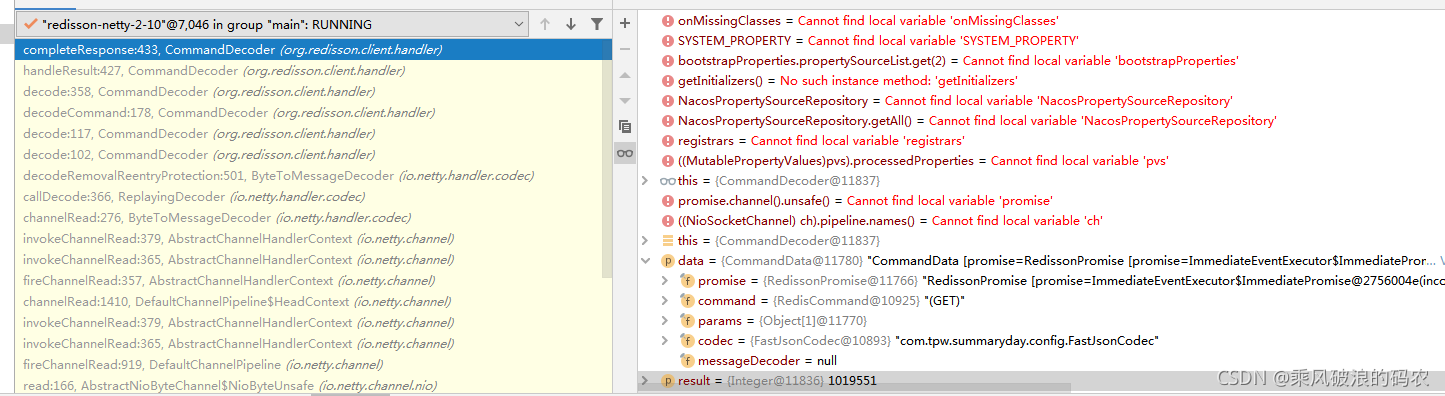
2.根据相应的PROMISE设置回调数据。
   CommandDecoder
 protected void completeResponse(CommandData<Object, Object> data, Object result) {
        if (data != null) {
            data.getPromise().trySuccess(result);
        }
    }
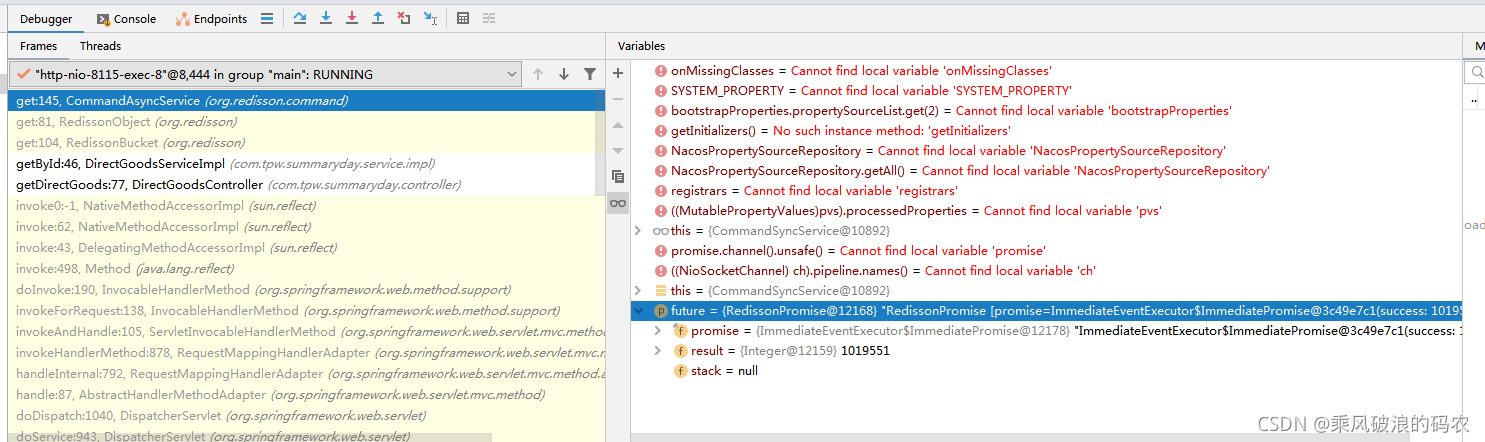
3.在等待异步PROMISE结果。
    CommandAsyncService
@Override
    public <V> V get(RFuture<V> future) {
        try {
            future.await();
        } catch (InterruptedException e) {
            Thread.currentThread().interrupt();
        }
        if (future.isSuccess()) {
            return future.getNow();
        }

        throw convertException(future);
    }


 2万+
2万+

 被折叠的 条评论
为什么被折叠?
被折叠的 条评论
为什么被折叠?
 到【灌水乐园】发言


