


 本文详细介绍了MyBatis与Spring框架的集成步骤,包括依赖导入、逆向工程生成代码、配置文件编写、注解式开发、事务管理、动态代理及AOP整合PageHelper插件等内容。
mybatis与Spring的集成
1.导入pom依赖
1.1 添加spring相关依赖(5.0.2.RELEASE)
	       spring-core
	       spring-beans
	       spring-context
	       spring-orm
	       spring-tx
	       spring-aspects
	       spring-web

	   1.2 添加mybatis相关依赖
	       mybatis核心:mybatis(3.4.5)
	       Mybatis分页:pagehelper(5.1.2)

	   1.3 spring整合mybatis(1.3.1)
	       mybatis-spring

	   1.4 添加dbcp2连接池
	       commons-dbcp2(2.1.1)
	       commons-pool2(2.4.3)

	   1.5 添加日志配置(2.9.1)
	       log4j-core
	       log4j-api
	       log4j-web

	   1.6 其他
	       junit(4.12)
	       javax.servlet-api(4.0.0)
	       lombok(1.18.2)
2.利用mybatis逆向工程生成模型层层代码
generatorConfig.xml
<?xml version="1.0" encoding="UTF-8" ?>
<!DOCTYPE generatorConfiguration PUBLIC "-//mybatis.org//DTD MyBatis Generator Configuration 1.0//EN"
"http://mybatis.org/dtd/mybatis-generator-config_1_0.dtd" >
<generatorConfiguration>
<!-- 引入配置文件 -->
<properties resource="jdbc.properties"/>
<!--指定数据库jdbc驱动jar包的位置-->
<classPathEntry location="D:\\installing software\\maven_repository\\mysql\\mysql-connector-java\\5.1.44"/>
<!-- 一个数据库一个context -->
<context id="infoGuardian">
<!-- 注释 -->
<commentGenerator>
<property name="suppressAllComments" value="true"/><!-- 是否取消注释 -->
<property name="suppressDate" value="true"/> <!-- 是否生成注释代时间戳 -->
</commentGenerator>
<!-- jdbc连接 -->
<jdbcConnection driverClass="${jdbc.driver}"
connectionURL="${jdbc.url}" userId="${jdbc.username}" password="${jdbc.password}"/>
<!-- 类型转换 -->
<javaTypeResolver>
<!-- 是否使用bigDecimal, false可自动转化以下类型(Long, Integer, Short, etc.) -->
<property name="forceBigDecimals" value="false"/>
</javaTypeResolver>
<!-- 01 指定javaBean生成的位置 -->
<!-- targetPackage:指定生成的model生成所在的包名 -->
<!-- targetProject:指定在该项目下所在的路径 -->
<javaModelGenerator targetPackage="com.xhh.model"
targetProject="src/main/java">
<!-- 是否允许子包,即targetPackage.schemaName.tableName -->
<property name="enableSubPackages" value="false"/>
<!-- 是否对model添加构造函数 -->
<property name="constructorBased" value="true"/>
<!-- 是否针对string类型的字段在set的时候进行trim调用 -->
<property name="trimStrings" value="false"/>
<!-- 建立的Model对象是否 不可改变 即生成的Model对象不会有 setter方法,只有构造方法 -->
<property name="immutable" value="false"/>
</javaModelGenerator>
<!-- 02 指定sql映射文件生成的位置 -->
<sqlMapGenerator targetPackage="com.xhh.mapper"
targetProject="src/main/java">
<!-- 是否允许子包,即targetPackage.schemaName.tableName -->
<property name="enableSubPackages" value="false"/>
</sqlMapGenerator>
<!-- 03 生成XxxMapper接口 -->
<!-- type="ANNOTATEDMAPPER",生成Java Model 和基于注解的Mapper对象 -->
<!-- type="MIXEDMAPPER",生成基于注解的Java Model 和相应的Mapper对象 -->
<!-- type="XMLMAPPER",生成SQLMap XML文件和独立的Mapper接口 -->
<javaClientGenerator targetPackage="com.xhh.mapper"
targetProject="src/main/java" type="XMLMAPPER">
<!-- 是否在当前路径下新加一层schema,false路径com.oop.eksp.user.model, true:com.oop.eksp.user.model.[schemaName] -->
<property name="enableSubPackages" value="false"/>
</javaClientGenerator>
<!-- 配置表信息 -->
<!-- schema即为数据库名 -->
<!-- tableName为对应的数据库表 -->
<!-- domainObjectName是要生成的实体类 -->
<!-- enable*ByExample是否生成 example类 -->
<!--<table schema="" tableName="t_book" domainObjectName="Book"-->
<!--enableCountByExample="false" enableDeleteByExample="false"-->
<!--enableSelectByExample="false" enableUpdateByExample="false">-->
<!--<!– 忽略列,不生成bean 字段 –>-->
<!--<!– <ignoreColumn column="FRED" /> –>-->
<!--<!– 指定列的java数据类型 –>-->
<!--<!– <columnOverride column="LONG_VARCHAR_FIELD" jdbcType="VARCHAR" /> –>-->
<!--</table>-->
<table schema="" tableName="t_mvc_book" domainObjectName="Book"
enableCountByExample="false" enableDeleteByExample="false"
enableSelectByExample="false" enableUpdateByExample="false">
<!-- 忽略列,不生成bean 字段 -->
<!-- <ignoreColumn column="FRED" /> -->
<!-- 指定列的java数据类型 -->
<!-- <columnOverride column="LONG_VARCHAR_FIELD" jdbcType="VARCHAR" /> -->
</table>
</context>
</generatorConfiguration>
3、编写配置文件applicationContext-mybatis.xml
3.1 注解式开发
   开启注解
   <!--1. 注解式开发 -->
   <!-- 注解驱动 -->
   <context:annotation-config/>
   <!-- 用注解方式注入bean,并指定查找范围:com.zking.ssh2及子子孙孙包-->
   <context:component-scan base-package="com.zking.oa"/>

   3.2 引入外部jdbc配置文件
   <context:property-placeholder location="classpath:jdbc.properties"/>

   3.3 配置dbcp2数据库连接池
   详见“dbcp2.txt”

   3.4 spring和mybatis整合
   详见“spring与mybatis整合.txt”


   3.5 注解式事物配置

	配置事务管理(环绕通知)	有关数据库操作的开启、提交操作都是在环绕在数据库操作的前后
    切面
		excution(* *..*Biz.*(..))

    <bean id="transactionManager" class="org.springframework.jdbc.datasource.DataSourceTransactionManager">
        <property name="dataSource" ref="dataSource" />
    </bean>

    <tx:annotation-driven transaction-manager="transactionManager" />

   3.6 开启动态代理
   <aop:aspectj-autoproxy/>

4.注解式开发
	ssh中数据的增删改查spring的配置如下
	@Repository
	<bean id=bookDao class=""/>
	@Service
	<bean id=bookService class="">
		@Autowired/@Resource:
		<property name=bookDao ref=bookDao/>
	</bean>
	@Constroller
	<bean id=bookAction class="">
		@Autowired/@Resource:
		<property name=bookService ref=bookService/>
	</bean>

	spring ioc注入方式
		set
		构造
		自动装配
			bytype	根据属性对应的接口在spring的上下文匹配实现类
			byname  根据属性名在spring上下文中寻找对应的id的Bean

	hibernate与spring测试
	applicationContext applicationContext = new classpathxmlappli..("appplicationContext.xml");
	applicationContext。getBean("xxxservice");

   @Repository:将DAO类声明为Bean
   @Service:通常作用在业务层
   @Constroller:通常作用在控制层,将在Spring MVC中使用
   @Component:是一个泛化的概念,仅仅表示spring中的一个组件(Bean),可以作用在任何层次
   @Scope:模式声明(singleton|prototype)
   @Autowired:将自动在代码上下文与其匹配(默认是类型匹配)的Bean,并自动注入到相应的地方
   @Resource:
   1)@Resource后面没有任何内容,默认通过name属性去匹配bean,找不到再按type去匹配
   2)指定了name或者type则根据指定的类型去匹配bean
   3)指定了name和type则根据指定的name和type去匹配bean,任何一个不匹配都将报错

   问题:@Autowired和@Resource两个注解的区别:
   相当于之前spring、hibernate时代中的set注入,省去set、get方法
   1)@Autowired默认按照byType方式进行bean匹配,@Resource默认按照byName方式进行bean匹配
   2)@Autowired是Spring的注解,@Resource是J2EE的注解,这个看一下导入注解的时候这两个注解的包名就一清二楚了
   Spring属于第三方的,J2EE是Java自己的东西,因此,建议使用@Resource注解,以减少代码和Spring之间的耦合。

   @Transactional
   注:个人感觉注解式事务比以前的声明式事务更加麻烦,要写的东西更多
applicationContext.mybatis.xml
<?xml version="1.0" encoding="UTF-8"?>
    <beans xmlns="http://www.springframework.org/schema/beans"
           xmlns:xsi="http://www.w3.org/2001/XMLSchema-instance"
           xmlns:context="http://www.springframework.org/schema/context" xmlns:tx="http://www.springframework.org/schema/tx"
           xmlns:aop="http://www.springframework.org/schema/aop"
           xsi:schemaLocation="http://www.springframework.org/schema/beans http://www.springframework.org/schema/beans/spring-beans.xsd http://www.springframework.org/schema/context http://www.springframework.org/schema/context/spring-context.xsd http://www.springframework.org/schema/tx http://www.springframework.org/schema/tx/spring-tx.xsd http://www.springframework.org/schema/aop http://www.springframework.org/schema/aop/spring-aop.xsd">
        <!--1. 注解式开发 -->
        <!-- 注解驱动 -->
        <context:annotation-config/>
        <!-- 用注解方式注入bean,并指定查找范围:com.javaxl.ssm及子子孙孙包-->
        <context:component-scan base-package="com.xhh"/>

        <context:property-placeholder location="classpath:jdbc.properties"/>

        <bean id="dataSource" class="org.apache.commons.dbcp2.BasicDataSource"
              destroy-method="close">
            <property name="driverClassName" value="${jdbc.driver}"/>
            <property name="url" value="${jdbc.url}"/>
            <property name="username" value="${jdbc.username}"/>
            <property name="password" value="${jdbc.password}"/>
            <!--初始连接数-->
            <property name="initialSize" value="10"/>
            <!--最大活动连接数-->
            <property name="maxTotal" value="100"/>
            <!--最大空闲连接数-->
            <property name="maxIdle" value="50"/>
            <!--最小空闲连接数-->
            <property name="minIdle" value="10"/>
            <!--设置为-1时,如果没有可用连接,连接池会一直无限期等待,直到获取到连接为止。-->
            <!--如果设置为N(毫秒),则连接池会等待N毫秒,等待不到,则抛出异常-->
            <property name="maxWaitMillis" value="-1"/>
        </bean>

        <!--4. spring和MyBatis整合 -->
        <!--1) 创建sqlSessionFactory-->
        <bean id="sqlSessionFactory" class="org.mybatis.spring.SqlSessionFactoryBean">
            <!-- 指定数据源 -->
            <property name="dataSource" ref="dataSource"/>
            <!-- 自动扫描XxxMapping.xml文件,**任意路径 -->
            <property name="mapperLocations" value="classpath*:com/xhh/**/mapper/*.xml"/>
            <!-- 指定别名 -->
            <property name="typeAliasesPackage" value="com/xhh/**/model"/>
            <!--配置pagehelper插件-->
            <property name="plugins">
                <array>
                    <bean class="com.github.pagehelper.PageInterceptor">
                        <property name="properties">
                            <value>
                                helperDialect=mysql
                            </value>
                        </property>
                    </bean>
                </array>
            </property>
        </bean>

        <!--2) 自动扫描com/xhh/**/mapper下的所有XxxMapper接口(其实就是DAO接口),并实现这些接口,-->
        <!--   即可直接在程序中使用dao接口,不用再获取sqlsession对象-->
        <bean class="org.mybatis.spring.mapper.MapperScannerConfigurer">
            <!--basePackage 属性是映射器接口文件的包路径。-->
            <!--你可以使用分号或逗号 作为分隔符设置多于一个的包路径-->
            <property name="basePackage" value="com/xhh/**/mapper"/>
            <property name="sqlSessionFactoryBeanName" value="sqlSessionFactory"/>
        </bean>

        <bean id="transactionManager" class="org.springframework.jdbc.datasource.DataSourceTransactionManager">
            <property name="dataSource" ref="dataSource" />
        </bean>
    <!--注解扫描驱动-->
        <tx:annotation-driven transaction-manager="transactionManager" />
        <aop:aspectj-autoproxy/>

</beans>
applicationContext.xml
<?xml version="1.0" encoding="UTF-8"?>
<beans xmlns="http://www.springframework.org/schema/beans"
       xmlns:xsi="http://www.w3.org/2001/XMLSchema-instance"
       xsi:schemaLocation="http://www.springframework.org/schema/beans http://www.springframework.org/schema/beans/spring-beans.xsd">

    <!--整合mybatis框架-->
    <import resource="applicationContext.mybatis.xml"></import>

</beans>
创建BaseTestCase,并在该类上加上两个注解
@RunWith(SpringJUnit4ClassRunner.class)
@ContextConfiguration(locations={“classpath:applicationContext.xml”})
@RunWith(SpringJUnit4ClassRunner.class)
@ContextConfiguration(locations={"classpath:applicationContext.xml"})
public class SpringBaseTest {

    protected Book book;
    protected PageBean pageBean;

    @Before
    public void init(){
        book = new Book();
        pageBean = new PageBean();

    }
}
Service层
BookService
public interface BookService {
    int deleteByPrimaryKey(Integer bid);

    int insert(Book record);

    int insertSelective(Book record);

    Book selectByPrimaryKey(Integer bid);

    int updateByPrimaryKeySelective(Book record);

    int updateByPrimaryKey(Book record);
BookServiceImpl
@Service
public class BookServiceImpl implements BookService {
    @Autowired
    private BookMapper bookMapper;

    @Override
    public int deleteByPrimaryKey(Integer bid) {
        return bookMapper.deleteByPrimaryKey(bid);
    }

    @Override
    public int insert(Book record) {
        return bookMapper.insert(record);
    }

    @Override
    public int insertSelective(Book record) {
        return bookMapper.insertSelective(record);
    }

    @Override
    public Book selectByPrimaryKey(Integer bid) {
        return bookMapper.selectByPrimaryKey(bid);
    }

    @Override
    public int updateByPrimaryKeySelective(Book record) {
        return bookMapper.updateByPrimaryKeySelective(record);
    }

    @Override
    public int updateByPrimaryKey(Book record) {
        return bookMapper.updateByPrimaryKey(record);
    }
BookServiceImplTest
public class BookServiceImplTest extends SpringBaseTest {

    @Autowired
    private BookService bookService;


    @Test
    public void insert() {
        book.setBid(88888);
        book.setBname("哈哈哈");
        book.setPrice(999f);
        this.bookService.insert(book);
    }

    @Test
    public void selectByPrimaryKey() {
        Book book = this.bookService.selectByPrimaryKey(88888);
        String bname = book.getBname();
        System.out.println(bname);
    }


}
Aop整合pagehelper插件
使用AOP编程解决分页代码重复的问题
@Around(“execution(* *…*Service.*pager(…))”)
public Object invoke(ProceedingJoinPoint args)

语法结构:execution(方法修饰符 方法返回值 方法所属类 匹配方法名 ( 方法中的形参表 ) 方法申明抛出的异常 )
“*” :代表一个任意类型的参数;
“…”:代表零个或多个任意类型的参数。
注意:记得开动态代理
切面类PagerAspect
package com.xhh;

import com.github.pagehelper.PageHelper;
import com.github.pagehelper.PageInfo;
import com.xhh.util.PageBean;
import org.aspectj.lang.ProceedingJoinPoint;
import org.aspectj.lang.annotation.Around;
import org.aspectj.lang.annotation.Aspect;
import org.springframework.stereotype.Component;

import java.util.List;

/**
 * @author 林耀东
 * @site www.baidu.com
 * @company
 * @create  2019-11-17 22:49
 *       第一个*代表返回类型不限
 *  *   第二个是*..代表任意包下
 * 处理* *..*Service.*Pager这个方法,只要调用这个方法,就能达到分页的效果
 *
 * PageHelper.start()
 * 调用方法目标方法之前
 * 处理结果集
 *
 *   *Pager(map,pagebean)
 *   *pager(map,bname)
 *
 */
@Component
@Aspect
public class PagerAspect {

    @Around("execution(* *..*Service.*Pager(..))")
    public Object invoke(ProceedingJoinPoint args) throws Throwable{
//        判断符合条件的方法是否包含pageBean参数
        Object[] params = args.getArgs();
        PageBean pageBean = null;
        for (Object param : params) {
            if(param instanceof PageBean){
                pageBean = (PageBean)param;
                break;
            }
        }
        if(pageBean !=null && pageBean .isPagination()){
            PageHelper.startPage(pageBean.getPage(),pageBean.getRows());
        }
        Object list = args.proceed(params);
        if (pageBean != null && pageBean.isPagination()){
            PageInfo pageInfo = new PageInfo((List) list);
            pageBean.setTotal(pageInfo.getTotal()+"");
        }
        return list;
}
BookService两个接口
    List<Map> aaaa(Map map, PageBean pageBean);

    List<Map> listPager(Map map, PageBean pageBean);
BookMapper
List<Map> aaaa(Map map);
BookMapper.xml
<select id="aaaa" resultType="java.util.Map" parameterType="java.util.Map">
    select * from t_mvc_book
    <where>
      <if test="null != bname and bname !=''">
        and bname like #{bname}
      </if>
    </where>
  </select>
实现类
@Override
    public List<Map> aaaa(Map map, PageBean pageBean) {
        return this.bookMapper.aaaa(map);
    }

    @Override
    public List<Map> listPager(Map map, PageBean pageBean) {
        return this.bookMapper.aaaa(map);
    }
test
@Test
public void aaaa() {
Map map = new HashMap();
map.put("bname", StringUtils.toLikeStr("圣墟"));
List<Map> aaaa = this.bookService.aaaa(map, pageBean);
for (Map m : aaaa) {
System.out.println(m);
}
}
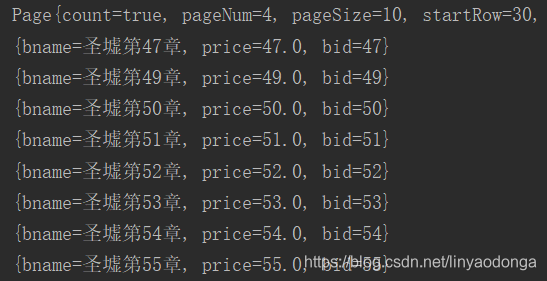
@Test
public void listPager() {
Map map = new HashMap();
map.put("bname", StringUtils.toLikeStr("圣墟"));
pageBean.setPage(4);
List<Map> aaaa = this.bookService.listPager(map, pageBean);
System.out.println(aaaa);
for (Map m : aaaa) {
System.out.println(m);
}
}
test


 3416
3416

 被折叠的 条评论
为什么被折叠?
被折叠的 条评论
为什么被折叠?
 到【灌水乐园】发言


