


 本文详细介绍了如何使用Spring Cloud构建微服务,包括服务提供方的创建,通过Eureka Client注册到服务中心,以及服务调用方的三种实现:LoadBalancerClient、Ribbon和Feign。通过实例展示了服务调用的负载均衡测试,验证了在集群部署下服务调用的高可用性。
文章目录
1.介绍
一个简单的微服务调用,可以使用三个微服务实现,
- 服务注册中心(Eureka Server)
- 服务提供方(服务生产者):使用Eureka Client向服务注册中心注册自身的REST服务。
- 服务调用方(服务消费者):从注册中心获取注册信息,调用REST服务。

本文提供了如下SpringBoot项目:
————服务提供方:
hello-service:通过Eureka Client将服务注册到服务注册中心。
————服务调用方:
服务调用方式一:hello-service-loadbalancerconsumer:用LoadBalancerClient进行客户端负载均衡,用RestTemplate实现服务的调用。
服务调用方式二:hello-service-ribbonconsumer:用ribbon进行客户端负载均衡,并用RestTemplate实现服务的调用。
服务调用方式三:hello-service-feignconsumer:用feign实现服务的调用。
环境配置:
SpringBoot 2.1.8.RELEASE
SpringCloud Greenwich.SR3
【注】其中服务注册中心通过Eureka Server实现(可参考Spring Cloud微服务(一):服务注册与发现(Greenwich SR3))。在启动hello-service(服务提供方)项目之前,先启动Eureka服务注册中心。
2.服务提供方
【步骤一】:创建一个SpringBoot项目,项目名为hello-service,在pom.xml文件中添加Eureka client的依赖。
	<parent>
        <groupId>org.springframework.boot</groupId>
        <artifactId>spring-boot-starter-parent</artifactId>
        <version>2.1.8.RELEASE</version>
    </parent>
    <dependencies>
        <dependency>
            <groupId>org.springframework.boot</groupId>
            <artifactId>spring-boot-starter-web</artifactId>
        </dependency>
		<dependency>
		    <groupId>org.springframework.cloud</groupId>
		    <artifactId>spring-cloud-starter-netflix-eureka-client</artifactId>
		</dependency>
    </dependencies>
    <dependencyManagement>
    	<dependencies>
			<dependency>
			    <groupId>org.springframework.cloud</groupId>
			    <artifactId>spring-cloud-dependencies</artifactId>
			    <version>Greenwich.SR3</version>
			    <type>pom</type>
			    <scope>import</scope>
			</dependency>
    	</dependencies>
    </dependencyManagement>
    <properties>
        <java.version>1.8</java.version>
    </properties>
    <build>
        <plugins>
            <plugin>
                <groupId>org.springframework.boot</groupId>
                <artifactId>spring-boot-maven-plugin</artifactId>
            </plugin>
        </plugins>
    </build>
【步骤二】:在SpringBoot项目配置文件application.properties中添加配置。配置内容如下:
server.port=8888
spring.application.name=hello-service
eureka.client.serviceUrl.defaultZone=http://peer1:8001/eureka/
其中spring.application.name用于指定微服务的名称,服务调用方对服务发起调用时需要此名称。eureka.client.serviceUrl.defaultZone配置的是eureka服务注册中心的位置。
【步骤三】:SpringBoot的启动类Application和REST服务接口。
Greenwich SR3版本的Spring Cloud中可以不添加@EnableDiscoveryClient注解,只需添加enreka client的maven依赖。
@SpringBootApplication
//@EnableDiscoveryClient 可不加
public class Application {

  public static void main(String[] args) {
    SpringApplication.run(Application.class, args);
  }
}
@RestController
public class HelloController {

  @RequestMapping("/hello")
  public String home() {
    return "hello world";
  }
}
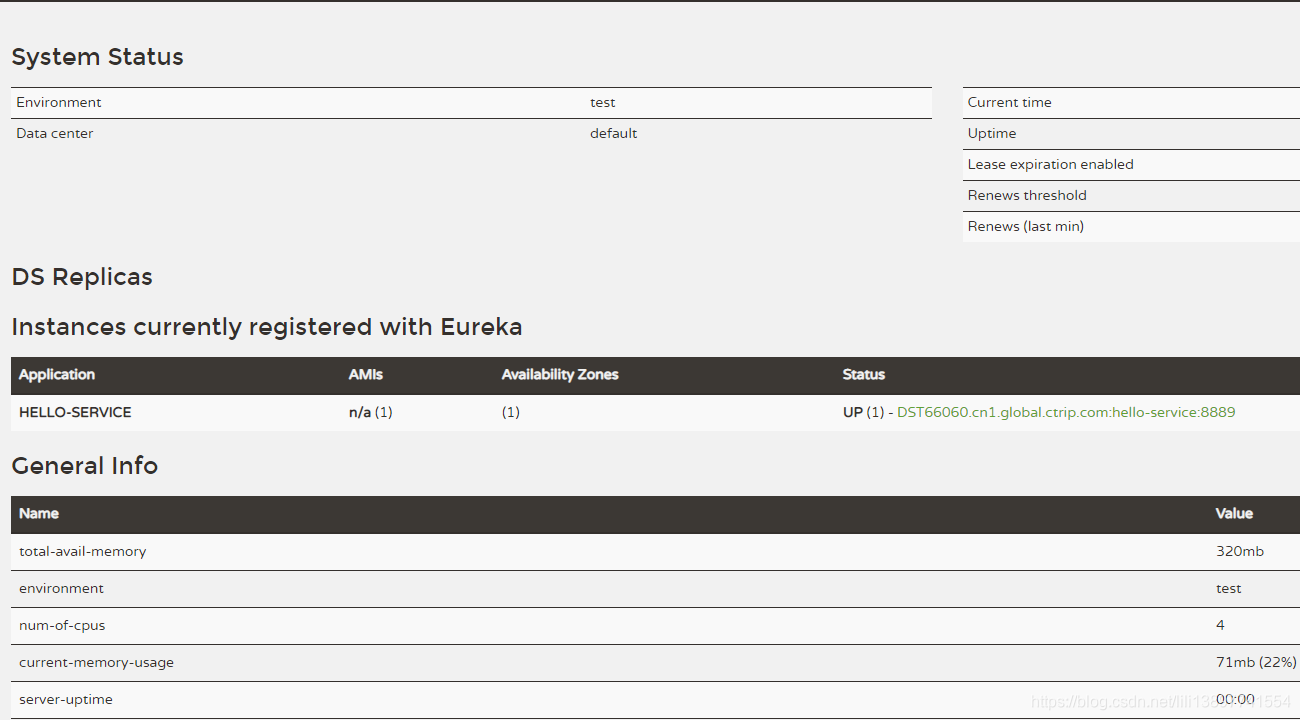
启动项目,访问地址http://localhost:8001查看Eureka服务注册中心面板,可以看到项目hello-service已经注册到服务注册中心,服务提供方已经完成。
3.服务调用方
3.1 使用LoadBalancerClient
Spring Cloud Commons为Spring Cloud微服务中的服务发现,负载均衡和断路器等模式提供的公共抽象层,所有Spring Cloud的客户端都可以使用该抽象层。其中LoadBalancerClient是org.springframework.cloud.client.loadbalancer.LoadBalancerClient包下面的抽象接口,从命名中可以看出,此接口是一个负载均衡的抽象接口定义。
【步骤一】:新建项目,项目名称为hello-service-loadbalancerconsumer,在pom.xml文件中添加eureka client的maven依赖。
  <parent>
        <groupId>org.springframework.boot</groupId>
        <artifactId>spring-boot-starter-parent</artifactId>
        <version>2.1.8.RELEASE</version>
    </parent>

    <dependencies>
        <dependency>
            <groupId>org.springframework.boot</groupId>
            <artifactId>spring-boot-starter-web</artifactId>
        </dependency>
		<dependency>
				<groupId>org.springframework.cloud</groupId>
				<artifactId>spring-cloud-starter-netflix-eureka-client</artifactId>
		</dependency>
    </dependencies>
    <dependencyManagement>
    	<dependencies>
			<dependency>
			    <groupId>org.springframework.cloud</groupId>
			    <artifactId>spring-cloud-dependencies</artifactId>
			    <version>Greenwich.SR3</version>
			    <type>pom</type>
			    <scope>import</scope>
			</dependency>
    	</dependencies>
    </dependencyManagement>
    <properties>
        <java.version>1.8</java.version>
    </properties>
    <build>
        <plugins>
            <plugin>
                <groupId>org.springframework.boot</groupId>
                <artifactId>spring-boot-maven-plugin</artifactId>
            </plugin>
        </plugins>
    </build>
【步骤二】:在配置文件application.properites中配置服务名称,以及注册中心的位置。
spring.application.name=hello-service-loadbalancerconsumer
server.port=9002
eureka.client.serviceUrl.defaultZone=http://peer1:8001/eureka/
【步骤三】:SpringBoot项目启动类,添加注解@EnableDiscoveryClient,创建一个RestTemplate的Spring Bean,用于REST服务调用。
@EnableDiscoveryClient
@SpringBootApplication
public class ConsumerApplication {

  @Bean
  RestTemplate restTemplate() {
    return new RestTemplate();
  }

  public static void main(String[] args) {
    SpringApplication.run(ConsumerApplication.class, args);
  }
}
【步骤四】:使用LoadBalancerClient 获取服务的实例信息,并用RestTemplate根据拼接的url完成远程服务调用。
@RestController
public class ConsumerController {

  @Autowired
  RestTemplate restTemplate;

  @Autowired
  LoadBalancerClient client;

  @RequestMapping(value="/hello",method=RequestMethod.GET)
  public String helloConsumer() {
    ServiceInstance instance = client.choose("hello-service");
    String url = String.format("http://%s:%s/hello",instance.getHost(),instance.getPort());
    return restTemplate.getForObject(url, String.class);
  }
}
启动项目,访问地址http://localhost:9002/hello,将会返回"hello world",如下。

3.2.使用Spring Cloud Ribbon
Ribbon是一个基于HTTP和TCP的客户端负载均衡器,使用@LoadBalanced注释修饰过的RestTemplate来实现面向服务的接口调用时,客户端具备了负载均衡的功能。负载均衡算法有轮询,随机,权值。默认采用的是轮询算法,可支持自定义算法。
【步骤一】:新建SpringBoot项目,项目名称为hello-service-ribbonconsumer,在pom.xml文件中添加Ribbon的maven依赖
<parent>
        <groupId>org.springframework.boot</groupId>
        <artifactId>spring-boot-starter-parent</artifactId>
        <version>2.1.8.RELEASE</version>
    </parent>

    <dependencies>
        <dependency>
            <groupId>org.springframework.boot</groupId>
            <artifactId>spring-boot-starter-web</artifactId>
        </dependency>
		<dependency>
		    <groupId>org.springframework.cloud</groupId>
		    <artifactId>spring-cloud-starter-netflix-eureka-client</artifactId>
		</dependency>
    <dependency>
        <groupId>org.springframework.cloud</groupId>
		<artifactId>spring-cloud-netflix-ribbon</artifactId>
    </dependency>
    </dependencies>
    <dependencyManagement>
    	<dependencies>
			<dependency>
			    <groupId>org.springframework.cloud</groupId>
			    <artifactId>spring-cloud-dependencies</artifactId>
			    <version>Greenwich.SR3</version>
			    <type>pom</type>
			    <scope>import</scope>
			</dependency>
    	</dependencies>
    </dependencyManagement>
    <properties>
        <java.version>1.8</java.version>
    </properties>
    <build>
        <plugins>
            <plugin>
                <groupId>org.springframework.boot</groupId>
                <artifactId>spring-boot-maven-plugin</artifactId>
            </plugin>
        </plugins>
    </build>
【步骤二】:在application.properties配置文件添加配置
spring.application.name=hello-service-ribbonconsumer
server.port=9000
eureka.client.serviceUrl.defaultZone=http://peer1:8001/eureka/
【步骤三】:SpringBoot项目启动类,添加注解@EnableDiscoveryClient,使此服务注册为Eureka客户端应用,以获得服务发现的能力。并创建RestTemplate的Spring Bean实例,通过@LoadBalanced注解开启客户端负载均衡。
@EnableDiscoveryClient
@SpringBootApplication
public class ConsumerApplication {

  @Bean
  @LoadBalanced
  RestTemplate restTemplate() {
    return new RestTemplate();
  }

  public static void main(String[] args) {
    SpringApplication.run(ConsumerApplication.class, args);
  }
}
【步骤四】:注入RestTemplate,使用RestTemplate实现远程服务调用。
@RestController
public class ConsumerController {

  @Autowired
  RestTemplate restTemplate;

  @RequestMapping(value="/hello",method=RequestMethod.GET)
  public String helloConsumer() {
    return restTemplate.getForEntity("http://hello-service/hello", String.class).getBody();
  }
}
启动项目,访问地址http://localhost:9000/hello,可以看到成功返回"hello world"。
3.3 使用Spring Cloud Feign
Feign是一个声明式Web Service客户端,它使得编写web Service客户端更加简单。为了使用Feign,需要创建一个接口,并对其进行注解。Feign支持插拔式的注解,包括Feign注解和JAX-WS注解,此外还支持可插拔式的编码器和解码器。Spring Cloud增加了对Spring MVC注解和Spring web中默认使用的HttpMessageConverters类的支持。
Spring Cloud集成了Ribbon和Eureka以及Spring Cloud LoadBalancer,这使得使用Feign时成为具有负载均衡的HTTP客户端。在Spring Cloud Feign中,使用@FeignClient注解时,具有Ribbon负载均衡功能。
【步骤一】:新建SpringBoot项目,项目名为hello-service-feignconsumer,添加feign的maven依赖。
	<parent>
        <groupId>org.springframework.boot</groupId>
        <artifactId>spring-boot-starter-parent</artifactId>
        <version>2.1.8.RELEASE</version>
    </parent>
    <dependencies>
        <dependency>
            <groupId>org.springframework.boot</groupId>
            <artifactId>spring-boot-starter-web</artifactId>
        </dependency>
		<dependency>
		    <groupId>org.springframework.cloud</groupId>
		    <artifactId>spring-cloud-starter-netflix-eureka-client</artifactId>
		</dependency>
	    <dependency>
		    <groupId>org.springframework.cloud</groupId>
		    <artifactId>spring-cloud-starter-feign</artifactId>
		    <version>1.4.7.RELEASE</version>
		</dependency>
    </dependencies>
    <dependencyManagement>
    	<dependencies>
			<dependency>
			    <groupId>org.springframework.cloud</groupId>
			    <artifactId>spring-cloud-dependencies</artifactId>
			    <version>Greenwich.SR3</version>
			    <type>pom</type>
			    <scope>import</scope>
			</dependency>
    	</dependencies>
    </dependencyManagement>
    <properties>
        <java.version>1.8</java.version>
    </properties>
    <build>
        <plugins>
            <plugin>
                <groupId>org.springframework.boot</groupId>
                <artifactId>spring-boot-maven-plugin</artifactId>
            </plugin>
        </plugins>
    </build>
【步骤二】:在application.properties配置文件中配置:
spring.application.name=hello-service-feignconsumer
server.port=9001
eureka.client.serviceUrl.defaultZone=http://peer1:8001/eureka/
【步骤三】:定义feign调用需要的接口,使用@FeignClient(name="hello-service")注解绑定要调用的服务名称。使用SpringMVC注解如@RequestMapping来配置服务实现。
@FeignClient(name= "hello-service")
public interface HelloClient {

  @RequestMapping("/hello")
  public String hello();
}
【步骤四】:Web服务远程调用。向HelloClient添加 @Autowired注解,这里注入的是是Spring Cloud生成的HelloClient代理类。
@RestController
public class ConsumerController {

  @Autowired
  HelloClient helloClient;

  @RequestMapping(value = "/hello")
  public String greeting() {
    return helloClient.hello();
  }
}
【步骤五】:SpringBoot项目启动类,添加注解@EnableFeignClients(启用feign进行远程调用)
@SpringBootApplication
@EnableDiscoveryClient
@EnableFeignClients
public class ConsumerApplication {

	public static void main(String[] args) {
		SpringApplication.run(ConsumerApplication.class, args);
	}
}
启动项目,访问地址http://localhost:9001/hello,返回"hello world"。
4.负载均衡测试
生产上为了服务的高可用,服务的提供者是集群方式部署。而上面三种服务调用方式,都能进行负载均衡调用,本节使用Spring Cloud Feign服务调用方式进行测试。将第一节服务提供方项目hello-service进行一些改动。
1.本机模拟服务生产者集群方式下,为了知道服务调用到的具体生产者,添加一个配置。
@RestController
public class HelloController {

  @Value("${eureka.product.instance}")
  private int instance;

  @RequestMapping("/hello")
  public String home() {
    return "hello world from instance:"+instance;
  }
}
在配置文件application.properties中添加eureka.product.instance。
server.port=8889
spring.application.name=hello-service
eureka.client.serviceUrl.defaultZone=http://peer1:8001/eureka/
eureka.product.instance=1
2.项目以不同配置内容进行启动,模拟集群部署。
将项目打包成jar,通过命令mvn clean package -Dmaven.test.skip=true来打包,或者eclipse中可以通过Run as->Maven build… 输入打包命令clean package -Dmaven.test.skip=true,其中-Dmaven.test.skip=true表示不编译和执行测试用例。打包后在${project}/target下面可找到jar包。
然后以不同配置内容启动。
java -jar hello-service-0.0.1-SNAPSHOT.jar --eureka.product.instance=1 --server.port=8888
java -jar hello-service-0.0.1-SNAPSHOT.jar --eureka.product.instance=2 --server.port=8889
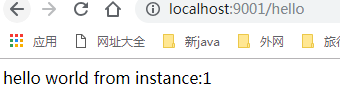
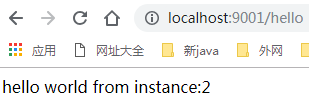
访问地址http://localhost:9001/hello,可以发现 "hello world from instance:1"和 "hello world from instance:2"交替返回,即实现了负载均衡的功能。
5. 问题
1.关于注解@EnableDiscoveryClient 和@EnableEurekaClient。
很多文章都提到,使用Eureka Client实现的服务提供方,启动类中需要加入@EnableDiscoveryClient 或者@EnableEurekaClient注解,从Spring Cloud Edgware开始,注解可省略。官网也提到一个普通的SpringBoot项目,加上spring-cloud-starter-netflix-eureka-client依赖和定位 Eureka server的url地址,项目就会自动注册到Eureka Server。
@EnableDiscoveryClient和@EnableEurekaClient共同点就是:都是能够让注册中心能够发现,扫描到服务。
不同点:@EnableEurekaClient只适用于Eureka作为注册中心,@EnableDiscoveryClient 可以是其他注册中心。
6.参考文献
1.https://stackabuse.com/spring-cloud-service-discovery-with-eureka/
2.SpringCloud官网
3.《Spring微服务实战》
4.《Spring Cloud与Docker微服务架构实战》
5.《Microservices》


 被折叠的 条评论
为什么被折叠?
被折叠的 条评论
为什么被折叠?
 到【灌水乐园】发言


