 SpringBoot集成线程池实战:异步执行与返回值处理


最近需要用到多线程, 自己维护线程池很麻烦, 正好看到 springboot 集成线程池的例子, 这里自己做了个尝试和总结, 记录一下, 也分享给需要的朋友;
不考虑事务的情况下, 这个多线程实现比较简单, 主要有以下几点:
- 在启动类加上 @EnableAsync 注解, 开启异步执行支持;
- 编写线程池配置类, 别忘了 @Configuration , 和 @Bean 注解;
- 编写需要异步执行的业务, 放到单独的类中 (可以定义为 service, 因为需要 spring 管理起来才能用 );
- 在业务service中调用异步执行的service, 注意这是重点, 不能直接在业务 service 中写异步执行的代码, 否则无法异步执行( 这就是单独放异步代码的原因);
好了, 上代码:
// 启动类
@EnableAsync
@EnableWebSecurity
@ServletComponentScan
@SpringBootApplication(scanBasePackages={"com.example.demo"})
public class DemoApplication {

	public static void main(String[] args) {
		SpringApplication.run(DemoApplication.class, args);
	}

}
// 线程池配置类
@Slf4j
@Configuration
public class BootThreadpoolConfig {

    // 配置核心线程数
    private int corePoolSize = 5;
    // 配置最大线程数
    private int maxPoolSize = 20;
    // 配置任务队列的长度
    private int queueCapacity = 500;
    // 配置任务的空闲时间
    private int aliveSeconds = 600;
    // 配置线程前缀
    private String namePrefix = "localThreadPool";

    // 自定义线程池, 起个好记的名
    @Bean(name = "localBootAsyncExecutor")
    public Executor asyncServiceExecutor() {
        log.info("初始化 springboot 线程池");
        ThreadPoolTaskExecutor executor = new ThreadPoolTaskExecutor();
        //配置核心线程数
        executor.setCorePoolSize(corePoolSize);
        //配置最大线程数
        executor.setMaxPoolSize(maxPoolSize);
        //配置队列大小
        executor.setQueueCapacity(queueCapacity);
        //配置线程池中的线程的名称前缀
        executor.setThreadNamePrefix(namePrefix);
        //配置线程的空闲时间
        executor.setKeepAliveSeconds(aliveSeconds);

        // RejectedExecutionHandler:当pool已经达到max size的时候,如何处理新任务
        // CallerRunsPolicy:不在新线程中执行任务,而是有调用者所在的线程来执行
        executor.setRejectedExecutionHandler(new ThreadPoolExecutor.CallerRunsPolicy());
        //执行初始化
        executor.initialize();
        log.info("springboot 线程池初始化完毕");
        return executor;
    }


}
// 异步执行代码
@Service("asyncExecutorTest")
public class AsyncExecutorTest {

    // 异步执行的方法, 注解内为自定义线程池类名
    @Async("localBootAsyncExecutor")
    public Future<Integer> test1(Integer i) throws InterruptedException {
        Thread.sleep(100);
        System.out.println("@Async 执行: " + i);
        return new AsyncResult(i);
    }

    // 这里使用其它方式调用,详见后面的 service3 方法
    public Integer test2(Integer i) throws InterruptedException {
        Thread.sleep(100);
        System.out.println(" excute.run 执行: " + i);
        return i;
    }
}
// 业务 service
@Service("asyncExcutorService")
public class AsyncExcutorService {
@Autowired
AsyncExecutorTest asyncExecutorTest;
@Autowired
Executor localBootAsyncExecutor;
// 测试 无返回值异步执行
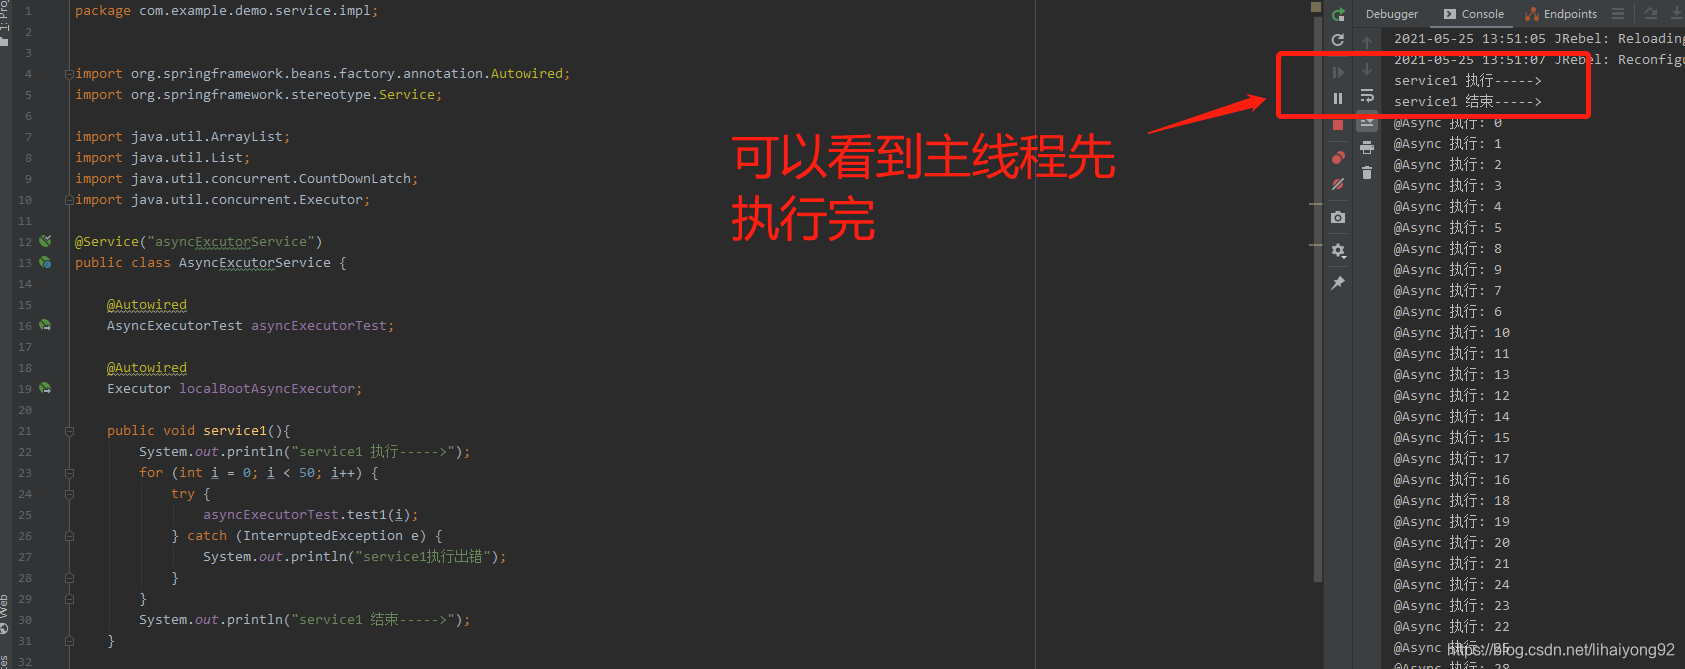
public void service1(){
System.out.println("service1 执行----->");
for (int i = 0; i < 50; i++) {
try {
asyncExecutorTest.test1(i);
} catch (InterruptedException e) {
System.out.println("service1执行出错");
}
}
System.out.println("service1 结束----->");
}
// 测试 有返回值异步执行
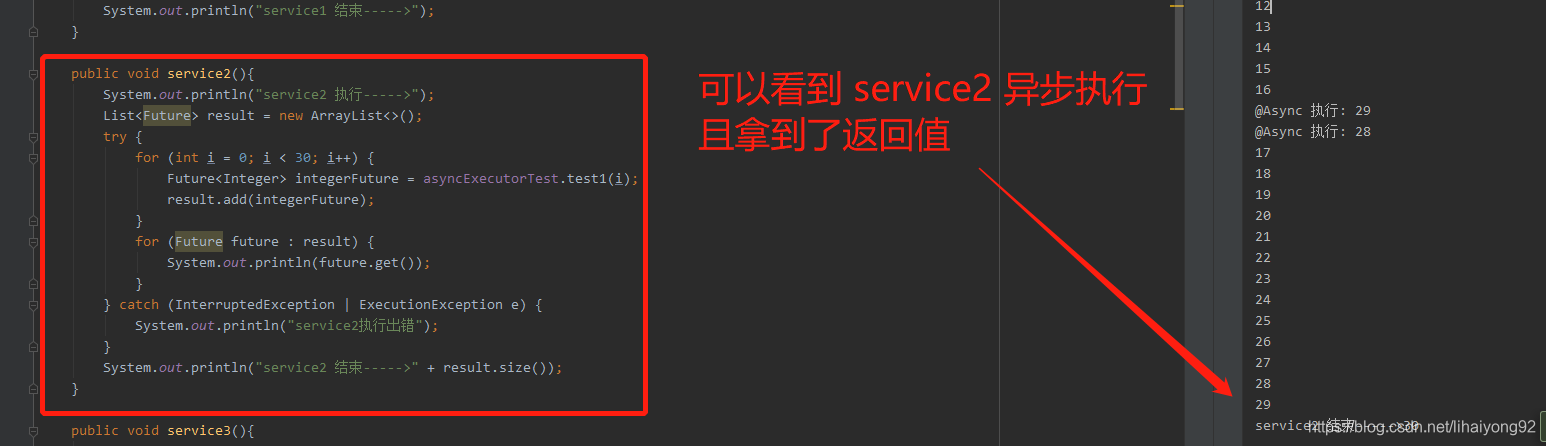
public void service2(){
long l = System.currentTimeMillis();
System.out.println("service2 执行----->");
List<Future> result = new ArrayList<>();
try {
for (int i = 0; i < 300; i++) {
Future<Integer> integerFuture = asyncExecutorTest.test1(i);
result.add(integerFuture);
}
for (Future future : result) {
System.out.println(future.get());
}
} catch (InterruptedException | ExecutionException e) {
System.out.println("service2执行出错");
}
System.out.println("service2 结束----->" + (System.currentTimeMillis() - l));
}
// 测试 有返回值异步执行
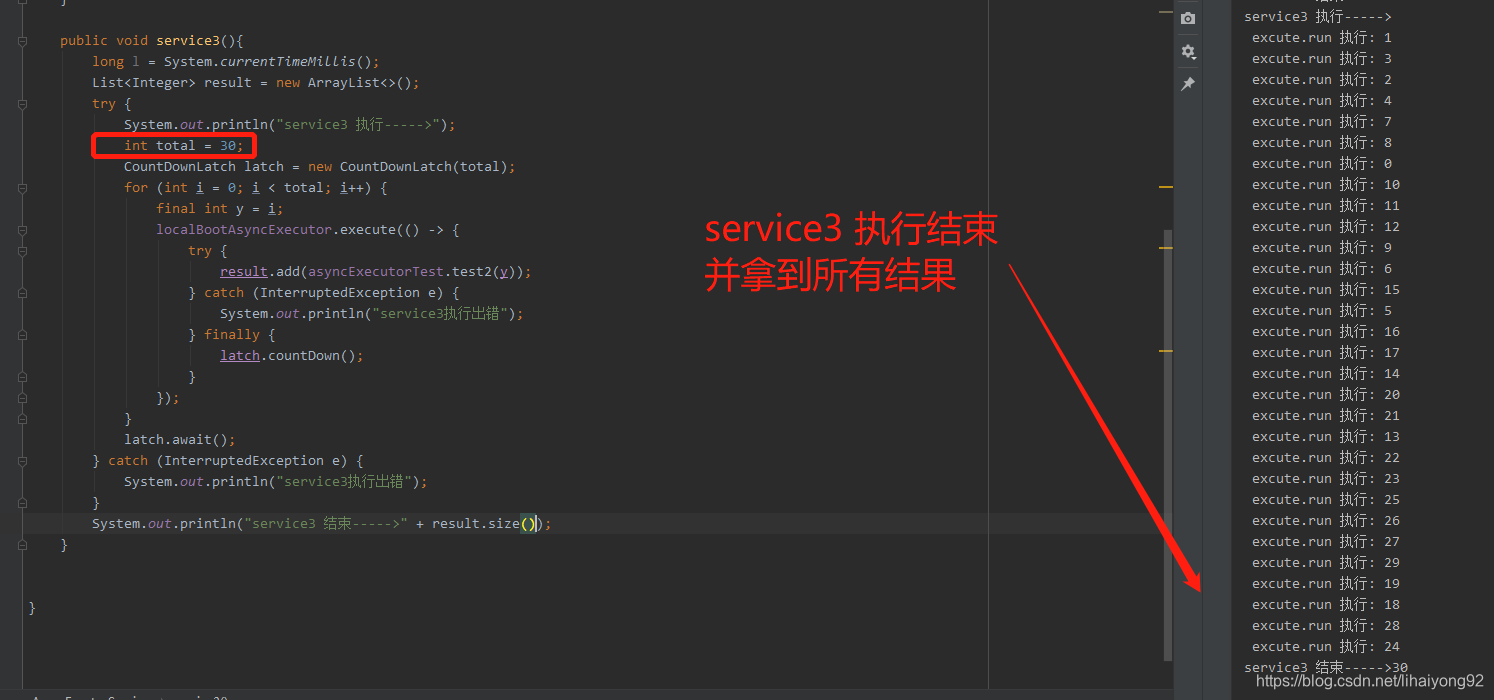
public void service3(){
long l = System.currentTimeMillis();
List<Integer> result = new ArrayList<>();
try {
System.out.println("service3 执行----->");
int total = 300;
CountDownLatch latch = new CountDownLatch(total);
for (int i = 0; i < total; i++) {
final int y = i;
localBootAsyncExecutor.execute(() -> {
try {
result.add(asyncExecutorTest.test2(y));
} catch (InterruptedException e) {
System.out.println("service3执行出错");
} finally {
latch.countDown();
}
});
}
latch.await();
} catch (InterruptedException e) {
System.out.println("service3执行出错");
}
System.out.println("service3 结束----->" + (System.currentTimeMillis() - l));
}
}
这里说下 service1 和 service2 的区别:
1. 两个都用的是一个线程池执行的
2. service1 单纯执行业务, 不用返回数据, 主线程也不用等待
3. service2 需要返回数据, 主线程需要等待结果( 注意返回值只能是 Future, 最后再 .get()去获取, 否则无法异步执行)
4. service3 也可以返回数据, 但是书写上麻烦一些. 返回值直接是想要的结果, 不像 service2 还需要提取一次数据.
其它就是 controller 了, 自己随便写一个调用一下就行了, 这里就不写了, 以下是我测试的 console 日志
service1 执行日志
service2 执行日志
service3
打完收工!


 1965
1965

 被折叠的 条评论
为什么被折叠?
被折叠的 条评论
为什么被折叠?
 到【灌水乐园】发言


