


 本文详细介绍了一位开发者从零开始搭建Spring+SpringMVC+Hibernate框架的过程,包括项目结构设计、配置文件编写、核心代码实现及遇到的问题与解决办法。
写下这篇文章的原因说来愧疚,毕竟工作快两年了,还没有自己搭过框架,鉴于最近处于在职找工作的状态,刚好尝试着搭建一下。
这本应该是在两年前就应该做的事情,硬生生晚了两年,如果有人看见希望不要嘲笑。球放过。写得不好或者有错的地方欢迎指出,虽然可能没人看 哈哈 该文章主要是为了鞭策自己,各位大佬不喜勿喷,或者有更好的搭建方式请给小弟提提建议。鉴于公司目前用的是spring+springMVC+hibernate所以先搭个类似框架。
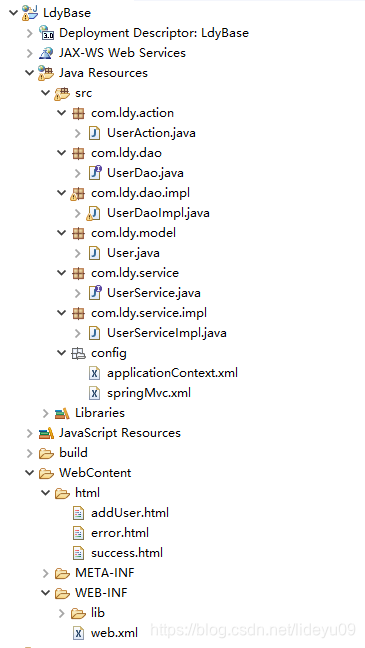
1.首先新建一个项目大概的结构如下:我就不解释具体的分层了:
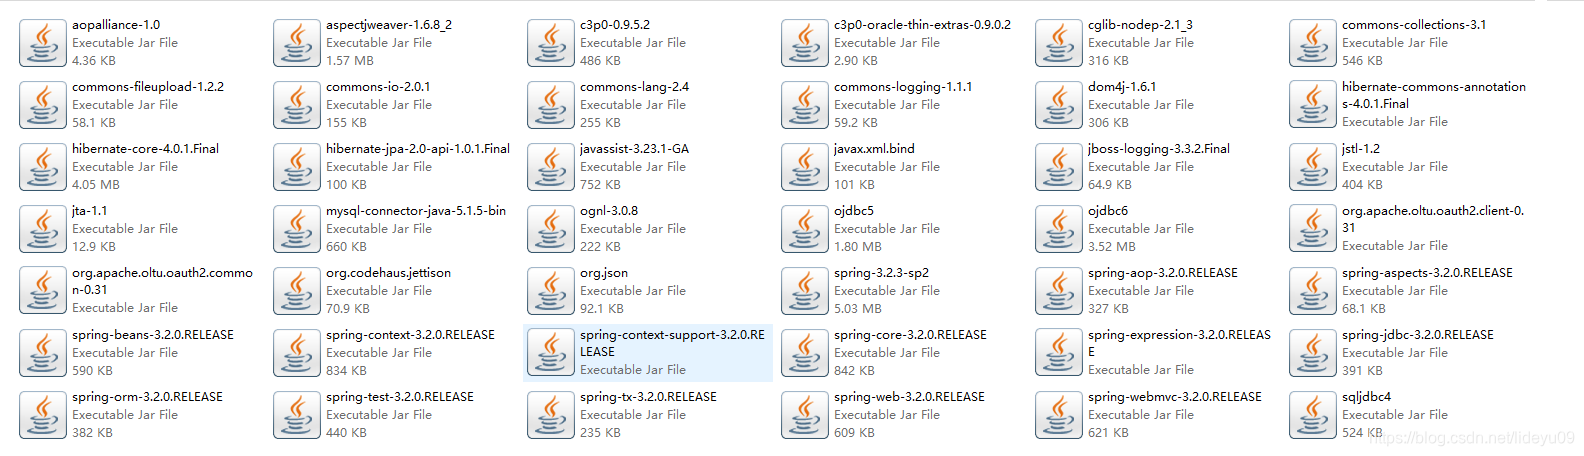
相关的jar包 可能有些是多余的,刚开始各种jar包缺失
2.第二步骤就是开始配置相关的配置文件:比如web.xml,还有上图中的两个xml文件。
(1)web.xml
<?xml version="1.0" encoding="UTF-8"?>
<web-app xmlns:xsi="http://www.w3.org/2001/XMLSchema-instance"
    xmlns="http://java.sun.com/xml/ns/javaee"
    xsi:schemaLocation="http://java.sun.com/xml/ns/javaee http://java.sun.com/xml/ns/javaee/web-app_3_0.xsd"
    id="WebApp_ID" version="3.0">

<display-name>LdyBase</display-name>
  <welcome-file-list>
    <welcome-file>index.html</welcome-file>
    <welcome-file>index.htm</welcome-file>
    <welcome-file>index.jsp</welcome-file>
    <welcome-file>default.html</welcome-file>
    <welcome-file>default.htm</welcome-file>
    <welcome-file>default.jsp</welcome-file>
  </welcome-file-list>

  <!--加载applicationContext配置文件 也可以在classpath后面加个*号然后去获取前缀+*获取全部 -->
	<context-param>
		<param-name>contextConfigLocation</param-name>
		<param-value>classpath:config/applicationContext.xml</param-value>
	</context-param>

	<!-- 开启监听 -->
	<listener>
		<listener-class>org.springframework.web.context.ContextLoaderListener</listener-class>
	</listener>
	<!-- 配置springmvc 的DispatcherServlet -->
	<servlet>
		<servlet-name>dispatcherServlet</servlet-name>
		<servlet-class>org.springframework.web.servlet.DispatcherServlet</servlet-class>
		<init-param>
			<param-name>contextConfigLocation</param-name>
			<param-value>classpath:config/springMvc.xml</param-value> <!-- 初始化参数值  即我们放置的配置文件路径-->
		</init-param>
		<load-on-startup>1</load-on-startup>
	</servlet>
	<servlet-mapping>
		<servlet-name>dispatcherServlet</servlet-name>
		<url-pattern>*.do</url-pattern>
	</servlet-mapping>
	<!-- 过滤器解决中文乱码问题  -->
	<filter>
		<filter-name>CharacterEncodingFilter</filter-name>
		<filter-class>org.springframework.web.filter.CharacterEncodingFilter</filter-class>
		<init-param>
			<param-name>encoding</param-name>
			<param-value>UTF-8</param-value>
		</init-param>
		<init-param>
			<!--是否强制设置request的编码为encoding,默认false,不建议更改-->
			<param-name>forceRequestEncoding</param-name>
			<param-value>false</param-value>
		</init-param>
		<init-param>
			<!--是否强制设置response的编码为encoding,建议设置为true,下面有关于这个参数的解释-->
			<param-name>forceResponseEncoding</param-name>
			<param-value>true</param-value>
		</init-param>
	</filter>
	<!--这里不能留空或者直接写 '/',否者不起作用 -->
	<filter-mapping>
		<filter-name>CharacterEncodingFilter</filter-name>
		<url-pattern>/*</url-pattern>
	</filter-mapping>
	<!-- 配置Spring的OpenSessionInViewFilter,以解决懒加载问题  -->
	<filter>
		<filter-name>openSession</filter-name>
		<filter-class>org.springframework.orm.hibernate4.support.OpenSessionInViewFilter</filter-class>
	</filter>
	<filter-mapping>
		<filter-name>openSession</filter-name>
		<url-pattern>/*</url-pattern>
	</filter-mapping>

</web-app>
(2)springmvc.xml 文件如下(注解扫描,然后就是视图解析器)个人习惯用html所以解析器配置的是html
<?xml version="1.0" encoding="UTF-8"?>
<beans xmlns="http://www.springframework.org/schema/beans"
    xmlns:xsi="http://www.w3.org/2001/XMLSchema-instance" xmlns:context="http://www.springframework.org/schema/context"
    xmlns:mvc="http://www.springframework.org/schema/mvc"
    xsi:schemaLocation="http://www.springframework.org/schema/beans
    http://www.springframework.org/schema/beans/spring-beans.xsd
    http://www.springframework.org/schema/context
    http://www.springframework.org/schema/context/spring-context-3.2.xsd
    http://www.springframework.org/schema/mvc
    http://www.springframework.org/schema/mvc/spring-mvc-3.2.xsd">

 	<!-- 开启注解,java文件里的@ -->
    <mvc:annotation-driven />

	<!-- 注解扫描包,注意换成自己的路径 -->
    <context:component-scan base-package="com.ldy.action">
        <!-- 只扫描@Controller的部分 -->
        <context:include-filter type="annotation" expression="org.springframework.stereotype.Controller"/>
    </context:component-scan>


	<!-- 配置视图解析器 -->
	<bean class="org.springframework.web.servlet.view.InternalResourceViewResolver">
		<property name="prefix" value="/html/"></property>
		<property name="suffix" value=".html"></property>
	</bean>
</beans>
(3)applicationContext.xml
<?xml version="1.0" encoding="UTF-8"?>
<beans xmlns="http://www.springframework.org/schema/beans"
    xmlns:xsi="http://www.w3.org/2001/XMLSchema-instance" xmlns:tx="http://www.springframework.org/schema/tx"
    xmlns:aop="http://www.springframework.org/schema/aop" xmlns:context="http://www.springframework.org/schema/context"
    xsi:schemaLocation="http://www.springframework.org/schema/beans
        http://www.springframework.org/schema/beans/spring-beans-3.2.xsd
        http://www.springframework.org/schema/tx
        http://www.springframework.org/schema/tx/spring-tx-3.2.xsd
        http://www.springframework.org/schema/aop
        http://www.springframework.org/schema/aop/spring-aop.xsd
        http://www.springframework.org/schema/context
        http://www.springframework.org/schema/context/spring-context.xsd">

   <!-- 只解析除controller之外的注解(即解析service、dao), 避免重复加载导致事务失效  -->
   <context:component-scan base-package="com.ldy" />

    <!-- 配置数据源 -->
    <bean id="dataSource"
        class="org.springframework.jdbc.datasource.DriverManagerDataSource">
        <property name="driverClassName" value="com.mysql.jdbc.Driver" />
        <property name="url" value="jdbc:mysql://localhost:3306/ldybase?characterEncoding=UTF-8" />
        <property name="username" value="root" />
        <property name="password" value="123456" />
    </bean>

    <!-- 配置SessionFactory -->
    <bean id="sessionFactory"
        class="org.springframework.orm.hibernate4.LocalSessionFactoryBean">
        <property name="dataSource" ref="dataSource" />
         <property name="annotatedClasses">
            <list>
                <value>com.ldy.model.User</value>
            </list>
        </property>
        <property name="hibernateProperties">
            <props>
                <prop key="hibernate.dialect">org.hibernate.dialect.MySQLDialect</prop>
                <prop key="hibernate.hbm2ddl.auto">update</prop>
                <prop key="hibernate.connection.autocommit">true</prop>
                <prop key="hibernate.show_sql">true</prop>
                <prop key="hibernate.format_sql">true</prop>
            </props>
        </property>
    </bean>

   <!-- 事务管理器 -->
    <bean id="transactionManager"
        class="org.springframework.orm.hibernate4.HibernateTransactionManager">
        <property name="sessionFactory" ref="sessionFactory" />
    </bean>
    <tx:annotation-driven transaction-manager="transactionManager" />
</beans>
3.配置完xml文件就剩简单的代码实现了。
(1)UserAction.java
package com.ldy.action;

import javax.servlet.http.HttpServletRequest;
import org.springframework.beans.factory.annotation.Autowired;
import org.springframework.stereotype.Controller;
import org.springframework.web.bind.annotation.RequestMapping;
import com.ldy.model.User;
import com.ldy.service.UserService;
/**
 * 用户action层与前端交互
 * @author ldy
 *
 */
@Controller
@RequestMapping("/user")
public class UserAction {
		@Autowired
	    private UserService userService;
		/**
	     * 添加用户数据
	     * @param request request
	     */
	    @RequestMapping(value = "/addUser.do")
	    public String addUser(HttpServletRequest request) throws Exception {
	    	//获取用户信息
	        try {
	        	String name = request.getParameter("name");
				String password = request.getParameter("password");
				int age = Integer.parseInt(request.getParameter("age"));
				System.out.println(name+" "+password+" "+age);
		        User user=new User();
		        user.setName(name);
		        user.setAge(age);
		        user.setPassword(password);
	        	userService.addUser(user);
	            return "/success";
	        } catch (Exception e) {
	        	e.printStackTrace();
	            return "/error";
	        }
	    }
}
(2)UserService.java和UserServiceImpl.java写一起了
package com.ldy.service;
import com.ldy.model.User;
/**
 * 用户逻辑处理接口层
 * @author ldy
 */
public interface UserService {

	public void addUser(User user);

}
----------------------------------------------------------------------------------------------
package com.ldy.service.impl;

import org.springframework.beans.factory.annotation.Autowired;
import org.springframework.stereotype.Service;
import org.springframework.transaction.annotation.Transactional;
import com.ldy.dao.UserDao;
import com.ldy.model.User;
import com.ldy.service.UserService;

/**
 * 用户逻辑处理实现层
 * @author ldy
 */
@Service
public class UserServiceImpl implements UserService {
    @Autowired
	private UserDao userDao;
    /**
     * 添加用户数据
     * @param user 用户对象
     */
    @Transactional
    public void addUser(User user){
    	userDao.addUser(user);
    }
}
(3)UserDao.java和UserDaoImpl.java写一起了
package com.ldy.dao;
import com.ldy.model.User;

/**
 * 用户数据交互接口层
 * @author ldy
 */
public interface UserDao {
	public void addUser(User user);
}
----------------------------------------------------------------------------------------------
package com.ldy.dao.impl;

import java.util.List;
import javax.annotation.Resource;
import org.hibernate.Query;
import org.hibernate.SessionFactory;
import org.springframework.stereotype.Repository;
import com.ldy.dao.UserDao;
import com.ldy.model.User;
/**
 * 用户数据交互实现层
 * @author ldy
 */
@Repository
public class UserDaoImpl implements UserDao {
	//注入已在applicationContext.xml中配制好的sessionFactory
    @Resource(name = "sessionFactory")
    private SessionFactory sessionFactory;
    /**
     * 添加用户数据
     * @param user 用户对象
     */
    public void addUser(User user){
    		sessionFactory.getCurrentSession().save(user);
    }
    /**
     * 数据检索
     * @return user 用户对象集合(预留)
     */
	public List<User> getUsers(){
			String hql="from user";
	        Query query=sessionFactory.getCurrentSession().createQuery(hql);
	        return query.list();
	}
}
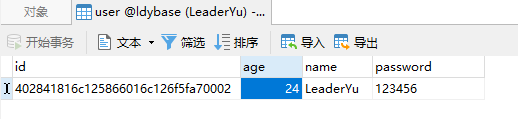
(4)User.java这个就是数据库对应的实体类了。我这边没有配置数据库映射文件hbm.xml 因为我直接在实体类上用注解去和数据库对应上,感觉这样比较省事。然后我user表的id是varchar类型的是系统产生的32位的uuid
package com.ldy.model;

import javax.persistence.Column;
import javax.persistence.Entity;
import javax.persistence.GeneratedValue;
import javax.persistence.Id;
import javax.persistence.Table;
import org.hibernate.annotations.GenericGenerator;
/**
 * 用户实体类
 * @author ldy
 *
 */
@Entity
@Table(name = "user")
public class User {
	@Id
	@Column(name = "id")
    @GeneratedValue(generator = "system-uuid")
    @GenericGenerator(name = "system-uuid", strategy = "uuid")
	private String id ;

	@Column(name = "name")
	private String name;

	@Column(name = "password")
	private String password;

	@Column(name = "age")
	private int age;

	public String getId() {
		return id;
	}
	public void setId(String id) {
		this.id = id;
	}
	public String getName() {
		return name;
	}
	public void setName(String name) {
		this.name = name;
	}
	public String getPassword() {
		return password;
	}
	public void setPassword(String password) {
		this.password = password;
	}
	public int getAge() {
		return age;
	}
	public void setAge(int age) {
		this.age = age;
	}


}
4.html页面。
html页面:
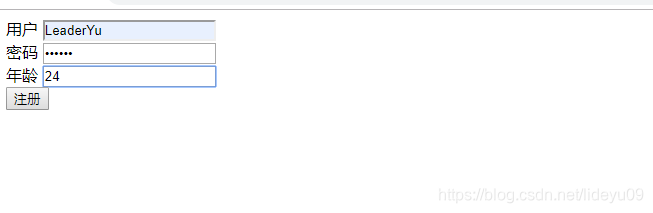
1.addUser.html
<!DOCTYPE html>
<html>
<head>
<meta charset="UTF-8">
<title>添加用户</title>
</head>
<body>
	<form action="/LdyBase/user/addUser.do" method="post">
		用户	<input type="text" name="name"/><br/>
		密码 <input type="password" name="password"/><br/>
		年龄 <input type="text" name="age"/><br/>
		<input type="submit" value="注册">
	</form>
</body>
</html>
2.error.html
<!DOCTYPE html>
<html>
<head>
<meta charset="UTF-8">
<title>注册失败</title>
</head>
<body>
失败了阿,朋友!
</body>
</html>
3.success.html
<!DOCTYPE html>
<html>
<head>
<meta charset="UTF-8">
<title>Insert title here</title>
</head>
<body>
终于success了。
</body>
</html>
至此这个spring+pringmvc+hibernate框架就算搭建成功了。
以前一直用公司的框架直接开发 这次搭建遇到了各种问题有的小问题没记,记了几个主要的。学习了。
问题1:java.util.concurrent.ExecutionException: org.apache.catalina.LifecycleException: Failed to start component [StandardEngine[Catalina].StandardHost[localhost].StandardContext[/LdyBase]]
答:这个问题简单,方法重新构建路径选择合适的jdk。jar包缺失
问题2:Could not autowire field: private com.ldy.service.UserService com.ldy.action.UserAction.userService; nested exception is org.springframework.beans.factory.CannotLoadBeanClassException: Cannot find class [com.mchange.v2.c3p0.ComboPooledDataSource] for bean with name ‘dataSource’ defined in class path resource [config/applicationContext.xml]; nested exception is java.lang.ClassNotFoundException: com.mchange.v2.c3p0.ComboPooledDataSource
缺失c3p0的jar包,主要的时间都在找jar包,然后找到了一个网站可以去找找,不能说都有,但是大部分有。
附上链接 酷派网
问题3:sessionFactory.getCurrentSession().save(user); 代码执行都没有任何问题,但是数据库没有保存成功。
解决思路:1.这个时候还是要捕捉下异常,然后打印问题。
2.配置SessionFactory 时设置自动提交 <prop key="hibernate.connection.autocommit">true</prop>
3.Service层中是否在调用DAO层中的save()方法之前添加注解@Transactional,又涉及到操作数据库的都要加上这个注解
搭的有点简单 因为只是说想看看自己搭个spring+pringmvc+hibernate框架会是怎么样的心态 所以只要能实现数据插入就行了。下午看看 在搭个spring+pringmvc+mybatis的框架。


 571
571


 到【灌水乐园】发言


