


 本文介绍如何在Shiro安全框架中整合EhCache缓存,包括配置步骤、注解使用、序列化需求及常见问题解决。涵盖权限数据与业务数据缓存策略,提升系统查询性能。
缓存简介:
缓存可以提高查询数据性能,对同一批数据进行多次查询时, 第一次查询走数据库,查询数据后,将数据保存在内存中,
第二次以后查询可以直接从内存获取数据,而不需要和数据库进行交互。
每次访问一个需要被权限控制资源时,调用Realm的授权方法,根据当前用户查询角色(role)和权限(permission)信息,
每次调用 都会查询一次数据库。
问题: 为什么使用ehcache而不使用redis缓存?
1、Shiro 默认对ehcache的支持
2、在后台管理系统中 ehcache使用非常普遍 ,因为spring可以集成ehcache。
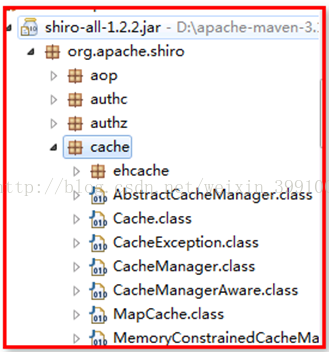
1. shiro和EhCache 框架整合
第一步: 在common_parent 导入 ehcache maven坐标
导入Ehcache 开发包
<!--导入eheache的缓存包 -->
       <dependency>
           <groupId>net.sf.ehcache</groupId>
           <artifactId>ehcache-core</artifactId>
           <version>2.6.11</version>
       </dependency>
导入Spring 整合 ehcache包 spring-context-support 包。
第二步: 使用ehcache ,导入ehcache.xml 配置文件
解压 ehcache-core.jar包 ,将ehcache-failsafe.xml 复制src/main/resources
改名 ehcache.xml
自定义缓存区
<ehcache xmlns:xsi="http://www.w3.org/2001/XMLSchema-instance" xsi:noNamespaceSchemaLocation="../config/ehcache.xsd">
	<!-- 配置缓存文件夹
		默认:path="java.io.tmpdir"
		 eternal="true":ture为设置缓存永不过期
		 通过注解当进行增删改时清除缓存,这样就会是同步数据库的缓存了
	-->
    <diskStore path="E:\\temp"/>
    <defaultCache
            maxElementsInMemory="10000"
            eternal="true"
            maxElementsOnDisk="10000000"
            diskExpiryThreadIntervalSeconds="120"
            memoryStoreEvictionPolicy="LRU">
        <persistence strategy="localTempSwap"/>
    </defaultCache>
    <cache
    		name="bos"
            maxElementsInMemory="10000"
            eternal="true"
            maxElementsOnDisk="10000000"
            diskExpiryThreadIntervalSeconds="120"
            memoryStoreEvictionPolicy="LRU">
        <persistence strategy="localTempSwap"/>
    </cache>
</ehcache>
其中 name = “bos”,表示缓存的名称
属性简介:
name:指定当前CacheManager的名称。
dynamicConfig:boolean类型。表示是否可以动态的更新配置,默认为true。当设置为false的时候,我们在运行期通过CacheManager的Configuration来改变配置信息时将不会发生作用。使用代码进行配置时我们可以通过Configuration对象的dynamicConfig(booleandynamicConfig)方法来指定该配置。
maxBytesLocalDisk:在CacheManager级别指定能够使用的本地磁盘的最大容量。当指定了该属性后隐式的使所有Cache的overflowToDisk变为true,如需关闭则需要在对应的Cache上设置overflowToDisk为false。
maxBytesLocalHeap:在CacheManager级别指定能够使用的堆内存的最大容量。
maxBytesLocalOffHeap:在CacheManager级别指定能够使用的非堆内存的最大容量。当指定了该属性后会隐式的使所有Cache的overflowToDisk变为true,如需关闭则需在对应的Cache上设置overflowToOffHeap为false。该属性只对企业版Ehcache有用。
defaultTransactionTimeoutInSeconds:
updateCheck:boolean类型,是否检查更新,默认为true。当设置为true时,CacheManager会定期的从网上去检查当前的Ehcache是否是最新的版本,如果不是,则会将比当前版本新的版本列出来。
需要注意的是当我们在CacheManager级别上指定了maxBytesLocalOffHeap时会使overflowToOffHeap的默认值变为true。也就是说该CacheManager里面所有的Cache在没有显示的指定overflowToOffHeap属性值时其值默认都是true,原本默认是false。

第三步: 配置shiro整合ehcache
创建applicationContext-cache.xml文件,将ehcacheManager 交给spring 管理
<?xml version="1.0" encoding="UTF-8"?>
<beans xmlns="http://www.springframework.org/schema/beans"
	xmlns:xsi="http://www.w3.org/2001/XMLSchema-instance"
	xmlns:cache="http://www.springframework.org/schema/cache"
	xsi:schemaLocation="
		http://www.springframework.org/schema/beans
		http://www.springframework.org/schema/beans/spring-beans.xsd
		http://www.springframework.org/schema/cache
		http://www.springframework.org/schema/cache/spring-cache.xsd">
	<!-- 添加缓存管理 -->
    <!-- cacheManager工厂类,指定ehcache.xml的位置 -->
    <bean id="ehcacheManagerFactory" class="org.springframework.cache.ehcache.EhCacheManagerFactoryBean">
         <property name="configLocation" value="classpath:ehcache.xml" />
    </bean>
</beans>
在applicationContext.xml中,导入ehCache缓存
<!--添加eache缓存的应用 -->
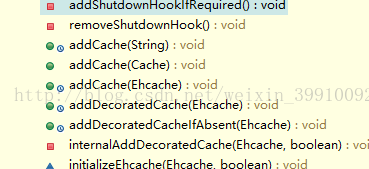
<import resource="classpath:applicationContext-cache.xml"/>默认Ehcache 提供CacheManager,并提供 addCache()、getCache() 这些方法,原理在内存保存key-value
CacheManager.java中提供的方法:
1. 配置shiro整合ehcache完成对授权数据缓存
把哪些数据作为缓存key ? 把哪些数据作为缓存value ?
第一步: 配置shiro封装缓存管理器,配置在applicationContext-cache.xml中
<!-- shiro封装cacheManager -->
<bean id="shiroCacheManager" class="org.apache.shiro.cache.ehcache.EhCacheManager">
	<property name="cacheManager" ref="ehcacheManagerFactory"></property>
</bean>
第二步: 将shiro的缓存管理器,注入到安全管理器中 在shiro中
回顾shiro机制:应用程序代码 – Subject –SecurityManager– Realm (查询认证和授权数据)
要想在Realm中将查询的数据放置到缓存中,需要在Realm之前创建动态代理对象,通过缓存代理控制Realm。配置在applicationContext-shiro.xml中
<!-- 配置安全管理器 -->
<bean id="securityManager" class="org.apache.shiro.web.mgt.DefaultWebSecurityManager">
	<property name="realm" ref="bosRealm"></property>
	<!-- 将shiro的缓存管理器,注入到安全管理器中
		要想在Realm中将查询的数据放置到缓存中,
		需要在Realm之前创建动态代理对象,通过缓存代理控制Realm
	 -->
	<property name="cacheManager" ref="shiroCacheManager"></property>
</bean>
第三步: 对认证数据、授权数据哪些进行缓存 ?
配置Realm
<!-- 将自定义Realm注入安全管理器 SecurityManager当中 -->
<bean id="bosRealm" class="cn.baidu.bos.realm.BosRealm">
	<!--
		对认证数据、授权数据 哪些进行缓存
		缓存区的名字就是ehcache.xml 自定义cache的name
	-->
	<property name="authorizationCacheName" value="bos"></property>
</bean>
出现bug:注意:使需要缓存对象,实现Serializable接口
java.io.NotSerializableException: ...
解决方案:
需要在缓存涉及实体类实现Serializable接口
第四步:测试,不会再查询BosRealm类中的doGetAuthorizationInfo授权中的方法。
2. Ehcache对普通业务数据进行缓存
Spring 整合Ehcache后,缓存注解的使用
当spring整合缓存框架后,提供了一套注解《spring-framework-reference.pdf》
参考:
spring-framework-reference.pdf”
重点了解:
@Cacheable 应用缓存区,对方法返回结果进行缓存 ----用于查询方法
@CacheEvict清除缓存区数据 ---用于增加、修改、删除方法
@CachePut 在不影响方法执行的情况下更新缓存
@Cacheing 将多个缓存操作重新组合到一个方法中
@CacheConfig 在类级别上共享一些与缓存相关的设置
第一步:在applicationContext-cache.xml中 配置spring 缓存管理器,封装ehcache自带CacheManager
	<!-- spring封装ehcache缓存管理器 -->
	<bean id="springCacheManager" class="org.springframework.cache.ehcache.EhCacheCacheManager">
		<property name="cacheManager" ref="ehcacheManagerFactory"></property>
	</bean>
第二步: 激活spring 缓存注解
<!-- 启用缓存注解功能,这个是必须的,否则注解不会生效,另外,该注解一定要声明在spring主配置文件中才会生效 -->
<cache:annotation-driven cache-manager="springCacheManager"/>
第三步: 配置ehcache.xml文件,添加一个收派标准的缓存区域,命名standard
<cache
    	name="standard"
        maxElementsInMemory="10000"
        eternal="true"
        maxElementsOnDisk="10000000"
        diskExpiryThreadIntervalSeconds="120"
        memoryStoreEvictionPolicy="LRU">
     <persistence strategy="localTempSwap"/>
</cache>第四步:对实体类Standard进行序列化
第五步:在被spring管理bean对象方法上使用@Cacheable 、@CacheEvict
基于注解的相关概念:
1.@Cacheable
可以标记在一个方法上,也可以标记在一个类上。当标记在一个方法上时表示该方法是支持缓存的,当标记在一个类上时则表示该类所有的方法都是支持缓存的。对于一个支持缓存的方法,Spring会在其被调用后将其返回值缓存起来,以保证下次利用同样的参数来执行该方法时可以直接从缓存中获取结果,而不需要再次执行该方法。Spring在缓存方法的返回值时是以键值对进行缓存的,值就是方法的返回结果,至于键的话,Spring又支持两种策略,默认策略和自定义策略。
需要注意的是当一个支持缓存的方法在对象内部被调用时是不会触发缓存功能的。@Cacheable可以指定三个属性,value、key和condition。
2.@CachePut
在支持Spring Cache的环境下,对于使用@Cacheable标注的方法,Spring在每次执行前都会检查Cache中是否存在相同key的缓存元素,如果存在就不再执行该方法,而是直接从缓存中获取结果进行返回,否则才会执行并将返回结果存入指定的缓存中。而@CachePut也可以声明一个方法支持缓存功能。与@Cacheable不同的是使用@CachePut标注的方法在执行前不会去检查缓存中是否存在之前执行过的结果,而是每次都会执行该方法,并将执行结果以键值对的形式存入指定的缓存中。
@CachePut也可以标注在类上和方法上。使用@CachePut时我们可以指定的属性跟@Cacheable是一样的。
3.@CacheEvict
@CacheEvict是用来标注在需要清除缓存元素的方法或类上的。当标记在一个类上时表示其中所有的方法的执行都会触发缓存的清除操作。@CacheEvict可以指定的属性有value、key、condition、allEntries和beforeInvocation。其中value、key和condition的语义与@Cacheable对应的属性类似。即value表示清除操作是发生在哪些Cache上的(对应Cache的名称);key表示需要清除的是哪个key,如未指定则会使用默认策略生成的key;condition表示清除操作发生的条件。
属性一 :value
必须指定的,其表示当前方法的返回值是会被缓存在哪个Cache上的,对应Cache的名称,为ehcache.xml中的<cache name="myCache"/> 。其可以是一个Cache也可以是多个Cache,当需要指定多个Cache时其是一个数组。
属性二 :key
缓存的Key,当我们没有指定该属性时,Spring将使用默认策略生成key(表示使用方法的参数类型及参数值作为key),key属性是用来指定Spring缓存方法的返回结果时对应的key的。该属性支持SpringEL表达式。我们还可以自定义策略:自定义策略是指我们可以通过Spring的EL表达式来指定我们的key。这里的EL表达式可以使用方法参数及它们对应的属性。使用方法参数时我们可以直接使用“#参数名”或者“#p参数index”
key的生成策略有两种:一种是默认策略,一种是自定义策略
¹默认的key生成策略是通过KeyGenerator生成的,其默认策略如下:
1.如果方法没有参数,则使用0作为key。
2.如果只有一个参数的话则使用该参数作为key。
3.如果参数多余一个的话则使用所有参数的hashCode作为key
²自定义策略是指我们可以通过Spring的EL表达式来指定我们的key。这里的EL表达式可以使用方法参数及它们对应的属性。使用方法参数时我们可以直接使用“#参数名”或者“#p参数index
属性三 :condition
有的时候我们可能并不希望缓存一个方法所有的返回结果。通过condition属性可以实现这一功能。
condition属性默认为空,表示将缓存所有的调用情形。其值是通过SpringEL表达式来指定的,当为true时表示进行缓存处理;当为false时表示不进行缓存处理,即每次调用该方法时该方法都会执行一次。如下示例表示只有当user的id为偶数时才会进行缓存
@Cacheable(value={"users"}, key="#user.id", condition="#user.id%2==0")
public User find(User user) {
System.out.println("find user by user " + user);
return user;
}
属性四 :allEntries
是boolean类型,表示是否需要清除缓存中的所有元素。默认为false,表示不需要。当指定了allEntries为true时,Spring Cache将忽略指定的key。有的时候我们需要Cache一下清除所有的元素,这比一个一个清除元素更有效率。
@CacheEvict(value="users", allEntries=true)
public void delete(Integer id) {
System.out.println("delete user by id: " + id);
}
属性五 :beforeInvocation
清除操作默认是在对应方法成功执行之后触发的,即方法如果因为抛出异常而未能成功返回时也不会触发清除操作。使用beforeInvocation可以改变触发清除操作的时间,当我们指定该属性值为true时,Spring会在调用该方法之前清除缓存中的指定元素。
@CacheEvict(value="users", beforeInvocation=true)
public void delete(Integer id) {
System.out.println("delete user by id: " + id);
}
注意我们也可以使用ehcache的去除策略最近使用(LRU)"策略,其它还有先入先出FIFO,最少使用LFU,较少使用LRU
修改StandardServiceImpl.java文件中的2个方法,例如:一个是查询,一个是新增
@Override
@Cacheable(value="standard")
publicList<Standard> findAll() {
returnstandardRepository.findAll();
}
@Override
@CacheEvict(value="standard",allEntries=true)
publicvoidsave(Standardstandard) {
standardRepository.save(standard);
}
其中:all-entries="true",如果设置为true,表示该方法执行后,清理缓存数据;false为不清理缓存。
第六步:测试查询,再测试新增
3. 有参数的方法如何对结果数据进行缓存
参考:
spring-framework-reference.pdf”

针对数据在不同条件下进行不同缓存,设置@Cacheable注解 key属性,只要key的值相同,就查询缓存的数据,key的值不同,就会查询数据库
修改StandardServiceImpl.java中的findPageData的方法
这里使用自定义策略
自定义策略是指我们可以通过Spring的EL表达式来指定我们的key。这里的EL表达式可以使用方法参数及它们对应的属性。使用方法参数时我们可以直接使用“#参数名”或者“#p参数index
@Override
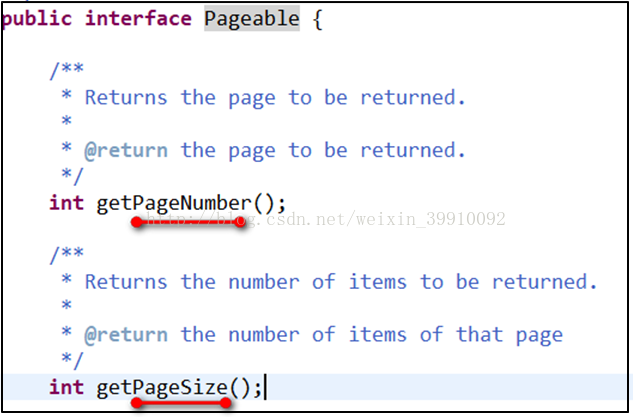
@Cacheable(value="standard",key="#pageable.pageNumber+'_'+#pageable.pageSize")
publicPage<Standard> findPageData(Pageablepageable) {
returnstandardRepository.findAll(pageable);
}
这里注意:
其中
#pageable.pageNumber
和
#pageable.pageSize
表示参数Pageable对象中的2个属性
如果传递的pageNuber和pageSize的值相同
第一遍查询执行Page<Standard> findPageData(Pageable pageable) 的方法;
第二遍查询不会执行Page<Standard> findPageData(Pageable pageable) 的方法,从缓存中获取数据。
----------------------------------------------------------------------------------------
applicationContext-cache.xml的总的配置
<?xml version="1.0" encoding="UTF-8"?>
<beans xmlns="http://www.springframework.org/schema/beans"
	xmlns:xsi="http://www.w3.org/2001/XMLSchema-instance"
	xmlns:cache="http://www.springframework.org/schema/cache"
	xsi:schemaLocation="
		http://www.springframework.org/schema/beans
		http://www.springframework.org/schema/beans/spring-beans.xsd
		http://www.springframework.org/schema/cache
		http://www.springframework.org/schema/cache/spring-cache.xsd">
	<!-- 启用缓存注解功能,这个是必须的,否则注解不会生效,另外,该注解一定要声明在spring主配置文件中才会生效 -->
    <cache:annotation-driven cache-manager="springCacheManager"/>
	<!-- 添加缓存管理 -->
    <!-- cacheManager工厂类,指定ehcache.xml的位置 -->
    <bean id="ehcacheManagerFactory" class="org.springframework.cache.ehcache.EhCacheManagerFactoryBean">
         <property name="configLocation" value="classpath:ehcache.xml" />
    </bean>
	<!-- shiro封装cacheManager -->
	<bean id="shiroCacheManager" class="org.apache.shiro.cache.ehcache.EhCacheManager">
		<property name="cacheManager" ref="ehcacheManagerFactory"></property>
	</bean>
	<!-- spring封装ehcache缓存管理器 -->
	<bean id="springCacheManager" class="org.springframework.cache.ehcache.EhCacheCacheManager">
		<property name="cacheManager" ref="ehcacheManagerFactory"></property>
	</bean>
</beans>
<ehcache xmlns:xsi="http://www.w3.org/2001/XMLSchema-instance" xsi:noNamespaceSchemaLocation="../config/ehcache.xsd">
	<!-- 配置缓存文件夹
		默认:path="java.io.tmpdir"
		eternal="true":ture为设置缓存永不过期
		通过注解当进行增删改时清除缓存,这样就会是同步数据库的缓存了
	-->
    <diskStore path="E:\\temp"/>
    <defaultCache
            maxElementsInMemory="10000"
            eternal="true"
            maxElementsOnDisk="10000000"
            diskExpiryThreadIntervalSeconds="120"
            memoryStoreEvictionPolicy="LRU">
        <persistence strategy="localTempSwap"/>
    </defaultCache>
    <cache
    		name="bos"
            maxElementsInMemory="10000"
            eternal="true"
            maxElementsOnDisk="10000000"
            diskExpiryThreadIntervalSeconds="120"
            memoryStoreEvictionPolicy="LRU">
        <persistence strategy="localTempSwap"/>
    </cache>
    <cache
    		name="standard"
            maxElementsInMemory="10000"
            eternal="true"
            maxElementsOnDisk="10000000"
            diskExpiryThreadIntervalSeconds="120"
            memoryStoreEvictionPolicy="LRU">
        <persistence strategy="localTempSwap"/>
    </cache>
</ehcache>


 743
743

 被折叠的 条评论
为什么被折叠?
被折叠的 条评论
为什么被折叠?
 到【灌水乐园】发言


