


 本文介绍了如何在Spring Boot应用中引入Actuator依赖,用于健康检查和监控。通过配置`application.yml`文件,开启了所有端点的暴露,并特别排除了`env`和`beans`端点。同时,配置ShiroConfig以允许匿名访问`/actuator/**`路径。通过访问`http://localhost:9999/actuator/info`,可以查看相关信息。文章重点在于Actuator的使用和安全配置。
- 导入pom
 <dependency>
            <groupId>org.springframework.boot</groupId>
            <artifactId>spring-boot-starter-actuator</artifactId>
        </dependency>
- 配置yml(由于是2.0的将所有的端点都屏蔽了)
#开启actuator在springboot2 端口问题
management:
  endpoints:
    web:
      exposure:
        include: "*"
      #  exclude: env,beans  除去这两个端口外
- 配置shiroConfig
filterMap.put("/actuator/**", "anon");
- 打开链接
http://localhost:9999/actuator/info
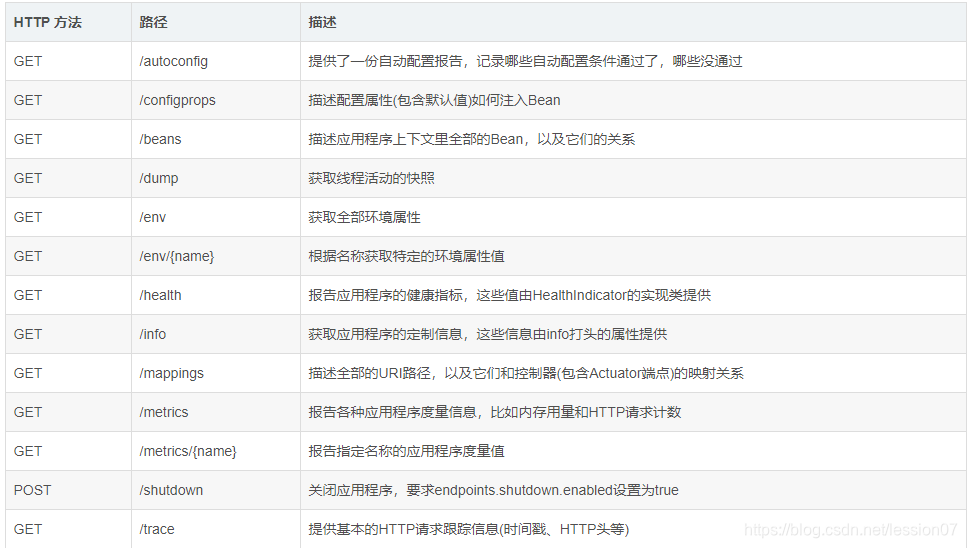
至于actuator/后面的是接info还是其他的,主要看自己的要求


 556
556

 被折叠的 条评论
为什么被折叠?
被折叠的 条评论
为什么被折叠?
 到【灌水乐园】发言


