


GRPC
宝藏网站:http://cmsblogs.com/
今天来学习下grpc,遵循 What-Why-How
What
关键词:RPC, HTTP2.0 protobuf 3.x Netty4.x
同类技术:dubbo, grpc, thrift,feign
解决了什么问题:
- grpc是干什么的:解决服务间相互调用的问题,使得组件之间可以相互发送请求传输数据。gRPC使客户端程序可以像调本地程序一样调用不同服务器上的应用程序
- 优缺点:性能高(通信采用Netty,http2.0), 通过
proto定义的接口也是非常清晰和灵活 (它的优点也对应其他技术的缺点)
组成部分
<dependency>
	<groupId>io.grpc</groupId>
	<artifactId>grpc-protobuf</artifactId>
</dependency>
<dependency>
	<groupId>io.grpc</groupId>
	<artifactId>grpc-stub</artifactId>
</dependency>
<dependency>
	<groupId>io.grpc</groupId>
	<artifactId>grpc-netty</artifactId>
</dependency>
<dependency>
Why 存在?
为什么会出现:基于之前各种技术的弊端吧
How 来个Hello World?
说做就做
1. 新建Maven项目
3个依赖包
<properties>
       <grpc.version>1.0.3</grpc.version>
   </properties>

   <dependencies>
       <dependency>
           <groupId>io.grpc</groupId>
           <artifactId>grpc-netty</artifactId>
           <version>${grpc.version}</version>
       </dependency>
       <dependency>
           <groupId>io.grpc</groupId>
           <artifactId>grpc-protobuf</artifactId>
           <version>${grpc.version}</version>
       </dependency>
       <dependency>
           <groupId>io.grpc</groupId>
           <artifactId>grpc-stub</artifactId>
           <version>${grpc.version}</version>
       </dependency>
   </dependencies>
转换工具
<build>
       <extensions>
           <extension>
               <groupId>kr.motd.maven</groupId>
               <artifactId>os-maven-plugin</artifactId>
               <version>1.4.1.Final</version>
           </extension>
       </extensions>
       <plugins>
           <plugin>
               <groupId>org.xolstice.maven.plugins</groupId>
               <artifactId>protobuf-maven-plugin</artifactId>
               <version>0.5.0</version>
               <configuration>
                   <protocArtifact>com.google.protobuf:protoc:3.1.0:exe:${os.detected.classifier}</protocArtifact>
                   <pluginId>grpc-java</pluginId>
                   <pluginArtifact>io.grpc:protoc-gen-grpc-java:${grpc.version}:exe:${os.detected.classifier}</pluginArtifact>
               </configuration>
               <executions>
                   <execution>
                       <goals>
                           <goal>compile</goal>
                           <goal>compile-custom</goal>
                       </goals>
                   </execution>
               </executions>
           </plugin>
       </plugins>
   </build>
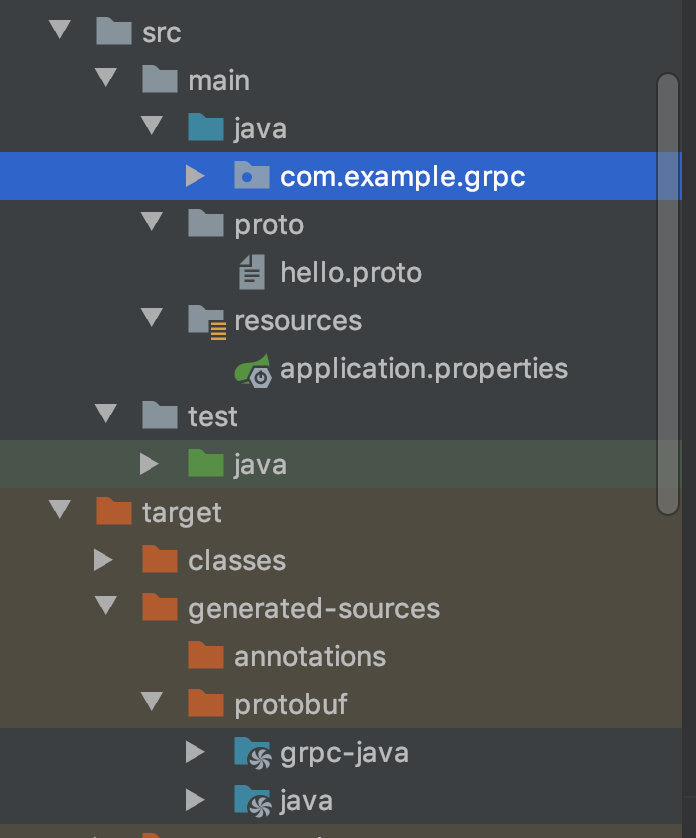
2. 编写proto文件
在main目录下建立一个proto文件夹,然后在里面建立hello.proto,内容如下:
syntax = "proto3";

option java_multiple_files = true;
option java_package = "io.grpc.examples.helloworld";
option java_outer_classname = "HelloWorldProto";
option objc_class_prefix = "HLW";

package helloworld;

// The greeting service definition.
service Greeter {
 // Sends a greeting
 rpc SayHello (HelloRequest) returns (HelloReply) {}
}

// The request message containing the user's name.
message HelloRequest {
 string name = 1;
}

// The response message containing the greetings
message HelloReply {
 string message = 1;
}
接下来执行 mvn compile,就会生成如下代码,如果未被标记为源代码目录的话,就右键标记下:
3. 服务端代码
public class HelloWorldServer {

   private int port = 50051;
   private Server server;

   /**
    * 启动服务
    * @throws IOException
    */
   private void start() throws IOException {
       server = ServerBuilder.forPort(port)
                             .addService(new GreeterImpl())
                             .build()
                             .start();

       System.out.println("service start...");

       Runtime.getRuntime().addShutdownHook(new Thread() {

           @Override
           public void run() {
               System.err.println("*** shutting down gRPC server since JVM is shutting down");
               HelloWorldServer.this.stop();
               System.err.println("*** server shut down");
           }
       });
   }

   private void stop() {
       if (server != null) {
           server.shutdown();
       }
   }

   // block 一直到退出程序
   private void blockUntilShutdown() throws InterruptedException {
       if (server != null) {
           server.awaitTermination();
       }
   }

   public static void main(String[] args) throws IOException, InterruptedException {
       final HelloWorldServer server = new HelloWorldServer();
       server.start();
       server.blockUntilShutdown();
   }

   // 实现 定义一个实现服务接口的类
   private class GreeterImpl extends GreeterGrpc.GreeterImplBase {

       public void sayHello(HelloRequest req, StreamObserver<HelloReply> responseObserver) {
           //获取参数
           System.out.println("收到的信息:"+req.getName());

           //这里可以放置具体业务处理代码 start

           //这里可以放置具体业务处理代码 end

           //构造返回
           HelloReply reply = HelloReply.newBuilder().setMessage(("Hello: " + req.getName())).build();
           responseObserver.onNext(reply);
           responseObserver.onCompleted();
       }
   }
}
4. 客户端代码
public class HelloWorldClient {
private final ManagedChannel channel; //一个gRPC信道
private final GreeterGrpc.GreeterBlockingStub blockingStub;//阻塞/同步 存根
//初始化信道和存根
public HelloWorldClient(String host,int port){
this(ManagedChannelBuilder.forAddress(host, port)
// Channels are secure by default (via SSL/TLS). For the example we disable TLS to avoid
// needing certificates.
.usePlaintext(true));
}
/** Construct client for accessing RouteGuide server using the existing channel. */
private HelloWorldClient(ManagedChannelBuilder<?> channelBuilder) {
channel = channelBuilder.build();
blockingStub = GreeterGrpc.newBlockingStub(channel);
}
public void shutdown() throws InterruptedException {
channel.shutdown().awaitTermination(5, TimeUnit.SECONDS);
}
//客户端方法
public void greet(String name){
HelloRequest request = HelloRequest.newBuilder().setName(name).build();
HelloReply response;
try {
response = blockingStub.sayHello(request);
} catch (StatusRuntimeException e) {
System.out.println("RPC调用失败:"+e.getMessage());
return;
}
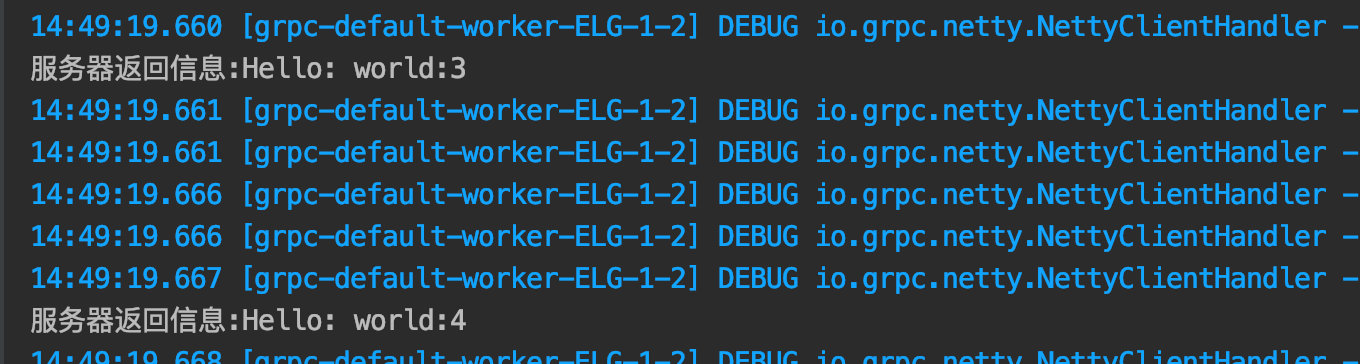
System.out.println("服务器返回信息:"+response.getMessage());
}
public static void main(String[] args) throws InterruptedException {
HelloWorldClient client = new HelloWorldClient("127.0.0.1",50051);
try {
for(int i=0;i<5;i++){
client.greet("world:"+i);
}
}finally {
client.shutdown();
}
}
}
5. 测试
启动服务端

启动客户端
6. 回顾分析
这一步思考做了什么,为什么跑通了,大概就是如下
- 引入3个依赖
grpc-netty,grpc-protobuf,grpc-stub通信,序列化,客户端,最后再引入build插件 - 写
proto文件,自己命名并且定义消息格式 - 用build工具生成代码,然后测试


 1128
1128

 被折叠的 条评论
为什么被折叠?
被折叠的 条评论
为什么被折叠?
 到【灌水乐园】发言


