


 本文详细介绍了Linux系统的网络配置,包括IP地址、子网掩码、IP通信判定、网络设定工具如ping和ifconfig的使用,以及图形和命令方式的IP设定。此外,还讲解了网关的配置、DNS解析设置,以及如何管理网络配置文件,并提供了DHCP服务的配置方法。
linux下的网络配置
1.什么是IP ADDRESS
internet protocol ADDRESS 网络进程地址
ipv4 internet protocol version 4
1.2x32 ip是由32个01组成
11111110.11111110.11111110.11111110 = 254.254.254.254
2.子网掩码
用来划分网络区域
子网掩码非0的位对应的ip上的数字表示这个ip的网络位
子网掩码0位对应的数字是ip的主机位
网络位表示网络区域
主机位表示网络区域里某台主机
3.ip通信判定
网络位一致,主机位不一致的2个IP可以直接通讯
172.25.254.1/24 24=255.255.255.0
172.25.254.2/24
172.25.0.1/16
4.网络设定工具
ping 检测网络是否通畅
ping -c1 ping 1 次
ping -w1 等待1秒
ping -c1 -w1 ip ping1次等待1秒

ifconfig 查看或设定网络接口
ifconfig                                   查看
ifconfig device ip/24              设定
ifconfig device down             关闭
ifconfig device up                  开启
ifconfig device ip/24              设定
ifconfig device down 关闭
ifconfig device up 开启


ip addr 检测或这顶网络接口
ip addr show                         检测
ip addr add ip/24 dev device 设定
ip addr del dev ens160 ip/24 删除
ip addr flush ens160             更改ip步骤
ip addr add  dev ens160 172.25.254.11/24
"注意: device的名字一个物理事实,看到什么名字只能用什么名字"
ip addr add ip/24 dev device 设定
ip addr del dev ens160 ip/24 删除
ip addr flush ens160 更改ip步骤
ip addr add dev ens160 172.25.254.11/24


5.图形方式设定ip
设定:
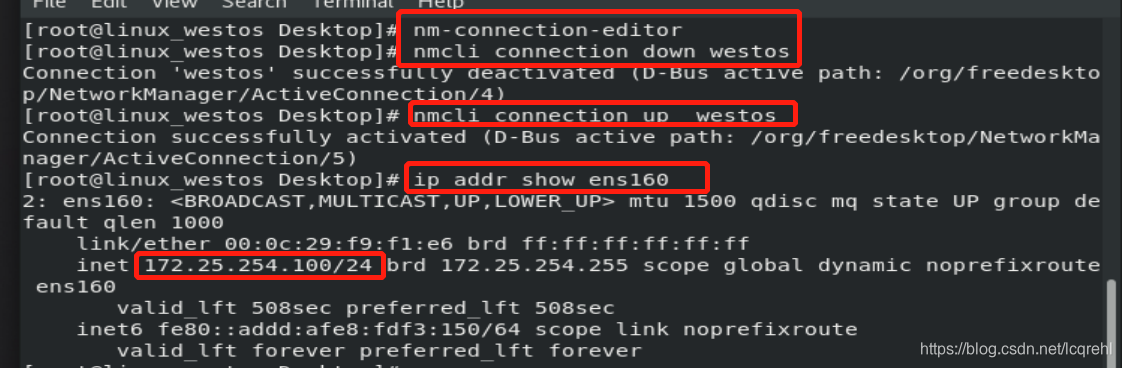
- nm-connection-editor
更改:
不建议用服务控制网络
systemctl restart NetworkManager
建议使用:
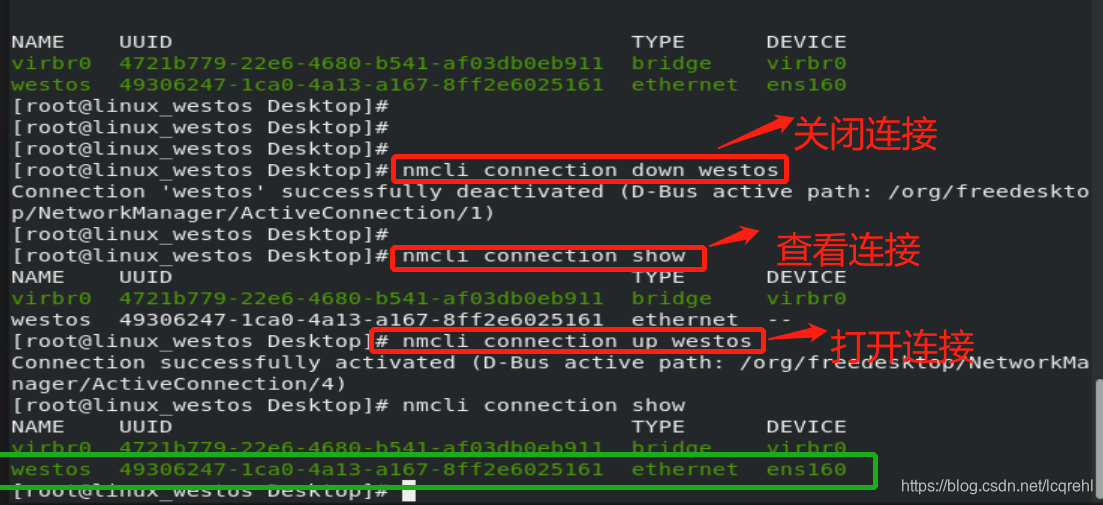
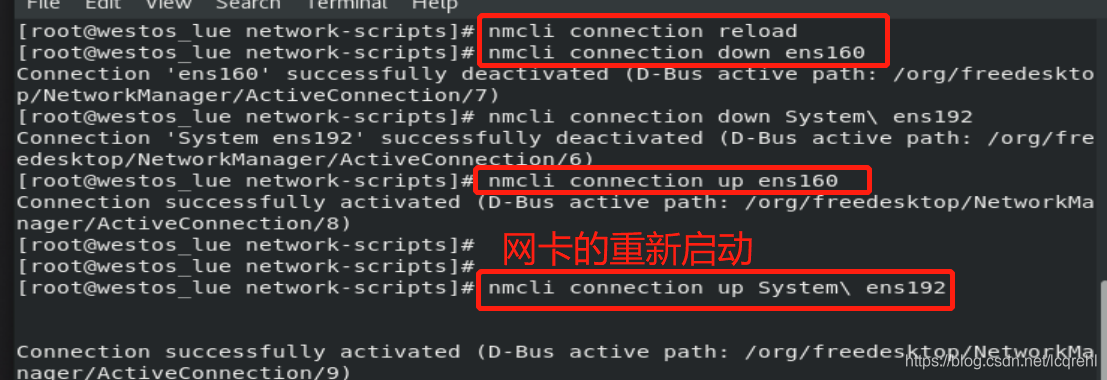
nmcli connection show
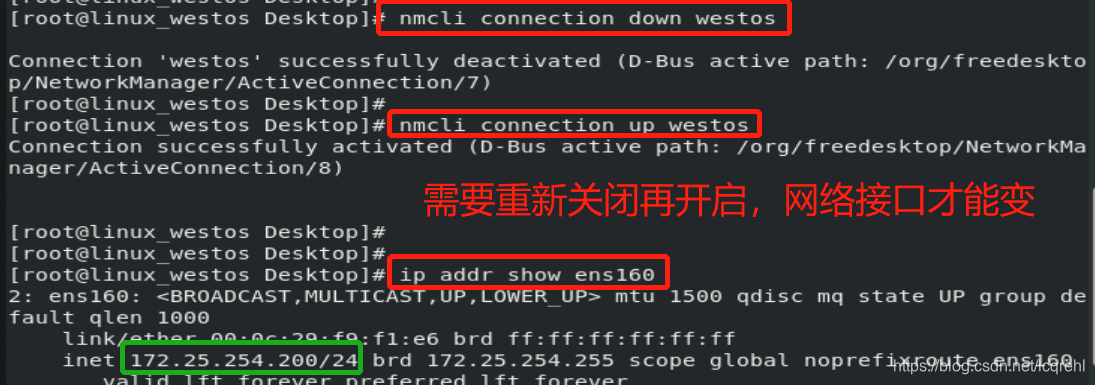
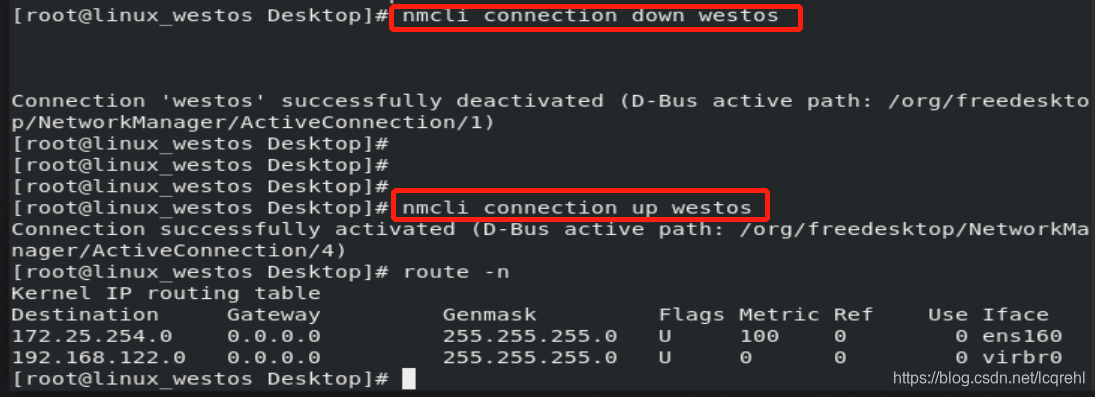
nmcli connection down westos
nmcli connection up westos
- nmtui 图文
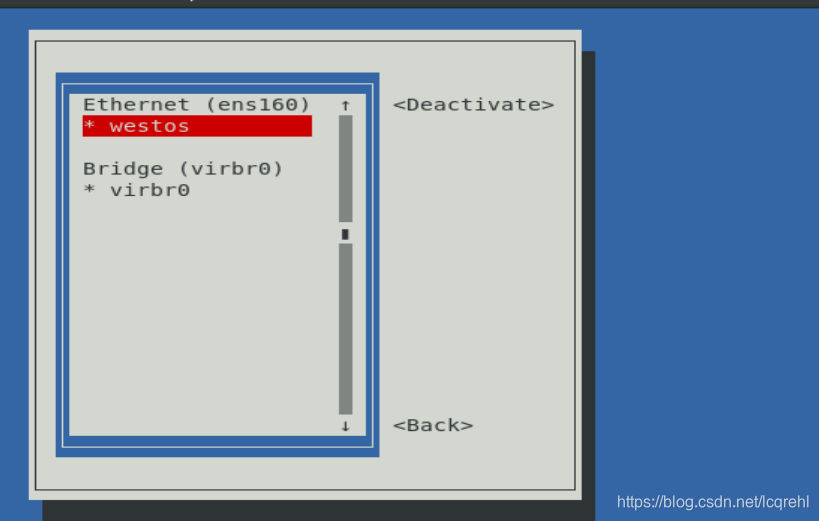
6.命令方式设定网络
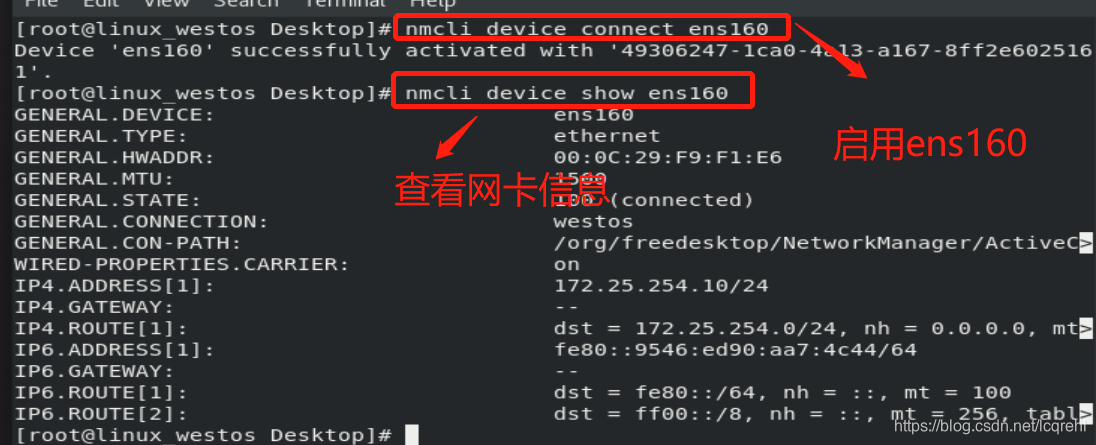
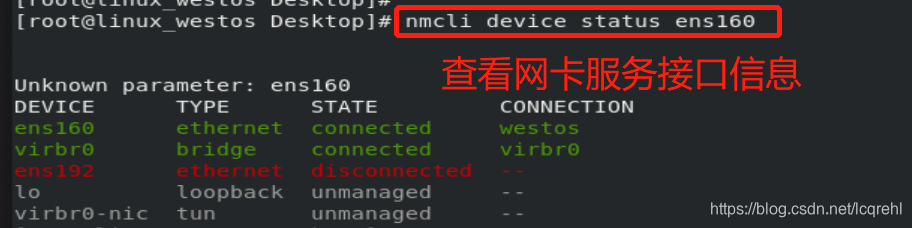
nmcli                   NetworkManager  必须开启

nmcli device connect ens160    启用ens160网卡
nmcli device disconnect ens160 关闭ens160网卡
nmcli device show ens160          查看网卡信息
nmcli device status ens160        查看网卡服务接口信息
nmcli connection show             查看连接
nmcli connection down westos 关闭连接
nmcli connection up westos      开启连接
nmcli connection delete westos 删除连接
添加连接
nmcli connection add type ethernet con-name westos ifname ens160 ip4 172.25.254.100/24
更改
nmcli connection modify westos  ipv4.addresses 172.25.254.200/24
添加连接
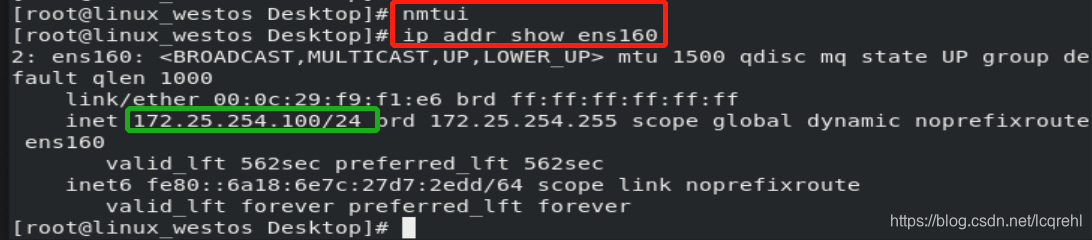
nmcli connection add type ethernet con-name westos ifname ens160 ip4 172.25.254.100/24

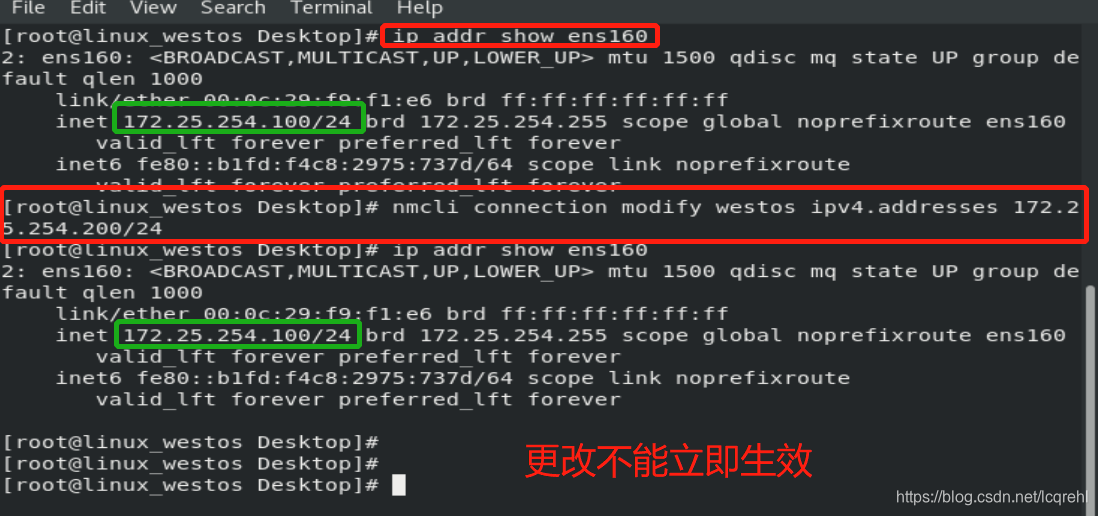
更改
nmcli connection modify westos ipv4.addresses 172.25.254.200/24
添加动态的网络
7.管理网络配置文件
网络配置目录
/etc/sysconfig/network-scripts/
网络配置文件的名命规则(vim /etc/sysconfig/network-scripts/ifcg-xxxx)
ifcfg-xxxx (ifcfg-westos )
DEVICE=xxx                                设备名称
BOOTPROTO=dhcp/static/none                设备工作方式
ONBOOT=yes                                网络服务开启时自动激活网卡
IPADDR=IP                                 ip地址
PREFIX=24                                 子网掩码
NETMASK=255.255.255.0                     子网掩码
NAME=                                     接口名称
dhcp网络设定
vim /etc/sysconfig/network-scripts/ifcfg-ens160

DEVICE=ens160
ONBOOT=yes
BOOTPROTO=dhcp
nmcli connection reload
示例:
静态网络设定文件
vim /etc/sysconfig/network-scripts/ifcfg-lue
DEVICE=ens160
ONBOOT=yes
BOOTPROTO=none
IPADDR=172.25.254.100
NETMASK=255.255.255.0
NAME=westos
nmcli connection reload
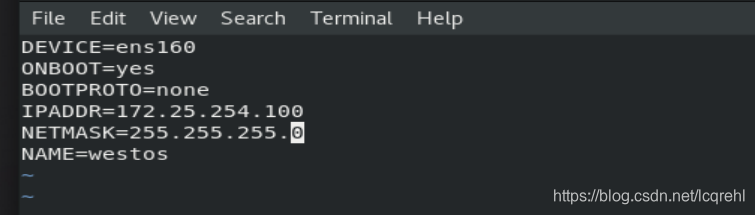


注:写完需要nmcli connection reload
当ip更改后,需要nmcli connection down westos,再nmcli connection up westos
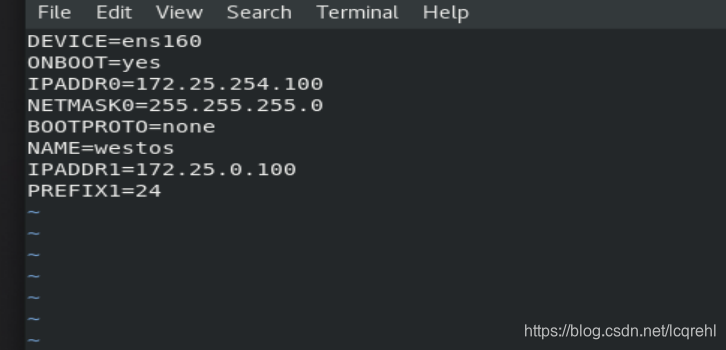
一块网卡上配置多个IP
vim /etc/sysconfig/network-scripts/ifcfg-lue
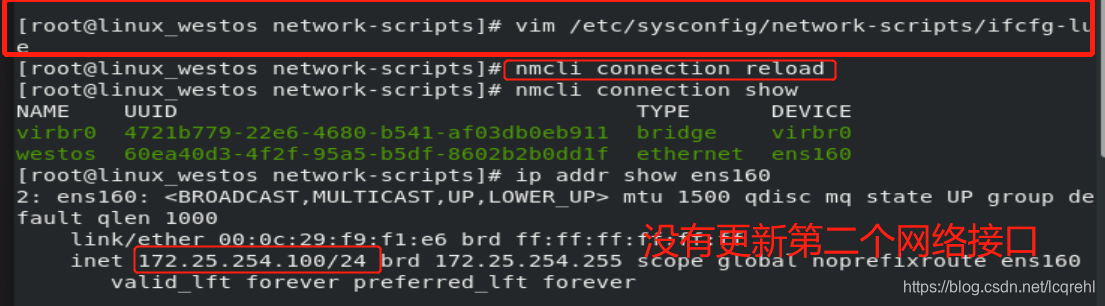
DEVICE=ens160
ONBOOT=yes
IPADDR0=172.25.254.100
NETMASK0=255.255.255.0
BOOTPROTO=none
NAME=westos
IPADDR1=172.25.0.100
PREFIX1=24
nmcli connection reload
ip addr show ens160

8.lo回环接口
回环接口------人的神经----127.0.0.1-----localhost
9.网关
- 把westos_lue双网卡主机变成路由器
网络环境设定

systemctl start firewalld
firewall-cmd --list
firewall-cmd --permanent --add-masquerade
firewall-cmd --list-all

vim /etc/sysctl.conf
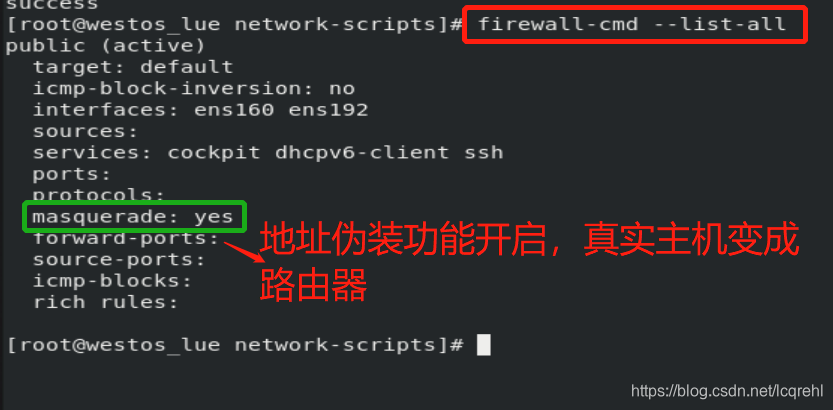
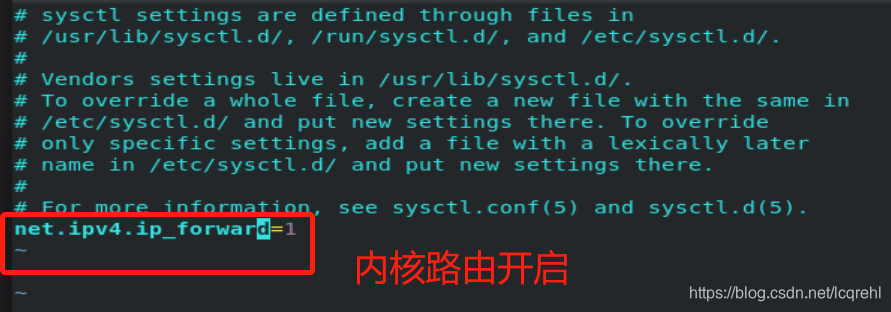
以上步骤完成,双网卡主机变成路由器
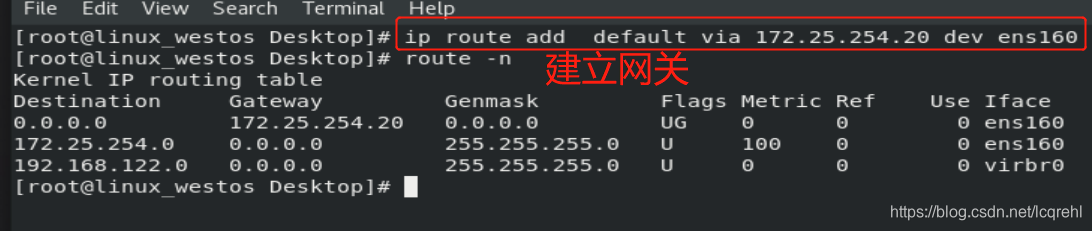
- linux_westos临时网关的设置
ip route add default via 172.25.254.20 dev ens160
当网卡重新启动,网关消失

- 设定单网卡主机linux_westos的网关
vim /etc/sysconfig/network 全局网关,针对所有没有设定网关的网卡生效
GATEWAY=172.25.254.20
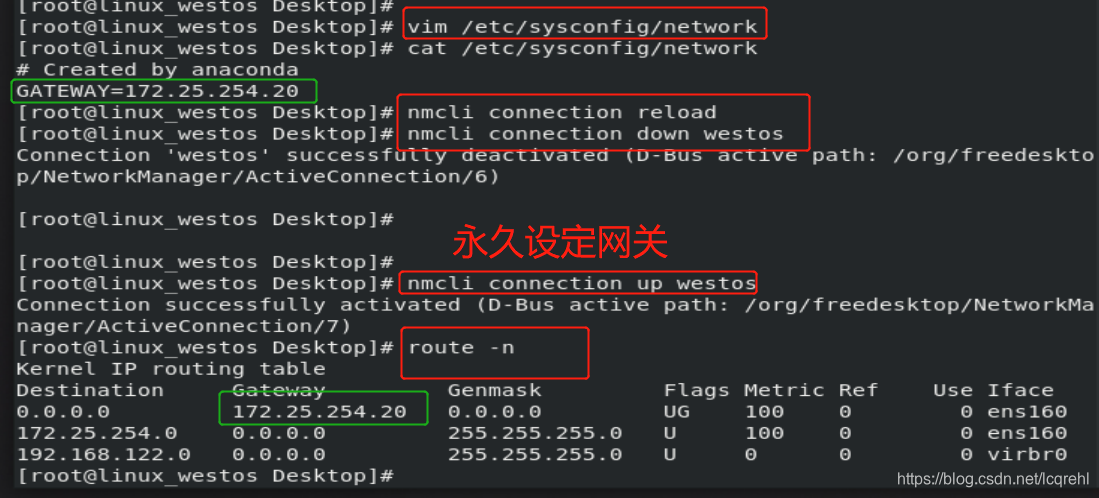
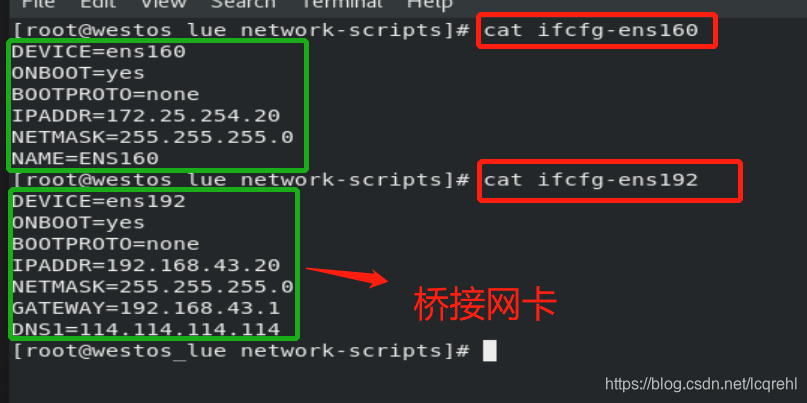
vim /etc/sysconfig/network-scripts/ifcfg-ens160
GATEWAY0=172.25.254.20 档网卡中设定的IP有多个时,指定对于那个IP生效
GATEWAY=172.25.254.20 档网卡中设定的IP只有一个时
route -n 查看网关
10.设定dns
地址解析
系统操作者对字符敏感
系统网络通信需要通过ip地址这个数字
当操作着输入网址www.baidu.com,这个网址不是一个可以通信的IP地址
于是必须要在系统中把www.baidu.com变成百度服务器的IP地址
这样的过程叫做地址解析
domain name server == 域名解析服务 解析就是把域名变成IP
vim /etc/hosts 本地解析文件,此文件中直接提供地址解析
ip 域名
220.181.111.188 www.baidu.com
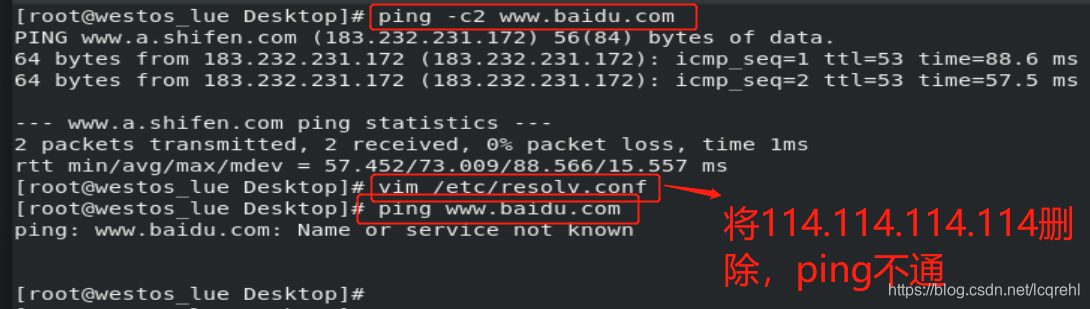
vim /etc/resolv.conf dns的指向文件 不需要重新启动网络立即生效
nameserver 114.114.114.114 当需要某个域名的IP地址时去问 114.114.114.114

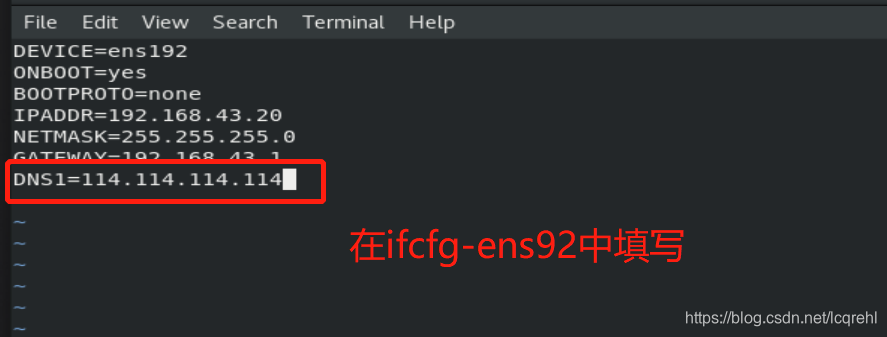
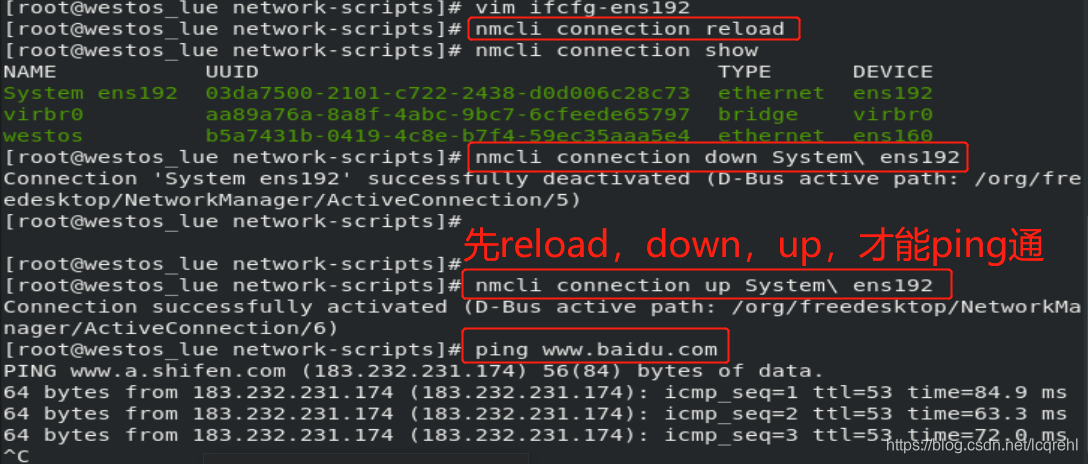
vim /etc/sysconfig/network-scripts/ifcfg-ens192
DNS1=114.114.114.114 需要重启网络,当网络重新启动
此参数会修改/etc/resolv.conf
注意:
当网络工作模式为dhcp时
系统会自动获得ip 网关 dns
那么/etc/resolv.conf会被获得到的信息修改
如果不需要获得dns信息 在网卡配置文件中加入
PREEDNS=no
11.设定解析的优先级
系统默认: /etc/hosts(files) > /etc/resolv.conf(myhostname)
vim /etc/nsswitch.conf
67 hosts: files dns myhostname etc/hosts优先

vim /etc/nsswitch.conf
67 hosts: dns files myhostname dns优先
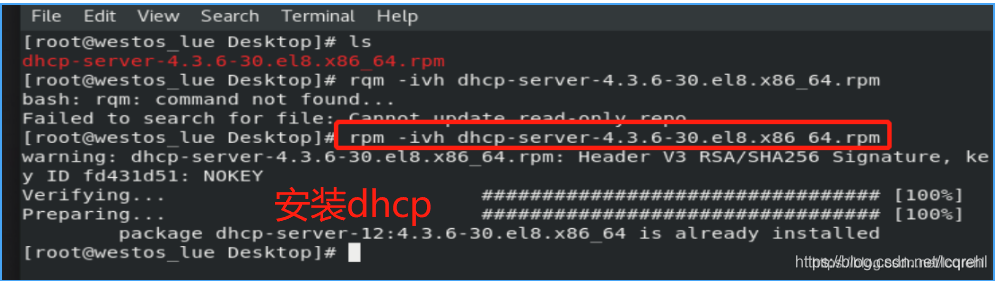
12.dhcp服务配置
在主机中使用景象找到dhcp-server的安装包
rpm -ivh dhcp-server
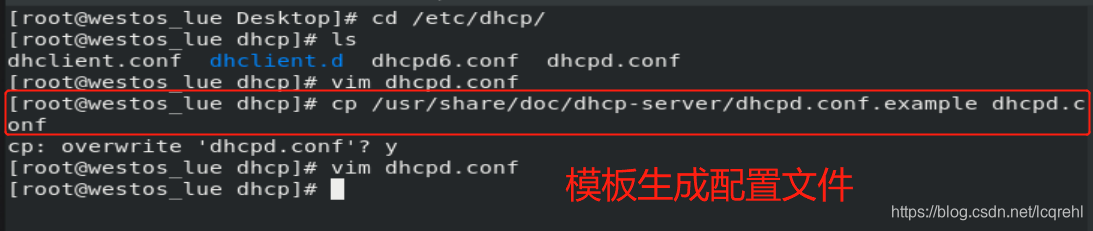
cp /usr/share/doc/dhcp*/dhcpd.conf.example /etc/dhcp/dhcpd.conf 用模板生成配置文件
vim /etc/dhcp/dhcpd.conf
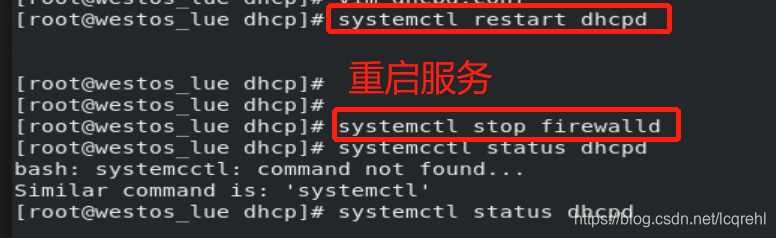
 # dhcpd.conf
# #
# Sample configuration file for ISC dhcpd
#
# option definitions common to all supported networks...
option domain-name "westos.com";            ##域名
option domain-name-servers 114.114.114.114; ##dns
default-lease-time 600;                     ##默认租约
max-lease-time 7200;                        ##最长租约
# Use this to enble / disable dynamic dns updates globally.
#ddns-update-style none;
# If this DHCP server is the official DHCP server for the local
# network, the authoritative directive should be uncommented.
#authoritative;
#Use this to send dhcp log messages to a different log file (you also
# have to hack syslog.conf to complete the redirection).
log-facility local7;
# No service will be given on this subnet, but declaring it helps the
# DHCP server to understand the network topology.
27 删除
28 删除
# This is a very basic subnet declaration.
 subnet 172.25.254.0 netmask 255.255.255.0 {   ##子网设定
range 172.25.254.160 172.25.254.200;           ##IP地址池
option routers 172.25.254.250;                 ##网关
} 35行后面全删除
systemctl restart dhcpd
systemctl stop firewalld
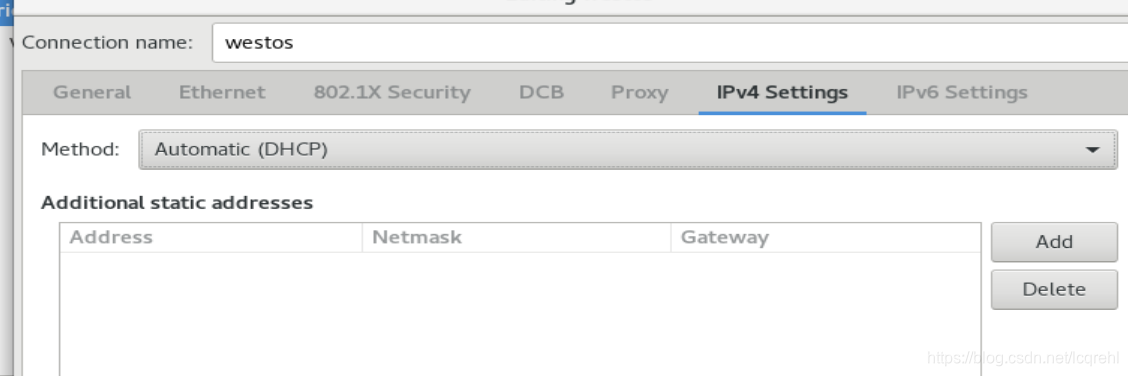
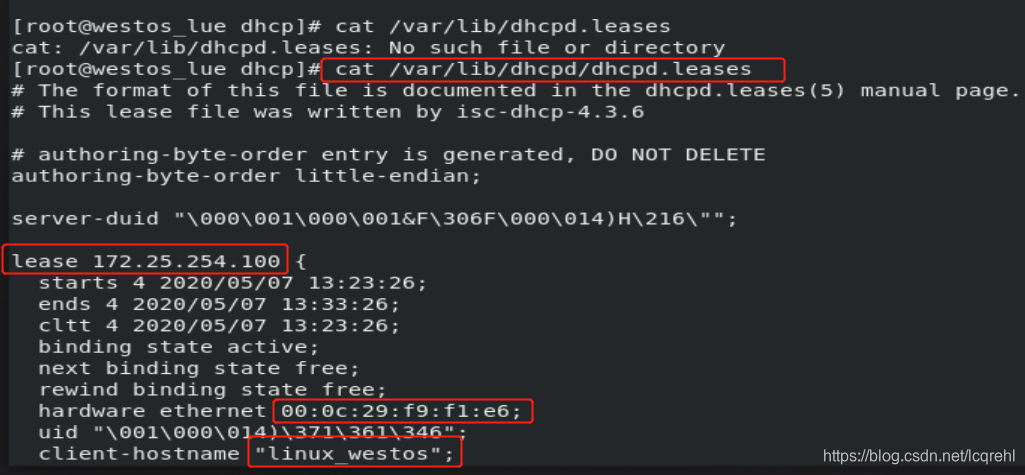
测试: 在网络工作模式是dhcp的主机中重启网络 可以看到 ip
GW
dns
全部获取成功
安装dhcp安装包
测试


 1193
1193

 被折叠的 条评论
为什么被折叠?
被折叠的 条评论
为什么被折叠?
 到【灌水乐园】发言


