


注:1、如果已经安装了ES和ik,需要重新安装,需要把/usr/share/elasticsearch/plugins/路径下ik删除,避免版本不匹配导致ES不能启动
2、如果kibana要跟elasticsearch配合使用,安装的时候请将两个工具的版本保持一致,不然可能会出现一些奇怪的问题
一、CentOS7下安装ES
1. 配置jdk环境,建议1.8
安装之前必须先安装JDK:CentOS7.5.1804 Minimal 安装JDK1.8.0_172
java -version

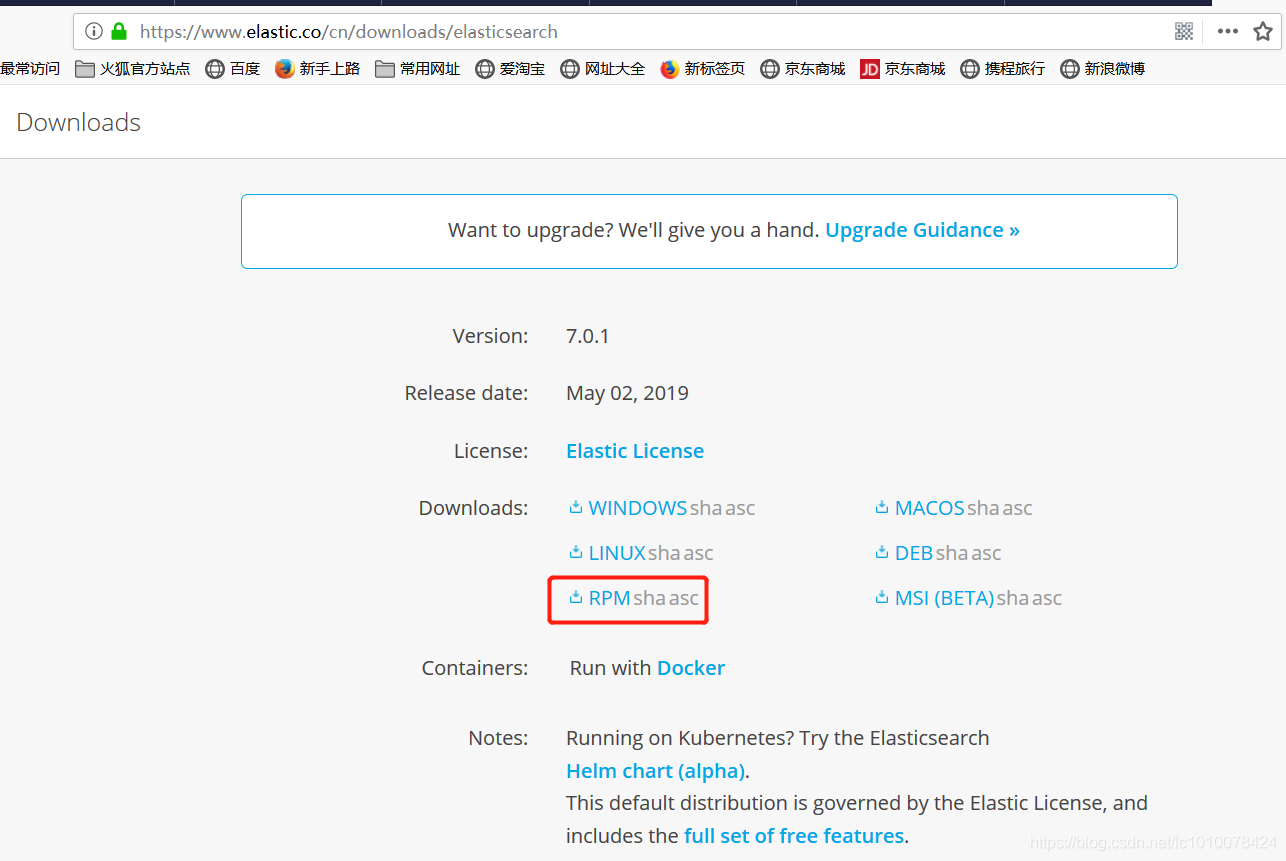
2. 下载最新版elasticsearch压缩包
elasticsearch官网地址 :https://www.elastic.co/cn/downloads/elasticsearch
右键点击RPM选择 – 复制连接地址
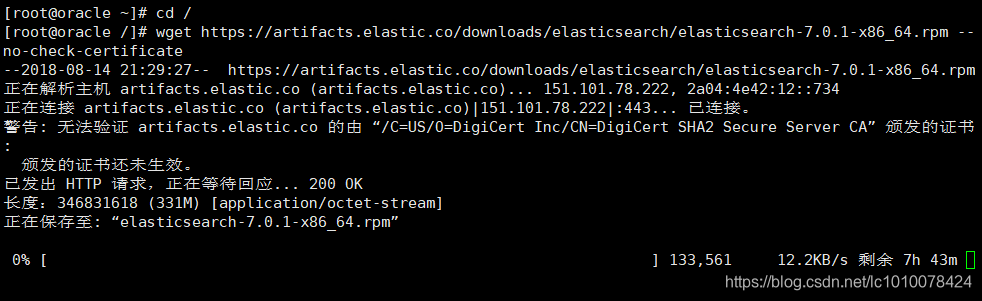
3、下载rmp包
[root@oracle /]# wget https://artifacts.elastic.co/downloads/elasticsearch/elasticsearch-7.0.1-x86_64.rpm --no-check-certificate
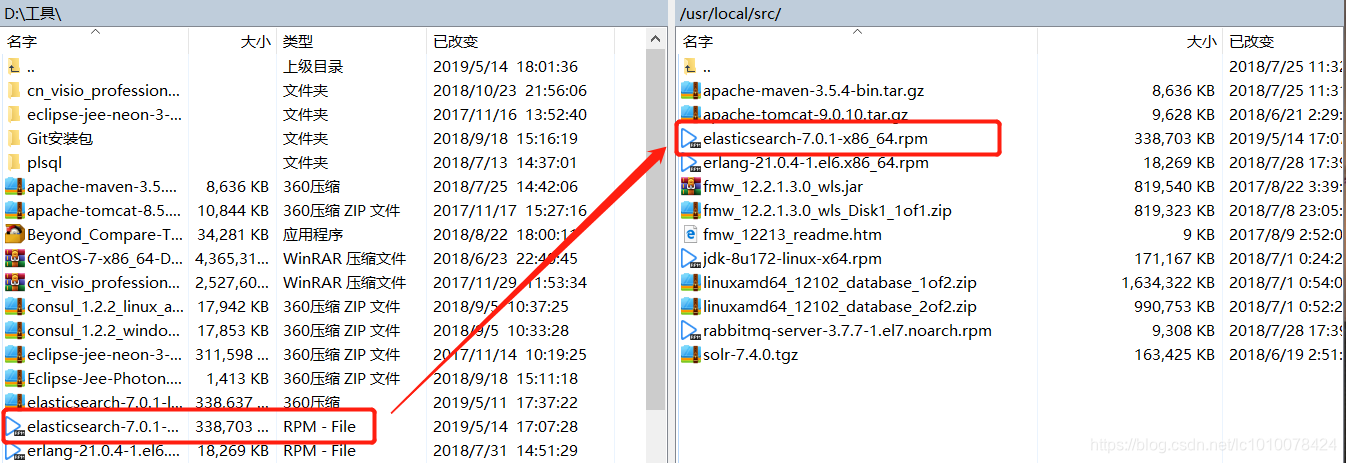
 或者直接下载rpm安装包,然后上传服务器
4、上传服务器(如果是通过wget方式下载,则跳过此步)
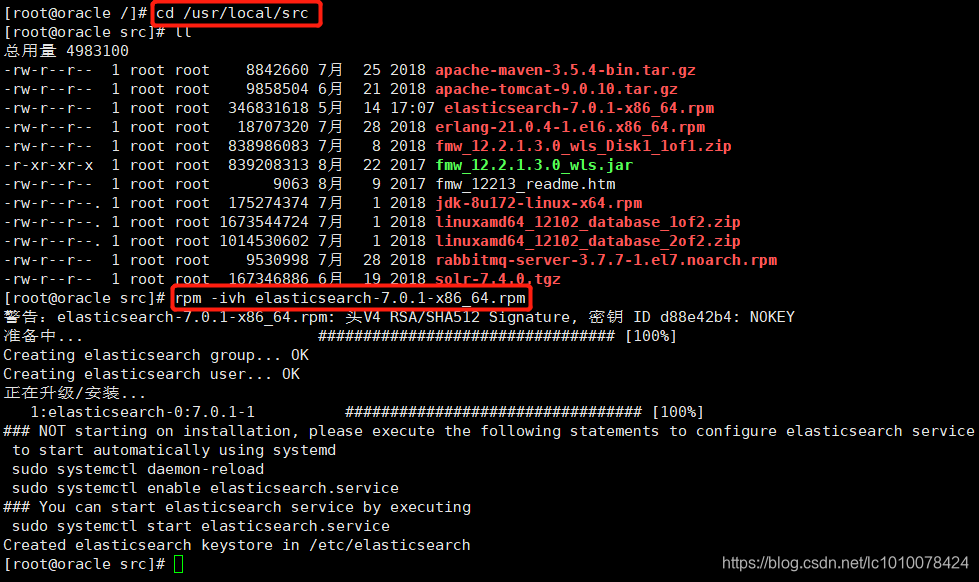
5、安装ES
[root@oracle /]# cd /usr/local/src
[root@oracle src]# ll
[root@oracle src]# rpm -ivh elasticsearch-7.0.1-x86_64.rpm
6、启动ES
[root@oracle src]# sudo systemctl start elasticsearch.service

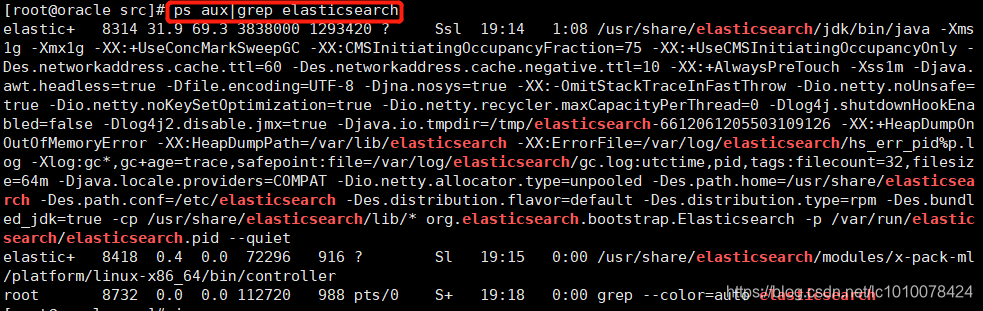
7、查看ES是否启动
[root@oracle src]# ps aux|grep elasticsearch
8、调试
[root@oracle src]# curl -XGET 'http://localhost:9200/'

出现如下信息代表成功:
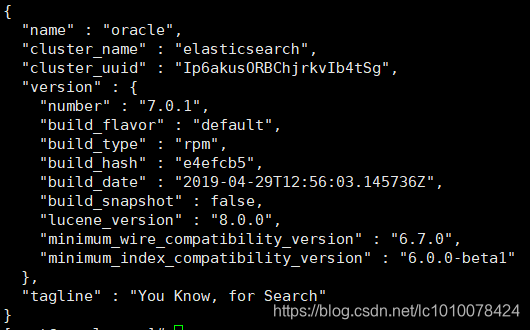
至此ES配置成功!
二、外网访问
1. 查看ES目录结构
[root@oracle src]# whereis elasticsearch
elasticsearch: /etc/elasticsearch /usr/share/elasticsearch

2、修改配置文件
[root@oracle src]# vi /etc/elasticsearch/elasticsearch.yml
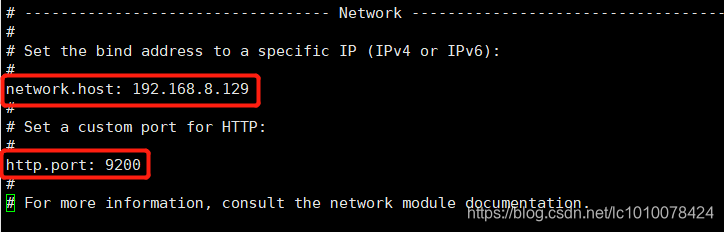
【提示】上面的IP是我安装es的虚拟机的IP地址。端口号默认就是9200。如果远程访问没有成功、或是出现错误,尝试把上面的IP换成0.0.0.0
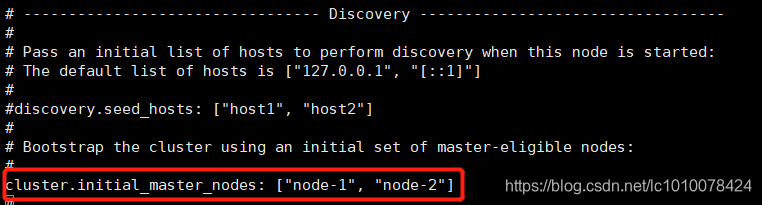
并修改/etc/elasticsearch/elasticsearch.yml配置文件里的cluster.initial_master_nodes属性
3、重启ES
[root@oracle src]# sudo systemctl restart elasticsearch.service
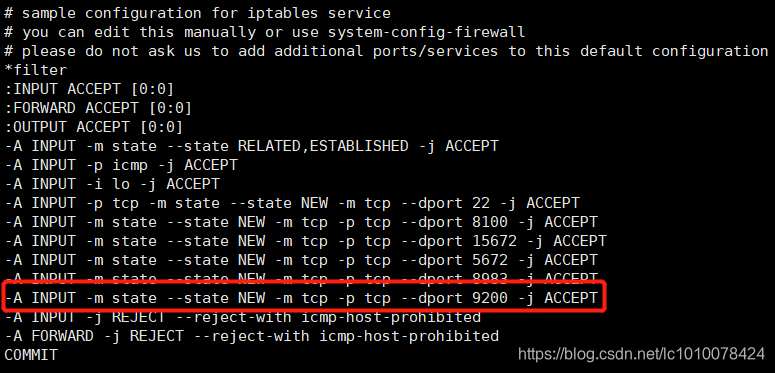
4、设置防火墙
[root@oracle ~]# sudo vi /etc/sysconfig/iptables
添加参数
-A INPUT -m state --state NEW -m tcp -p tcp --dport 9200 -j ACCEPT
[root@oracle ~]# sudo systemctl restart iptables  #重启生效
5、外网访问测试
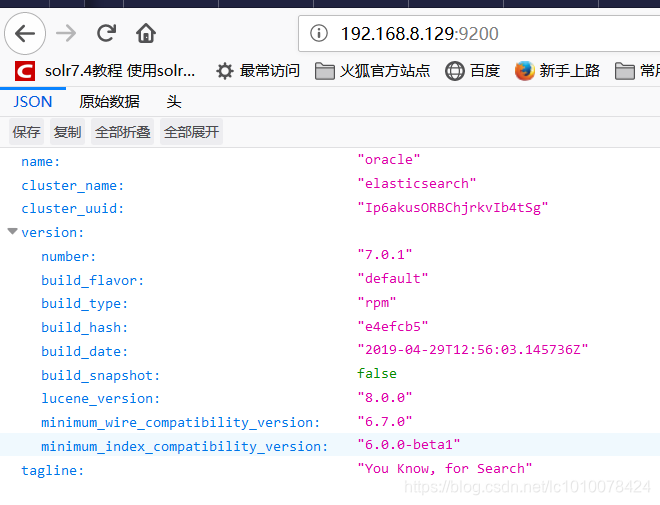
至此外网访问配置成功!
三、elasticsearch开机自启动
1、在/etc/init.d目录下新建elasticsearch 文件
[root@oracle /]# vi /etc/init.d/elasticsearch
#!/bin/bash
#
# elasticsearch <summary>
#
# chkconfig:   2345 80 20
# description: Starts and stops a single elasticsearch instance on this system
#

### BEGIN INIT INFO
# Provides: Elasticsearch
# Required-Start: $network $named
# Required-Stop: $network $named
# Default-Start: 2 3 4 5
# Default-Stop: 0 1 6
# Short-Description: This service manages the elasticsearch daemon
# Description: Elasticsearch is a very scalable, schema-free and high-performance search solution supporting multi-tenancy and near realtime search.
### END INIT INFO

#
# init.d / servicectl compatibility (openSUSE)
#
if [ -f /etc/rc.status ]; then
    . /etc/rc.status
    rc_reset
fi

#
# Source function library.
#
if [ -f /etc/rc.d/init.d/functions ]; then
    . /etc/rc.d/init.d/functions
fi

# Sets the default values for elasticsearch variables used in this script
ES_HOME="/usr/share/elasticsearch"
MAX_OPEN_FILES=65535
MAX_MAP_COUNT=262144
ES_PATH_CONF="/etc/elasticsearch"

PID_DIR="/var/run/elasticsearch"

# Source the default env file
ES_ENV_FILE="/etc/sysconfig/elasticsearch"
if [ -f "$ES_ENV_FILE" ]; then
    . "$ES_ENV_FILE"
fi

# ES_USER and ES_GROUP settings were removed
if [ ! -z "$ES_USER" ] || [ ! -z "$ES_GROUP" ]; then
    echo "ES_USER and ES_GROUP settings are no longer supported. To run as a custom user/group use the archive distribution of Elasticsearch."
    exit 1
fi

exec="$ES_HOME/bin/elasticsearch"
prog="elasticsearch"
pidfile="$PID_DIR/${prog}.pid"

export ES_JAVA_OPTS
export JAVA_HOME
export ES_PATH_CONF
export ES_STARTUP_SLEEP_TIME

lockfile=/var/lock/subsys/$prog

##新加内容开始
case "$1" in
start)
cd /usr/share/elasticsearch
./bin/elasticsearch -d
!
##新加内容结束
echo "elasticsearch startup"
;;


if [ ! -x "$exec" ]; then
    echo "The elasticsearch startup script does not exists or it is not executable, tried: $exec"
    exit 1
fi

checkJava() {
    if [ -x "$JAVA_HOME/bin/java" ]; then
        JAVA="$JAVA_HOME/bin/java"
    else
        JAVA=`which java`
    fi

    if [ ! -x "$JAVA" ]; then
        echo "Could not find any executable java binary. Please install java in your PATH or set JAVA_HOME"
        exit 1
    fi
}

start() {
    checkJava
    [ -x $exec ] || exit 5

    if [ -n "$MAX_OPEN_FILES" ]; then
        ulimit -n $MAX_OPEN_FILES
    fi
    if [ -n "$MAX_LOCKED_MEMORY" ]; then
        ulimit -l $MAX_LOCKED_MEMORY
    fi
    if [ -n "$MAX_MAP_COUNT" -a -f /proc/sys/vm/max_map_count ] && [ "$MAX_MAP_COUNT" -gt $(cat /proc/sys/vm/max_map_count) ]; then
        sysctl -q -w vm.max_map_count=$MAX_MAP_COUNT
    fi

    # Ensure that the PID_DIR exists (it is cleaned at OS startup time)
    if [ -n "$PID_DIR" ] && [ ! -e "$PID_DIR" ]; then
        mkdir -p "$PID_DIR" && chown elasticsearch:elasticsearch "$PID_DIR"
    fi
    if [ -n "$pidfile" ] && [ ! -e "$pidfile" ]; then
        touch "$pidfile" && chown elasticsearch:elasticsearch "$pidfile"
    fi

    cd $ES_HOME
    echo -n $"Starting $prog: "
    # if not running, start it up here, usually something like "daemon $exec"
    daemon --user elasticsearch --pidfile $pidfile $exec -p $pidfile -d
    retval=$?
    echo
    [ $retval -eq 0 ] && touch $lockfile
    return $retval
}

stop() {
    echo -n $"Stopping $prog: "
    # stop it here, often "killproc $prog"
    killproc -p $pidfile -d 86400 $prog
    retval=$?
    echo
    [ $retval -eq 0 ] && rm -f $lockfile
    return $retval
}

restart() {
    stop
    start
}

reload() {
    restart
}

force_reload() {
    restart
}

rh_status() {
    # run checks to determine if the service is running or use generic status
    status -p $pidfile $prog
}

rh_status_q() {
    rh_status >/dev/null 2>&1
}


case "$1" in
    start)
        rh_status_q && exit 0
        $1
        ;;
    stop)
        rh_status_q || exit 0
        $1
        ;;
    restart)
        $1
        ;;
    reload)
        rh_status_q || exit 7
        $1
        ;;
    force-reload)
        force_reload
        ;;
    status)
        rh_status
        ;;
    condrestart|try-restart)
        rh_status_q || exit 0
        restart
        ;;
    *)
        echo $"Usage: $0 {start|stop|status|restart|condrestart|try-restart|reload|force-reload}"
        exit 2
esac
exit $?
2、赋予执行权限
[root@oracle /]# cd /etc/init.d/
[root@oracle init.d]# chmod +x elasticsearch

3、添加到开机启动任务
[root@oracle init.d]# chkconfig elasticsearch on
4、重启CentOS验证elasticsearch 是否能够开机自启动
[root@oracle ~]# reboot
5、验证是否成功
方式一:
[root@oracle ~]# ps aux|grep elasticsearch
方式二:
[root@oracle ~]# curl -XGET 'http://localhost:9200/'
方式三:
常用命令
sudo systemctl start elasticsearch.service  #启动es
sudo systemctl restart elasticsearch.service #重启es
systemctl status elasticsearch  #查看es状态
ps aux|grep elasticsearch  #查看es进程
whereis elasticsearch  #查看es目录
可以看出elasticsearch的安装目录和配置文件所在目录,因为rpm安装和安装包解压的目录结构是不一样的,为了方便运维,你需要记住:
启动文件目录:/usr/share/elasticsearch/bin
配置文件目录:/etc/elasticsearch
日志目录:/var/log/elasticsearch
请关注我个人学习的公众号,公众号会不定期发布个人学习的内容记录!


 764
764

 被折叠的 条评论
为什么被折叠?
被折叠的 条评论
为什么被折叠?
 到【灌水乐园】发言


