


文章目录
一、Spring Boot 单元测试
(一)对项目HelloWorld01进行单元测试
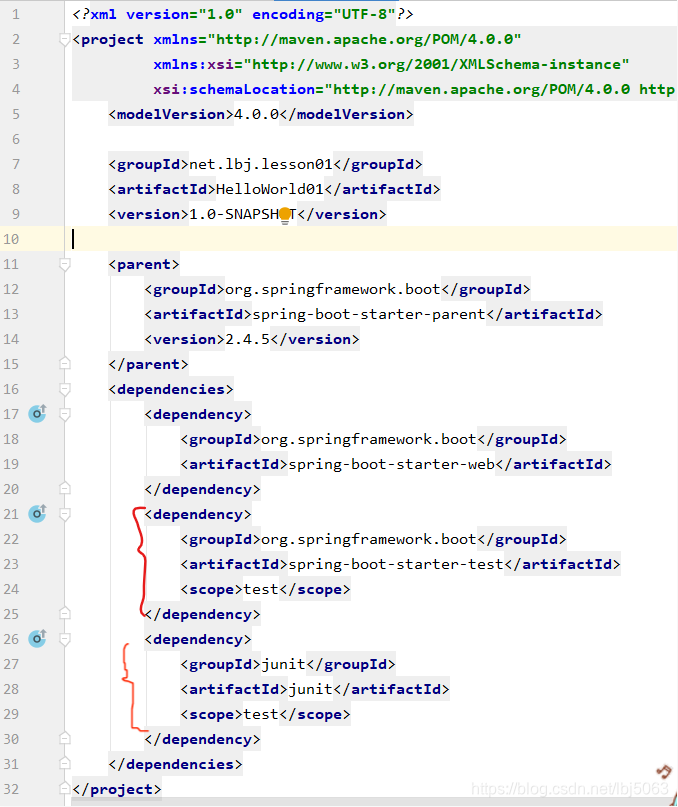
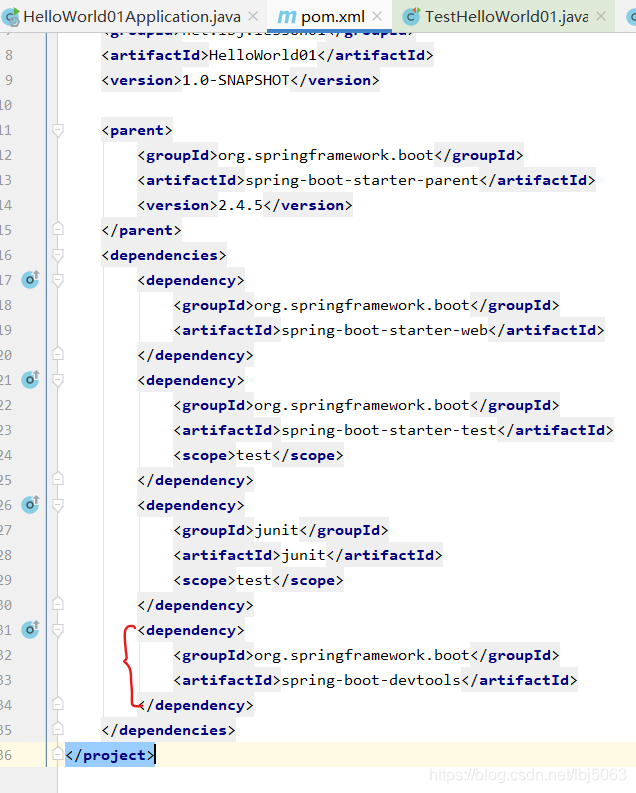
1.修改pom.xml文件,添加测试依赖启动器
<dependency>
    <groupId>org.springframework.boot</groupId>
    <artifactId>spring-boot-starter-test</artifactId>
    <scope>test</scope>
</dependency>
junit是在测试类中写注解符@RunWith生成的
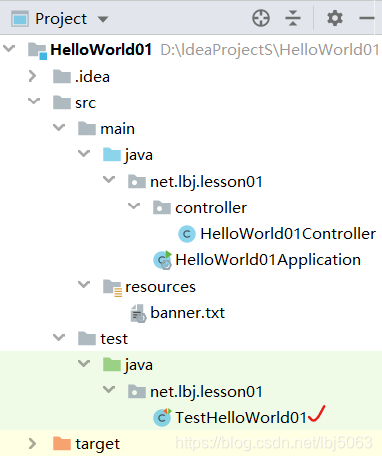
2.创建测试类与测试方法
- 在src/test/java里创建net.lbj.lesson01包,并在包里创建测试类TestHelloWorld01
package net.lbj.lesson01;

import net.lbj.lesson01.controller.HelloWorld01Controller;
import org.junit.Test;
import org.junit.runner.RunWith;
import org.springframework.beans.factory.annotation.Autowired;
import org.springframework.boot.test.context.SpringBootTest;
import org.springframework.test.context.junit4.SpringRunner;

/**
 * 测试HelloWorld01
 * 20210426
 */
@RunWith(SpringRunner.class) //测试启动器,并加载Spring Boot测试注解
@SpringBootTest //标记Spring Boot单元测试,会自动加载Spring应用容器
public class TestHelloWorld01 {
    //注入待测试类
    @Autowired
    public HelloWorld01Controller controller;

    @Test
    public void testHello() {
        //获取控制器hello()方法的返回值
        String hello = controller.hello();
        //在控制台输出hello()方法的返回值
        System.out.println("hello()方法的返回值:" + hello);
    }
}
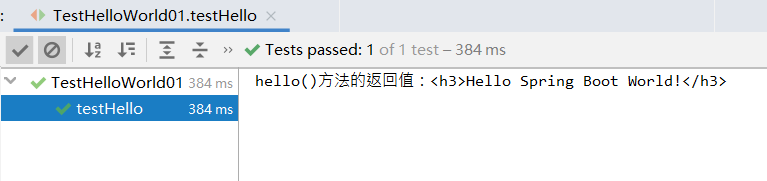
- 运行测试方法testHello()
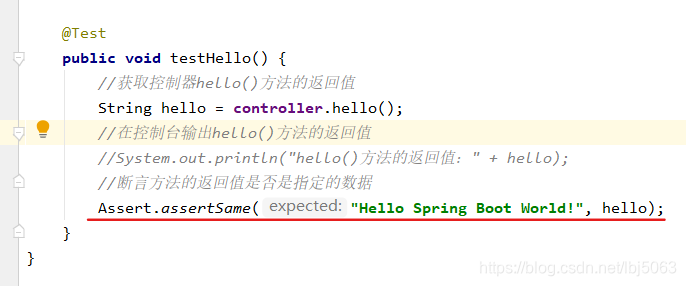
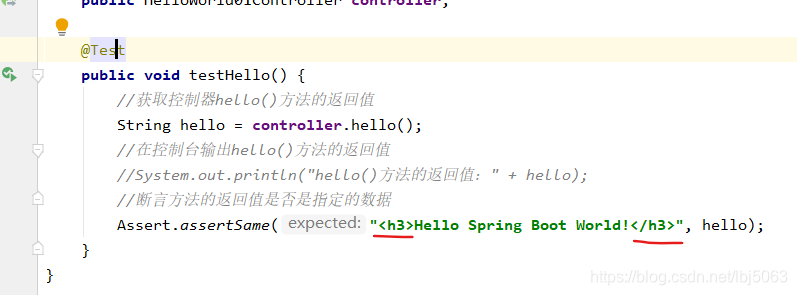
- 如果相判断待测试类的方法的返回值是不是指定的某个数据,那么我们可以利用Assert类的assertSame()方法来进行测试
- 修改测试方法testHello()
- 运行测试方法testHello()

测试失败,抛出AssertionError(断言错误)
期望值:Hello Spring Boot World!
实际值:Hello Spring Boot World!
- 再次修改测试方法testHello()
- 运行测试方法:

(二)对项目HelloWorld02进行单元测试
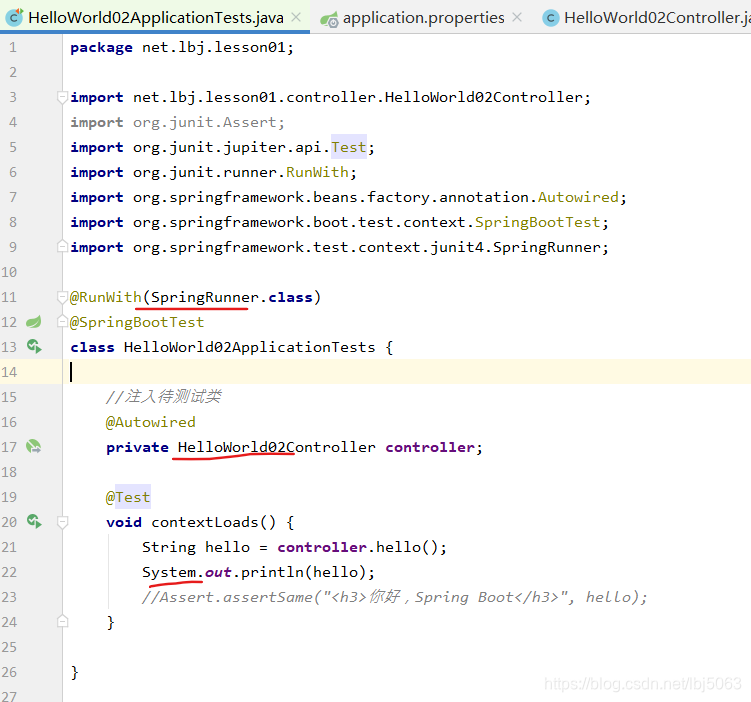
构建项目时自动生成的测试类

- 添加注解,注入待测试类,编写测试方法contextLoads()的测试代码
- 运行测试方法
运行错误:
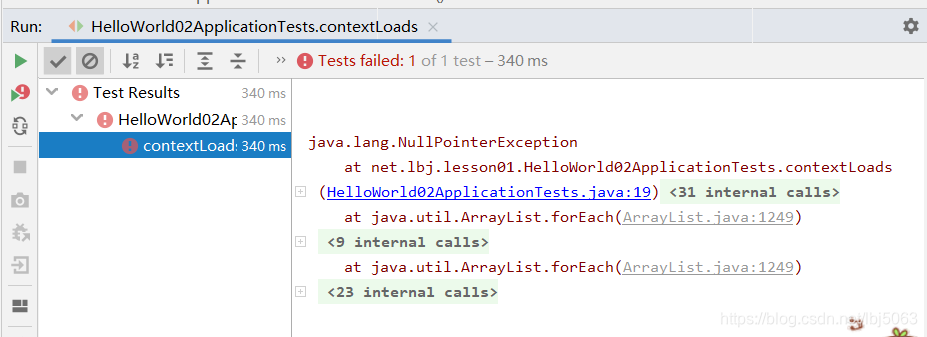
原因:没有注入@Autowired
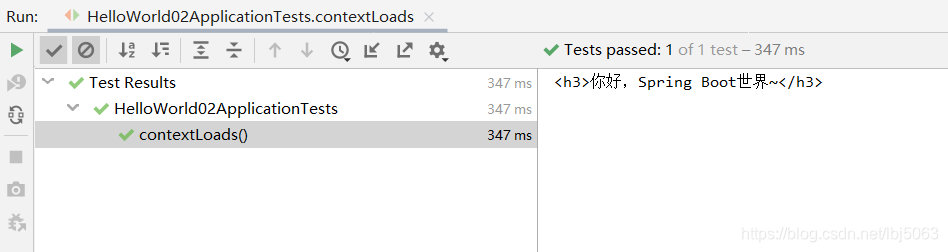
运行结果:
二、Spring Boot热部署
(一)对项目HelloWorld01进行热部署
1.在pom.xml文件里添加开发工具依赖
<dependency>
    <groupId>org.springframework.boot</groupId>
    <artifactId>spring-boot-devtools</artifactId>
</dependency>
2.热部署配置
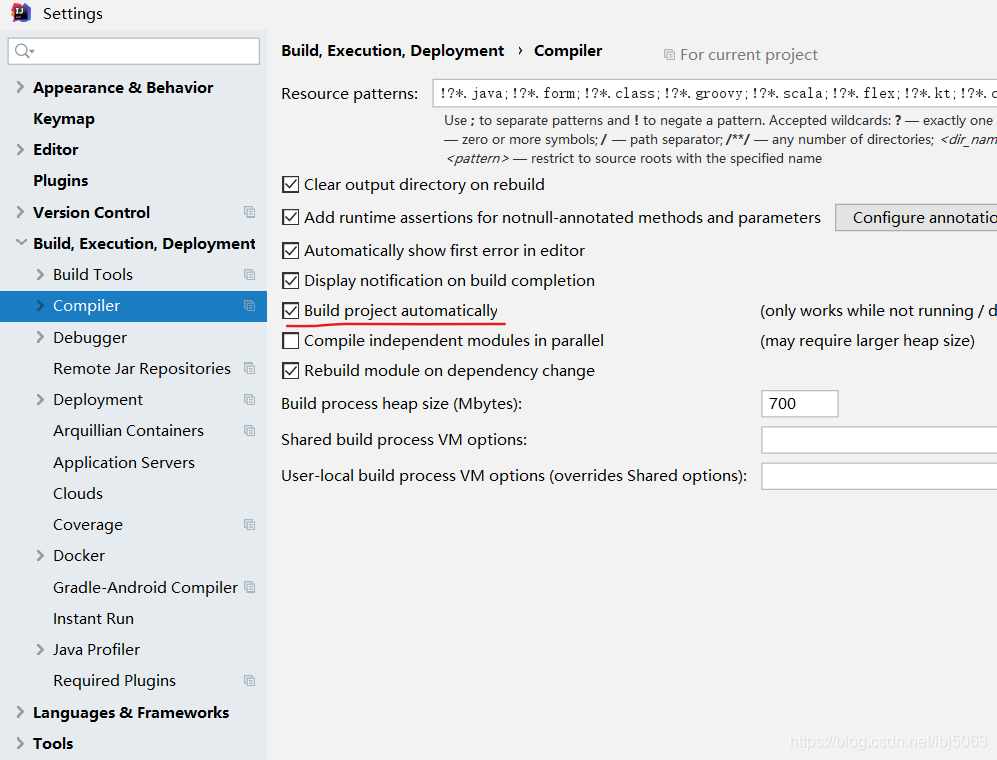
- 单击[file]->[settings]菜单项,打开设置对话框,找到complier,勾选择build project automatically (自动构建项目)
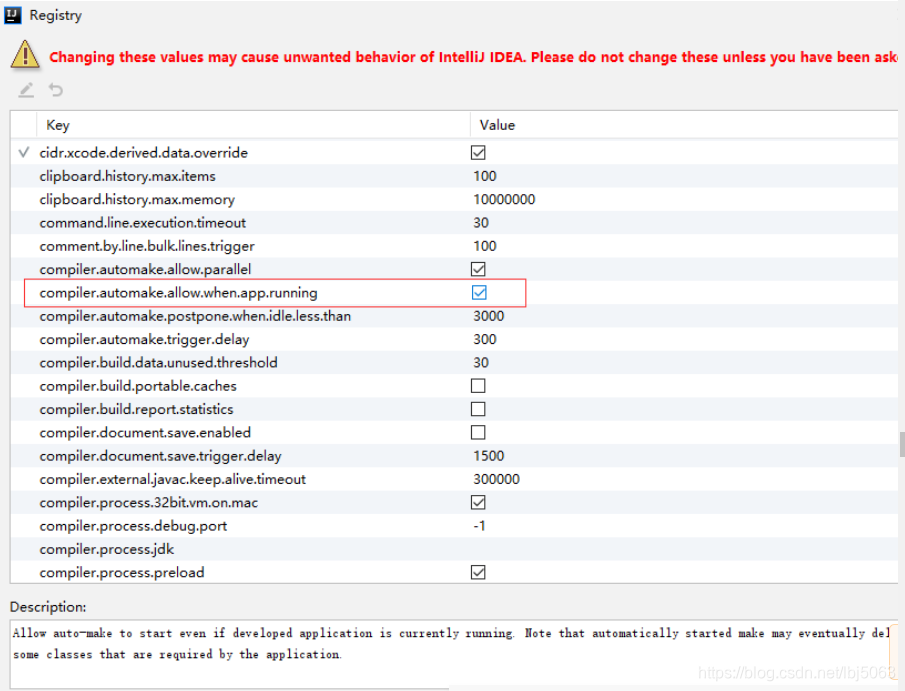
- 按组合键Ctrl + Shift + Alt + /打开Maintenance对话框

- 单击Registry选项,在Registry对话框里,勾选compiler.automake.allow.when.app.running,让程序在运行过程中也能自动编译
3.热部署测试
- 运行启动类HelloWorld01Application
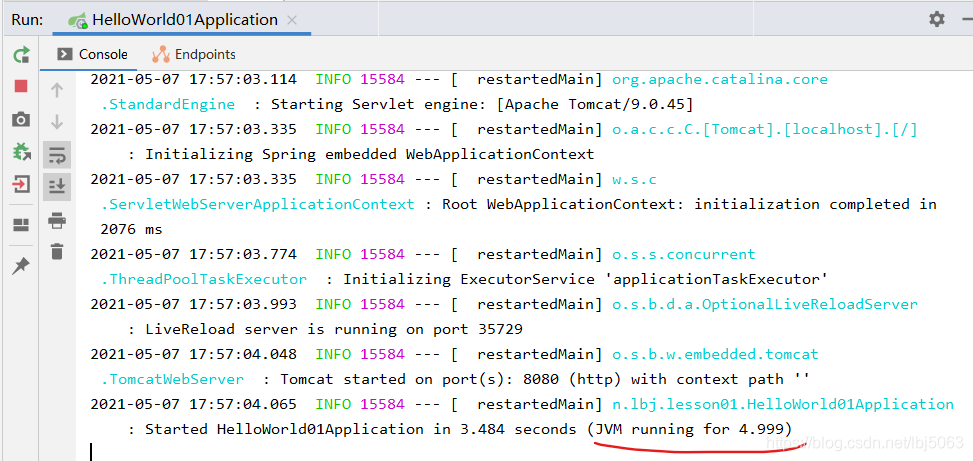
- 在浏览器里访问http://localhost:8080/lbj01/hello
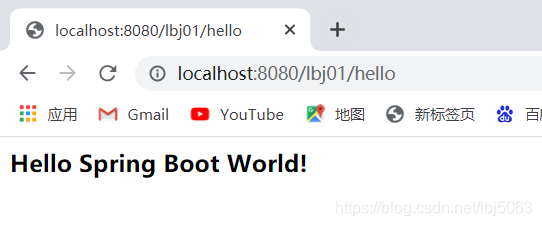
- 修改控制器HelloWorld01Controller代码,刷新浏览器,查看结果

由此可见,采用了热部署,修改了程序,不用重启项目,系统会在程序运行过程中自动编译,于是可以看到修改后程序的运行结果。
三、课后作业
任务1、对上一讲的课后作业StudentInfo项目进行单元测试(Information)
任务2、按照讲稿实现热部署,并针对项目StudentInfo进行热部署测试(Information)


 1348
1348

 被折叠的 条评论
为什么被折叠?
被折叠的 条评论
为什么被折叠?
 到【灌水乐园】发言


