onlineSchool 项目课 六:课程主页的开发

onlineSchool 项目课 七:实现用户的登录功能 一,Java代码实现用户的登录注册功能。 前台: 1,点击一个a标签,请求到countroller,返回一个页面,实现返回的页面结构。 2, form表单输入用户登录或注册的用户名密码。展示验证码,点击验证码变换的效果。 3,对密码进行64位的哈希编码,并设置到输入框。 (注册还需要比对密码一致,不一致数据回滚。) 4,ajaxSubmit提交form表单,校验成功,页面跳转,校验失败,返回Java中定义的失败提示,重置输入框。 //提交登录的form表单 function doLogin() { 阅读详情

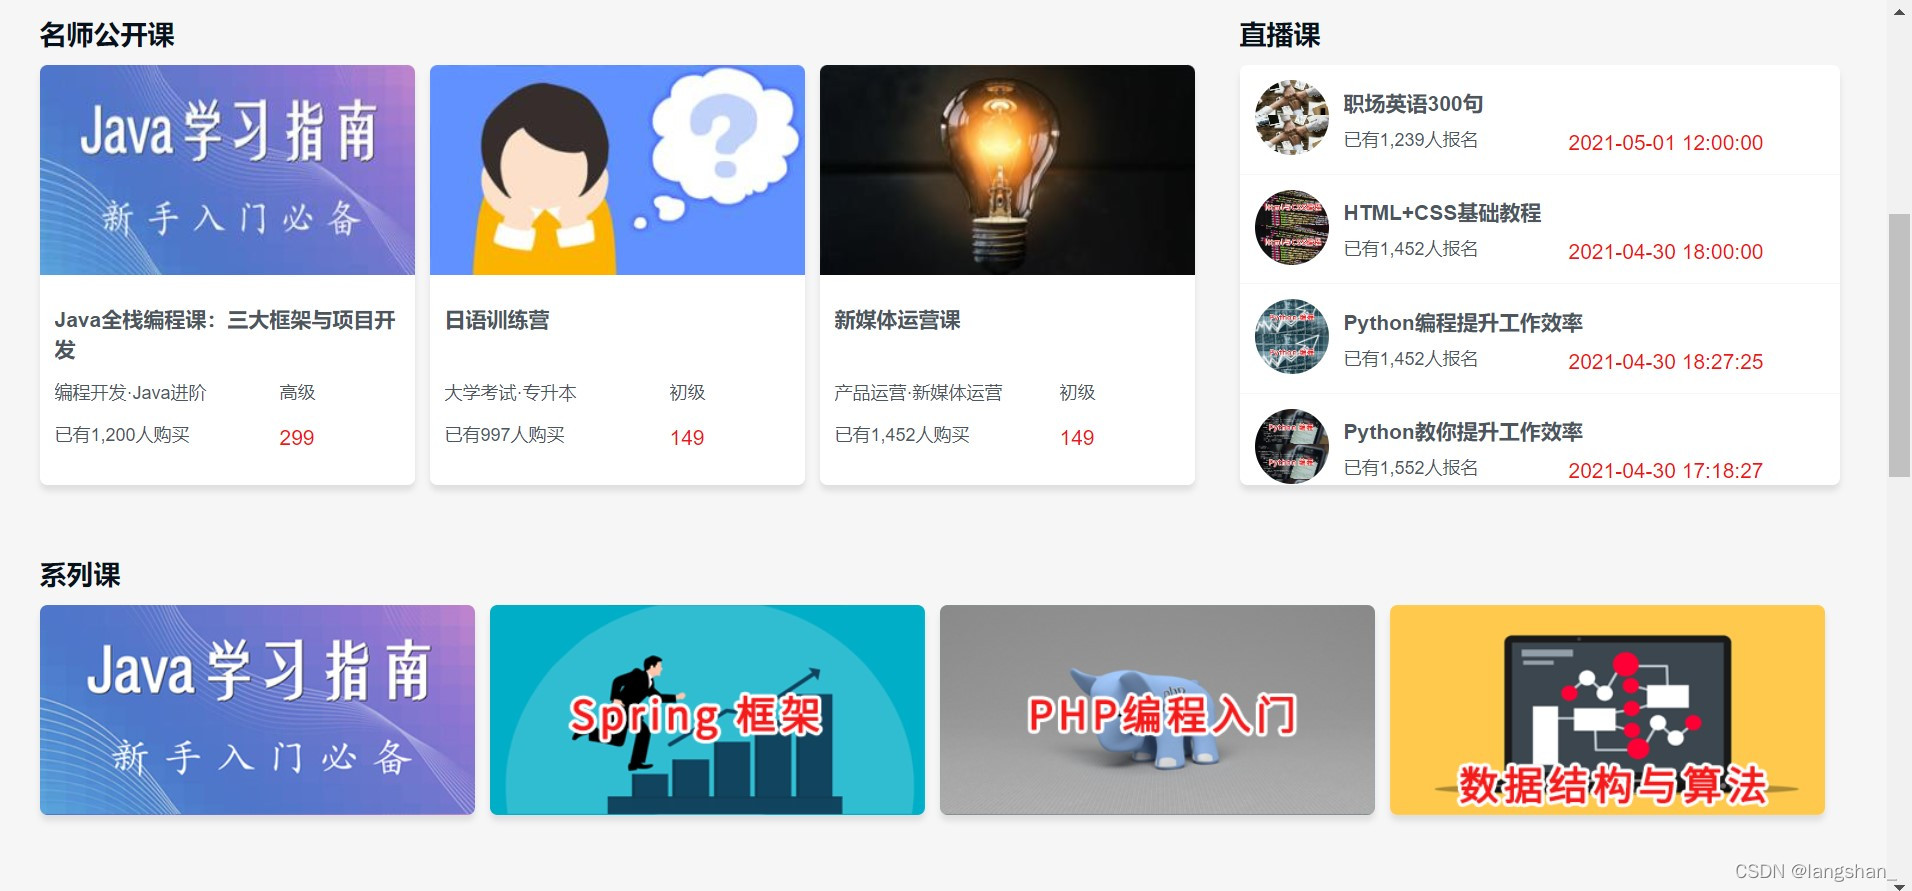
一,课程的主页开发:
1,轮播的 bootstrap 样式

在这里插入图片描述
2,?过滤二级分类数据 cid

3,sql语句
在这里插入图片描述在这里插入图片描述

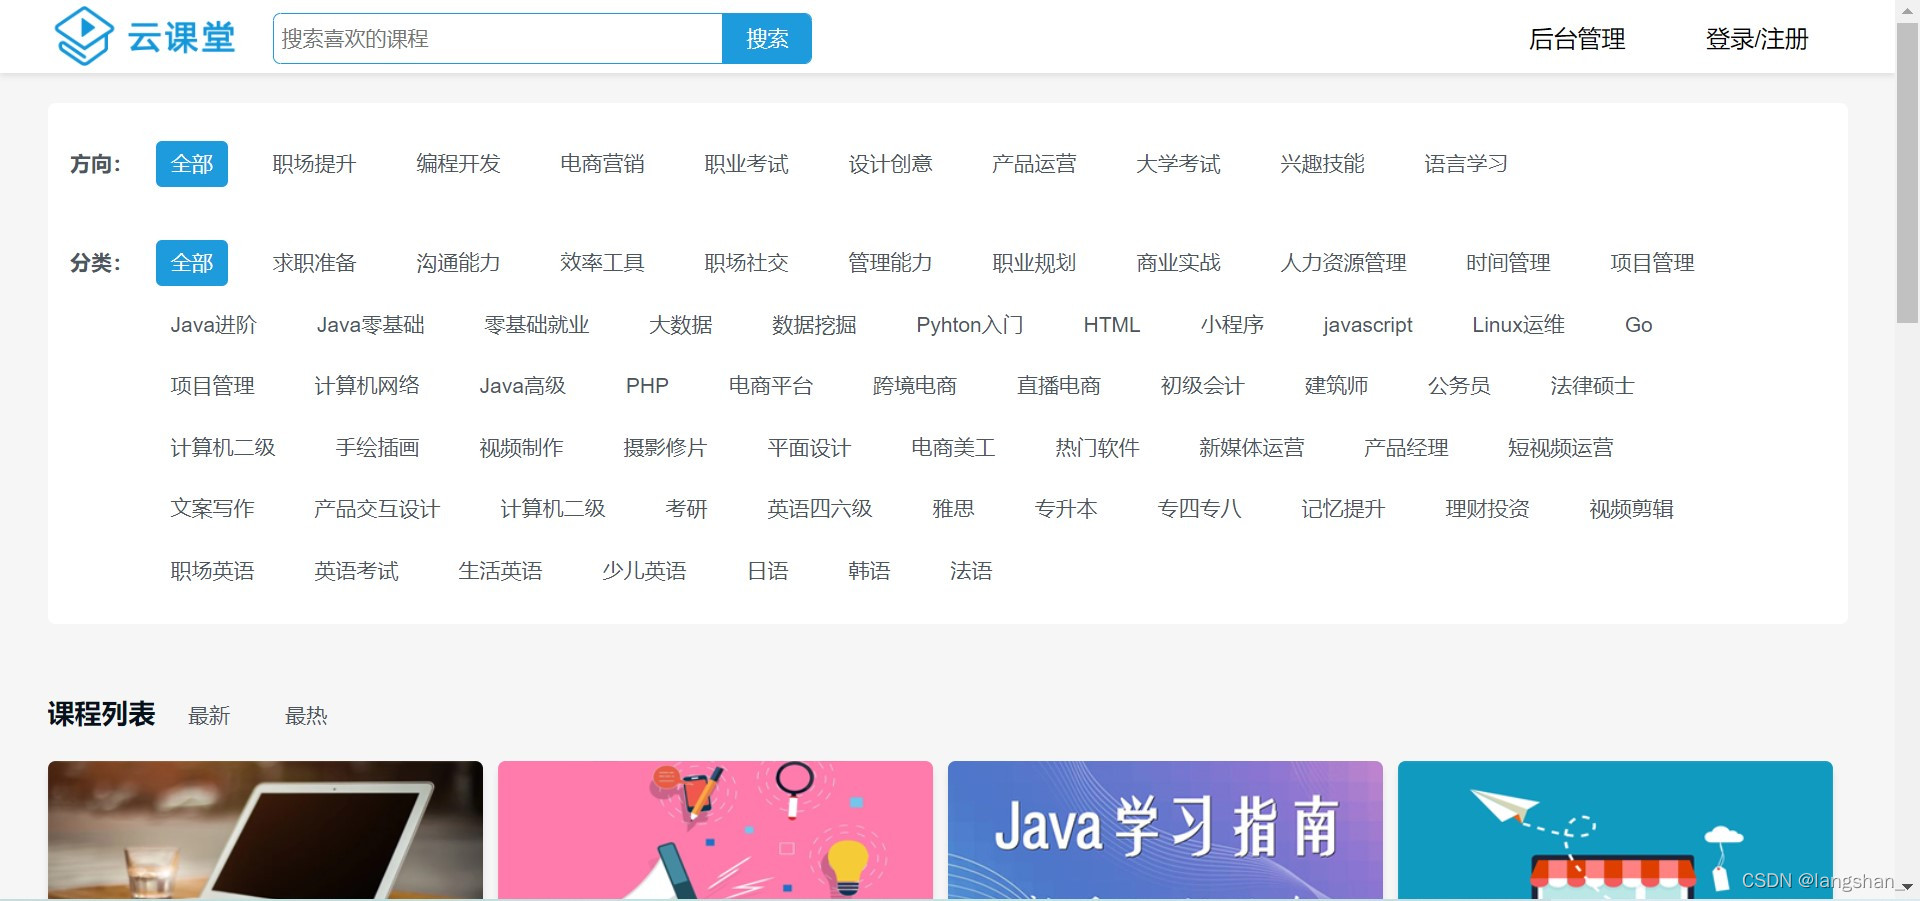
二,课程展示页:
在这里插入图片描述

1,触发函数结合分页:
使用同一个触发函数,传递当前操作的分类数据的code,排序的字段,页码(页码的默认值是1),设置到 form表单对应的输入框,同步提交form表单。

//分类
<a href="javascript:void (0)" onclick="queryPage(1,'${key}')">${item.name!}</a>
<a href="javascript:void (0)" onclick="queryPage(1,'${classify.code!}')">全部</a>

//排序                   
<a onclick="queryPage(1,'${c!}','last')"  href="javascript:void(0)" style="display: inline-block">
        <span>最新</span>
    </a>
    <a onclick="queryPage(1,'${c!}','pop')" href="javascript:void(0)" style="display: inline-block">
        <span>最热</span>
    </a>

//分页
 <a class="page-num active" href="javascript:void(0)" onclick="queryPage('${n}','${c!}','${sortField!}')">${n}</a>
    
<form id="queryForm" style="display: none">
    <input type="text" id="c" name="c">
    <input type="text" id="sortField" name="sortField">
    <input type="text" id="pageNum" name="pageNum">
</form>
//触发函数点击时将对应的字段设置到form表单,同步提交form 表单
  function queryPage(pageNum,c,sortField) {
        $('#pageNum').val(pageNum);
        $('#c').val(c)
        if (sortField != null){
            alert(sortField)
            $('#sortField').val(sortField)
        }
        $('#queryForm').submit()
    }

controller中根据前台提交的分类数据的code,getByCode 获取分类的数据添加到model,作美观设计。把分类数据的code设置到分页类的entity中。用StringUtils 判断如果 sortField 没有值就设置一个默认值传到 mapper 中,默认展示的是已上架的课程,一页展示12条数据,调用分页的函数实现分页。

@GetMapping("courses")
    public ModelAndView courses(String c, String sortField, Pagination<Course> page){
        //返回课程展示的页面
        ModelAndView mv = new ModelAndView("zY/courses");

        //从数据库中获取分类的数据展示
        Map<String, ClassifyBean> classifyMap = classifyService.queryAllClassifyMap();
        mv.addObject("classifyMap",classifyMap);

        Course queryEntity = new Course();
        if (StringUtils.isNotEmpty(c)){
            //美观
            Classify classify = classifyService.getByCode(c);
            if ("0".equals(classify.getParentCode())){
                mv.addObject("classify",classify);
                
                queryEntity.setClassify(classify.getCode());
            }else {
                mv.addObject("classify",classifyService.getByCode(classify.getParentCode()));
                mv.addObject("subClassify",classify);
                
                queryEntity.setSubClassify(classify.getCode());
            }
            mv.addObject("c",c);
        }

        //默认展示出来的都是已上架的课程,设置一页展示几条数据
        queryEntity.setOnsale(1);
        page.setPageSize(12);

        //分页结合排序
        //根据提交的排序的字段,设置对应的 sortField
        if ("last".equals(sortField)){
            page.setSortField("id");
        }
        if ("pop".equals(sortField)){
            page.setSortField("study_count");
        }
        
        //分类是根据动态的sql实现的,排序是根据orderBy实现的,所以要设置默认值
        if (StringUtils.isEmpty(page.getSortField())){
            page.setSortField("createAt");
        }
        if (StringUtils.isEmpty(page.getSortDirection())){
            page.setSortDirection("DESC");
        }
        //将分类和排序的字段都添加到modal中,前端去判断有点击到,就添加对应的底色
        mv.addObject("sortField",sortField);
        
        //调用分页的函数,实现分页
        page =courseService.queryPage(queryEntity,page);
        mv.addObject("page",page);
        return mv;
    }

2,美观设计:
通过触发函数把分类的code传到后台,后台通过传入的code去获取一整条数据,并添加到model。

//分页的entity
Course queryEntity = new Course();
 if (StringUtils.isNotEmpty(c)){
            //美观
            Classify classify = classifyService.getByCode(c);
            if ("0".equals(classify.getParentCode())){ 
            //一级分类的parentCode是0,当点击的是一级分类
            //把一级分类的数据添加到modal
                mv.addObject("classify",classify);
				
                queryEntity.setClassify(classify.getCode());
            }else {
                //二级分类的parentCode是一级分类的code,当点击的是二级分类,把对应的一二级分类的数据都添加到modal
                mv.addObject("classify",classifyService.getByCode(classify.getParentCode()));
                mv.addObject("subClassify",classify);

                queryEntity.setSubClassify(classify.getCode());
            }
            //把对应的分类的code也添加到modal,通过触发函数实现分页也展示分类下的课程
            mv.addObject("c",c);
        }

前台去判断model中有数据,就在对应的分类的值上做高亮展示,没有数据就在全部上做高亮展示。

a 当选择了一级分类,一级分类上有数据,就在对应的一级分类展示在这里插入图片描述
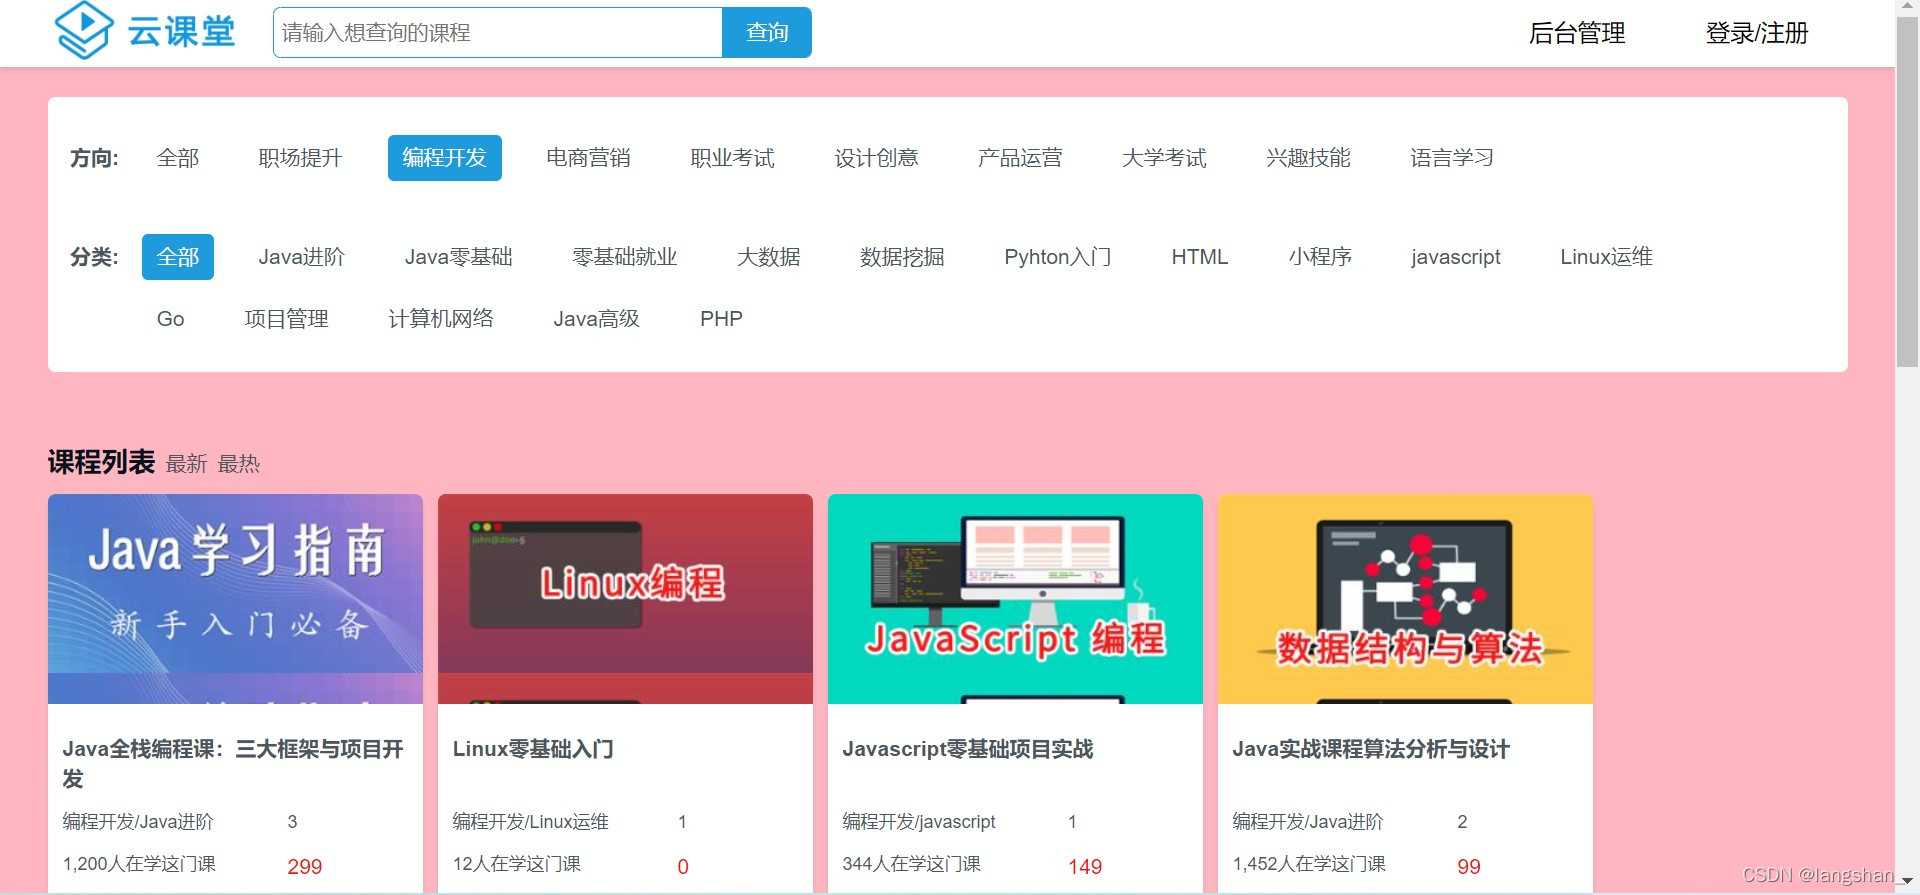
<li class="course-nav-item <#if classify?? && classify.code==key>cur-course-nav</#if>">               

b 当没有选择对应的分类,modal 中没有分类的值,就在全部上高亮在这里插入图片描述

<li class="course-nav-item  <#if !classify??>cur-course-nav</#if>" >

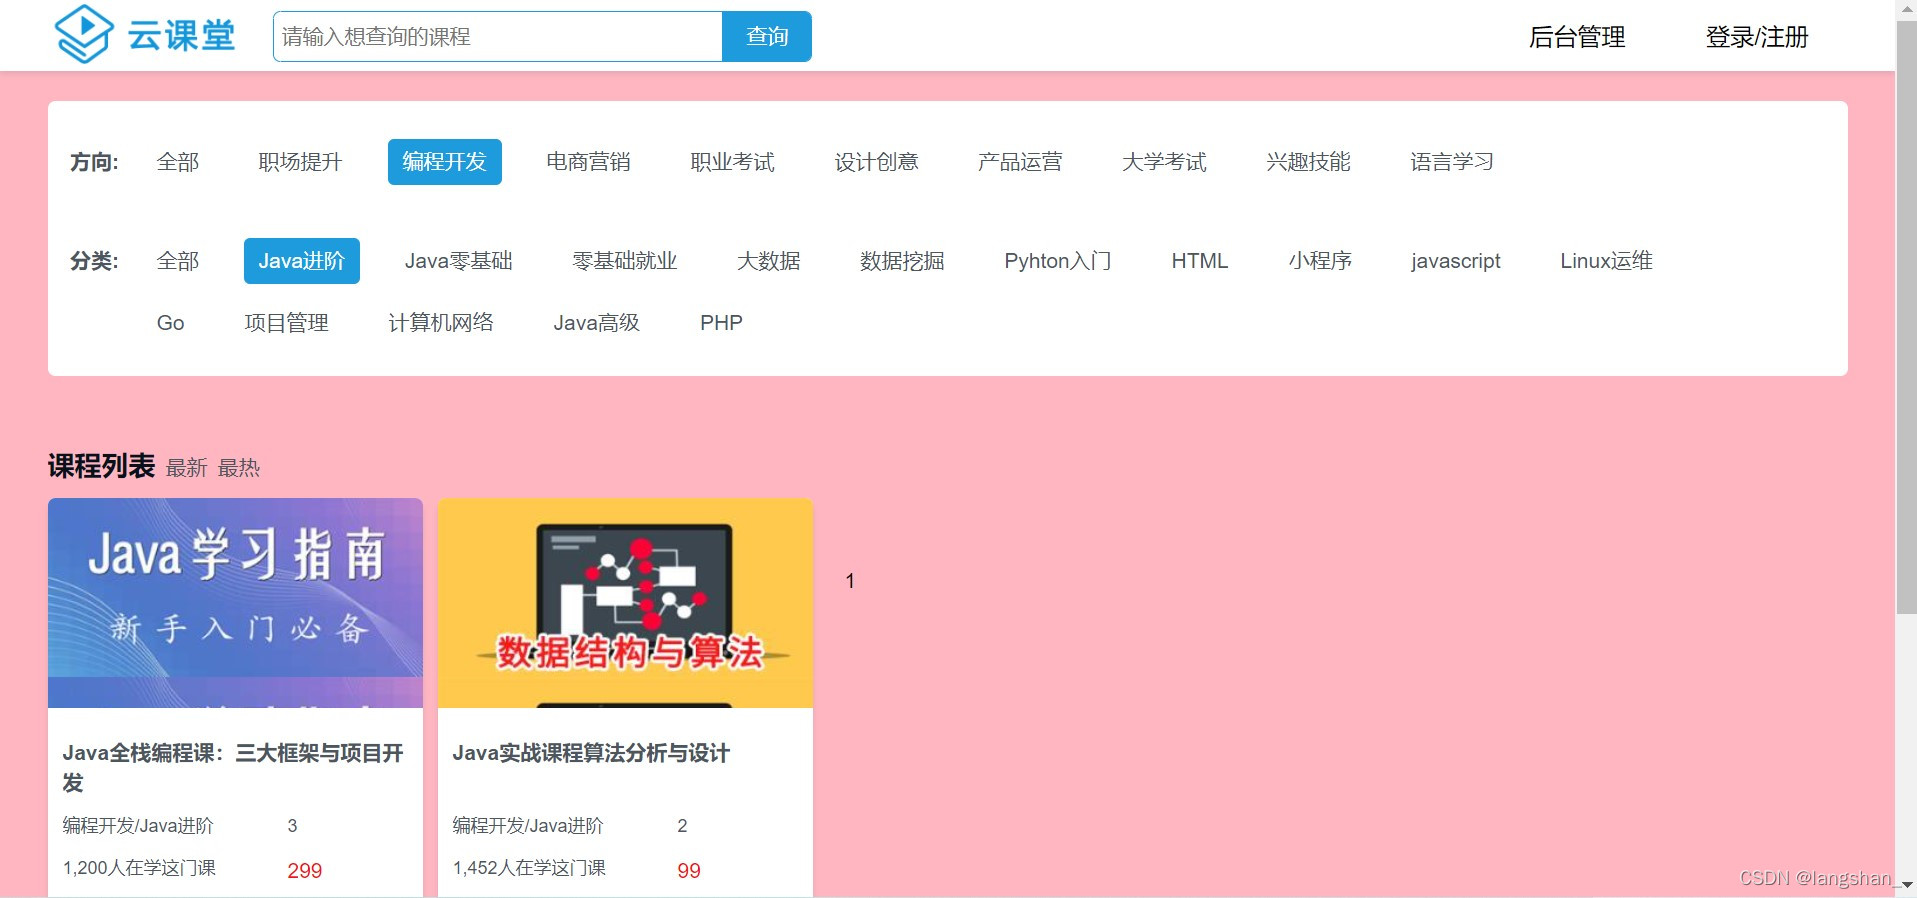
如果一级分类有值,就在对应的一级分类的值上做高亮展示。
如果对应的二级分类有值,就在对应的一二级分类上都做高亮展示。所以后台获取数据是二级分类时,二级分类对应的一级分类也应加载到model中。
在这里插入图片描述

3,过滤二级分类数据的效果:
当有一级分类,二级分类的数据才会过滤,(这句话怎么理解:当选择对应的一级分类, model中有一级分类的值,才会展示对应二级分类的数据。如果没有选择一级分类,就应该展示全部的一级分类,就不用过滤二级分类。)所以要先判断有一级分类,再根据当一级分类的code等于二级分类的parentCode,过滤二级分类的数据,如果没有选择一级分类就展示全部的分类的数据。

//展示数据的
 <#if classifyMap??> //一级分类map存在
<#list classifyMap as key , item> //遍历一级分类map
<#list item.subClassifyList as subItem> //遍历二级分类map
				//过滤数据的
                <#if classify??> //当选择了一级分类
                <#if classify.code == subItem.parentCode> //过滤二级分类
                <li class="course-nav-item <#if subClassify?? && subClassify.code == subItem.code>cur-course-nav</#if>" >//在对应的二级分类上高亮
                    <a href="javascript:void (0)" onclick="queryPage(1,'${subItem.code!}')">${subItem.name!}</a>//通过触发函数把当前的分类传到后台
                </li>
                </#if>
                <#else> //当没有选择一级分类,展示全部的分类数据
                <li class="course-nav-item" >
                    <a href="javascript:void (0)" onclick="queryPage(1,'${subItem.code!}')">${subItem.name!}</a>
                </li>
                </#if>
</#list>
</#list>
</#if>

点击分类时,展示分类下对应的课程,用分页函数实现。

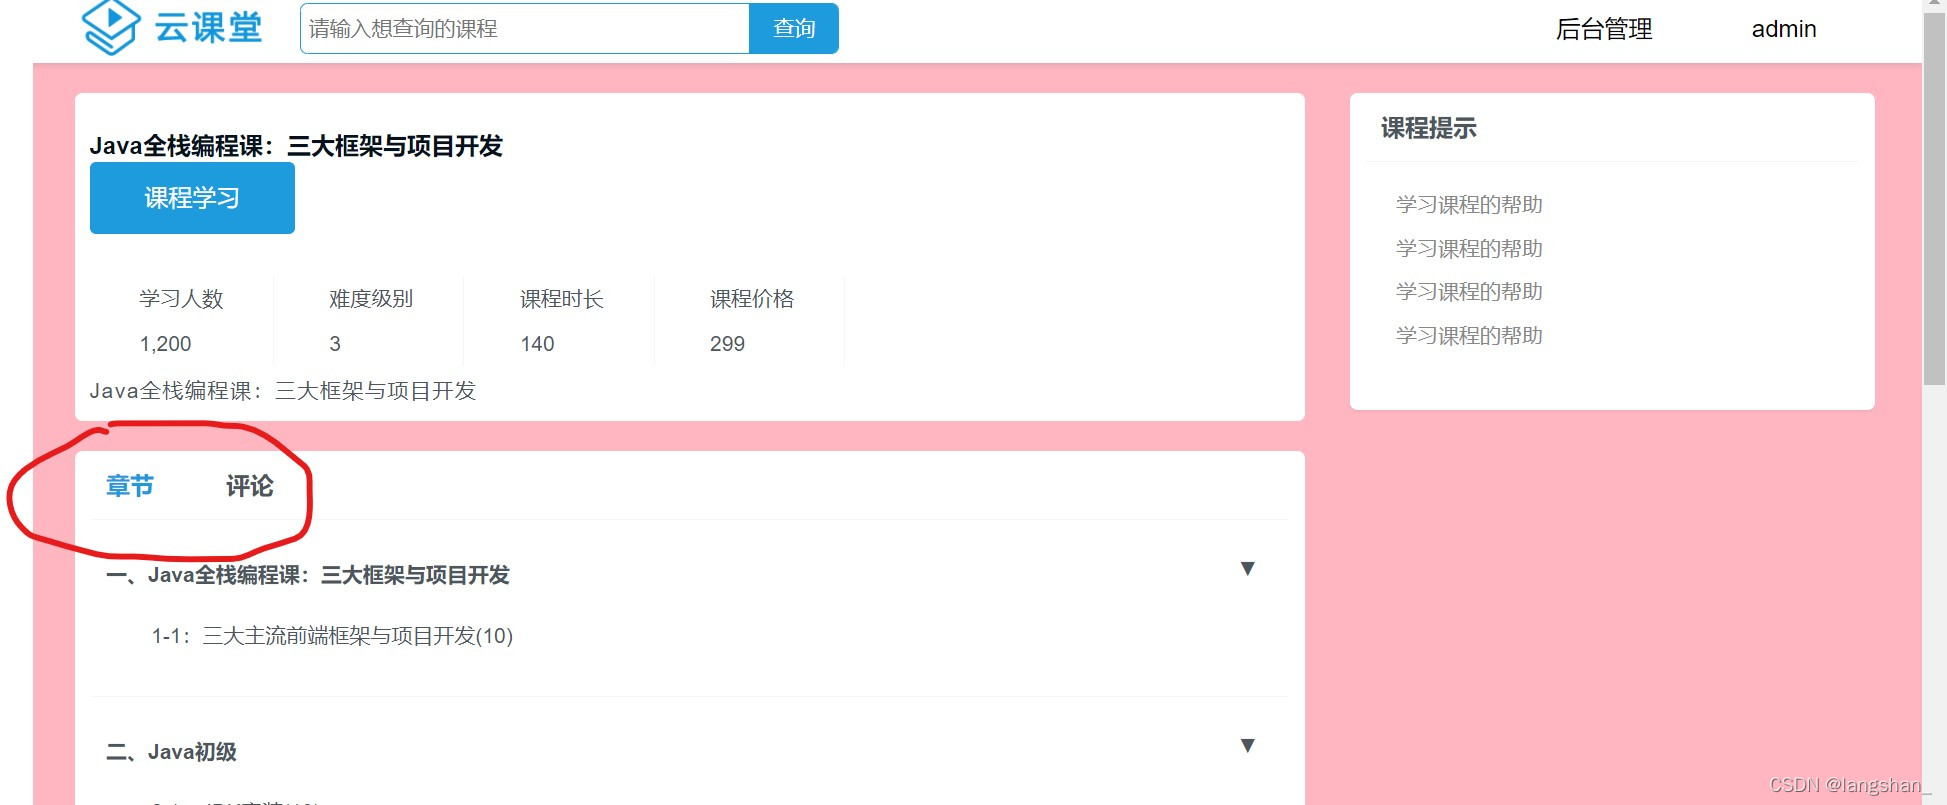
三,课程的详情页:

点击这里可以请求到课程的详情在这里插入图片描述

在这里插入图片描述
1,章节和评论点击时底色切换的效果:
取包含点击对象的父节点的样式选择器,找到点击对象使用的标签,遍历这些标签去掉标签中底色样式,标签中使用的触发函数,把点击的对象传过来,给传过来的对象加上底色,一次只能传一个对象。

<div class="panel-menu">
  <a href="javasript:void(0)">
   <span onclick="show(this,'section')" class="menu-item cur">章 节</span>
  </a>
  <a href="javasript:void(0)">
   <span onclick="show(this,'comment')" class="menu-item cur">评 论</span>
  </a>
</div>
function show(el,id) {
    $('.panel-menu').find('span').each(function (i,item) {
        $(item).removeClass('cur')
    })
    $(el).addClass('cur')

    if (id == 'section'){
        $('#section').show()
        $('#comment').hide()
    }else {
        $('#section').hide()
        $('#comment').show()
    }
}

章节和评论内容的切换效果:
触发函数传点击对象的同时,也把章节或评论的内容对应的id传过来,函数中判断id是section还是comment展示对应div的内容。

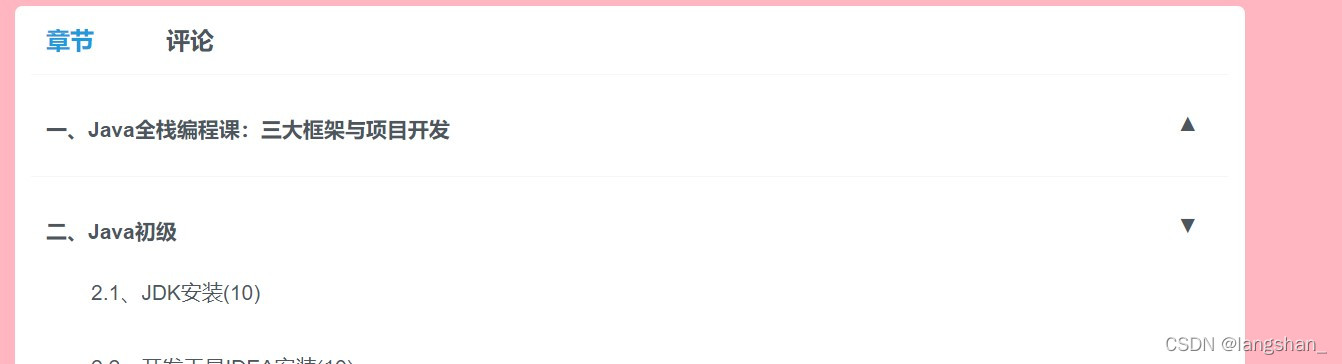
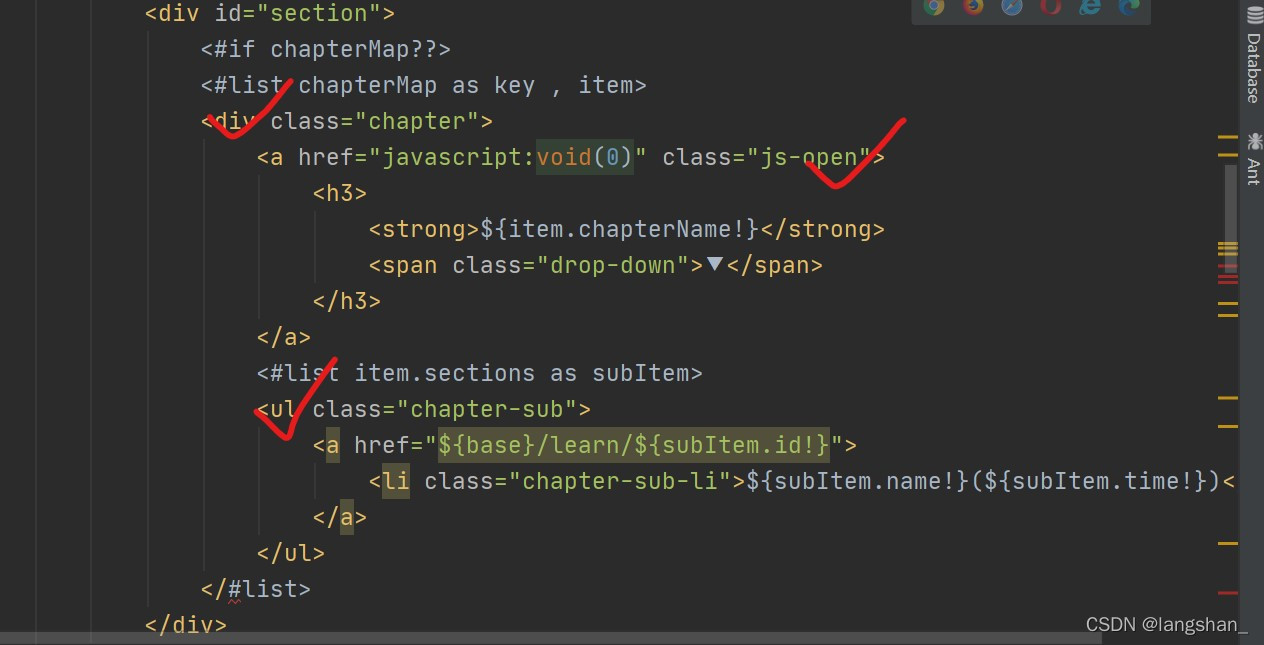
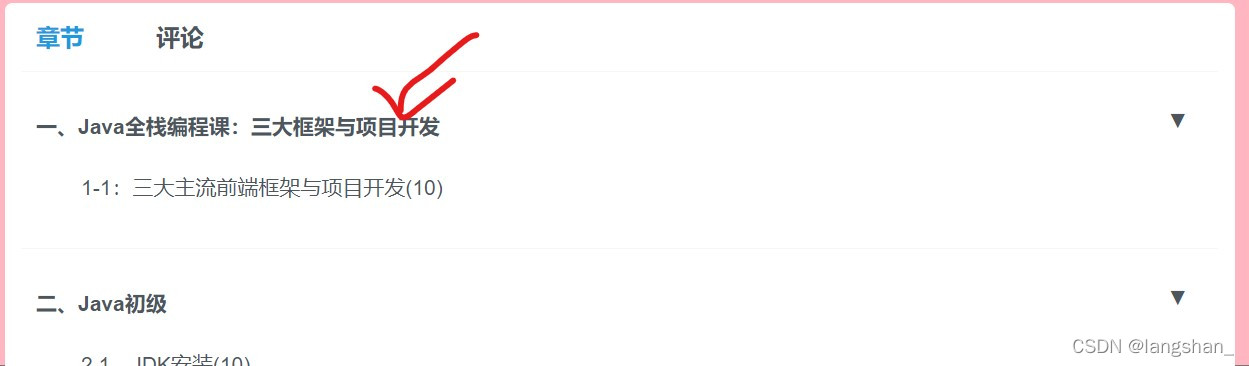
2,点击章名称节信息显示或隐藏效果:
在这里插入图片描述在这里插入图片描述
在这里插入图片描述

点击对象,章名称的样式做点击事件,点击时定位到父节点,找到该显示或隐藏的内容使用的标签,通过css样式判断此标签是显示还是隐藏,如果返回的是none就是没显示,点击时就让对应的 ul 标签显示,else对应的 ul 标签就隐藏。
▼▲图标根据修改后节信息该显示或隐藏进行修改。

 $(function () {
        $('.js-open').click(function () {
            let display = $(this).parent().find('ul').css('display')
            if (display == 'none'){
                $(this).parent().find('ul').css('display','block')
                $(this).parent().find('.drop-down').html('▼')
            }else {
                $(this).parent().find('ul').css('display','none')
                $(this).parent().find('.drop-down').html('▲')
            }
        })

3,课程评论的加载:使用 jquery load,load页面可以返回一个view,把页面的内容插入到div。

<div id="comment">

</div>

获取评论内容,查询数据库的url。
根据课程的 id 查询课程下的评论。
(后续还会传章节的id,查询课程具体章节下的评论。)

		let url = '${base}/course/comment'
        let courseId = '${course.id!}'
        $('#comment').load(url,{'courseId':courseId})

mapper中做关联查询,返回到list前台去遍历。

//加载课程评论的数据,mapper要做关联查询
    @RequestMapping("course/comment")
    public ModelAndView comment(Long courseId,Long sectionId,String from){
        ModelAndView mv = new ModelAndView("zY/course_comment");
        if (courseId != null){
            //传入一个对象
            CourseComment courseComment = new CourseComment();
            if (sectionId != null){
            //如果有sectionId    
            courseComment.setSectionId(sectionId);
            }
            courseComment.setCourseId(courseId);
            List<CourseComment> comments = courseCommentService.queryCourseComment(courseComment);
            mv.addObject("comments",comments);
            
            //把来自哪个页面的请求信息加载到modal中,详情和学习两个页面都需要加载课程的评论,在返回的view中判断如果是来自学习的页面请求就显示对应的a标签可以回复评论
            mv.addObject("from",from);
        }
        return mv;
    }

mapper中的关联查询:leftJoint查询左表的所有字段。查询课程评论表 c的所有字段和用户表的头像,根据 username 建立两个表的关联,添加result 和 domain 中的字段,否则图片数据取不出来。

<select id="queryCourseComment" parameterType="com.langshan.onlineschoollangshan.domain.CourseComment" resultMap="bean_map">
		SELECT
		c.id, c.username, c.to_username, c.courseId, c.sectionId, c.section_title, c.content, c.refId, c.ref_content, c.type, c.createAt, c.updateAt,
		u.header
		FROM course_comment c
		LEFT JOIN auth_user u
		ON c.username = u.username
		<where>
			<if test="courseId !=null">
				AND c.courseId = #{courseId}
			</if>
			<if test="c.sectionId !=null">
				AND c.sectionId = #{sectionId}
			</if>
		</where>
	</select>

四,验证码
1,为什么发布评论要填写验证码?
避免有人频繁发布不好的评论。避免有人用工具发布评论。

2,如果以后想用把idCode拷贝到自己的项目中。
3,验证码的实现原理:
在这里插入图片描述

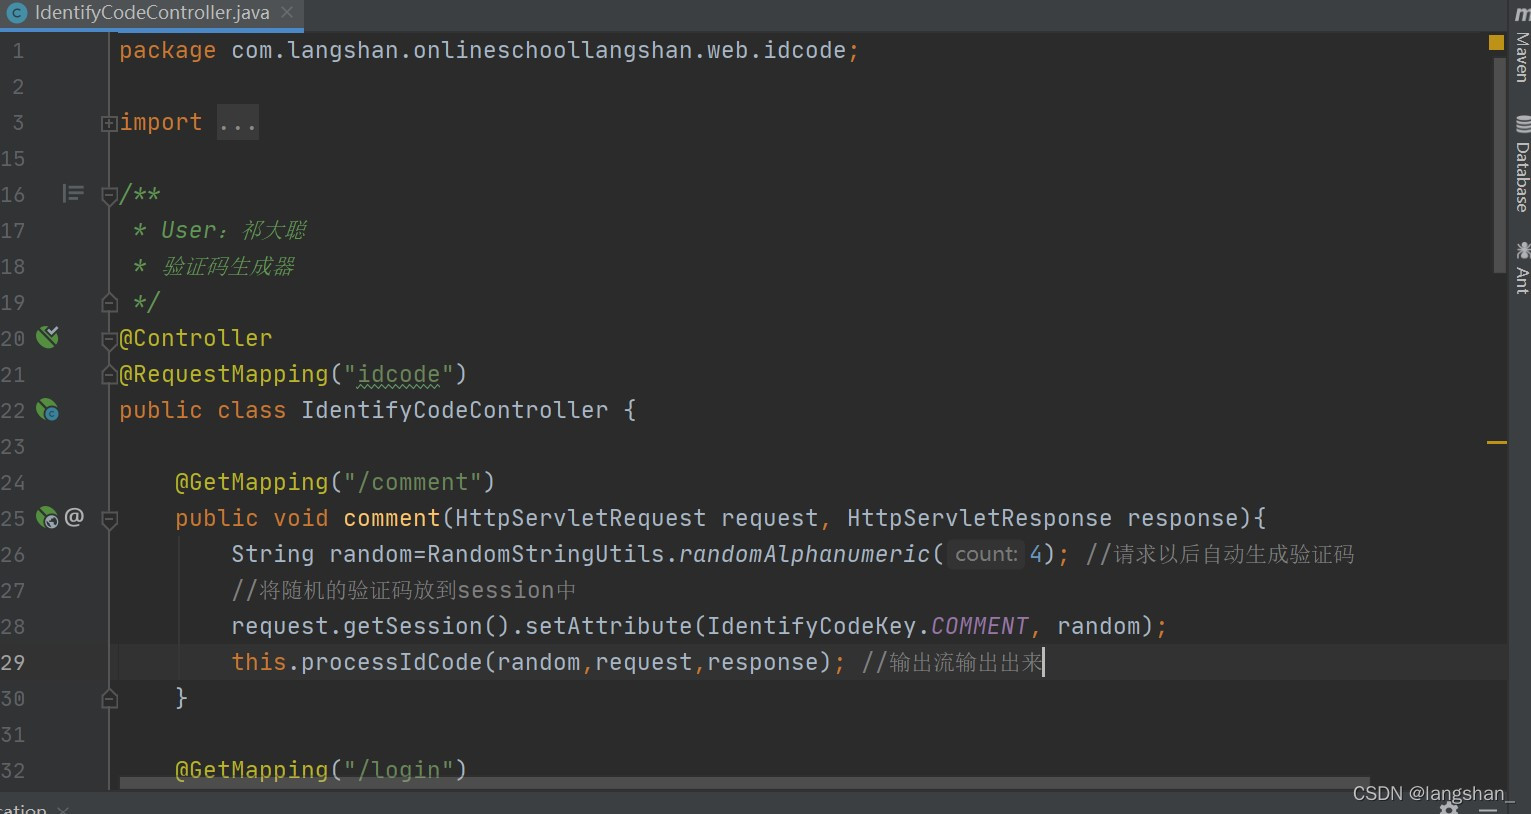
当请求到 idcode/comment,会随机自动生成验证码并放到图片里,用输出流输出出去。
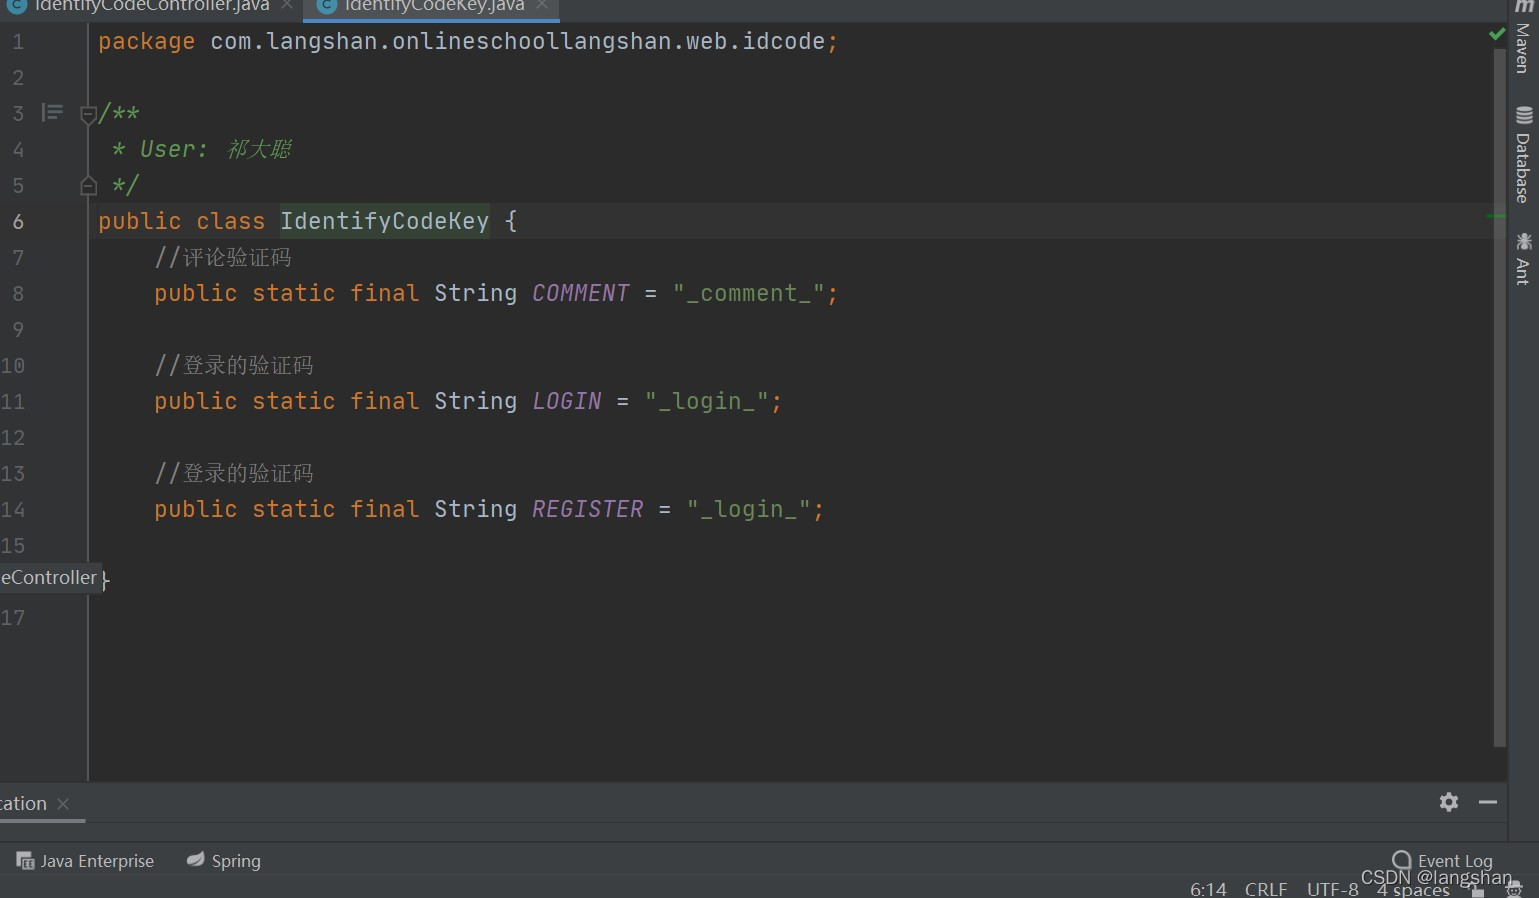
也把验证码通过request,set到 session当中,方便之后校验,以key value的形式 set 到 session中,key对应验证码的不同功能,有登录,注册,评论功能的验证码。
在这里插入图片描述
controller中做验证码的校验,可以通过 request 从 session中获取,进行对比看是否一样,一样才能发布内容。

4,验证码的校验:request从session中把验证码 get key 获取出来返回一个对象,获取session中的验证码为空要返回失败信息。
将获取的对象转化成 String类型,忽略前端提交的验证码的大小写进行对比,不相同就返回错误的信息,相同就继续执行代码。


    @RequestMapping("doLogin")
    @ResponseBody
    public String doLogin(String username,String password,String identityCode,
                          HttpServletRequest request){
 //获取session中的验证码进行校验
        Object sessionCode = request.getSession().getAttribute(IdentifyCodeKey.REGISTER);
        if (sessionCode == null){
            return JsonView.failureJson("验证码为空");
        }
        if (!sessionCode.toString().equalsIgnoreCase(identityCode)){
            return JsonView.failureJson("验证码输入错误");
        }

5,点击验证码图片变换效果:由于图片在 session 中有缓存,再次请求不会刷新,所以要获取当前时间的时间戳,修改src属性的值,再请求一次 idcode/comment 地址并加上时间戳,获取新的验证码再用输出流输出出来,展示到页面中。

<img src="${base}/idcode/comment" class="identity-code" id="identityCodeImg" onclick="reloadIdCode()">                    
function reloadIdCode() {
        let t = new Date().getTime()
        $('#identityCodeImg').attr('src','${base}/idcode/comment?t='+t)
    }

五,课程的学习页面

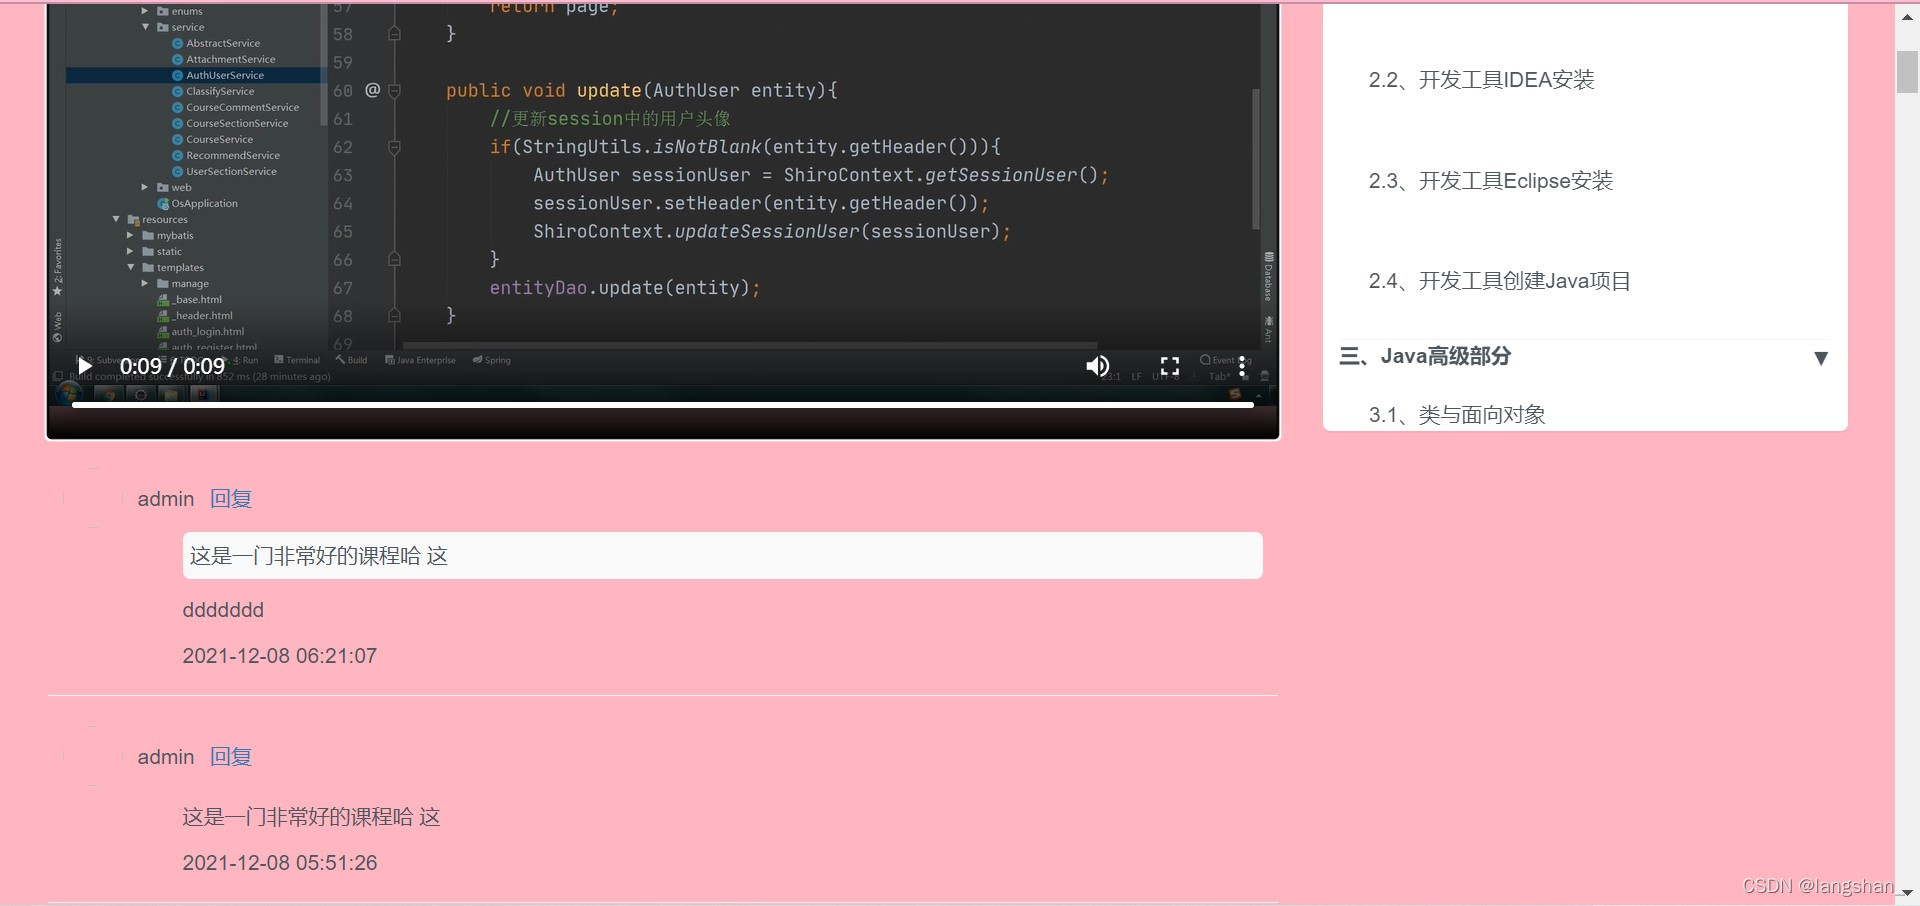
1,课程的详情页面中要获取对应章节的 id 请求到课程的学习页面,播放对应小节的 videoUrl。(个人中心的开发会具体讲),load 加载评论。
在这里插入图片描述

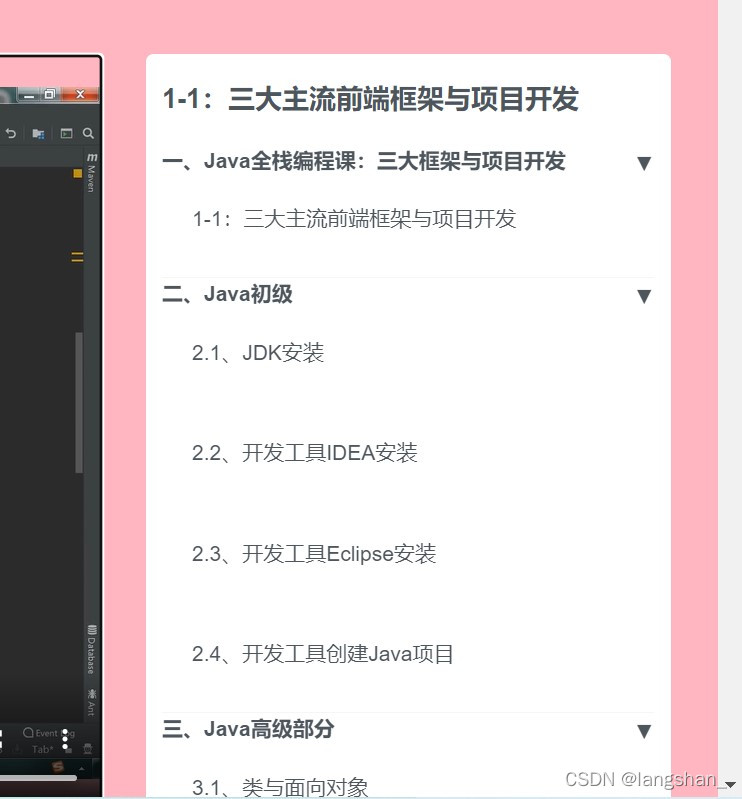
2,章节数据的样式:首先要固定章节数据的panel 的高度,超出部分隐藏overflow:hidden,滚动效果 overflow-y:scroll。
在这里插入图片描述
3,添加评论的form表单页面结构,展示验证码,点击验证码的变换效果。
在这里插入图片描述

<form id="commentForm" action="${base}/saveComment" method="post">
                
                <input type="hidden" id="sectionId" name="sectionId" value="${courseSection.id!}">
                <input type="hidden" id="refId" name="refId" value="">
                
                <div class="form-group clearfix">
                    <textarea id="content" name="content" rows="3px" cols="100px" class="form-control"></textarea>
                </div>
                <div class="form-group clearfix">
                    <input type="text" id="identityCode" name="identityCode" class="form-control" style="width: 200px;float: left">
                    <img src="${base}/idcode/comment" class="indeity-code" id="identityCodeImg" onclick="reloadIdCode()">
                    <div style="display: none" id="_alertInfo" class="alert-success"></div>
                    <input onclick="doSubmit()" type="button" value="发布" class="modal-btn modal-btn-bg" >
                </div>
</form>

4,添加课程的评论:
需求是要求用户必须输入评论的内容,而且内容长度小于200,登录了,输入正确的验证码才能发布。

提交前先判断是否有评论的内容,且长度小于200,是否填写验证码,否:通过id 把错误信息传到页面,并将数据回滚。
ajaxSubmit提交form表单,发布评论成功,重新加载评论并清空输入框(把输入框的内容设成空串),发布失败返回java中定义的错误信息。

 function doSubmit() {
         let content = $('#content').val()
          if (_os.isEmpty(content) || content.length > 200){
            _os.alertMsg("评论的内容输入错误")
               return;
          }
          let identityCode = $('#identityCode').val()
          if (_os.isEmpty(identityCode)){
           os.alertMsg("请输入验证码")
           return;
          }

        $('#commentForm').ajaxSubmit({
            dataType:'json',
            success:function (resp) {
                if (resp.errcode == 0){
                    loadComment();
                    $('#content').val("")
                    $('#identityCode').val("")
                }else {
                    _os.alertMsg(resp.message)
                }
            }
        })
    }

controller中接收评论的form 表单和提交的验证码,对验证码进行校验。根据 form 表单隐藏的 input中,判断是否有refId,有是回复评论,没有是发表评论,创建课程评论数据到数据库。

 @RequestMapping("saveComment")
    @ResponseBody
    public String saveComment(HttpServletRequest request,//获取session中的验证码
                              CourseComment comment,String identityCode) {
                              //提交的评论的数据,提交的验证码
        //验证码校验
        Object sessionCode = request.getSession().getAttribute(IdentifyCodeKey.COMMENT);
        if (sessionCode != null && StringUtils.isNotEmpty(identityCode)) {
            if (!sessionCode.toString().equalsIgnoreCase(identityCode)) {
                return JsonView.failureJson("验证码错误");
            }
        } else {
            return JsonView.failureJson("验证码错误");
        }

        //评论内容不应为空,和针对一个课程一个小节的评论
        if (StringUtils.isEmpty(comment.getContent())) {
            return JsonView.failureJson("评论为空,无法发布");
        }
		//获取课程小节的数据
        Long sectionId = comment.getSectionId();
        if (sectionId == null) {
            return JsonView.failureJson("小节数据不存在,无法发布");
        }

        CourseSection courseSection = courseSectionService.getById(sectionId);
        if (courseSection == null) {
            return JsonView.failureJson("小节数据不存在,无法发布");
        }

        //创建评论,设置字段
        comment.setSectionTitle(courseSection.getName());
        comment.setCourseId(courseSection.getCourseId()); //每个小节的数据都有课程的id
        comment.setUsername("admin"); //尚未实现登录功能直接写死
        comment.setType(0);

        boolean flag = false;
        if (comment.getRefId() != null) {
            CourseComment courseComment = courseCommentService.getById(comment.getRefId());//被援引的评论
            comment.setRefContent(courseComment.getContent()); //被援引的评论的内容
            comment.setToUsername(courseComment.getUsername());//被援引的评论是谁留下的
            flag = true;
        }

        if (!flag) { //表示不执行回复的业务代码,直接执行添加的业务代码
            comment.setToUsername("admin");
            comment.setRefId(0L);
            comment.setRefContent("");
        }

        courseCommentService.create(comment);
        return JsonView.successJson();
    }
在这里插入图片描述
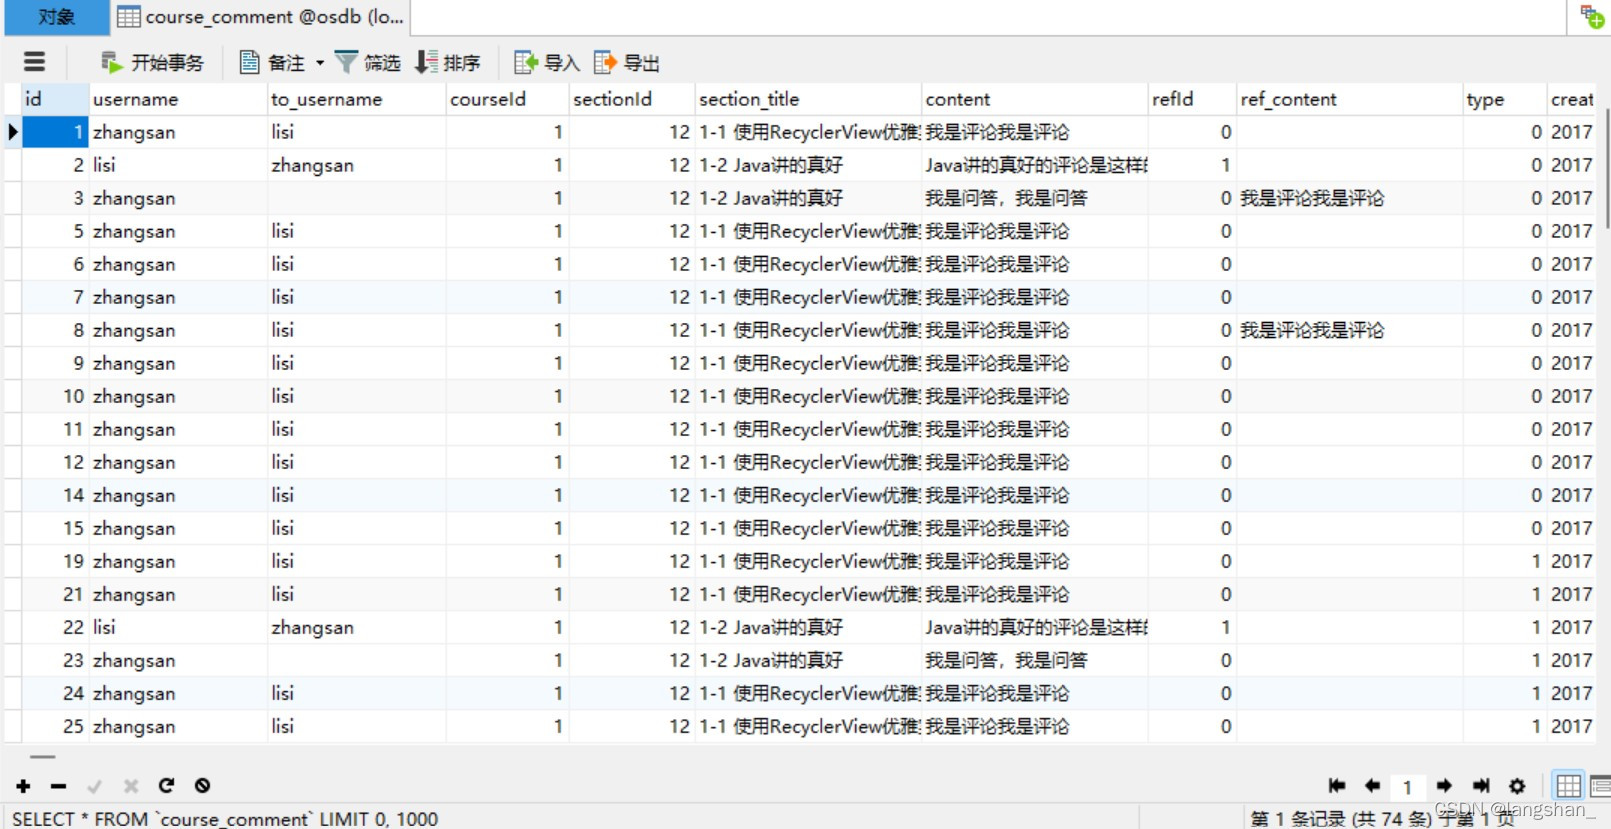
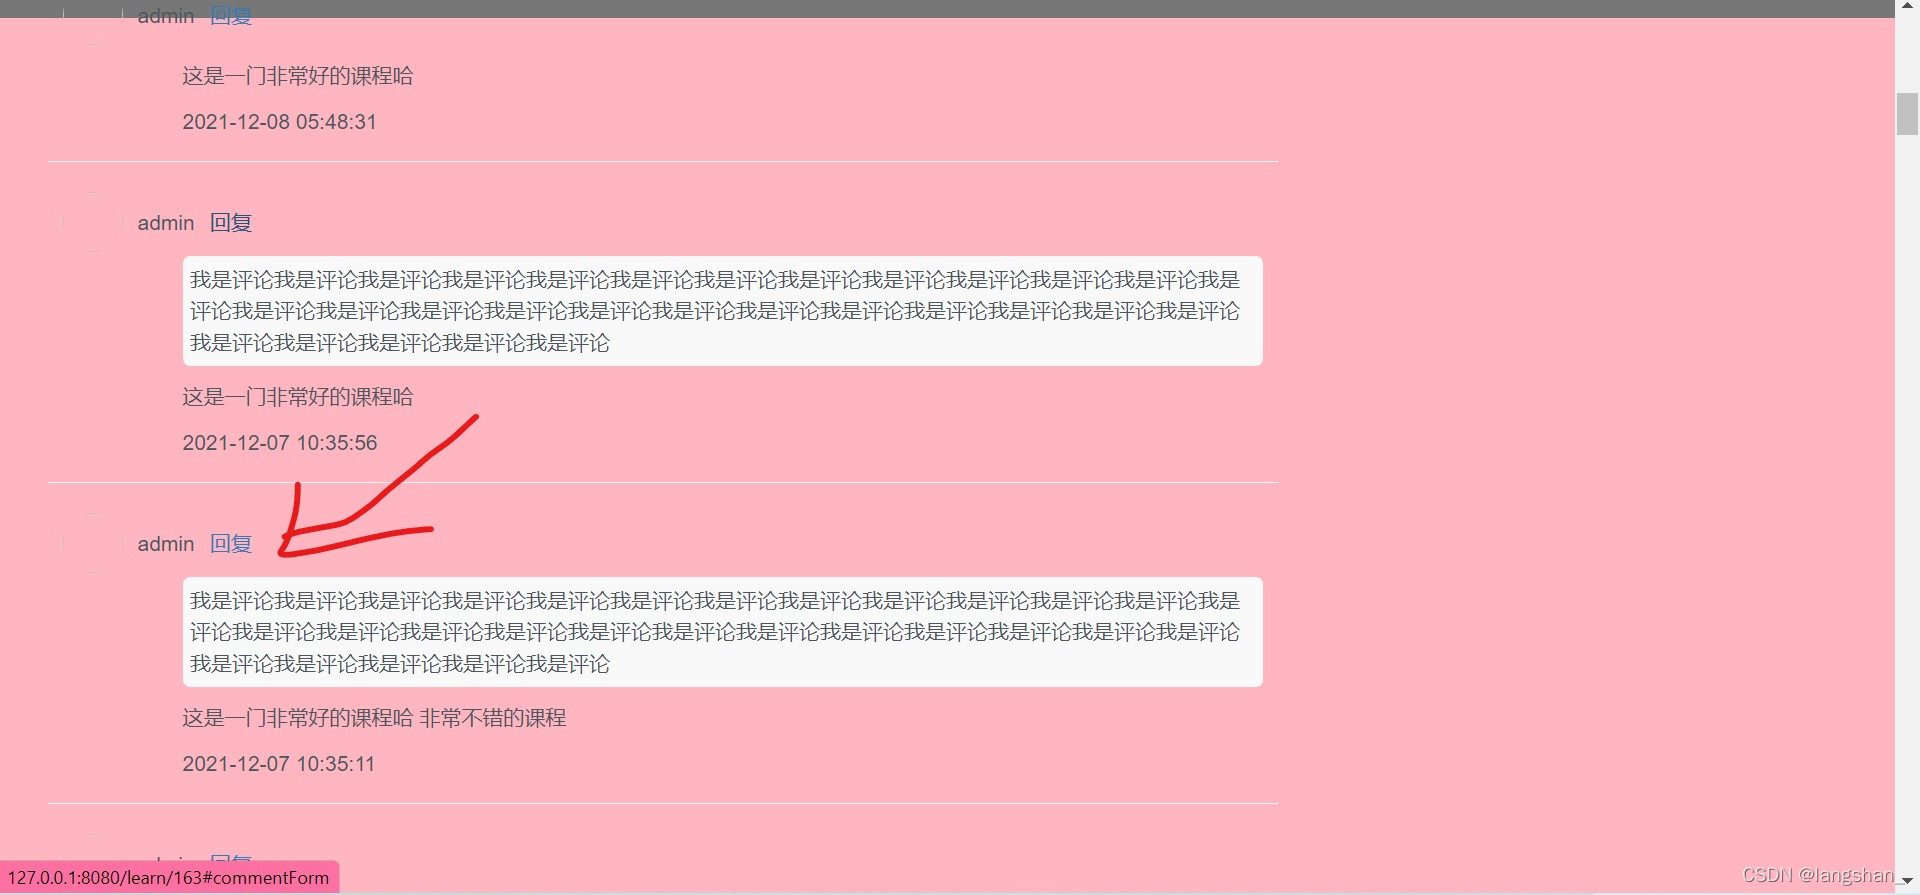
以上是数据库的评论表对应的字段, sectoinId和 refId 都通过comment view中隐藏的input,form表单提交到后台,sectionId 是播放视频的videoUrl时把小节数据添加到modal可以遍历出来的,如果是回复的课程评论 被回复的 refId 在点击回复时把值设置进去,再提交到后台的,点击时获取用户名,显示被回复的用户名。
在这里插入图片描述

		<#if from?? && from=='learn'>
        <a class="user-name" href="#commentForm" onclick="reComment('${item.username!}','${item.id!}')" style="float: left">回复</a>
        </#if>
function reComment(toUsername,id) {
        if (toUsername != null){
            $('#toUsername').html("回复"+ toUsername);
        }

        if (id != null){
            $('#refId').val(id)
        }
    }

href =“#id”:锚点,点击时会滚动到这个id对应的div。例如 href="#commentForm" 点击回复时,会滚动到这个id对应的内容

onlineSchool 立即下载

相关推荐

Arco Design Pro PC端商家后台框架 | Axure高保真原型库

摘要:本Axure原型设计方案基于字节跳动ArcoDesignPro规范,提供企业级后台快速搭建方案。包含动态表格、表单验证等核心组件,采用中继器驱动设计,支持响应式布局。方案覆盖80%后台常用交互,可节省60%原型制作时间,配套完整设计文档和组件库,实现原型到开发的高效衔接。特别适用于电商、SaaS等后台系统开发,支持权限管理、数据分析等场景,显著提升团队协作效率。

招风的黑耳优快云 3974

onlineSchool 项目课 三 :上下级数据

一,分类数据: 1,创建bean封装数据结构。(java类) //放上下级数据 public class ClassifyBean extends Classify { private List<Classify> SubClassifyList = new ArrayList<Classify>(); public List<Classify> getSubClassifyList() { return SubClassifyList

langshan_的博客 311

保姆级教程:用Zemax 18.9复现单模光纤耦合仿真(附康宁SMF-28e参数)

本文提供了一份详细的Zemax 18.9单模光纤耦合仿真教程,以康宁SMF-28e为例,涵盖从软件设置、材料参数输入到系统构建和优化的全流程。通过光束耦合分析和物理光学传播(POP)技术,帮助用户准确模拟光纤耦合效率,并解决常见问题,适用于光学设计初学者和专业人士。

weixin_27330481的博客 313

html 个人主页效果实例,html ------个人主页制作示例(div布局)

该楼层疑似违规已被系统折叠隐藏此楼查看此楼.header{width:1000px;margin-left:auto;margin-right:auto;padding-top:20px;}.header a{color:Black;text-decoration:none;}.header a:hover{text-decoration:underline;}.nav { clear:both...

weixin_30268555的博客 1306

射频工程师必须了解的S参数四项要点

本文围绕单端 6 英寸走线的 S 参数展开深入分析,核心包含四项关键要点:低频下导线电学长度远小于信号波长,S11 呈大负分贝值、S21 接近 0 分贝;端口与走线的阻抗不匹配引发反射叠加,形成 S11 首个峰值(对应传输线四分之一波长频率);S21 相位可作为一致性检查依据,其 90° 相位差与 S11 峰值吻合;理想建模中 S11 峰值随频率上升因损耗下降,实际测量因连接器等阻抗不连续性,S11 会出现振荡上升。分析依托 Keysight ADS 工具与电磁求解器原理,为 S 参数解读提供科学支撑。

一只豌豆象的博客 1285

5分钟搞定!用ZLMediaKit+GB28181搭建低成本外网视频监控(含避坑指南)

本文详细介绍了如何利用开源ZLMediaKit流媒体服务器与国标GB28181协议,快速搭建低成本、可外网访问的企业级视频监控系统。文章提供了从服务端部署、设备配置到外网访问优化的完整实战指南,并重点分享了网络配置、性能调优及常见问题的避坑方案,帮助用户实现高清视频流的稳定推送与多格式播放。

bush的博客 332

《网页设计与制作》课程主页

引言 为了激发广大童鞋的学习积极性,让我们的学习更加贴近未来工作需求,便于记录学习过程、总结学习收获、广交朋友,我们在优快云上开通课程主页,希望大家可以通过优快云这样的学习平台,更好地提升自我。 课程愿景 我们的目标是经过一系列前端方面课程的学习,能逐渐胜任前端开发工程师的工作要求,因此在认识课程之前,我们先来看一则招聘简章。 来自于上海鲸科信息科技有限公司的前端开发工程师招聘:

dainengchimi007的专栏 1153

Mac电脑本地安装Stable Diffusion小白教程避开所有坑教程

如果出现黄字部分警告,如WARNING: The scripts pip, pip3 and pip3.9 are installed inz‘/usr/local/opt/python@3.9/Frameworks/Python.framework/Versions/3.9/bin’ which is not on PATH)需要将其添加到path。下载pip,输入:curl https://bootstrap.pypa.io/pip/get-pip.py -o get-pip.py。

jackerjin123的博客 1799

网页设计课程主页

网页设计 《网页设计与制作(HTML+CSS)》是面向计算机相关专业的一门专业基础课,涉及计算机基础、互联网等内容,通过本课程的学习,学生能够了解网页web发展历史及其未来方向,熟悉网页设计流程、掌握网络中常见的网页布局效果、学会制作各种企业,门户,电商类网站。

bluechen10的专栏 772

RT-DETR改进策略【Conv和Transformer】| HiLo注意力机制 通过分离处理图像的高频和低频信息,高效处理图像特征

本文记录的是利用改进检测模型,针对目标检测中面临的多尺度特征融合效率与长距离依赖建模难题,HiLo注意力模块的引入旨在通过频率解耦策略优化高分辨率特征处理,将高频细节(如目标边缘)与低频语义(如场景结构)分离建模,提升目标检测精度。Fast Vision Transformers with HiLo AttentionHiLo注意力模块的提出源于对传统自注意力机制局限性的反思。传统多头自注意力(MSA)在处理高分辨率图像时存在以下问题:HiLo将注意力模块分为高频(Hi-Fi)和低频(Lo-Fi)两个分支,

Limiiiing的博客 818

使用LabVIEW创建和分析柱状图:从基础绘制到高级数据分析的完整指南

LabVIEW,全称为Laboratory Virtual Instrument Engineering Workbench,是由美国国家仪器公司(National Instruments, NI)开发的一款图形化编程语言。自1986年首次推出以来,LabVIEW凭借其强大的数据采集、分析和控制能力,在工程、科研、教育等领域得到了广泛应用。与传统的文本编程语言不同,LabVIEW采用了图形化编程方式,用户通过连接不同的函数节点来实现复杂的逻辑和算法。

qq_38334677的博客 775

onlineSchool 项目课 八:个人中心部分的开发

点击菜单栏的背景色:将 curNav 和当前的点击对象添加到modal。前台去判断 curNav 是否存在且是当前的点击对象,是就添加背景色,不是就维持原来的样式。 学习记录的加载:登录的用户才有学习记录,通过当前登录用户的id获取学习记录表 user course section表 t 的数据,对学习记录表的数据做关联查询,关联course c 表,section s 表 查询字段,通过t表的courseId,t表的sectionId建立与course表,courseSection表的关联。 查询 t表

langshan_的博客 272

21、博弈中的对抗搜索算法解析

本文深入解析了博弈中的对抗搜索算法,涵盖极小极大算法、阿尔法-贝塔剪枝、移动排序与换位表等核心技术。文章分析了算法的数学基础与实现机制,探讨了其在国际象棋、围棋等复杂游戏中的应用,并扩展至多人游戏中的联盟与合作行为。通过对比不同类型策略的优劣,展示了对抗搜索在实际博弈系统中的演进方向与优化路径,为人工智能决策提供了理论支持与实践指导。

rust6ferris的博客 129

onlineSchool 项目课 四 :对项目图片的处理

一,实现图片的预览。 1, 标签预留图片上传的位置。 <img id="imagePreview" style="width: 220px;height: 90px;background-size: contain;background-image: url('/file/attachment/${(entity.picture)!}/0');"> 2,选择的input,可以选择图片文件。 <input id="file" type="file"

langshan_的博客 192

温度PID控制PLC程序

温度PID稳定控制程序,适用于欧姆龙PLC,对其他PLC也具有很大参考价值

文档:亲测可用解决vnc灰屏,黑屏,鼠标大黑叉情况

主要解决vnc-viewer灰屏,黑屏,鼠标大黑叉等现象,详细见文档。

onlineSchool 项目课 五:动态的章节数据

一,动态章节表单的实现 1,添加章节信息:通过包含章节样式的id,复制id 里面包含的章节的输入框,得到的是一个dom 对象,通过html 获取 dom 对象的内容,append 到 tabcontent中。 章节的内容是拿出来且隐藏的,用触发事件点击添加时,才复制一份出来,复制的一份也是隐藏的,通过替换隐藏的样式才显示出来。 replaceAll替换隐藏的样式。 (如果章节的内容不拿出来,这个情况太复杂了,不好描述,可以选择不隐藏章节的内容试试看是什么情况。) 2,添加节信息:通过 id 复制节信息,得到

langshan_的博客 950

深度学习工具包 DeepLearningToolbox

深度学习工具包Deprecation notice.-----This toolbox is outdated and no longer maintained.There are much better tools available for deep learning than this toolbox, e.g. [Theano](http://deeplearning.net/software/theano/), [torch](http://torch.ch/) or [tensorflow](http://www.tensorflow.org/)I would suggest you use one of the tools mentioned above rather than use this toolbox.Best, Rasmus.DeepLearnToolbox================A Matlab toolbox for Deep Learning.Deep Learning is a new subfield of machine learning that focuses on learning deep hierarchical models of data.It is inspired by the human brain&#39;s apparent deep (layered, hierarchical) architecture.A good overview of the theory of Deep Learning theory is[Learning Deep Architectures for AI](http://www.iro.umontreal.ca/~bengioy/papers/ftml_book.pdf)For a more informal introduction, see the following videos by Geoffrey Hinton and Andrew Ng.* [The Next Generation of Neural Networks](http://www.youtube.com/watch?v=AyzOUbkUf3M) (Hinton, 2007)* [Recent Developments in Deep Learning](http://www.youtube.com/watch?v=VdIURAu1-aU) (Hinton, 2010)* [Unsupervised Feature Learning and Deep Learning](http://www.youtube.com/watch?v=ZmNOAtZIgIk) (Ng, 2011)If you use this toolbox in your research please cite [Prediction as a candidate for learning deep hierarchical models of data](http://www2.imm.dtu.dk/pubdb/views/publication_details.php?id=6284)```@MASTERSTHESIS\{IMM2012-06284, author = "R. B. Palm", title = "Prediction as a candidate for learning deep hierarchical models of data", year = "2012",}```Contact: rasmusbergpalm at gmail dot comDirectories included in the toolbox-----------------------------------`NN/` - A library for Feedforward Backpropagation Neural Networks`CNN/` - A library for Convolutional Neural Networks`DBN/` - A library for Deep Belief Networks`SAE/` - A library for Stacked Auto-Encoders`CAE/` - A library for Convolutional Auto-Encoders`util/` - Utility functions used by the libraries`data/` - Data used by the examples`tests/` - unit tests to verify toolbox is workingFor references on each library check REFS.mdSetup-----1. Download.2. addpath(genpath(&#39;DeepLearnToolbox&#39;));Example: Deep Belief Network---------------------```matlabfunction test_example_DBNload mnist_uint8;train_x = double(train_x) / 255;test_x = double(test_x) / 255;train_y = double(train_y);test_y = double(test_y);%% ex1 train a 100 hidden unit RBM and visualize its weightsrand(&#39;state&#39;,0)dbn.sizes = [100];opts.numepochs = 1;opts.batchsize = 100;opts.momentum = 0;opts.alpha = 1;dbn = dbnsetup(dbn, train_x, opts);dbn = dbntrain(dbn, train_x, opts);figure; visualize(dbn.rbm{1}.W&#39;); % Visualize the RBM weights%% ex2 train a 100-100 hidden unit DBN and use its weights to initialize a NNrand(&#39;state&#39;,0)%train dbndbn.sizes = [100 100];opts.numepochs = 1;opts.batchsize = 100;opts.momentum = 0;opts.alpha = 1;dbn = dbnsetup(dbn, train_x, opts);dbn = dbntrain(dbn, train_x, opts);%unfold dbn to nnnn = dbnunfoldtonn(dbn, 10);nn.activation_function = &#39;sigm&#39;;%train nnopts.numepochs = 1;opts.batchsize = 100;nn = nntrain(nn, train_x, train_y, opts);[er, bad] = nntest(nn, test_x, test_y);assert(er < 0.10, &#39;Too big error&#39;);```Example: Stacked Auto-Encoders---------------------```matlabfunction test_example_SAEload mnist_uint8;train_x = double(train_x)/255;test_x = double(test_x)/255;train_y = double(train_y);test_y = double(test_y);%% ex1 train a 100 hidden unit SDAE and use it to initialize a FFNN% Setup and train a stacked denoising autoencoder (SDAE)rand(&#39;state&#39;,0)sae = saesetup([784 100]);sae.ae{1}.activation_function = &#39;sigm&#39;;sae.ae{1}.learningRate = 1;sae.ae{1}.inputZeroMaskedFraction = 0.5;opts.numepochs = 1;opts.batchsize = 100;sae = saetrain(sae, train_x, opts);visualize(sae.ae{1}.W{1}(:,2:end)&#39;)% Use the SDAE to initialize a FFNNnn = nnsetup([784 100 10]);nn.activation_function = &#39;sigm&#39;;nn.learningRate = 1;nn.W{1} = sae.ae{1}.W{1};% Train the FFNNopts.numepochs = 1;opts.batchsize = 100;nn = nntrain(nn, train_x, train_y, opts);[er, bad] = nntest(nn, test_x, test_y);assert(er < 0.16, &#39;Too big error&#39;);```Example: Convolutional Neural Nets---------------------```matlabfunction test_example_CNNload mnist_uint8;train_x = double(reshape(train_x&#39;,28,28,60000))/255;test_x = double(reshape(test_x&#39;,28,28,10000))/255;train_y = double(train_y&#39;);test_y = double(test_y&#39;);%% ex1 Train a 6c-2s-12c-2s Convolutional neural network %will run 1 epoch in about 200 second and get around 11% error. %With 100 epochs you&#39;ll get around 1.2% errorrand(&#39;state&#39;,0)cnn.layers = { struct(&#39;type&#39;, &#39;i&#39;) %input layer struct(&#39;type&#39;, &#39;c&#39;, &#39;outputmaps&#39;, 6, &#39;kernelsize&#39;, 5) %convolution layer struct(&#39;type&#39;, &#39;s&#39;, &#39;scale&#39;, 2) %sub sampling layer struct(&#39;type&#39;, &#39;c&#39;, &#39;outputmaps&#39;, 12, &#39;kernelsize&#39;, 5) %convolution layer struct(&#39;type&#39;, &#39;s&#39;, &#39;scale&#39;, 2) %subsampling layer};cnn = cnnsetup(cnn, train_x, train_y);opts.alpha = 1;opts.batchsize = 50;opts.numepochs = 1;cnn = cnntrain(cnn, train_x, train_y, opts);[er, bad] = cnntest(cnn, test_x, test_y);%plot mean squared errorfigure; plot(cnn.rL);assert(er<0.12, &#39;Too big error&#39;);```Example: Neural Networks---------------------```matlabfunction test_example_NNload mnist_uint8;train_x = double(train_x) / 255;test_x = double(test_x) / 255;train_y = double(train_y);test_y = double(test_y);% normalize[train_x, mu, sigma] = zscore(train_x);test_x = normalize(test_x, mu, sigma);%% ex1 vanilla neural netrand(&#39;state&#39;,0)nn = nnsetup([784 100 10]);opts.numepochs = 1; % Number of full sweeps through dataopts.batchsize = 100; % Take a mean gradient step over this many samples[nn, L] = nntrain(nn, train_x, train_y, opts);[er, bad] = nntest(nn, test_x, test_y);assert(er < 0.08, &#39;Too big error&#39;);%% ex2 neural net with L2 weight decayrand(&#39;state&#39;,0)nn = nnsetup([784 100 10]);nn.weightPenaltyL2 = 1e-4; % L2 weight decayopts.numepochs = 1; % Number of full sweeps through dataopts.batchsize = 100; % Take a mean gradient step over this many samplesnn = nntrain(nn, train_x, train_y, opts);[er, bad] = nntest(nn, test_x, test_y);assert(er < 0.1, &#39;Too big error&#39;);%% ex3 neural net with dropoutrand(&#39;state&#39;,0)nn = nnsetup([784 100 10]);nn.dropoutFraction = 0.5; % Dropout fraction opts.numepochs = 1; % Number of full sweeps through dataopts.batchsize = 100; % Take a mean gradient step over this many samplesnn = nntrain(nn, train_x, train_y, opts);[er, bad] = nntest(nn, test_x, test_y);assert(er < 0.1, &#39;Too big error&#39;);%% ex4 neural net with sigmoid activation functionrand(&#39;state&#39;,0)nn = nnsetup([784 100 10]);nn.activation_function = &#39;sigm&#39;; % Sigmoid activation functionnn.learningRate = 1; % Sigm require a lower learning rateopts.numepochs = 1; % Number of full sweeps through dataopts.batchsize = 100; % Take a mean gradient step over this many samplesnn = nntrain(nn, train_x, train_y, opts);[er, bad] = nntest(nn, test_x, test_y);assert(er < 0.1, &#39;Too big error&#39;);%% ex5 plotting functionalityrand(&#39;state&#39;,0)nn = nnsetup([784 20 10]);opts.numepochs = 5; % Number of full sweeps through datann.output = &#39;softmax&#39;; % use softmax outputopts.batchsize = 1000; % Take a mean gradient step over this many samplesopts.plot = 1; % enable plottingnn = nntrain(nn, train_x, train_y, opts);[er, bad] = nntest(nn, test_x, test_y);assert(er < 0.1, &#39;Too big error&#39;);%% ex6 neural net with sigmoid activation and plotting of validation and training error% split training data into training and validation datavx = train_x(1:10000,:);tx = train_x(10001:end,:);vy = train_y(1:10000,:);ty = train_y(10001:end,:);rand(&#39;state&#39;,0)nn = nnsetup([784 20 10]); nn.output = &#39;softmax&#39;; % use softmax outputopts.numepochs = 5; % Number of full sweeps through dataopts.batchsize = 1000; % Take a mean gradient step over this many samplesopts.plot = 1; % enable plottingnn = nntrain(nn, tx, ty, opts, vx, vy); % nntrain takes validation set as last two arguments (optionally)[er, bad] = nntest(nn, test_x, test_y);assert(er < 0.1, &#39;Too big error&#39;);```[![Bitdeli Badge](https://d2weczhvl823v0.cloudfront.net/rasmusbergpalm/deeplearntoolbox/trend.png)](https://bitdeli.com/free "Bitdeli Badge")

onlineSchool 项目课 一:ajax提交

一,ajax异步提交的介绍 url:异步提交到对应的controller,提交的 url 地址要和@Request mapping与函数的名称对应上。 type:‘post’/'get '对应controller中 @PostMapping 或@GetMapping 注解,是接收提交的方式。 dataType:‘json’ 把提交后返回的数据格式转成json,返回的可以是从数据库中查询的数据,也可以没有返回的数据。但是必须要写,T必须要大写,是固定写法。可以 alert 一下resp.errorcode,如

langshan_的博客 196

efm32 入门.pdf

本PDF共计22页,介绍的是操作驱动API,下载与否自己斟酌。

onlineSchool 项目课 二 :分页函数和数据的上下移动

分页函数。 动态的sql针对entity的字段,根据网页上传过来查询参数,对数据库中的数据进行筛选。包括计算需要展示的数据总数和筛选具体的数据。 在service中把需要展示的数据总数加载到page中以后,page中将总的数据条数,除以controller中设置的每页展示几条数据,会自动生成一个页码的数组。 将具体的数据也加载到page中以后,通过计算得出,每个页码对应的页面,应从第几条具体的数据开始展示。 通过前端提交的不同的页码,可以对展示的数据进行切换。 这样一个页面查询条件传到sql筛选出来的数据,

langshan_的博客 235

编程思维启蒙(Raptor)课程主页

【关于Raptor】    “没有思路”,这是不少程序设计初学者挂在嘴边的问题。在用编程解决问题的过程中,让自己具备编程的思维,这是我一直倡导的做法,不少同学坚持了,也找到了感觉。   有没有好的方法让同学们具备编程思路?传统的程序设计学习,是“学语言”与“学程序设计”同时进行的,这种学习路径的“认知负荷”的确有些大。如果能在不涉及语言细节的情况下,能够对编程思路进行训练,那就好了。   这样

迂者-贺利坚的专栏 1万+

课程主页demo测试

&lt;!DOCTYPE html&gt; &lt;html lang="en"&gt; &lt;head&gt; &lt;meta charset="UTF-8"&gt; &lt;title&gt;course010&lt;/title&gt; &lt;meta content="width=device-width, initi

Haines 357

“数据结构基础”系列网络课程主页

前言  自从下决心要解决学生动手能力差的问题,开始了课程实践资源的建设之旅;自迷上了翻转课堂,所教课程的视频,也就逐渐形成了体系。在为我自己的校内学生服务的同时,也希望能够让更多人有机会用到。   自全身心投入教学,收入、奖金的渠道也便收缩到了极致。接受优快云学院商业运作的规则,将课程投放此处,一则创收一些,弥补付出数倍精力建设资源而只能喝大锅饭中稀粥中的不平衡,二则因免费带来的不珍惜也让自己有......

迂者-贺利坚的专栏 1万+

InnoDB 内存结构总览:Change Buffer、AHI 与 Log Buffer

本文系统梳理InnoDB内存结构中的ChangeBuffer、Adaptive Hash Index(AHI)与LogBuffer。ChangeBuffer缓存二级索引页不在内存时的变更,减少随机IO,仅在页加载时合并;聚簇索引修改立即执行,因数据本身不可延后。AHI基于高频等值查询自动构建哈希索引,加速定位,仅支持等值操作。LogBuffer为redo log内存缓冲,配合磁盘日志实现崩溃恢复。三者均服务于性能优化,其中ChangeBuffer与AHI共享BufferPool空间,而LogBuffer独立

bksczm的博客 290

V8 机制、手写核心函数与 TypeScript 类型体操

或固定初始化(如数组先定长、对象先给全字段)保持类型与形状稳定;这些都比"换框架"更基础。只能处理纯数据(丢函数、Date、RegExp、循环引用报错)。生产级深拷贝要处理:原始值短路、循环引用、V8(Chrome / Node 的 JS 引擎)不是"解释一行跑一行"那么简单,它用。图:V8 执行流程——解释执行 + 热点优化,优化失败会 Deopt 回退。JS 内存自动管理,但"自动"不等于"不会漏"。是"固定间隔最多执行一次"。手写 Promise 是"懂异步"的试金石。是"停下后才执行最后一次",

qq_38468358的博客 348

Spring Boot 数据源与 MyBatis(-Plus) 自定义配置详解

本文详解 Spring Boot 中单数据源环境下 HikariCP 与 MyBatis-Plus 的自定义配置。通过手动声明 SqlSessionFactory,实现下划线转驼峰、日志输出、一级缓存策略等精细化控制。结合 HikariCP 核心参数调优(如最大连接数、连接生命周期),确保高性能与稳定性。适用于仅需访问单一数据库的场景,避免多数据源复杂性,兼顾性能与可维护性。

BADAO_LIUMANG_QIZHI的博客 203

Java EE 进阶:8.MyBatis 操作数据库(入门)(第一弹)

Java EE 进阶:8.MyBatis 操作数据库(入门)(第一弹)

要努力去发光,而不是被照亮~ 135

LeetCode Hot 100 二叉树专题(二)3 题(Java)

本篇文章共 3 题:543. 二叉树的直径、102. 二叉树的层序遍历、108. 将有序数组转换为二叉搜索树。 每道题都统一按「① 题目分析 & 解题思路 → ② 常见解法(附代码)及讲解 → ③ 知识点总结」的顺序组织;代码使用 Java 编写,节点定义沿用 LeetCode 默认的 TreeNode。

2401_88612756的博客 368

【从零理解 Spring AI · 12】MCP 的两种角色:做客户端还是做服务端

上一篇讲了 MCP 的概念:标准协议、三大角色、M+N 替代 M×N。

nice_lcj520的博客 506
上一篇: onlineSchool 项目课 八:个人中心部分的开发
下一篇: 了解maven,快速融入Java项目开发
langshan_
博客等级 码龄5年 33粉丝 22原创
评论
成就一亿技术人!
拼手气红包6.0元
还能输入1000个字符
 
 条评论被折叠 查看
添加红包

请填写红包祝福语或标题

个

红包个数最小为10个

元

红包金额最低5元

当前余额3.43元 前往充值 >
需支付:10.00元
成就一亿技术人!
领取后你会自动成为博主和红包主的粉丝 规则
hope_wisdom
发出的红包
实付元
使用余额支付
点击重新获取
扫码支付
钱包余额 0

抵扣说明:

1.余额是钱包充值的虚拟货币,按照1:1的比例进行支付金额的抵扣。
2.余额无法直接购买下载,可以购买VIP、付费专栏及课程。

余额充值