springboot2.6.13+nacos2.5.1Server+spring-cloud-alibaba配置

Nacos的版本有严格的限制,一点不对可能就报错,但是用起来比较好用,灵活性比较大,毕竟是开源的,看不顺眼的都可以改;

Springboot集成nacos通用的有alibabaCloud、nacos-config、SDK方式

这里我们使用springboot2.7.18集成alibabaCloud的方式,中间也踩了不少的坑,可能与我原来项目的集成太多组件有关系,在此来记录一下

nacos server : 2.5.1 部署就很简单了,就不再描述。

1、Maven环境准备
 

<!--Spring Boot依赖-->
<dependency>
    <groupId>org.springframework.boot</groupId>
    <artifactId>spring-boot-starter-web</artifactId>
    <exclusions>
        <!-- 去掉springboot自带的日志 ,使用的是log4j2.yml-->
        <exclusion>
            <groupId>org.springframework.boot</groupId>
            <artifactId>spring-boot-starter-logging</artifactId>
        </exclusion>
    </exclusions>
</dependency>
<dependency>
    <groupId>org.springframework.boot</groupId>
    <artifactId>spring-boot-starter-log4j2</artifactId>
</dependency>
<dependency>
    <groupId>org.springframework.boot</groupId>
    <artifactId>spring-boot-starter-test</artifactId>
    <exclusions>
        <!-- 去掉springboot自带的日志 ,使用的是log4j2.yml-->
        <exclusion>
            <groupId>org.springframework.boot</groupId>
            <artifactId>spring-boot-starter-logging</artifactId>
        </exclusion>
    </exclusions>
    <scope>test</scope>
</dependency>
<!-- 配置文件读取包-->
<dependency>
    <groupId>com.alibaba.cloud</groupId>
    <artifactId>spring-cloud-starter-alibaba-nacos-config</artifactId>
    <version>2021.0.5.0</version> <!-- 请根据实际情况选择合适的版本 -->
</dependency>
<!-- 服务发现包-->
<dependency>
    <groupId>com.alibaba.cloud</groupId>
    <artifactId>spring-cloud-starter-alibaba-nacos-discovery</artifactId>
    <version>2021.0.5.0</version> <!-- 请根据实际情况选择合适的版本 -->
</dependency>
<dependency>
    <groupId>org.springframework.cloud</groupId>
    <artifactId>spring-cloud-starter-bootstrap</artifactId>
    <version>3.1.0</version>
</dependency>

2、新建bootstrap.yml文件

spring:
  application:
    name: im_web
  cloud:
    nacos:
      server-addr: 127.0.0.1:8848
      config:
        server-addr: ${spring.cloud.nacos.server-addr}
        enabled: true
        refresh-enabled: true
        username: nacos
        password: nacos
        group: gzp #用于应用分组
      discovery:
        # 注册中心地址
        server-addr: ${spring.cloud.nacos.server-addr}
        username: nacos
        password: nacos
        group: gzp #用于应用分组


3、对应使用配置的controller service compent
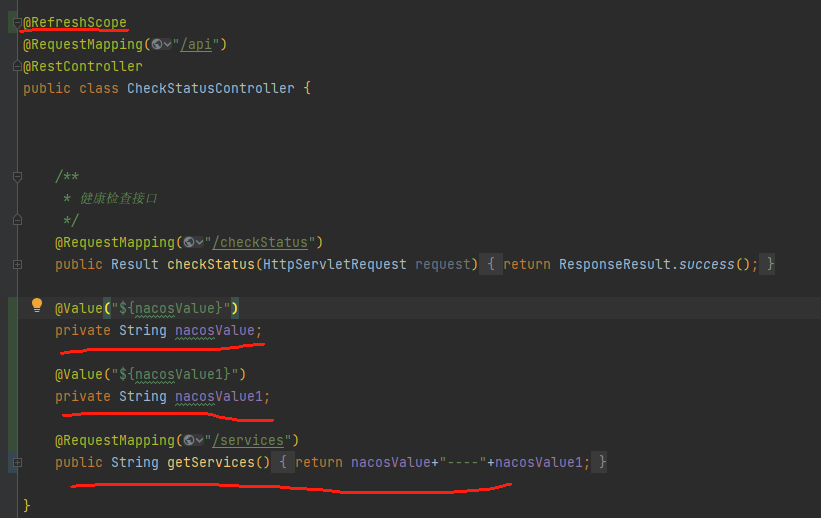
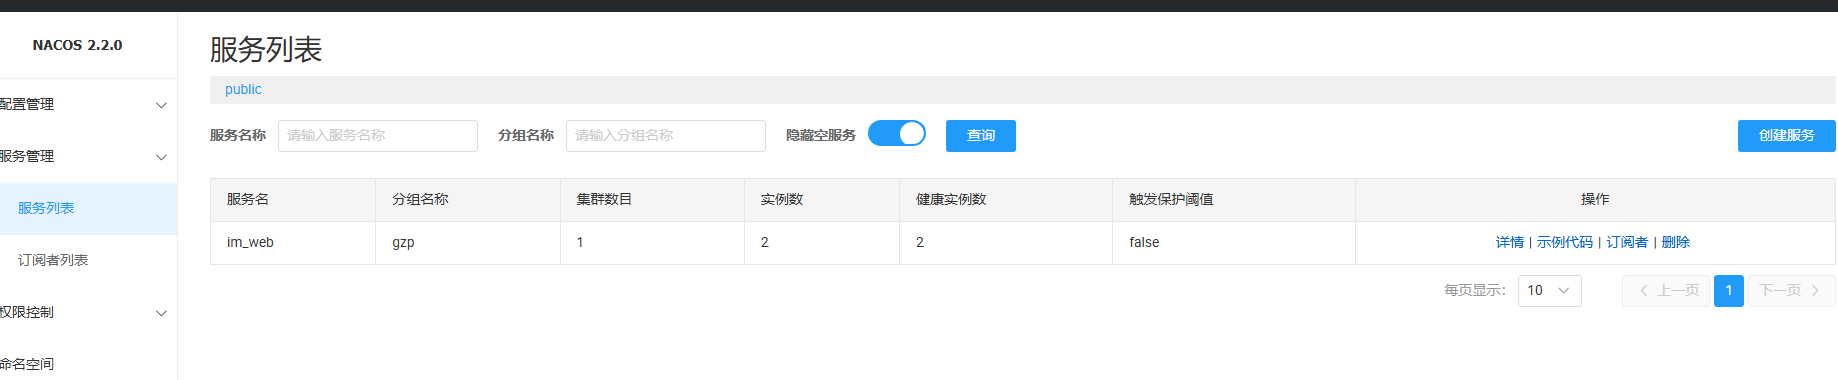
4、nacos服务发现


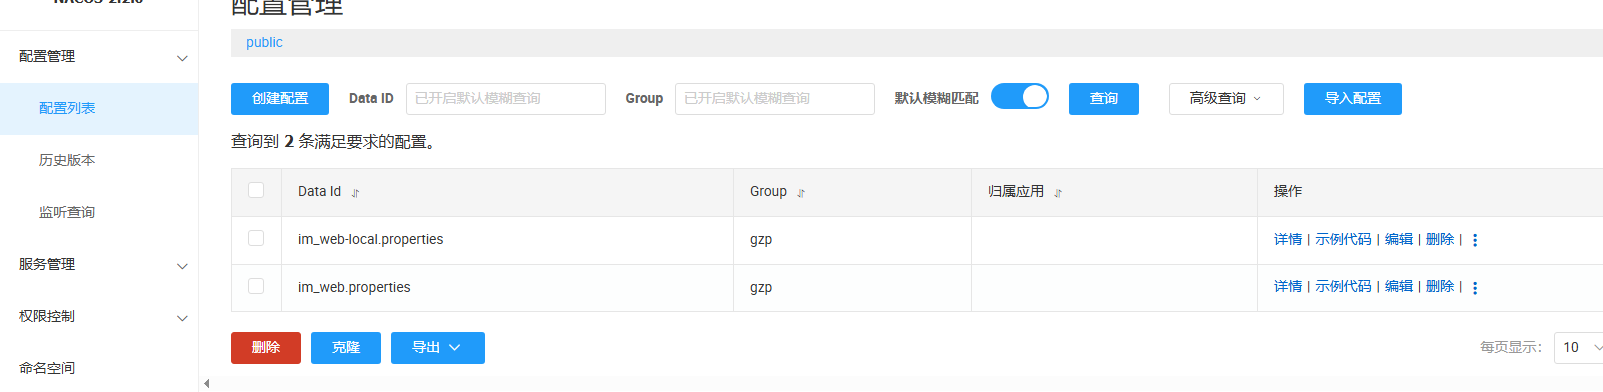
5、根据自己配置所在配置文件选择对应dataId

6、配置动态更改

### 实现Spring Boot 2.6.13与Security和JWT的集成 #### 添加依赖项 为了使Spring Security能够处理基于JSON Web Token (JWT)的身份验证,在`pom.xml`文件中添加必要的Maven依赖: ```xml <dependency> <groupId>org.springframework.boot</groupId> <artifactId>spring-boot-starter-security</artifactId> </dependency> <!-- JWT --> <dependency> <groupId>io.jsonwebtoken</groupId> <artifactId>jjwt-api</artifactId> <version>0.11.5</version> </dependency> <dependency> <groupId>io.jsonwebtoken</groupId> <artifactId>jjwt-impl</artifactId> <scope>runtime</scope> <version>0.11.5</version> </dependency> <dependency> <groupId>io.jsonwebtoken</groupId> <artifactId>jjwt-jackson</artifactId> <!-- or jjwt-gson if Gson is preferred --> <scope>runtime</scope> <version>0.11.5</version> </dependency> ``` #### 创建安全配置类 创建一个新的Java类用于设置Spring Security的行为,包括启用HTTP基本认证以及指定哪些请求应该被保护。 ```java @EnableWebSecurity public class SecurityConfig extends WebSecurityConfigurerAdapter { private final JwtTokenProvider jwtTokenProvider; public SecurityConfig(JwtTokenProvider jwtTokenProvider){ this.jwtTokenProvider = jwtTokenProvider; } @Override protected void configure(HttpSecurity http) throws Exception { http.csrf().disable() .sessionManagement().sessionCreationPolicy(SessionCreationPolicy.STATELESS) .and() .authorizeRequests() .antMatchers("/auth/**").permitAll() // Allow all users to access the auth endpoint. .anyRequest().authenticated() // All other requests require authentication. .and() .apply(new JwtConfigurer(jwtTokenProvider)); } } ``` 此部分展示了如何通过禁用CSRF防护并调整会话管理策略来适应无状态API的要求[^1]。 #### 定义JwtTokenProvider组件 该服务负责生成、解析和验证令牌。这通常涉及到密钥库中的私钥/公钥对或共享秘密。 ```java @Component public class JwtTokenProvider { @Value("${jwt.secret}") private String secretKey; @Value("${jwt.expirationInMs}") private long validityInMilliseconds; public String createToken(String username, List<String> roles) { Claims claims = Jwts.claims().setSubject(username); claims.put("roles", roles); Date now = new Date(); Date expiryDate = new Date(now.getTime() + validityInMilliseconds); return Jwts.builder() .setClaims(claims) .setIssuedAt(now) .setExpiration(expiryDate) .signWith(SignatureAlgorithm.HS512, TextCodec.BASE64.decode(secretKey)) .compact(); } // Other methods like validateToken(), getUsernameFromToken(), etc... } ``` 这段代码片段说明了怎样利用JJWT库构建带有有效载荷声明的有效JWT字符串。 #### 控制器示例 下面是一个简单的控制器例子,它返回当前已登录用户的详情信息给前端应用。 ```java @RestController @RequestMapping("/api") public class UserController { @GetMapping("/me") public ResponseEntity<?> getCurrentUser(@AuthenticationPrincipal UserDetails userDetails) { Map<String, Object> response = new HashMap<>(); response.put("username", userDetails.getUsername()); response.put("authorities", userDetails.getAuthorities()); return ResponseEntity.ok(response); } } ``` 上述代码段显示了一个RESTful API端点 `/api/me` ,当接收到GET请求时将会响应包含用户名及其权限的信息对象[^2]。 #### 应用属性配置 最后一步是在项目的application.yml文件里加入一些特定于OAuth2客户端和服务提供者的参数设定。 ```yaml server: port: 8080 spring: security: oauth2: resourceserver: jwt: issuer-uri: https://login.example.com/oauth/token security: jwt: secret: your_base_64_encoded_Secret_Key expiration-in-ms: 86400000 # 一天有效期 ``` 这里指定了JWT签发者URI以及其他关于JWT签名的秘密键和过期时间等细节[^3]。
评论
添加红包

请填写红包祝福语或标题

红包个数最小为10个

红包金额最低5元

当前余额3.43前往充值 >
需支付:10.00
成就一亿技术人!
领取后你会自动成为博主和红包主的粉丝 规则
hope_wisdom
发出的红包
实付
使用余额支付
点击重新获取
扫码支付
钱包余额 0

抵扣说明:

1.余额是钱包充值的虚拟货币,按照1:1的比例进行支付金额的抵扣。
2.余额无法直接购买下载,可以购买VIP、付费专栏及课程。

余额充值