


 本文介绍了Android中TextView、EditText和ImageView的基本使用,包括属性设置、文字显示、输入限制、图片展示等。还展示了如何实现简单的图片轮换程序,涉及点击事件和ScaleType属性的应用。
TextView
一、在Android系统中,任何可视化控件都是继承自android.view.View类
任何从android.view.View继承的类都被称为视图。
开发人员有两种方式来创建视图对象:
1. 使用xml文件的方式来配置试图相关的属性,然后再装载这些视图
2. 完全使用java代码的方式来创建视图对象
二、Android SDK中的视图类分为三种
布局(Layout)
视图容器(View Container)
视图类
android.view.ViewGroup是一个容器类,该类也是View的子类,所有的布局类
和视图容器都是ViewGroup的子类。
而视图类直接继承自View类
三、TextView:用来呈现文字的显示
系统中常用的属性通过android:来引用是因为有xmlns的命名空间的定义
(一)常用属性:
text:文本显示
textColor:文字颜色
textSize:文字大小
visibility:可见性
默认是可见
invisible:不可见,但是控件的显示区域仍保留
gone:隐藏控件,并且当前控件的显示区域不保留
maxLength:文本长度
maxLines:文本行数
autoLink:自动链接,表示当前textView的链接类型
web:网页
(二)一个跑马灯的效果:
<TextView
            android:text="深圳的发展和经验表明,我们建立经济特区的政策是正确的深圳的发展和经验表明,我们建立经济特区的政策是正确的深圳的发展和经验表明,我们建立经济特区的政策是正确的"
            android:layout_width="match_parent"
            android:layout_height="wrap_content"
            android:layout_marginTop="20dp"
            android:textSize="20sp"
            android:singleLine="true"
            android:ellipsize="marquee"
            android:focusable="true"
            android:focusableInTouchMode="true"
            android:scrollHorizontally="true"
             />
(三)给文字周围添加图片
直接background天界图片会将文字覆盖,不是预想的结果
可以考虑drawableTop/left/right/bottom
EditText
一、用于输入文本的一个控件。
text:文本显示
textSize:文字大小
textColor:文字颜色
visibility:可见性。。。对所有的控件都适用
ems:默认EditText的字符呈现的宽度。
inputType:输入类型。number,textPassword。。。。
除此之外,EditText继承自TextView,所以TextView的属性对EditText都适用。
明密文切换效果:这里取名字为EditText editText
editText.setTransformationMethod(HideReturnsTransformationMethod.getInstance());
editText.setTransformationMethod(passwordTransformationMethod.getInstance());
需要注意的是明密文转换后会将光标的位置移动到首位,需要加一行代码将光标移动到最后。
editText.setSelection(editText.getText().length());
设置光标不可见:editText.setCursorVisible(false);
添加内容发生变化的监听:TextWatcher
该监听中回调
onTextChanged
beforeTextChanged
afterTextChanged
二、一个示例
activity_main.xml
<?xml version="1.0" encoding="utf-8"?>
<LinearLayout xmlns:android="http://schemas.android.com/apk/res/android"
    xmlns:app="http://schemas.android.com/apk/res-auto"
    xmlns:tools="http://schemas.android.com/tools"
    android:layout_width="match_parent"
    android:layout_height="match_parent"
    android:orientation="vertical"
    tools:context=".MainActivity">

    <EditText
        android:id="@+id/editText"
        android:layout_width="match_parent"
        android:layout_height="wrap_content"
        android:hint="请输入。。"
        android:inputType="textPassword"
        android:singleLine="true"/>

</LinearLayout>
MainActivity.java
package com.kjgym.demo01;

import android.support.v7.app.AppCompatActivity;
import android.os.Bundle;
import android.text.Editable;
import android.text.TextWatcher;
import android.util.Log;
import android.widget.EditText;

public class MainActivity extends AppCompatActivity {
    private EditText editText;

    @Override
    protected void onCreate(Bundle savedInstanceState) {
        super.onCreate(savedInstanceState);
        setContentView(R.layout.activity_main);

        // 初始化
        editText = findViewById(R.id.editText);

        // 添加监听
        editText.addTextChangedListener(new TextWatcher() {
            /**
             *
             * @param s:表示改变之前的内容,通常start和count组合,可以在s中读取本次改变字段中被改变的内容,
             *         而after表示改变后新的内容的数量
             * @param start:开始的位置
             * @param count:被改变的缘由的内容的个数
             * @param after:改变之后的内容的数量
             */
            @Override
            public void beforeTextChanged(CharSequence s, int start, int count, int after) {
                Log.i("TAG","前");
            }

            /**
             * 文本发生变化的时候执行的方法
             * @param s:
             * @param start
             * @param before
             * @param count:表示新增加的数量
             */
            @Override
            public void onTextChanged(CharSequence s, int start, int before, int count) {
                Log.i("TAG","ing");
            }

            /**
             *
             * @param s:表示最终的内容
             */
            @Override
            public void afterTextChanged(Editable s) {
                Log.i("TAG","后");
            }
        });

    }
}
ImageView
ImageView:用来显示图片的控件
1. 首先需要掌握的
- 掌握ImageView的使用
- 掌握src和backGround的区别
- 掌握ScaleType属性
2. src:指定当前ImageView的填充内容。如果需要在代码中动态
的设定当前ImageView的内容,可以使用setImageResourse
进行设定。
backgound:指定当前控件的背景
两者的区别:
background指的是背景,src指的是内容。
src如果是PNG格式等带有透明属性的图片的话,就会在透明的地方
显示出设置的background的背景。而不是黑色或者其他系统默认的
填充色等。
src:就是ImageView中内容填充的资源。
background:表示ImageView的背景显示。src是浮在background的上方。
3. ImageView也可以添加对应的点击监听事件。
只要是View的子类,都可以添加点击事件。
4. ImageButton:用来显示点击事件。就是比起直接在ImageView中的点击,明显多了
一种点击的效果。
5. 一般使用ImageButton来响应图片的点击效果
使用ImageView来呈现一个图片控件
ImageButton是ImageView的子类。所以在ImageView中的属性都适用于ImageButton
6. ScaleType属性是用来呈现图片内容在ImageView上的显示样式
常用的属性有fitXY,center,centerCrop等。
(详细内容本地见图片src = "F:\Android\Android学习笔记\andriodLearn01-ScaleType属性")
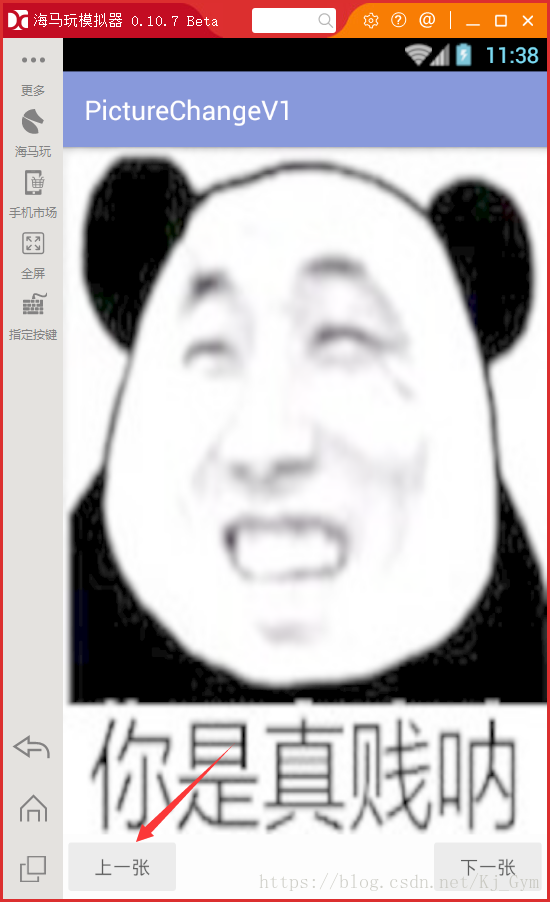
7. 实现一个简单的小程序
图片切换,点击上一张,下一张进行切换。
先看效果图:

一些需要注意的细节知识都有注释。
activity_pic.xml文件
<?xml version="1.0" encoding="utf-8"?>
<LinearLayout xmlns:android="http://schemas.android.com/apk/res/android"
    xmlns:app="http://schemas.android.com/apk/res-auto"
    xmlns:tools="http://schemas.android.com/tools"
    android:layout_width="match_parent"
    android:layout_height="match_parent"
    android:orientation="vertical"
    tools:context=".PicActivity">

    <ImageView
        android:id="@+id/pic"
        android:layout_width="match_parent"
        android:layout_height="match_parent"
        android:layout_weight="1"
        android:scaleType="fitXY"/>
    <LinearLayout
        android:layout_width="match_parent"
        android:layout_height="wrap_content">
        <Button
            android:id="@+id/pre"
            android:layout_width="wrap_content"
            android:layout_height="wrap_content"
            android:text="上一张"/>
        <ImageView
            android:layout_width="0dp"
            android:layout_height="1px"
            android:layout_weight="1"/><!-- 这里的ImageView实际含义,仅仅是为了将
             “上一张”和“下一张”这两个按钮撑开,达到分别居于界面两端的效果。
             这是个小技巧,以后可以使用-->
        <Button
            android:id="@+id/next"
            android:layout_width="wrap_content"
            android:layout_height="wrap_content"
            android:layout_gravity="right"
            android:text="下一张"/>
    </LinearLayout>
</LinearLayout>
PicActivity.java文件
package com.kjgym.picturechangev1;

import android.support.v7.app.AppCompatActivity;
import android.os.Bundle;
import android.util.Log;
import android.view.View;
import android.widget.Button;
import android.widget.ImageView;

/**
 * 这里使用在主类上继承OnclickListener接口来实现按钮的事件监听
 */
public class PicActivity extends AppCompatActivity implements View.OnClickListener{

    private ImageView pic;  // 展示图片的控件
    private Button pre,next;  // 上一张与下一张按钮
    // 这里int数组存放了要展示图片的id值
    private int[] pics = {R.drawable.a,R.drawable.b,R.drawable.c,R.drawable.d,R.drawable.e,R.drawable.f};
    private int position = 0;  // 用来表示当前图片的在数组中位置

    @Override
    protected void onCreate(Bundle savedInstanceState) {
        super.onCreate(savedInstanceState);
        setContentView(R.layout.activity_pic);

        // 初始化
        pic = findViewById(R.id.pic);
        pre = findViewById(R.id.pre);
        next = findViewById(R.id.next);

        // 为按钮添加事件
        pre.setOnClickListener(this);
        next.setOnClickListener(this);
    }
    @Override
    public void onClick(View v){
        switch (v.getId()){
            case R.id.pre:
                Log.i("TAG","前一张");
                position--;
                if(position<0){  // 这里的if判断语句是为了防止报数组下标越界异常。当指向小于零的时候自动指向最后一张的索引
                    position = pics.length-1;
                }
                pic.setImageResource(pics[position]);  // 这句话是java代码操作ImageView的api
                break;
            case R.id.next:
                Log.i("TAG","后一张");
                position++;
                if (position>=pics.length){   // 与上文的if语句同义
                    position = 0;
                }
                pic.setImageResource(pics[position]);
                break;
        }
    }
}


 被折叠的 条评论
为什么被折叠?
被折叠的 条评论
为什么被折叠?
 到【灌水乐园】发言


