


 本文探讨SpringBoot的配置类加载路径,包括file:./config/、file:./、classpath:/config/和classpath:/。当配置类生效,它会为容器添加组件,组件属性与配置文件中的properties类绑定。配置文件的所有可配置属性对应于各个功能的Properties类。同时,文章还提及了SpringBoot如何加载webjars和静态资源,如通过maven引入的jquery库,以及resources、static和public目录的优先级。
SpringBoot02
一.
配置文件加载顺序
Config locations are searched in reverse order. By default, the configured locations are
classpath:/,classpath:/config/,file:./,file:./config/
. The resulting search order is the following:
-
file:./config/
-
file:./
-
classpath:/config/
-
classpath:/
二.
yaml多环境配置
server:
port: 8081
spring:
profiles:
active: dev
---
server:
port: 8082
spring:
profiles: dev
---
server:
port: 8083
spring:
profiles: test

三.
自动配置过程

SpringBoot所有自动配置都是在启动的时候扫描并加载:spring.factories所有的自动配置类都在这里面,但是不一定会生效,要判断条件是否成立,只要导入了对应的start,就有对应的启动器,有了启动器,我们启动装配就会生效,然后配置成功。
以下@ConditionalOnxxx相关注解总结引用自博文
https://blog.youkuaiyun.com/win7system/article/details/54377471
|
@ConditionalOnBean (仅仅在当前上下文中存在某个对象时,才会实例化一个Bean)
|
|
@ConditionalOnClass (某个class位于类路径上,才会实例化一个Bean)
|
|
@ConditionalOnExpression(当表达式为true的时候,才会实例化一个Bean)
|
|
@ConditionalOnMissingBean(仅仅在当前上下文中不存在某个对象时,才会实例化一个Bean)
|
|
@ConditionalOnMissingClass(某个class类路径上不存在的时候,才会实例化一个Bean)
|
|
@ConditionalOnNotWebApplication(不是web应用,才会实例化一个Bean)
|
|
@ConditionalOnBean:当容器中有指定Bean的条件下进行实例化。
|
|
@ConditionalOnMissingBean:当容器里没有指定Bean的条件下进行实例化。
|
|
@ConditionalOnClass:当classpath类路径下有指定类的条件下进行实例化。
|
|
@ConditionalOnMissingClass:当类路径下没有指定类的条件下进行实例化。
|
|
@ConditionalOnWebApplication:当项目是一个Web项目时进行实例化。
|
|
@ConditionalOnNotWebApplication:当项目不是一个Web项目时进行实例化。
|
|
@ConditionalOnProperty:当指定的属性有指定的值时进行实例化。
|
|
@ConditionalOnExpression:基于SpEL表达式的条件判断。
|
|
@ConditionalOnJava:当JVM版本为指定的版本范围时触发实例化。
|
|
@ConditionalOnResource:当类路径下有指定的资源时触发实例化。
|
|
@ConditionalOnJndi:在JNDI存在的条件下触发实例化。
|
|
@ConditionalOnSingleCandidate:当指定的Bean在容器中只有一个,或者有多个但是指定了首选的Bean时触发实例化。
|
四.
自动配置原理
以
HttpEncodingAutoConfiguration(Http编码自动配置)
为例解释自动配置原理;
//表示这是一个配置类,和以前编写的配置文件一样,也可以给容器中添加组件;
@Configuration
//启动指定类的ConfigurationProperties功能;
//进入这个HttpProperties查看,将配置文件中对应的值和HttpProperties绑定起来;
//并把HttpProperties加入到ioc容器中
@EnableConfigurationProperties({HttpProperties.class})
//Spring底层@Conditional注解
//根据不同的条件判断,如果满足指定的条件,整个配置类里面的配置就会生效;
//这里的意思就是判断当前应用是否是web应用,如果是,当前配置类生效
@ConditionalOnWebApplication(
type = Type.SERVLET
)
//判断当前项目有没有这个类CharacterEncodingFilter;SpringMVC中进行乱码解决的过滤器;
@ConditionalOnClass({CharacterEncodingFilter.class})
//判断配置文件中是否存在某个配置:spring.http.encoding.enabled;
//如果不存在,判断也是成立的
//即使我们配置文件中不配置pring.http.encoding.enabled=true,也是默认生效的;
@ConditionalOnProperty(
prefix = "spring.http.encoding",
value = {"enabled"},
matchIfMissing = true
)
public class HttpEncodingAutoConfiguration {
//他已经和SpringBoot的配置文件映射了
private final Encoding properties;
//只有一个有参构造器的情况下,参数的值就会从容器中拿
public HttpEncodingAutoConfiguration(HttpProperties properties) {
this.properties = properties.getEncoding();
}
//给容器中添加一个组件,这个组件的某些值需要从properties中获取
@Bean
@ConditionalOnMissingBean //判断容器没有这个组件?
public CharacterEncodingFilter characterEncodingFilter() {
CharacterEncodingFilter filter = new OrderedCharacterEncodingFilter();
filter.setEncoding(this.properties.getCharset().name());
filter.setForceRequestEncoding(this.properties.shouldForce(org.springframework.boot.autoconfigure.http.HttpProperties.Encoding.Type.REQUEST));
filter.setForceResponseEncoding(this.properties.shouldForce(org.springframework.boot.autoconfigure.http.HttpProperties.Encoding.Type.RESPONSE));
return filter;
}
//。。。。。。。
}
一句话总结 :根据当前不同的条件判断,决定这个配置类是否生效!
-
一但这个配置类生效;这个配置类就会给容器中添加各种组件;
-
这些组件的属性是从对应的properties类中获取的,这些类里面的每一个属性又是和配置文件绑定的;
-
所有在配置文件中能配置的属性都是在xxxxProperties类中封装着;
-
配置文件能配置什么就可以参照某个功能对应的这个属性 类
//从配置文件中获取指定的值和bean的属性进行绑定
@ConfigurationProperties(prefix = "spring.http")
public class HttpProperties {
// .....
}
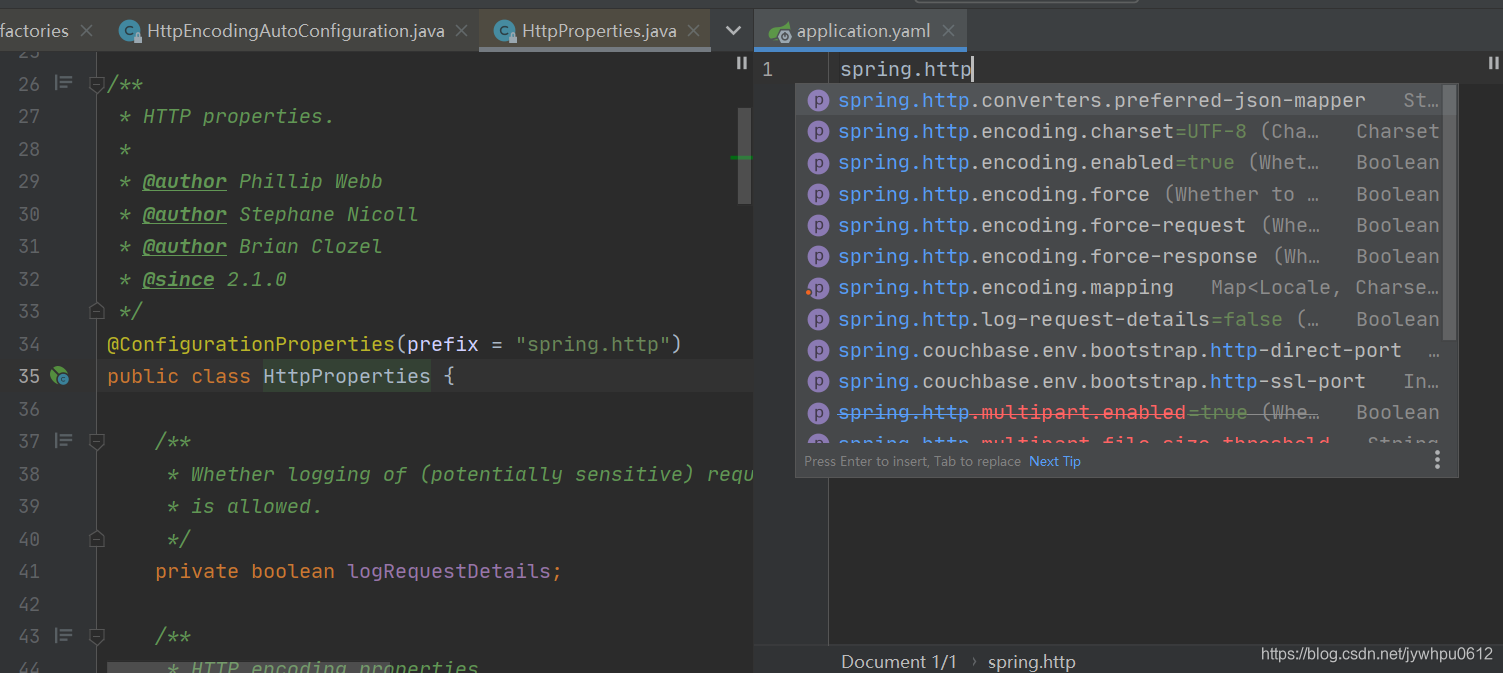
HttpProperties下的Encoding有右侧代码提示的属性。
总结:
1、SpringBoot启动会加载大量的自动配置类
2、我们看我们需要的功能有没有在SpringBoot默认写好的自动配置类当中;
3、我们再来看这个自动配置类中到底配置了哪些组件;(只要我们要用的组件存在在其中,我们就不需要再手动配置了)
4、给容器中自动配置类添加组件的时候,会从properties类中获取某些属性。我们只需要在配置文件中指定这些属性的值即可;
xxxxAutoConfigurartion:自动配置类;
给容器中添加组件
xxxxProperties:封装配置文件中相关属性;
可以通过yaml文件配置debug: true
来让控制台打印自动配置报告,这样我们就可以很方便的知道哪些自动配置类生效;
Positive matches:(自动配置类启用的:正匹配)
Negative matches:(没有启动,没有匹配成功的自动配置类:负匹配)
Unconditional classes: (没有条件的类)
五.
处理静态资源
在application.yaml中
spring:
mvc:
static-path-pattern:
点进去WebMvcProperties
private String staticPathPattern = "/**";
到时候可以修改这个默认静态资源路径
找到
WebMvcAutoConfiguration
//WebMvcAutoConfiguration
public void addResourceHandlers(ResourceHandlerRegistry registry) {
if (!this.resourceProperties.isAddMappings()) {
logger.debug("Default resource handling disabled");
return;
}
Duration cachePeriod = this.resourceProperties.getCache().getPeriod();
CacheControl cacheControl = this.resourceProperties.getCache().getCachecontrol().toHttpCacheControl();
if (!registry.hasMappingForPattern("/webjars/**")) {
customizeResourceHandlerRegistration(registry.addResourceHandler("/webjars/**")
.addResourceLocations("classpath:/META-INF/resources/webjars/")
.setCachePeriod(getSeconds(cachePeriod)).setCacheControl(cacheControl));
}
String staticPathPattern = this.mvcProperties.getStaticPathPattern();
if (!registry.hasMappingForPattern(staticPathPattern)) {
customizeResourceHandlerRegistration(registry.addResourceHandler(staticPathPattern)
.addResourceLocations(getResourceLocations(this.resourceProperties.getStaticLocations()))
.setCachePeriod(getSeconds(cachePeriod)).setCacheControl(cacheControl));
}
}
第一种方式回去找webjars,第二种
在ResourceProperties
//ResourceProperties
private static final String[] CLASSPATH_RESOURCE_LOCATIONS = { "classpath:/META-INF/resources/",
"classpath:/resources/", "classpath:/static/", "classpath:/public/" };
-
webjars 如通过maven导入了jquery,localhost:8080/webjars/jquery/3.4.1/jquery.js
-
resources,static,public 优先级由高到低
六.
首页的设置
在WebMvcAutoConfiguration中
@Bean
public WelcomePageHandlerMapping welcomePageHandlerMapping(ApplicationContext applicationContext,
FormattingConversionService mvcConversionService, ResourceUrlProvider mvcResourceUrlProvider) {
WelcomePageHandlerMapping welcomePageHandlerMapping = new WelcomePageHandlerMapping(
new TemplateAvailabilityProviders(applicationContext), applicationContext, getWelcomePage(),
this.mvcProperties.getStaticPathPattern());
welcomePageHandlerMapping.setInterceptors(getInterceptors(mvcConversionService, mvcResourceUrlProvider));
return welcomePageHandlerMapping;
}
private Optional<Resource> getWelcomePage() {
String[] locations = getResourceLocations(this.resourceProperties.getStaticLocations());
return Arrays.stream(locations).map(this::getIndexHtml).filter(this::isReadable).findFirst();
}
private Resource getIndexHtml(String location) {
return this.resourceLoader.getResource(location + "index.html");
}
可以将首页放在静态文件夹中,启动程序即可访问到
如果要放在templates文件夹下,只能通过controller跳转才能访问到。同时templates下的页面需要配置模板引擎的支持
七.
图标修改
1.spring boot 2.0之前更改图标
将想要的图标放进静态资源文件夹里命名为favicon.icon,在application.properties里配置
spring.mvc.favicon.enabled=false
2.spring boot 2.0之后就不能自动配置 favicon.ico了
在每个页面中引入
<!--springboot改图标-->
<link href="路径/favicon.ico" type="image/x-icon" rel="icon">
八.
thymeleaf模板引擎
1.
点击Pom
将pom.xml中的dependency复制到项目的pom文件中
<dependency>
<groupId>org.thymeleaf</groupId>
<artifactId>thymeleaf-spring5</artifactId>
</dependency>
<dependency>
<groupId>org.thymeleaf.extras</groupId>
<artifactId>thymeleaf-extras-java8time</artifactId>
</dependency>
ThymeleafProperties
private static final Charset DEFAULT_ENCODING = StandardCharsets.UTF_8;
public static final String DEFAULT_PREFIX = "classpath:/templates/";
public static final String DEFAULT_SUFFIX = ".html";
2.
在templates文件夹下写个demo.html
3.
写个简单的controller
@Controller
public class DemoController {
@RequestMapping("/demo")
public String demo(){
return "demo";
}
}
4.
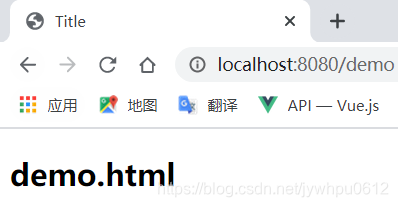
访问结果
九.
简单实用thymeleaf
1.
@Controller
public class DemoController {
@RequestMapping("/demo")
public String demo(Model model){
model.addAttribute("msg","hello springboot");
return "demo";
}
}
2.
<!DOCTYPE html>
<html lang="en">
<head>
<meta charset="UTF-8">
<title>Title</title>
</head>
<body>
<h2>${msg}</h2>
</body>
</html>
但是运行还是得不到msg的值,因为thymeleaf没有接管这个h2元素,得加上属性
<h2
th
:text
="${msg}"
></h2>再次运行可以得到值。
所有的html元素都可以被thymeleaf替换接管,th:元素名
3.
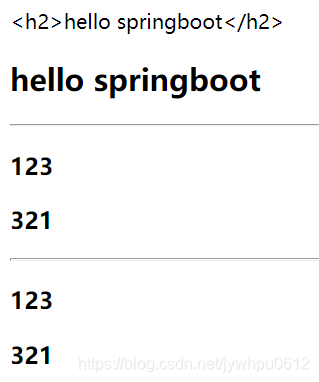
测试th部分属性
@RequestMapping("/demo")
public String demo(Model model){
model.addAttribute("msg","<h2>hello springboot</h2>");
model.addAttribute("msg2","<h2>hello springboot</h2>");
model.addAttribute("array", Arrays.asList("123","321"));
return "demo";
}
<div th:text="${msg}"></div>
<div th:utext="${msg2}"></div>
<hr/>
<h3 th:each="num:${array}" th:text="${num}"></h3>
<hr/>
<h3 th:each="num:${array}">[[${num}]]</h3>
十.
MVC自定义配置
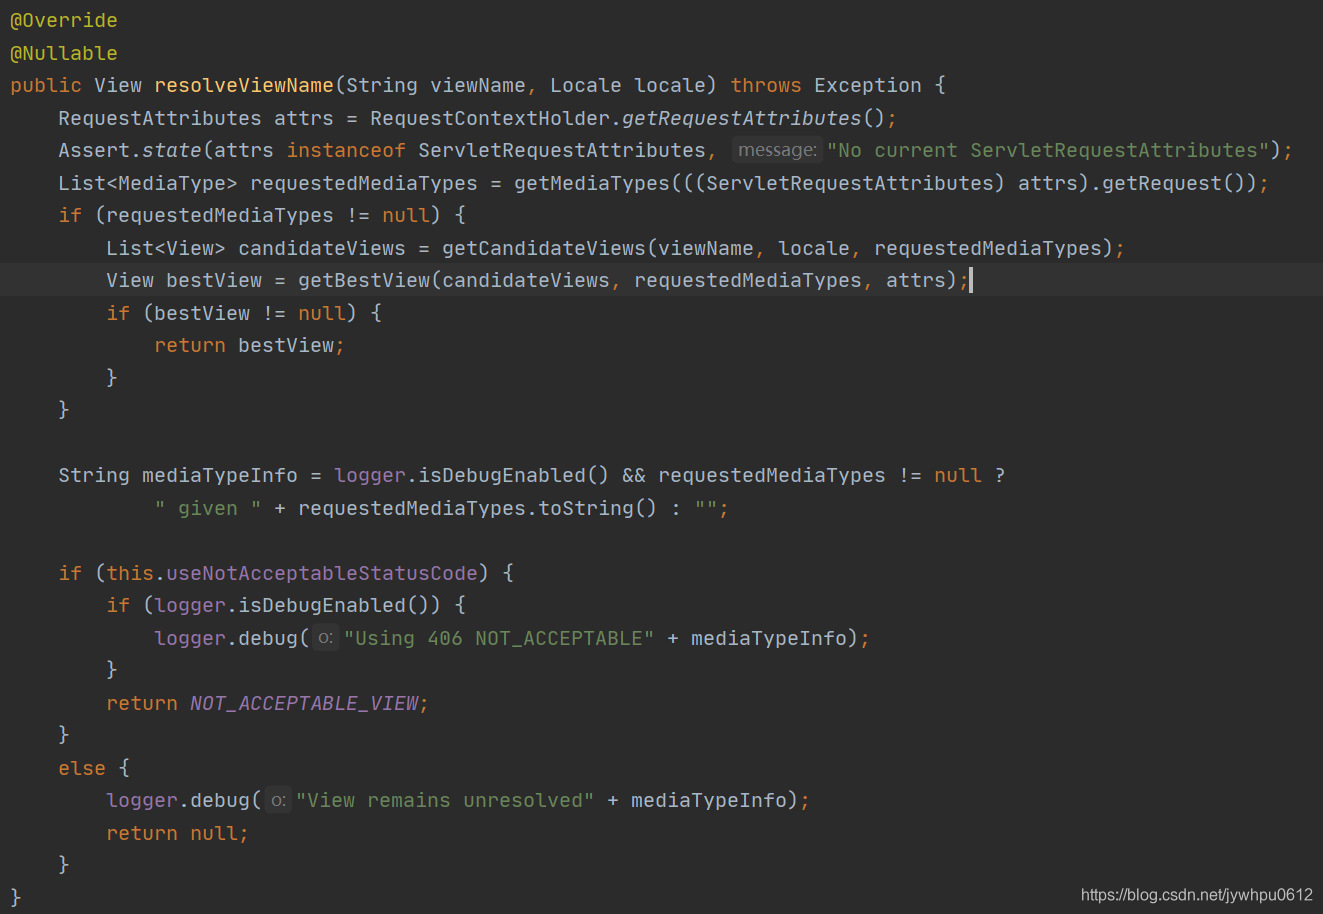
@Configuration
public class MyMvcConfig implements WebMvcConfigurer {
//实现了视图解析器接口的类,我们就可以把它看做视图解析器
@Bean
public ViewResolver myViewResolver(){
return new MyViewResolver();
}
//定义一个自己的视图解析器
public static class MyViewResolver implements ViewResolver{
@Override
public View resolveViewName(String viewName, Locale locale) throws Exception {
return null;
}
}
}
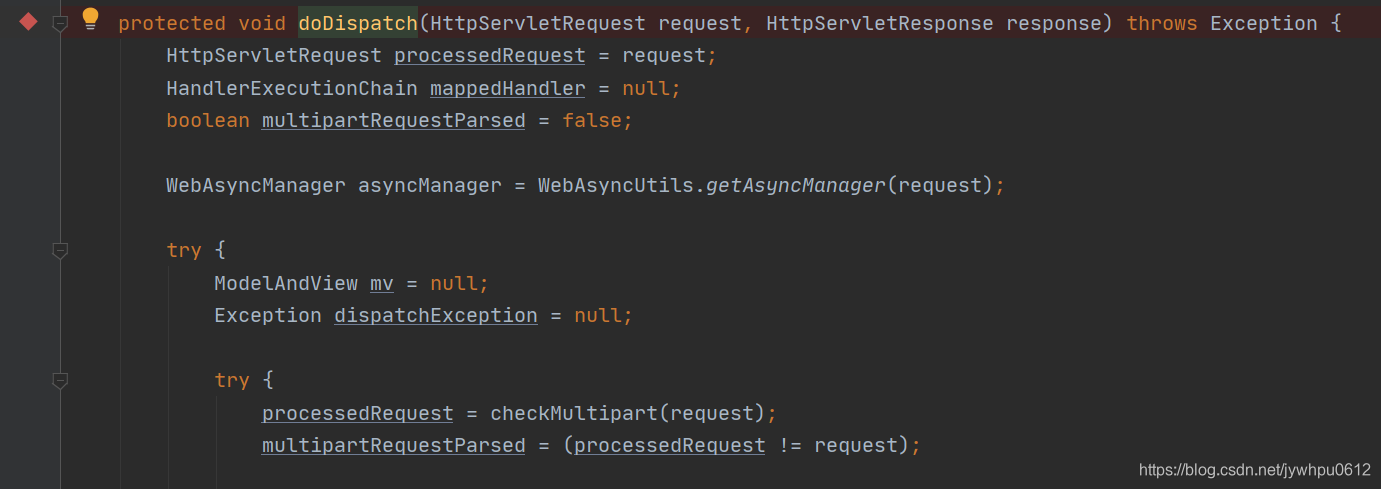
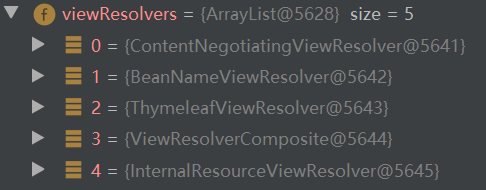
结论:
如果想diy一些定制化功能,只要写这个组件,然后将它交给springboot,springboot就会自动装配。


 9万+
9万+

 被折叠的 条评论
为什么被折叠?
被折叠的 条评论
为什么被折叠?
 到【灌水乐园】发言


