


 本文介绍了如何在Spring Cloud Alibaba中整合Sentinel,并通过Nacos实现服务降级。详细步骤包括Sentinel控制台的Linux配置、POM与YML配置、流控规则设置。同时,文章还探讨了使用Java代码替代JMeter进行压力测试的方法,以及OpenFeign调用时的服务降级配置。
02微服务组件Sentinel (控制台版)
第一步进入linux配置
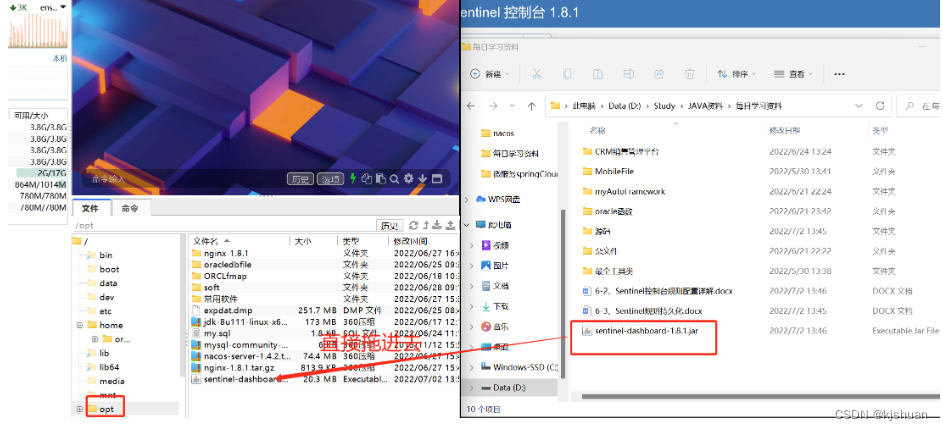
启动控制台命令 (注意先把文件拖入linux下的opt)
#1 打开编辑文件 vim dashboard.sh #复制下面的内容 账号cm 密码ok(注意 - 有可能要自己手动打) java -Dserver.port=8858 -Dsentinel.dashboard.auth.username=cm -Dsentinel.dashboard.auth.password=ok -jar /opt/sentinel-dashboard-1.8.1.jar #2 授权文件名 chmod 777 dashboard.sh ls ./dashboard.sh cat dashboard.sh ls /opt/ #3 浏览器启动(地址输入自己的) http://192.168.64.200:8858/#/login #4 账号cm 密码ok
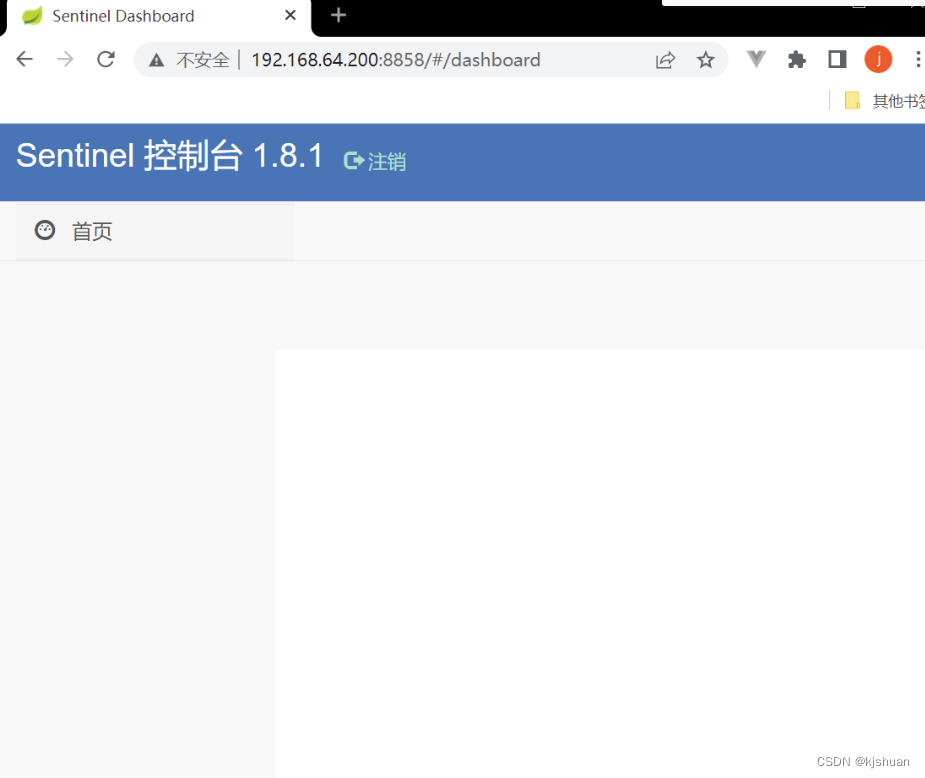
显示上面内容成功进入!!!
Sentinel 会在客户端首次调用的时候进行初始化,开始向控制台发送心跳包,所以要确保客户端有访问量;
Spring Cloud Alibaba整合Sentinel
第一步 配置pom
        <dependency>
            <groupId>com.alibaba.cloud</groupId>
            <artifactId>spring-cloud-starter-alibaba-sentinel</artifactId>
        </dependency>
第二步配置controller
@RestController
@RequestMapping("/nssent")
public class InitCtrl {
@RequestMapping("/init")
public String sayHello(){
return "Hello World";
}
}
第三步配置yml
server:
  port: 12005
spring:
  application:
    name: nessentinelctl
  cloud:
    sentinel:
      transport:
        dashboard: 192.168.64.200:8858
第四步启动浏览器输入
http://loc
 最低0.47元/天 解锁文章


 被折叠的 条评论
为什么被折叠?
被折叠的 条评论
为什么被折叠?
 到【灌水乐园】发言


