


在进行超时时间设置之前我们需要了解一次http请求经历的过程
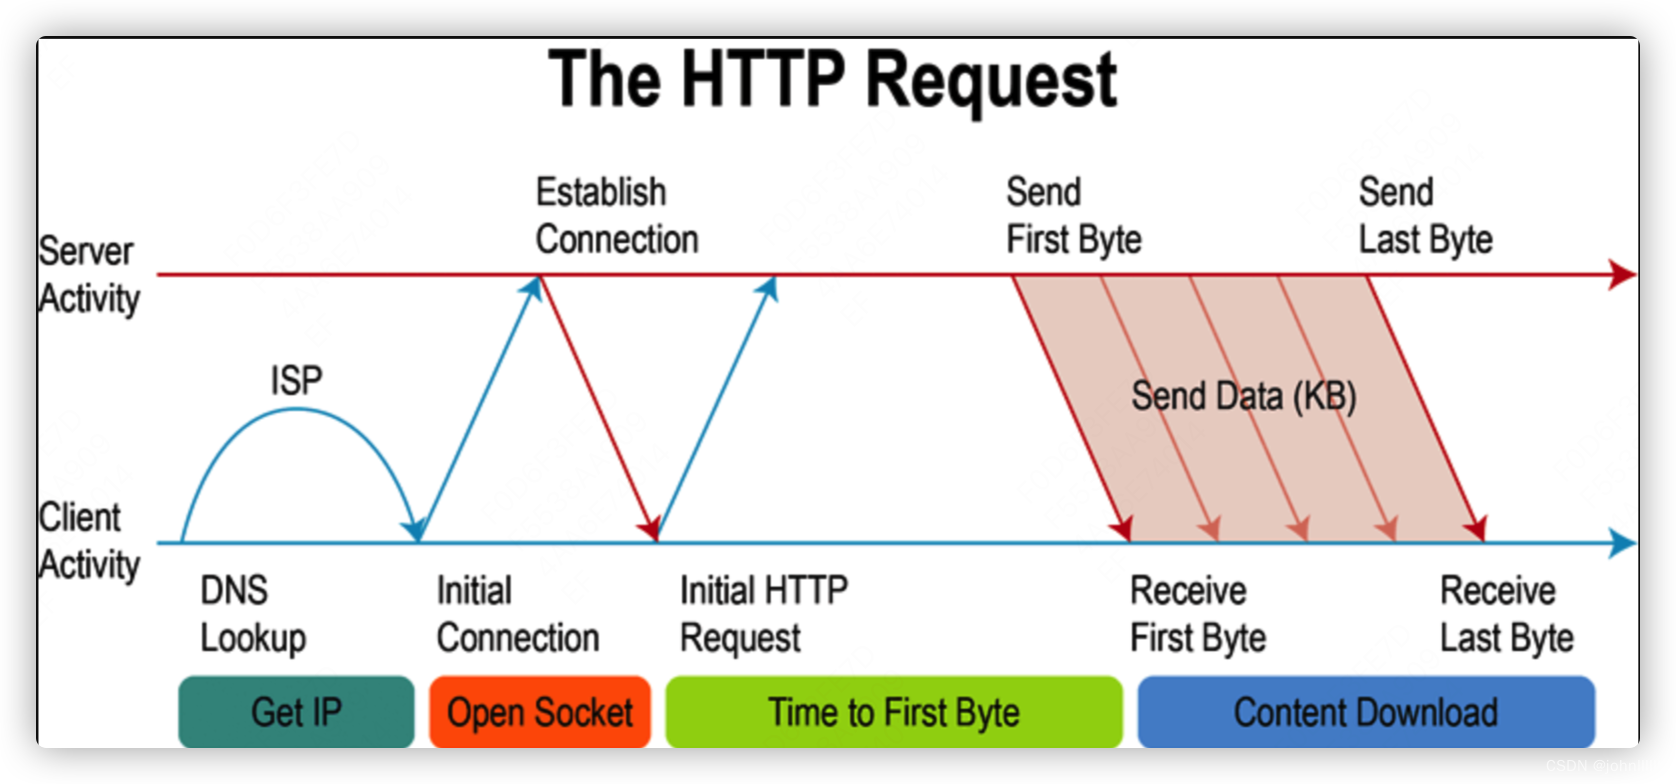
- 浏览器进行DNS域名解析,得到对应的IP地址
- 根据这个IP,找到对应的服务器建立连接(三次握手)
- 建立TCP连接后发起HTTP请求(一个完整的http请求报文)
- 服务器响应HTTP请求,返回数据(服务器如何响应)
- 客户端对页面进行渲染呈现给用户
- 服务器关闭TCP连接(四次挥手)
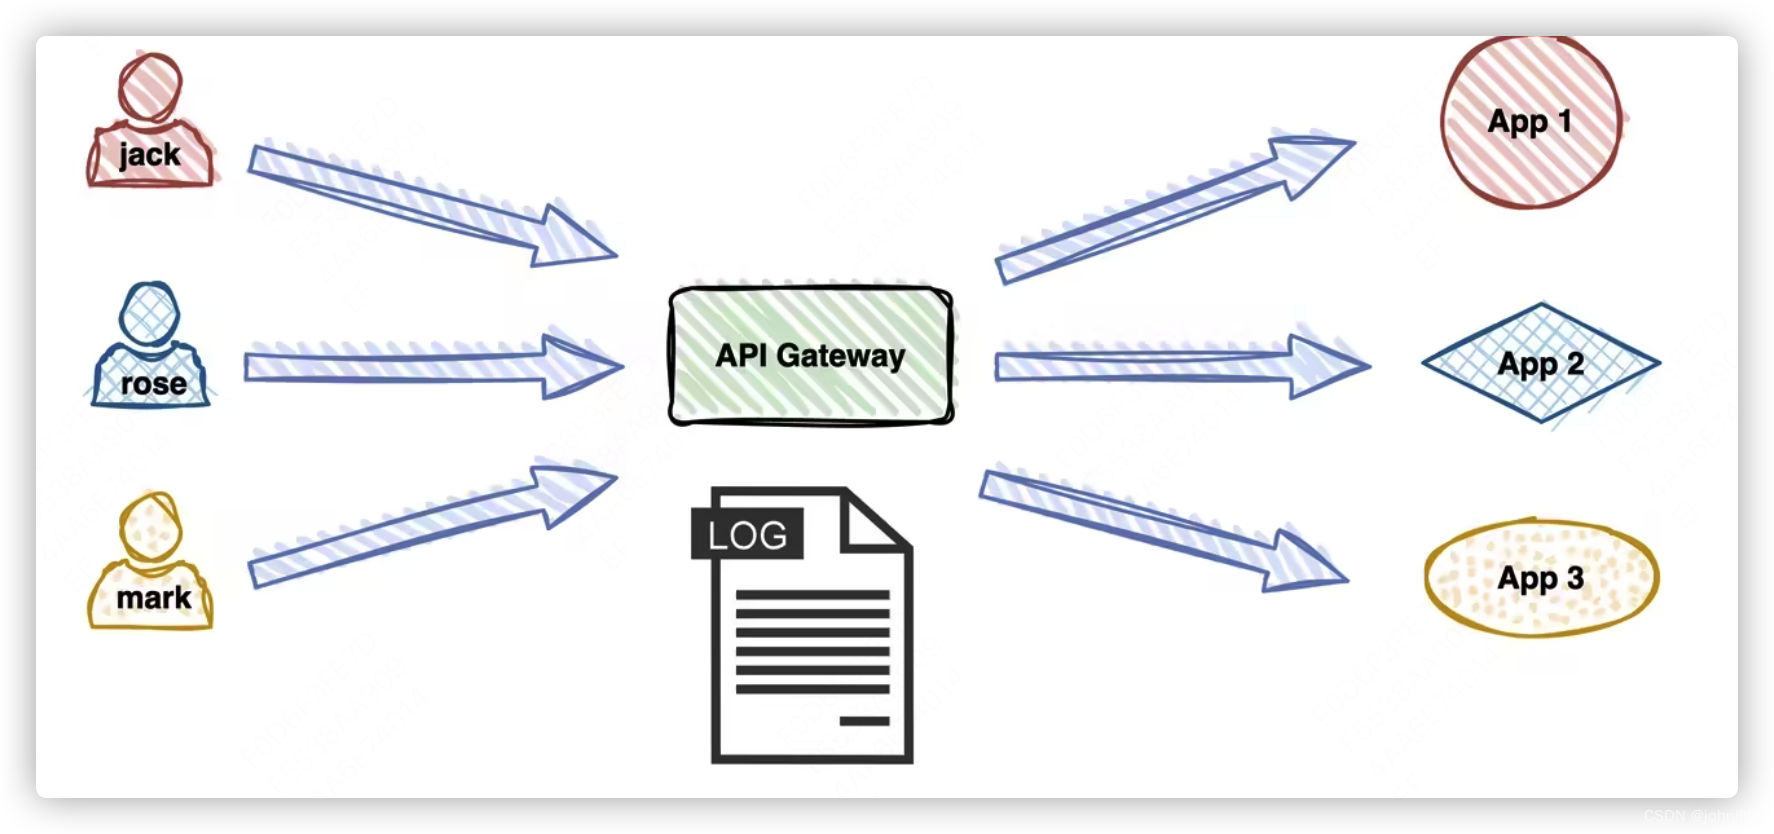
在客户端和服务器之间通常有一层网关来负责路由和负载均衡:
DNS和TCP的超时时间通常由系统指定,DNS默认为5s,TCP建了超时默认为127s
所以下面从客户端、网关、服务端三个方面来讲解下HTTP请求的超时时间设置:
1、客户端设置
以JS为例
(1)使用XMLHttpRequest
var xhr = new XMLHttpRequest();
xhr.open('GET', 'http://example.com/api', true);

// 设置超时时间,单位是毫秒
xhr.timeout = 2000; // 2秒后超时

// 定义超时处理逻辑
xhr.ontimeout = function () {
    console.error("The request for " + url + " timed out.");
};

xhr.onload = function () {
    // 请求成功的处理逻辑
    if (xhr.status >= 200 && xhr.status < 300) {
        console.log('The request was successful!', xhr.responseText);
    } else {
        console.error('The request failed!', xhr.status);
    }
};

xhr.onerror = function () {
    // 请求失败的处理逻辑
    console.error('The request encountered an error.');
};

xhr.send();
(2)使用fetch
const url = 'http://example.com/api';

// 设置超时时间
const timeout = 2000; // 2秒后超时

// 创建一个超时的Promise
const timeoutPromise = new Promise((resolve, reject) => {
    setTimeout(() => {
        reject(new Error('Request timed out'));
    }, timeout);
});

// 发起fetch请求
const fetchPromise = fetch(url);

// 使用Promise.race同时执行请求和超时Promise,哪个先完成就处理哪个
Promise.race([fetchPromise, timeoutPromise])
    .then(response => {
        // 检查是否响应成功
        if (!response.ok) {
            throw new Error('Network response was not ok');
        }
        return response.text();
    })
    .then(data => {
        // 请求成功的处理逻辑
        console.log('The request was successful!', data);
    })
    .catch(error => {
        // 请求失败或超时的处理逻辑
        console.error('Failed!', error);
    });
其中timeout指整个请求过程的超时时间。
2、网关超时时间设置
以nginx为例:
在nginx.conf配置文件中可以指定超时时间
server {
    location / {
        proxy_pass http://backend_server;
        proxy_connect_timeout 5s;
        proxy_read_timeout 10s;
        proxy_send_timeout 5s;
    }
}
其中:
-
连接超时(Connection Timeout): 这是指客户端尝试与服务器建立连接时的最大等待时间。如果在这个时间内没有建立连接(例如,服务器没有响应或者网络延迟很高),客户端就会放弃尝试并抛出一个超时异常。
-
读超时(Read Timeout): 读超时是指客户端与服务器连接成功后,等待服务器发送数据的最大时间。如果在这个时间内客户端没有收到任何数据,就会认为读取操作超时并抛出异常。这通常发生在服务器处理请求的时间过长,或者网络传输延迟导致数据包迟迟未到达客户端。
-
写超时(Write Timeout): 写超时是指在客户端尝试向服务器发送数据时的最大等待时间。如果客户端在这段时间内未能完成数据的发送,就会认为写操作超时。这可能是因为网络速度慢或者服务器处理写入请求的速度慢。
3、服务端超时时间设置
以Tomcat为例:
可以在server.xml 文件中指定服务器的超时时间,如下所示:
<Connector port="8080" protocol="HTTP/1.1"
           connectionTimeout="20000"
           redirectPort="8443"
           readTimeout="15000"
           writeTimeout="15000" />
其中参数在上文已提及,不再赘述。


 1745
1745


 到【灌水乐园】发言


