


 本文档详细介绍了如何创建Greenplum Command Center的gpperfmon数据库,启用数据收集代理,以及如何通过配置文件进行安装。安装过程包括在主节点上以gpadmin用户身份运行gpperfmon_install工具,设置gpperfmon数据库,配置gpperfmon用户权限,重启数据库以启动数据收集代理。此外,还涵盖了备用主节点的配置,gpmon用户的认证,以及Command Center web服务器的启动和停止步骤。
1.Creating the gpperfmon Database
This topic describes how to create the Command Center gpperfmon database and enable the gpperfmon data collection agents. This task must be completed one time for the Greenplum Database system, before you install Greenplum Command Center.When the data collection agents are enabled, their processes are started and stopped (using gpstart and gpstop ) on the Greenplum segment hosts along with the Greenplum Database server processes. Greenplum Database includes a gpperfmon_install utility that performs the following tasks:
- Creates the Command Center database (gpperfmon).
- Creates the Command Center superuser role ( gpmon ).
- Configures Greenplum Database server to accept connections from the gpmon role (edits the pg_hba.conf and .pgpass files).
- Sets the Command Center server configuration parameters in the Greenplum Database server postgresql.conf files.
1.1Enabling the Collection Agents
(1)Log in to the Greenplum master host as the gpadmin user.
$ su - gpadmin
(2)Source the path file from the Greenplum Database installation directory:
# source /usr/local/greenplum-db/greenplum_path.sh
(3)Run the gpperfmon_install utility with the –enable option. You must supply the connection port of the Greenplum Database master server process, and set the password for the gpmon superuser that will be created. For example:
$ gpperfmon_install --enable --password 123qwe --port 5432

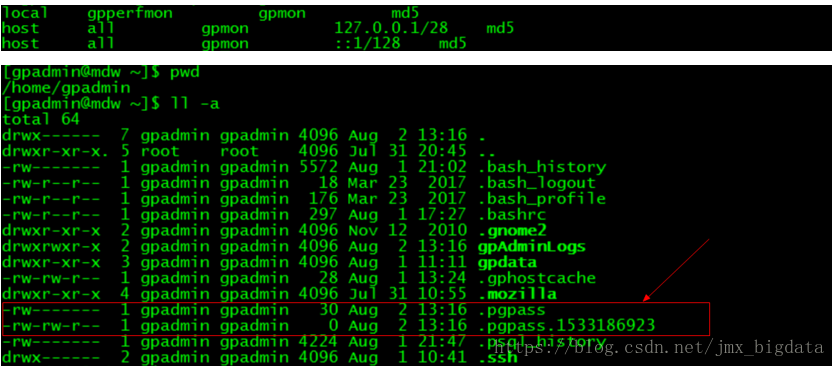
Note:The gpperfmon_install utility creates entries for the gpmon user in the $MASTER_DATABASE/pg_hba.conf file. The password you specify is saved in a .pgpass file in the gpadmin user’s home directory.
(4)When the utility completes, restart Greenplum Database server. The data collection agents do not start until the database is restarted.
$ gpstop -r
(5)Using the ps command, verify that the data collection process is running on the Greenplum master. For example:
$ ps -ef | grep gpmmon

(6)Run the following command to verify that the gpmon user can authenticate and that the data collection processes are writing to the Command Center database. If all of the segment data collection agents are running, you should see one row per segment host.
$ psql -U gpmon gpperfmon -c 'SELECT * FROM system_now;'

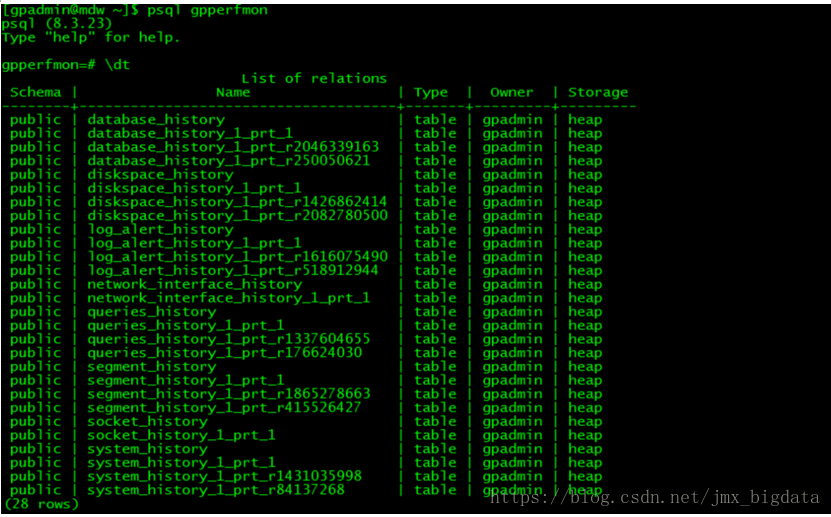
The data collection agents are now running, and your Greenplum system now has a gpperfmon database installed. This is the database where historical Command Center data is stored. You can connect to it as follows:
$ psql gpperfmon
1.2Configuring a Standby Master Host (if enabled)
(1)Copy the $MASTER_DATA_DIRECTORY/pg_hba.conf file from your primary master host to your standby master host. This ensures that the required connection options are also set on the standby master.

(2) Copy your ~/.pgpass file from your primary master host to your standby master host. This file usually resides in the gpadmin user’s home directory.
Note that the permissions on .pgpass must be set to 600
chmod 600 ~/.pgpass

1.3gpmon User Authentication
The gpperfmon_install utility adds entries for the gpmon user to the pg_hba.conf file, which allows the gpmon user to make a local connection to any database in the Greenplum cluster.
local gpperfmon gpmon md5
host all gpmon 127.0.0.1/28 md5
host all gpmon ::1/128 md5
For Greenplum Command Center, the gpmon user must also have host access from the host where the Command Center web server and backend run.This requires that you add an entry for the Command Center host. Edit the $MASTER_DATA_DIRECTORY/pg_hba.conf file and add a line like the following.
host all gpmon <cc-host-ip>/32 md5

2.Install With a Configuration File
2.1install
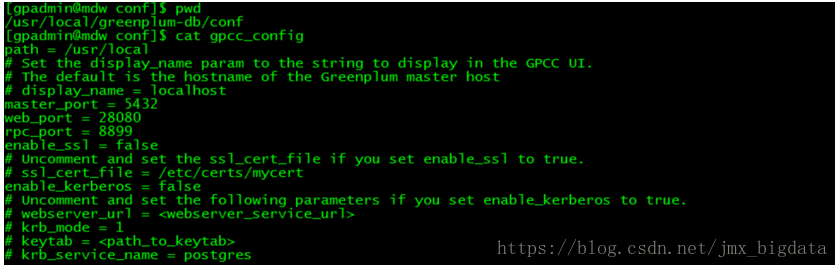
The following installation configuration file example sets all parameters to their default values.
path = /usr/local
# Set the display_name param to the string to display in the GPCC UI.
# The default is the hostname of the Greenplum master host
# display_name = localhost
master_port = 5432
web_port = 28080
rpc_port = 8899
enable_ssl = false
# Uncomment and set the ssl_cert_file if you set enable_ssl to true.
# ssl_cert_file = /etc/certs/mycert
enable_kerberos = false
# Uncomment and set the following parameters if you set enable_kerberos to true.
# webserver_url = <webserver_service_url>
# krb_mode = 1
# keytab = <path_to_keytab>
# krb_service_name = postgres
$ cd greenplum-cc-web-4.2.0-LINUX-x86_64
$ ./ gpccinstall-4.2.0 -c gpcc_config
[gpadmin@mdw conf]$ source /usr/local/greenplum-cc-web-4.2.0/gpcc_path.sh
[gpadmin@mdw conf]$ echo $GPCC_HOME
/usr/local/greenplum-cc-web-4.2.0
[gpadmin@mdw conf]$ gpssh -f hostfile_exkeys -e ls -l $GPCC_HOME
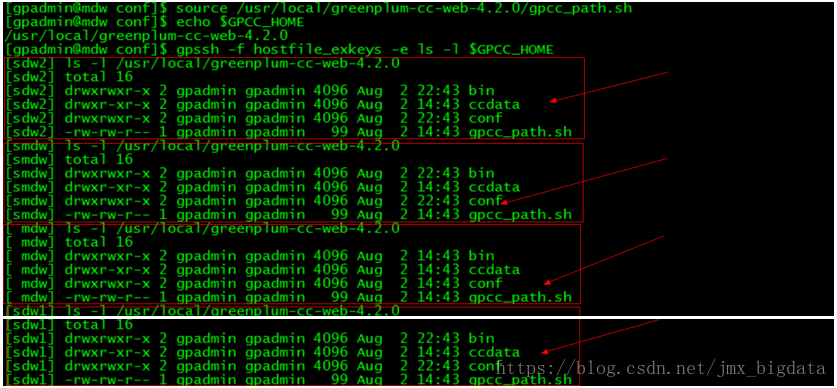
2.2Software Installation Directory
The following files and first-level subdirectories are copied into the installation directory you specify when you install Greenplum Command Center. This ocation can be referenced with the$GPCC_HOME environment variable when you have.
gpcc_path.sh – file containing environment variables for Greenplum Command Center
bin/ – program files for Greenplum Command Center
gpcc-agent - real-time query metrics collection agent
gpccws - the Greenplum Command Center web server
static/ - static files for the Command Center application
conf/
app.conf - configuration file for the Command Center web server
logs/ - web server access and error log files
open_source_licenses_GPCC.txt – licenses for open source components used by Greenplum Command Center
2.3Setting the Greenplum Command Center Environment
To enable the gpadmin user to execute Command Center utilities such as gpcc at the command line, source the gpcc_path.sh file in the Greenplum ommand Center installation directory. For example:
$ source /usr/local/greenplum-cc-web-4.2.0/gpcc_path.sh
The gpcc_path.sh script sets the GPCC_HOME environment variable to the Command Center installation directory and adds the $GPCC_HOME/bin directory to the path.
To automatically source the gpcc_path.sh each time you log in, add the above source command to your start-up script, for example ~/.bashrc or~/.bash_profile .
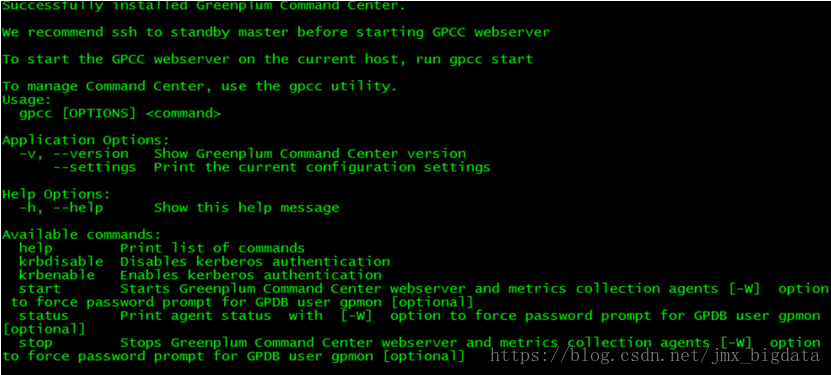
3.Starting and Stopping the Web Server
Starting the Command Center Web Server runs the gpccws web server, starts the metrics collection agents on the segment servers, and starts a listener on he Command Center rpc port.
You can run the gpcc command as the gpadmin user on the standby master host (recommended) or on the master host.
To ensure the gpcc command is on your path, source the gpcc_path.sh file in the Command Center installation directory or add it to the startup script for our command shell.
3.1To start Greenplum Command Center
(1)To log on to the standby from the master host:
$ ssh <standby-host>
(2)Source the Command Center environment variables.
$ source /usr/local/greenplum-cc-4.2.0/gpcc_path.sh
(3)Editing pg_hba.conf
testDB=# alter role gpmon with password '123qwe';
(4)Open the file $MASTER_DATA_DIRECTORY/pg_hba.conf in a text editor.
host gpperfmon gpmon 192.168.74.133/32 md5
(5) Reload the pg_hba.conf configuration file for your changes to take effect:
$ gpstop -u
Start the Command Center web server and the metrics collection agents.
$ gpcc start
Starting the gpcc agents and webserver…
2018/03/22 17:35:06 Agent successfully started on 7/8 hosts
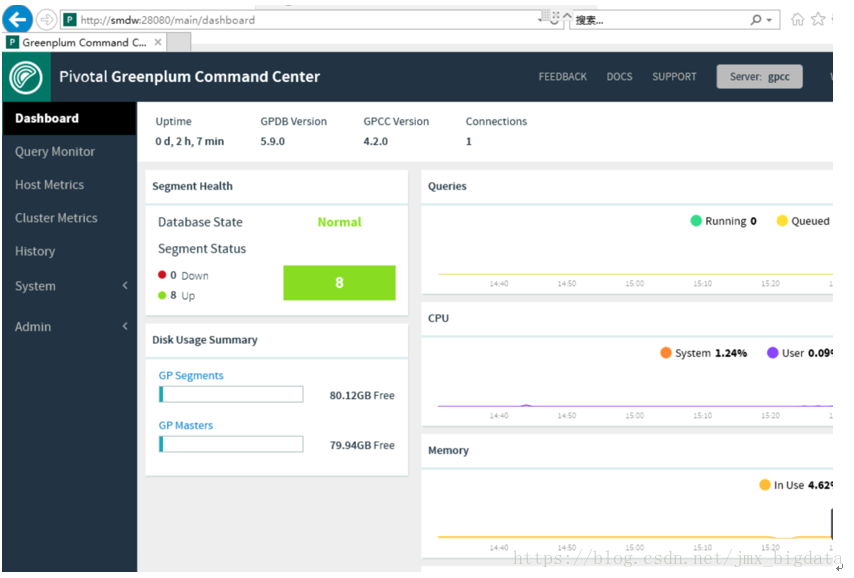
2018/03/22 17:35:06 View Greenplum Command Center at http://smdw:28080

3.2To stop Greenplum Command Center
$ gpcc stop
2018/03/22 17:36:23 Gpcc webserver and metrics collection agents have been stopped. Use gpcc start to start them again
To check the Greenplum Command Center status
$ gpcc status


 3958
3958


 到【灌水乐园】发言


