


1.创建虚拟环境
conda create -n mmdet3d python==3.8
2.激活虚拟环境
conda activate mmdet3d
3.安装cuda和torch
conda install pytorch==1.7.1 torchyvision==0.8.2 torchaudio==0.7.2 cudatoolkit=11.0 -c pytorch
4.pip install openmim -i https://pypi.tuna.tsinghua.edu.cn/simple/
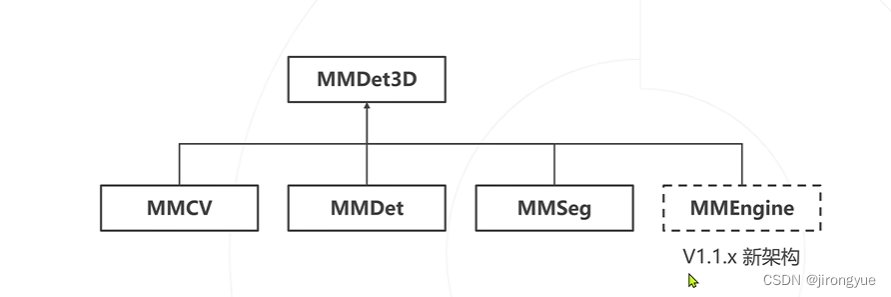
新的版本mmdet3d使用了MMEngine这个依赖,把旧版本许多的接口进行了封装,并不方便以后我们的diy。本文选取的mmdet3d的版本是v1.0.0rc5,旧版本在这个地址下载。
5.在上面链接里面下载好后,移动到服务器内,cd到这个目录下
cd /mnt/share/3D_Detection/mmdetection3d-1.0.0rc5/
6. mim install mmdet3d -i https://pypi.tuna.tsinghua.edu.cn/simple/
7. mim install -e .
此时的mim list如下图所示,而最终适配的版本号如第二张图所示。关于mmcv和mmcv-full的关系:mmcv-full可以理解成是mmcv更高阶的版本,实现的功能更多,一般情况两者不共存。因为v1.0.0r5版本的mmdet3d不需要mmengine这个库,所以删除掉。


8.mim uninstall mmcv
9.mim uninstall mmengine
10.mim install mmdet==2.28.1 -i https://pypi.tuna.tsinghua.edu.cn/simple/
11.mim install mmsegmentation==0.28.0 -i https://pypi.tuna.tsinghua.edu.cn/simple/
12.mim install mmcls==0.24.1 -i https://pypi.tuna.tsinghua.edu.cn/simple/
此时版本已经和图二完全对应,但是检测测试一下发现报错 from mmcv import Config, DictAction ImportError: cannot import name 'Config' from 'mmcv' (unknown location)
检查发现是mmcv-full的问题,大概意思是通过上面步骤下载的mmcv-full很可能与本地cuda,torch不匹配,所以需要删除再采取另一种方式下载。
13.删除mmcv-full: mim uninstall mmcv-full
在这个官方文档里面,选择与cuda和torch版本对应的mmcv-full下载指令,同时我们这里面mmcv_version是1.6.0。也参考过别的文档里面的其他方式。例如直接pip install mmcv-full==1.6.0会卡在wheel那一步,查找解决办法后有种说法是离线下载对应的wheel,但是发现文档提供的版本中没有1.6.0的版本,顾舍弃该方式。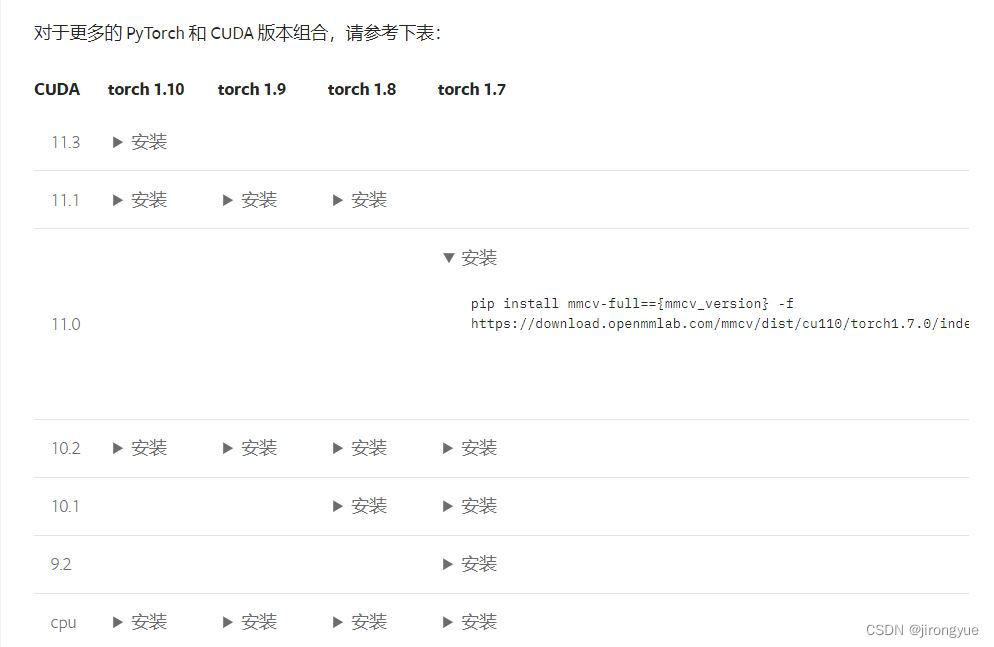
14.pip install mmcv-full==1.6.0 -f https://download.openmmlab.com/mmcv/dist/cu110/torch1.7.0/index.html -i https://pypi.tuna.tsinghua.edu.cn/simple/
简单测试后继续报错:分析原因大概是此时的numpy版本和环境不匹配导致的。
这个地方是按照这个文档解决的

15.
pip uninstall numpy
pip uninstall numba
pip install numba==0.53 -i https://pypi.tuna.tsinghua.edu.cn/simple/
pip install numpy==1.23.5-i https://pypi.tuna.tsinghua.edu.cn/simple/
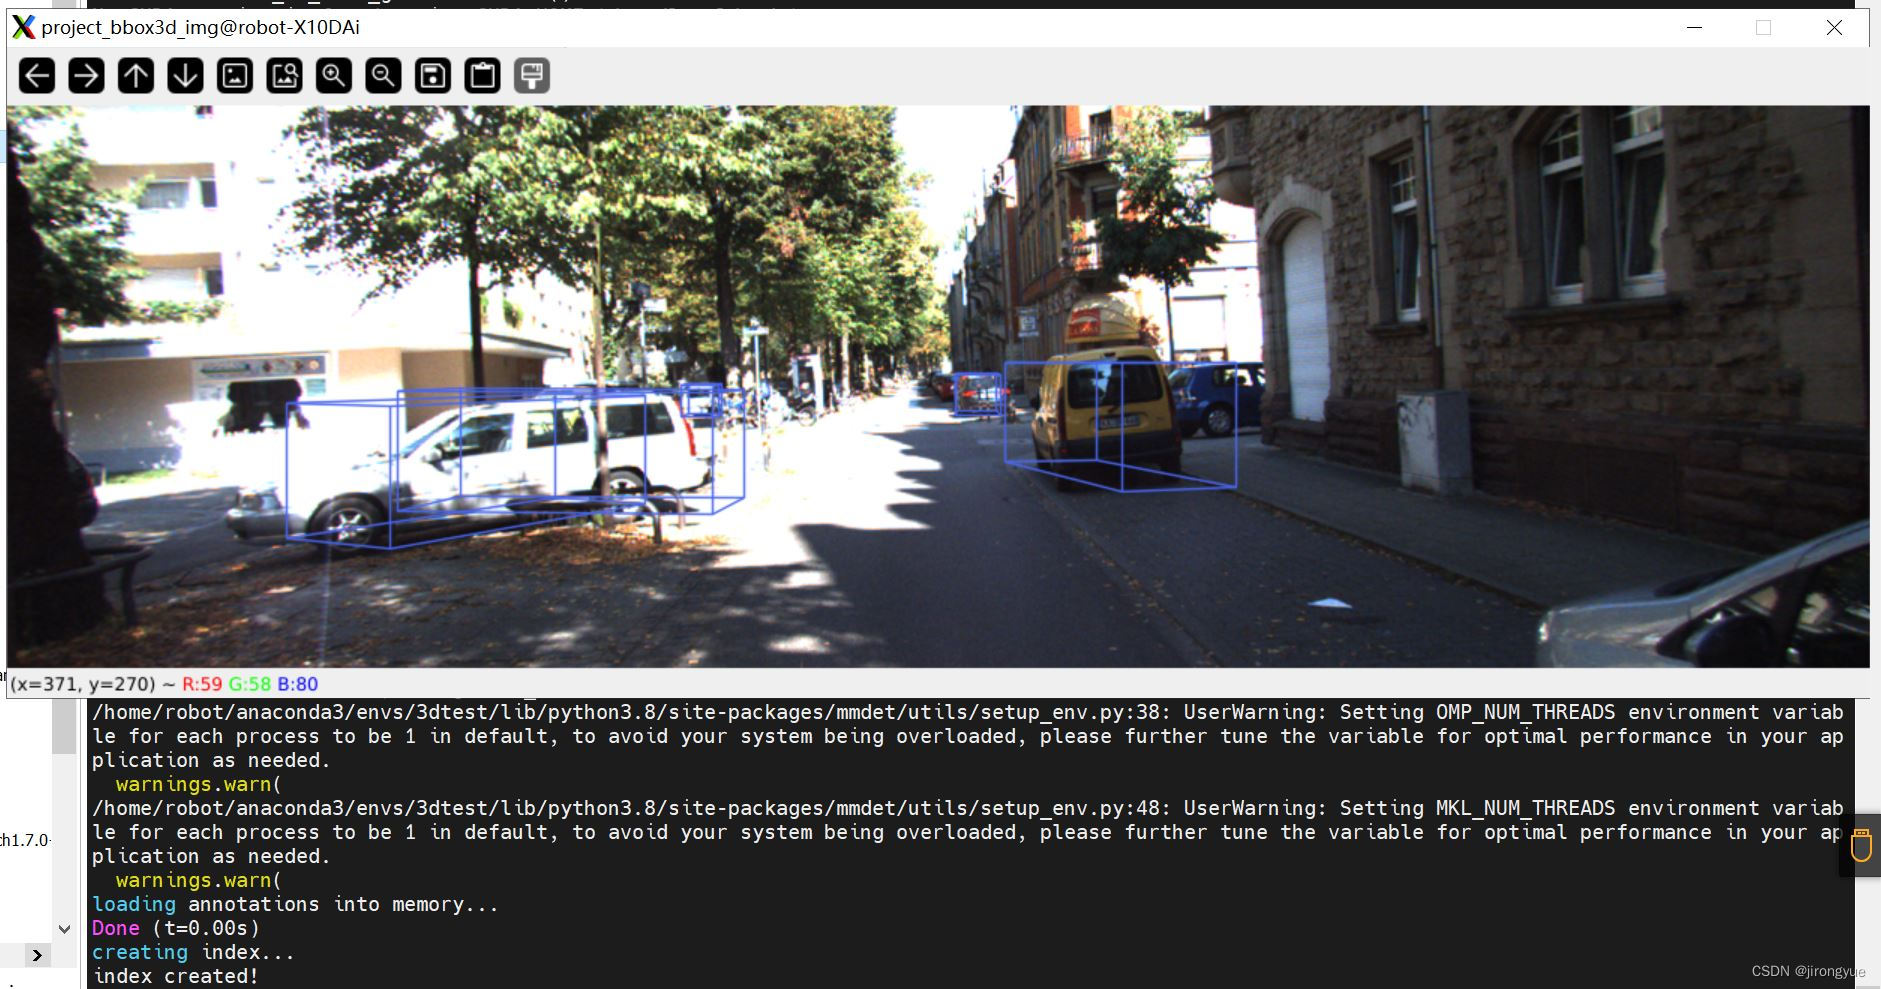
16.测试:python tools/test.py configs/smoke/smoke_dla34_pytorch_dlaneck_gn-all_8x4_6x_kitti-mono3d.py checkpoints/smoke_dla34_pytorch_dlaneck_gn-all_8x4_6x_kitti-mono3d.pth --show --show-dir ./outputs/smoke/smoke_kitti_72e


 被折叠的 条评论
为什么被折叠?
被折叠的 条评论
为什么被折叠?
 到【灌水乐园】发言


