


 本文介绍了在微服务架构中,如何通过RestTemplate进行服务调用的问题,指出硬编码服务提供者地址的不便及无法实现负载均衡的缺点。然后详细阐述了如何使用Nacos作为注册中心解决这些问题,包括Nacos的安装、服务提供者和消费者的配置,以及如何通过Nacos实现服务的注册与发现,确保在服务地址变化时能动态调整,并支持负载均衡。
在仅使用RestTemplate发送请求后,发现可以实现微服务之间的相互调用,但是需要将服务提供者的网络地址(ip,端口)编写到代码中,很不方便。
import com.bjp.pojo.User;
import org.springframework.beans.factory.annotation.Autowired;
import org.springframework.cloud.client.ServiceInstance;
import org.springframework.cloud.client.discovery.DiscoveryClient;
import org.springframework.web.bind.annotation.PathVariable;
import org.springframework.web.bind.annotation.RequestMapping;
import org.springframework.web.bind.annotation.RequestMethod;
import org.springframework.web.bind.annotation.RestController;
import org.springframework.web.client.RestTemplate;

import java.util.List;

@RestController
@RequestMapping(value = "/consumer")
public class ConsumerController {

    //访问Rest服务的客户端
    @Autowired
    private RestTemplate restTemplate;
    @Autowired
    private DiscoveryClient discoveryClient;

    @RequestMapping("/getUserById/{id}")
    public User getUserById(@PathVariable("id") Integer id) {
        //获取所有的服务名称
        List<String> services = discoveryClient.getServices();
        for (String se : services) {
            System.out.println(se);
        }

        //com.alibaba.cloud.nacos.NacosServiceInstance@5c0c7a0f
        //获取指定服务的实例化对象,获取与特定 serviceId 关联的所有 ServiceInstance。
        List<ServiceInstance> instances = discoveryClient.getInstances("nacos-provider");
        ServiceInstance instance = instances.get(0);
        //http://192.168.198.1:9090
        System.out.println(instance.getUri());
        //9090
        System.out.println(instance.getPort());
        //192.168.198.1
        System.out.println(instance.getHost());
        //nacos-provider
        System.out.println(instance.getServiceId());

        //问题:无法实现负载均衡
        String url = instance.getUri() + "/provider/getUserById/" + id;
        return restTemplate.getForObject(url, User.class);
    }

}
出现如下问题:
- 一旦服务提供者地址变化,就需要手动修改代码
- 一旦是多个服务提供者,无法实现负载均衡功能
- 一旦服务变的越来越多,人工维护调用关系困难
因此需要注册中心动态的实现服务治理,使用Nacos。
Nacos下载地址:https://github.com/alibaba/nacos/tags
一、在linux上安装
#1.指定路径解压
[root@localhost ~]# cd /usr/upload
[root@localhost upload]# tar -zxvf nacos-server-1.4.1.tar.gz -C /usr/local
#2.启动nacos,默认端口8848
[root@localhost local]# cd nacos/bin/
[root@localhost bin]# ./startup.sh -m standalone #非集群模式启动
#3.关闭nacos
[root@localhost bin]# ./shutdown.sh
测试连接是否成功
访问:http://虚拟机ip:8848/nacos进行登录验证,默认用户名和密码为nacos/nacos,下为登录后页面

二、Nacos注册中心
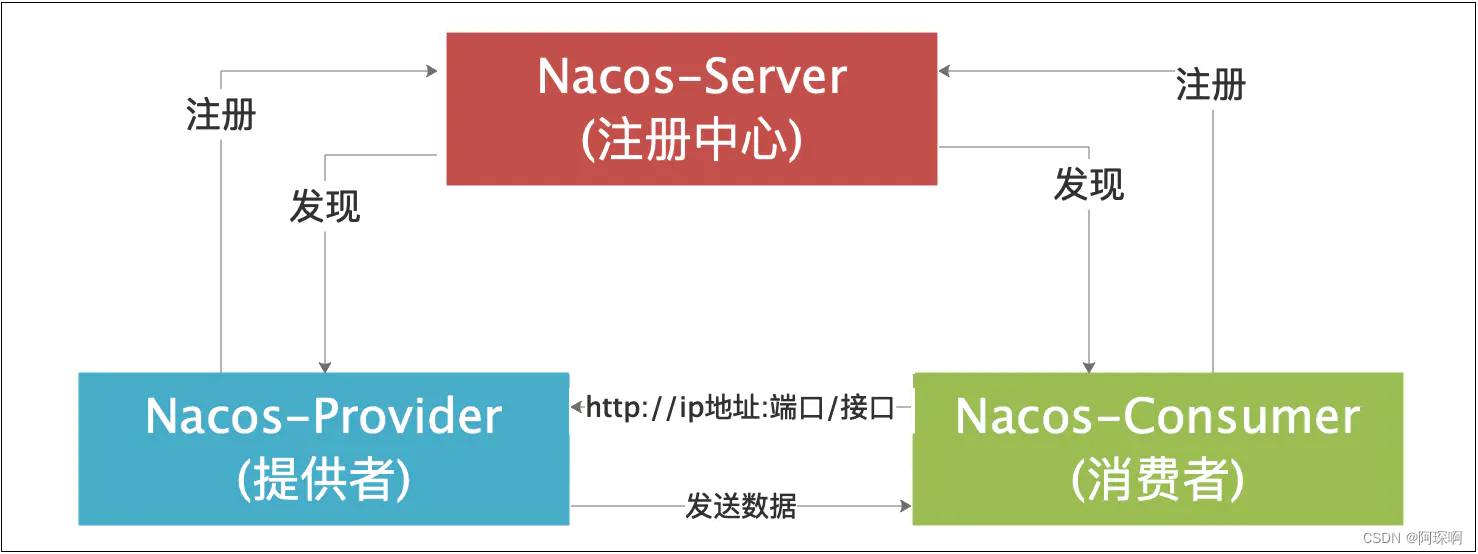
注册中心主要有三部分:
- Nacos-Server:注册中心,提供服务的注册和发现
- Nacos-Provider:服务提供方,把自身的服务实例注册到Nacos Server中
- Nacos-Consumer:服务调用方,通过Nacos Server获取服务列表,消费服务
三、使用Nacos
3.1.修改nacos_provider
3.1.1.maven依赖
        <!--nacos客户端-->
        <dependency>
            <groupId>com.alibaba.cloud</groupId>
            <artifactId>spring-cloud-starter-alibaba-nacos-discovery</artifactId>
        </dependency>
3.1.2.application.yml
spring:
  cloud:
    nacos:
      discovery:
        server-addr: 192.168.209.129:8848 #nacos服务的地址
  application:
    name: nacos-consumer #向注册中心注册的名字
3.1.3.springboot启动类
@SpringBootApplication
@EnableDiscoveryClient//向注册中心注册该服务,并可以获取其他服务的调用地址
public class ConsumerApp {
    public static void main(String[] args) {
        SpringApplication.run(ConsumerApp.class);
    }
}
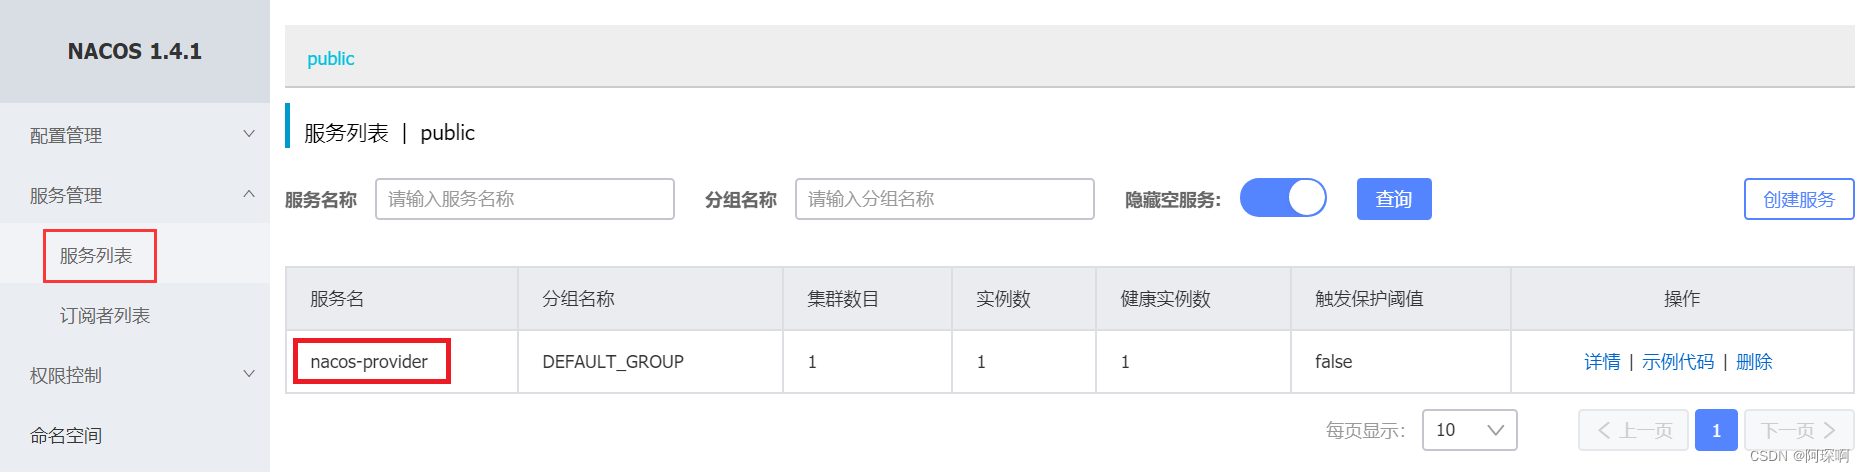
3.1.4.启动并测试
3.2.修改nacos_consumer
3.1.1.maven依赖
        <!--nacos客户端-->
        <dependency>
            <groupId>com.alibaba.cloud</groupId>
            <artifactId>spring-cloud-starter-alibaba-nacos-discovery</artifactId>
        </dependency>
3.1.2.application.yml
spring:
  cloud:
    nacos:
      discovery:
        server-addr: 192.168.209.129:8848 #nacos服务的地址
  application:
    name: nacos-provider #向注册中心注册的名字
3.1.3.springboot启动类
@SpringBootApplication
//新版本的springboot中默认已经开启了服务注册与发现(spring.cloud.nacos.discovery.enabled=true)
@EnableDiscoveryClient//向注册中心注册该服务,并可以获取其他服务的调用地址
public class ProviderApp {

    public static void main(String[] args) {
        SpringApplication.run(ProviderApp.class);
    }
}
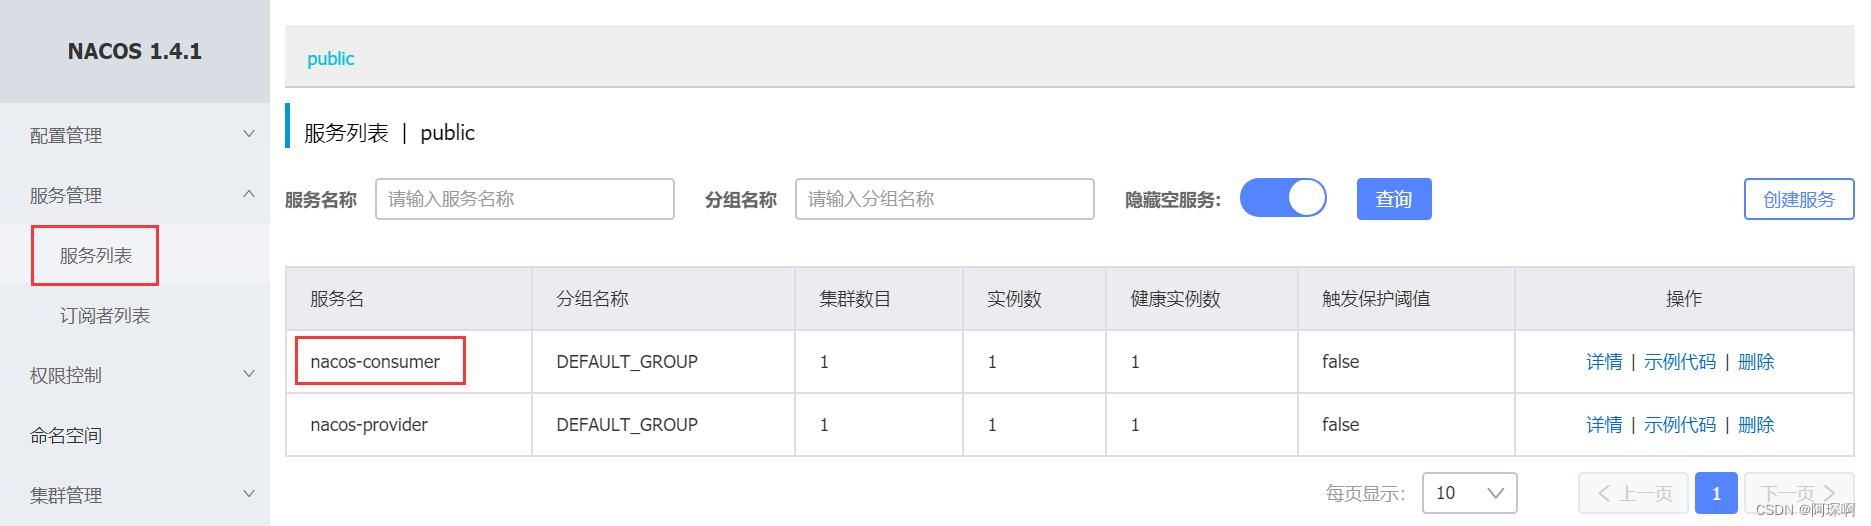
3.1.4.启动并测试
@RestController
@RequestMapping(value = "/consumer")
public class ConsumerController {

	@Autowired
	private RestTemplate restTemplate;

	@Autowired
	private DiscoveryClient discoveryClient;

	@RequestMapping(value="/getUserById/{id}")
	public User getUserById(@PathVariable Integer id){
		//获取nacos中注册的所有服务信息
		List<String> serviceList = discoveryClient.getServices();
		for (String service : serviceList) {
			System.out.println(service);
		}
		//获取nacos中注册的指定服务信息
		ServiceInstance instance = discoveryClient.getInstances("nacos-provider").get(0);
		String serviceUrl = instance.getHost() + ":" + instance.getPort();

		String url = "http://"+serviceUrl+"/provider/getUserById/"+id;
		return restTemplate.getForObject(url, User.class);
	}
}
3.1.5.测试
四、Nacos配置中心
4.1 微服务架构下关于配置文件的一些问题:
- 配置文件相对分散。在一个微服务架构下,配置文件会随着微服务的增多变的越来越多,而且分散在各个微服务中,不好统一配置和管理。
- 配置文件无法区分环境。微服务项目可能会有多个环境,例如:测试环境、预发布环境、生产环境。每一个环境所使用的配置理论上都是不同的,一旦需要修改,就需要我们去各个微服务下手动维护,这比较困难。
- 配置文件无法实时更新。我们修改了配置文件之后,必须重新启动微服务才能使配置生效,这对一个正在运行的项目来说是非常不友好的。
配置中心的思路是:
- 首先把项目中各种配置全部都放到一个集中的地方进行统一管理。
- 当各个服务需要获取配置的时候,就来配置中心的接口拉取自己的配置。
- 当配置中心中的各种参数有更新的时候,也能通知到各个服务实时的过来同步最新的信息,使之动态更新。
配置中心习下次更,敲代码去


 6798
6798


 到【灌水乐园】发言


