


因为是非安卓的环境,所以解析的话是不用去调相册或是拍照的。一般是直接用图片文件去解析,所以如果要在电脑上操作是非常简单的。
这里使用的工具是ZXING,在我的Eclipse上使用需要有两个包分别如下。

由于ZXING可以生产和解析非常多种的一维和二维码,这里只介绍二维码(QR_CODE)
生成二维码
//在ZXING中通过QRCoderWriter生成二维码
	public static void main(String[] args) throws WriterException, FileNotFoundException, IOException, NotFoundException, ChecksumException, FormatException {
		//创建二维码writer
		QRCodeWriter writer = new QRCodeWriter();
		//使用writer编码得到位图矩阵,注意BarcodeFormat的类型必须和writer生成的图形种类一致
		BitMatrix matrix = writer.encode("https://www.baidu.com", BarcodeFormat.QR_CODE, 150, 150);
		//writer很简单,只有两个encode方法,后者比前者多了一个额外信息的集合
		// Encode(String Contexts,BarcodeFormat,width,height)
		// Encode(String Contexts,BarcodeFormat,width,height,Map<EncodeHintType,?> hints)

		//直接写到图片里去
		MatrixToImageWriter.writeToStream(matrix, "png", new FileOutputStream("holyQR.png"));
	}
如此便生成了,为了验证,可以拿出手机扫扫自己生成的码。
解析二维码
有Writer就有reader,所以读取的方法也和上述类似。
public static void ReaderQRCode() throws FileNotFoundException, IOException, NotFoundException, ChecksumException, FormatException {
//二维码读取对象,同样只有两个encode方法
QRCodeReader reader = new QRCodeReader();
//直接去读取图片即可
BufferedImage read = ImageIO.read(new FileInputStream(new File("holyQR.png")));
//创建亮度源对象,将图片传入作为参数
LuminanceSource bufferedImageLuminanceSource = new BufferedImageLuminanceSource(read);
//创建二进制位图对象,传入上面的亮度源对象
BinaryBitmap binaryBitmap = new BinaryBitmap(new HybridBinarizer(bufferedImageLuminanceSource));
//解码即可
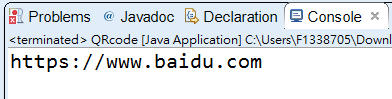
Result decode = reader.decode(binaryBitmap);
System.out.println(decode.getText());
}


 被折叠的 条评论
为什么被折叠?
被折叠的 条评论
为什么被折叠?
 到【灌水乐园】发言


