


Spring Framework的IOC的使用
一.搭建spring framework 环境
创建普通的Java Project
引入User lib库
在User库中放入spring的依赖jar包(spring5)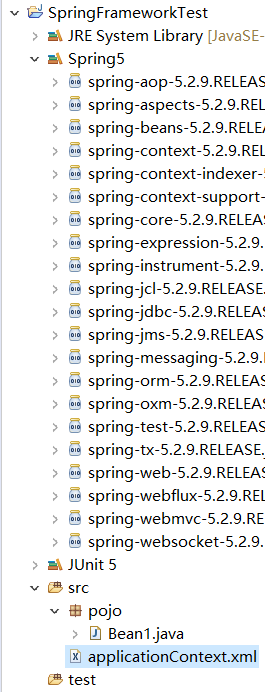
二.配置appliactionContext.xml
在src下创建applicationContext.xml
<?xml version="1.0" encoding="UTF-8"?>
<beans xmlns="http://www.springframework.org/schema/beans"
    xmlns:xsi="http://www.w3.org/2001/XMLSchema-instance"
    xmlns:context="http://www.springframework.org/schema/context"
    xmlns:aop="http://www.springframework.org/schema/aop"
    xmlns:tx="http://www.springframework.org/schema/tx"
    xsi:schemaLocation="http://www.springframework.org/schema/beans
    http://www.springframework.org/schema/beans/spring-beans.xsd
    http://www.springframework.org/schema/context
    http://www.springframework.org/schema/context/spring-context.xsd
    http://www.springframework.org/schema/aop
    http://www.springframework.org/schema/aop/spring-aop.xsd
    http://www.springframework.org/schema/tx
    http://www.springframework.org/schema/tx/spring-tx.xsd">


</beans>
三.简单对象装配
public class Address {


	private String City;

	private String Province;

	private String Country;
...}
<bean id="Adress" class="pojo.Address">
    	<property name="City" value="新余"></property>  <!--基础数据类型都可以直接使用value属性或标签-->
    	<property name="Province" value="江西"></property>
    	<property name="Country">
    		<value>中国</value>
    	</property>
    </bean>
测试:
@Test
	public void TestOne() {

		ClassPathXmlApplicationContext beanfactory = new 			                                                            ClassPathXmlApplicationContext("applicationContext.xml");
		Address a1 = (Address) beanfactory.getBean(Address.class);
		System.out.println(a1);
	}
结果:
Address [City=新余, Province=江西, Country=中国]
1.bean标签可配置的属性:
| name | 别名,可以区多个例 name="a1 a2 a3"则a1,a2,a3都是别名 |
| primary | 该bean优先被注入 |
| scope | 用来配置bean的作用域 |
| singleton单例 | |
| protoype原型(多例) | |
| request请求 | |
| session会话 | |
| global session整个项目 | |
| autowire | 当=true时,自动装配 |
| init-method | 指定bean的启动方法 |
| destory-method | 指定bean的销毁方法 |
| depend-on | 指定某个bean的实例化需要先实例化别的对象(有必要的先后顺序) |
| lazy-init | 懒加载对单例才有用,在创建bean工厂先不创建bean对象,getBean时才创建 |
| autowire-candidate | 设为false,容器在查找自动装配对象时,将不考虑该bean,即它不会被考虑作为其他bean自动装配的候选者, |
| factory-bean | 先把工厂的创建交给spring来管理。 然后在使用工厂的bean来调用里面的方法 |
| factory-method | 调用factory-method所指向的方法始实例化bean |
例:
private String City;

	private String Province;

	private String Country;

	public void init() {

		System.out.println("启动方法");
	}

	public void des() {

		System.out.println("销毁方法");
	}
...
}
<bean   id="Adress" class="pojo.Address" init-method="init" destroy-method="des" lazy-init="true" >
    <!--指定初始方法,销毁方法,设置懒加载-->
    <property name="City" value="新余"></property>
    <property name="Province" value="江西"></property>
    <property name="Country">
    <value>中国</value>
    </property>
 </bean>
测试代码:
ClassPathXmlApplicationContext beanfactory = new ClassPathXmlApplicationContext("applicationContext.xml");
//加载配置文件,观察是否会在建立工厂时初始化bean对象
System.out.println("初始化---------");
Address a1 = (Address) beanfactory.getBean(Address.class);
System.out.println(a1);
beanfactory.close();
结果:
初始化---------
启动方法
Address [City=新余, Province=江西, Country=中国]
销毁方法
显然,在初始化工厂的时候并没有创建address对象,因为输出语句最先输出,然后getBean之后才调用了init方法,这就是懒加载
在工厂关闭之前调用了销毁方法
2.factory标签的使用
bean的属性中factory-bean和factory-method比较特殊
它允许你自定义工厂类去通过工厂方法去生产对象,
当然你也可以单独使用factory-method不过此时它必须是静态方法
/**
 * 模拟一个静态工厂,创建业务层实现类
 */
public class StaticFactory {

	public static ICustomerService createCustomerService(){

		return new CustomerServiceImpl();
	}
}
<!-- 此种方式是:
	 使用StaticFactory类中的静态方法createCustomerService创建对象,并存入spring容器
	 id属性:指定bean的id,用于从容器中获取
	 class属性:指定静态工厂的全限定类名
	 factory-method属性:指定生产对象的静态方法
 -->
<bean id="customerService"
	  class="com.itheima.factory.StaticFactory"
	  factory-method="createCustomerService"></bean>
和factory-bean一起使用时就不需要是静态方法了
/**
 * 模拟一个实例工厂,创建业务层实现类
 * 此工厂创建对象,必须现有工厂实例对象,再调用方法
 */
public class InstanceFactory {

	public ICu
最低0.47元/天 解锁文章


 198
198

 被折叠的 条评论
为什么被折叠?
被折叠的 条评论
为什么被折叠?
 到【灌水乐园】发言


